
Crocheted clothing can feel intimidating. Two-piece sets? Even more so. But here is the truth: if you can double crochet and chain, you already have the skills to make this stunning lavender beach set.
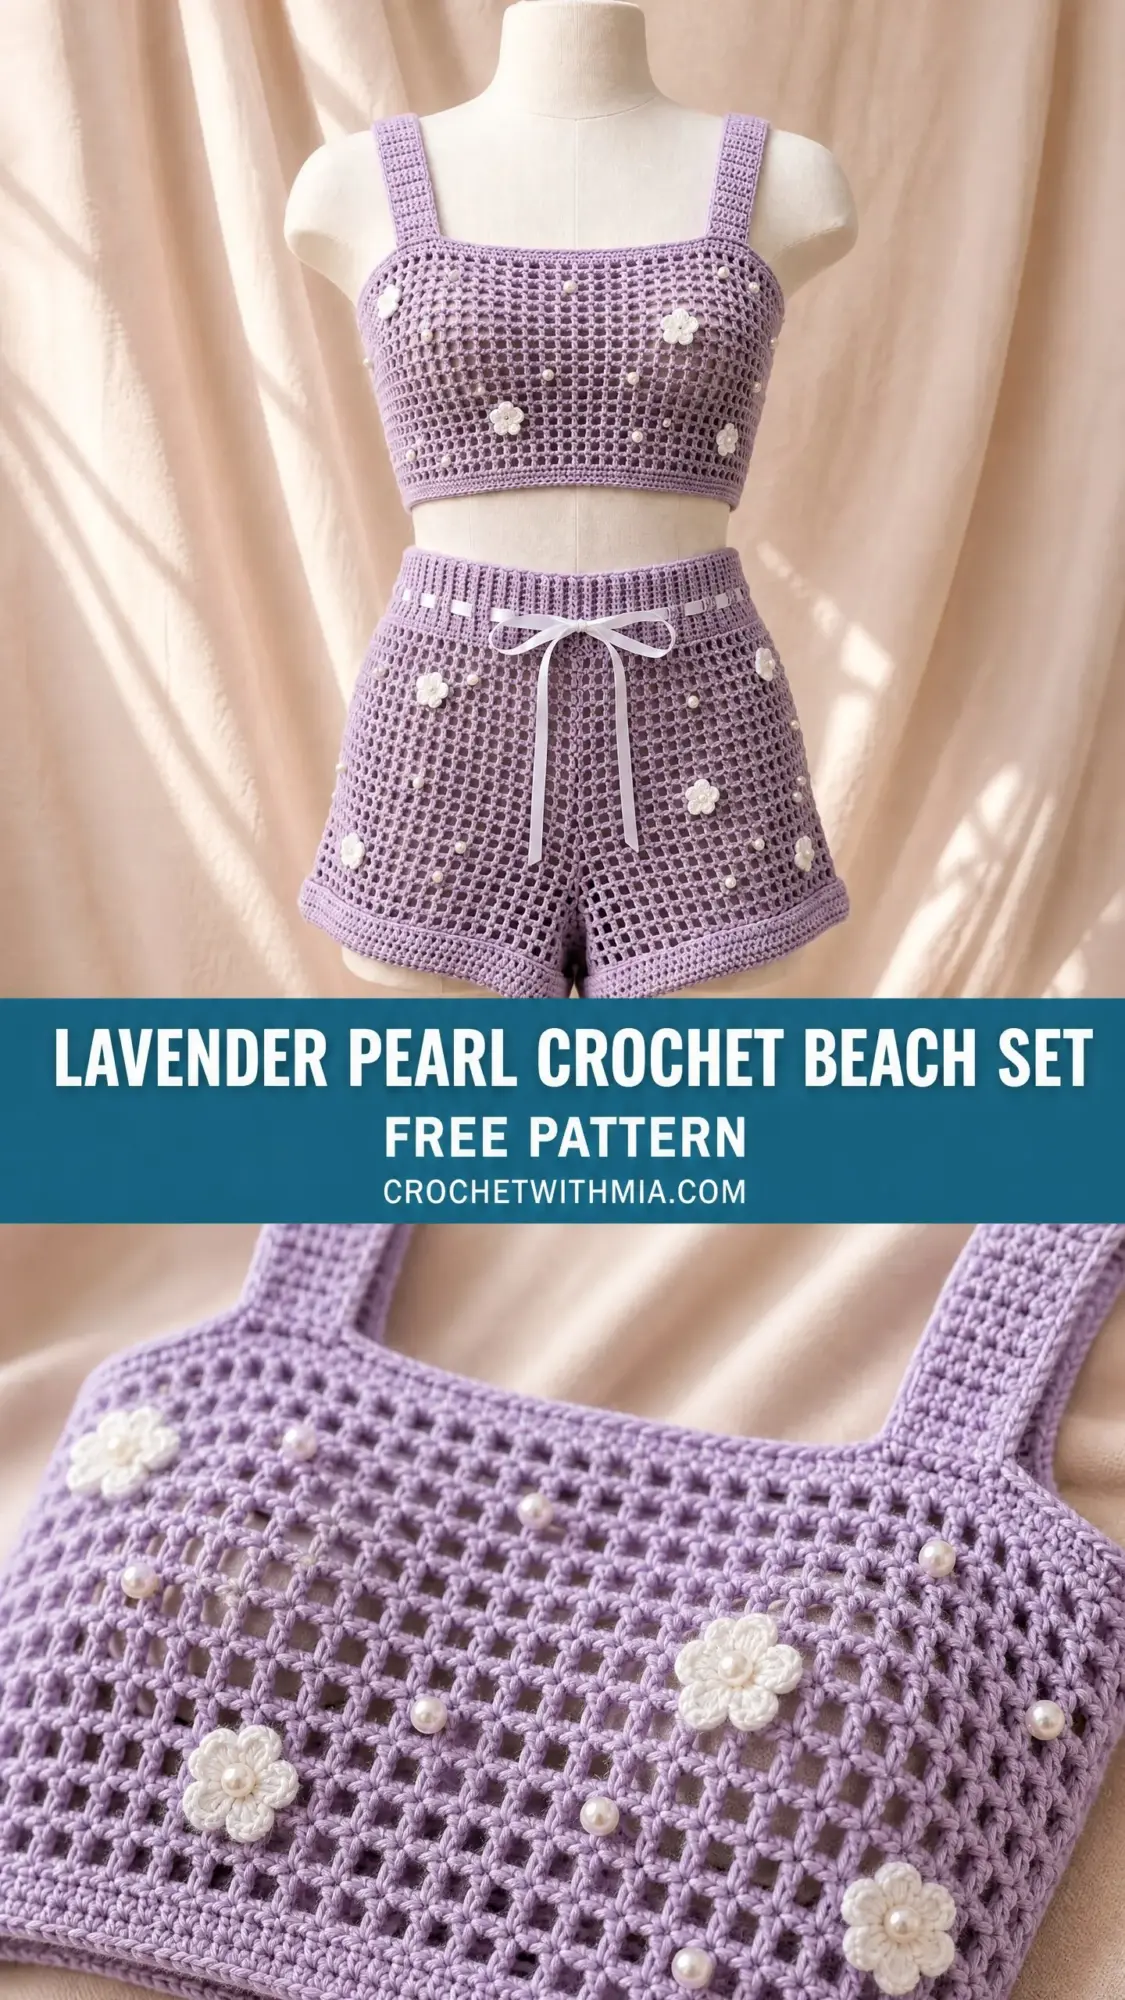
The entire design is built on a simple grid mesh stitch. That is it. A double crochet, a chain, skip a stitch, repeat. The flowers are tiny five-petal motifs worked in the round. The pearl beads are sewn on after everything is finished. Nothing here is as complicated as it looks on that dress form.
Whether you are a confident beginner ready to level up or an experienced crocheter looking for a satisfying summer project, this crochet pattern breaks down into manageable pieces. I will walk you through every single step, from the foundation chain to the final bow on those shorts.
Why This Crochet Beach Set Works
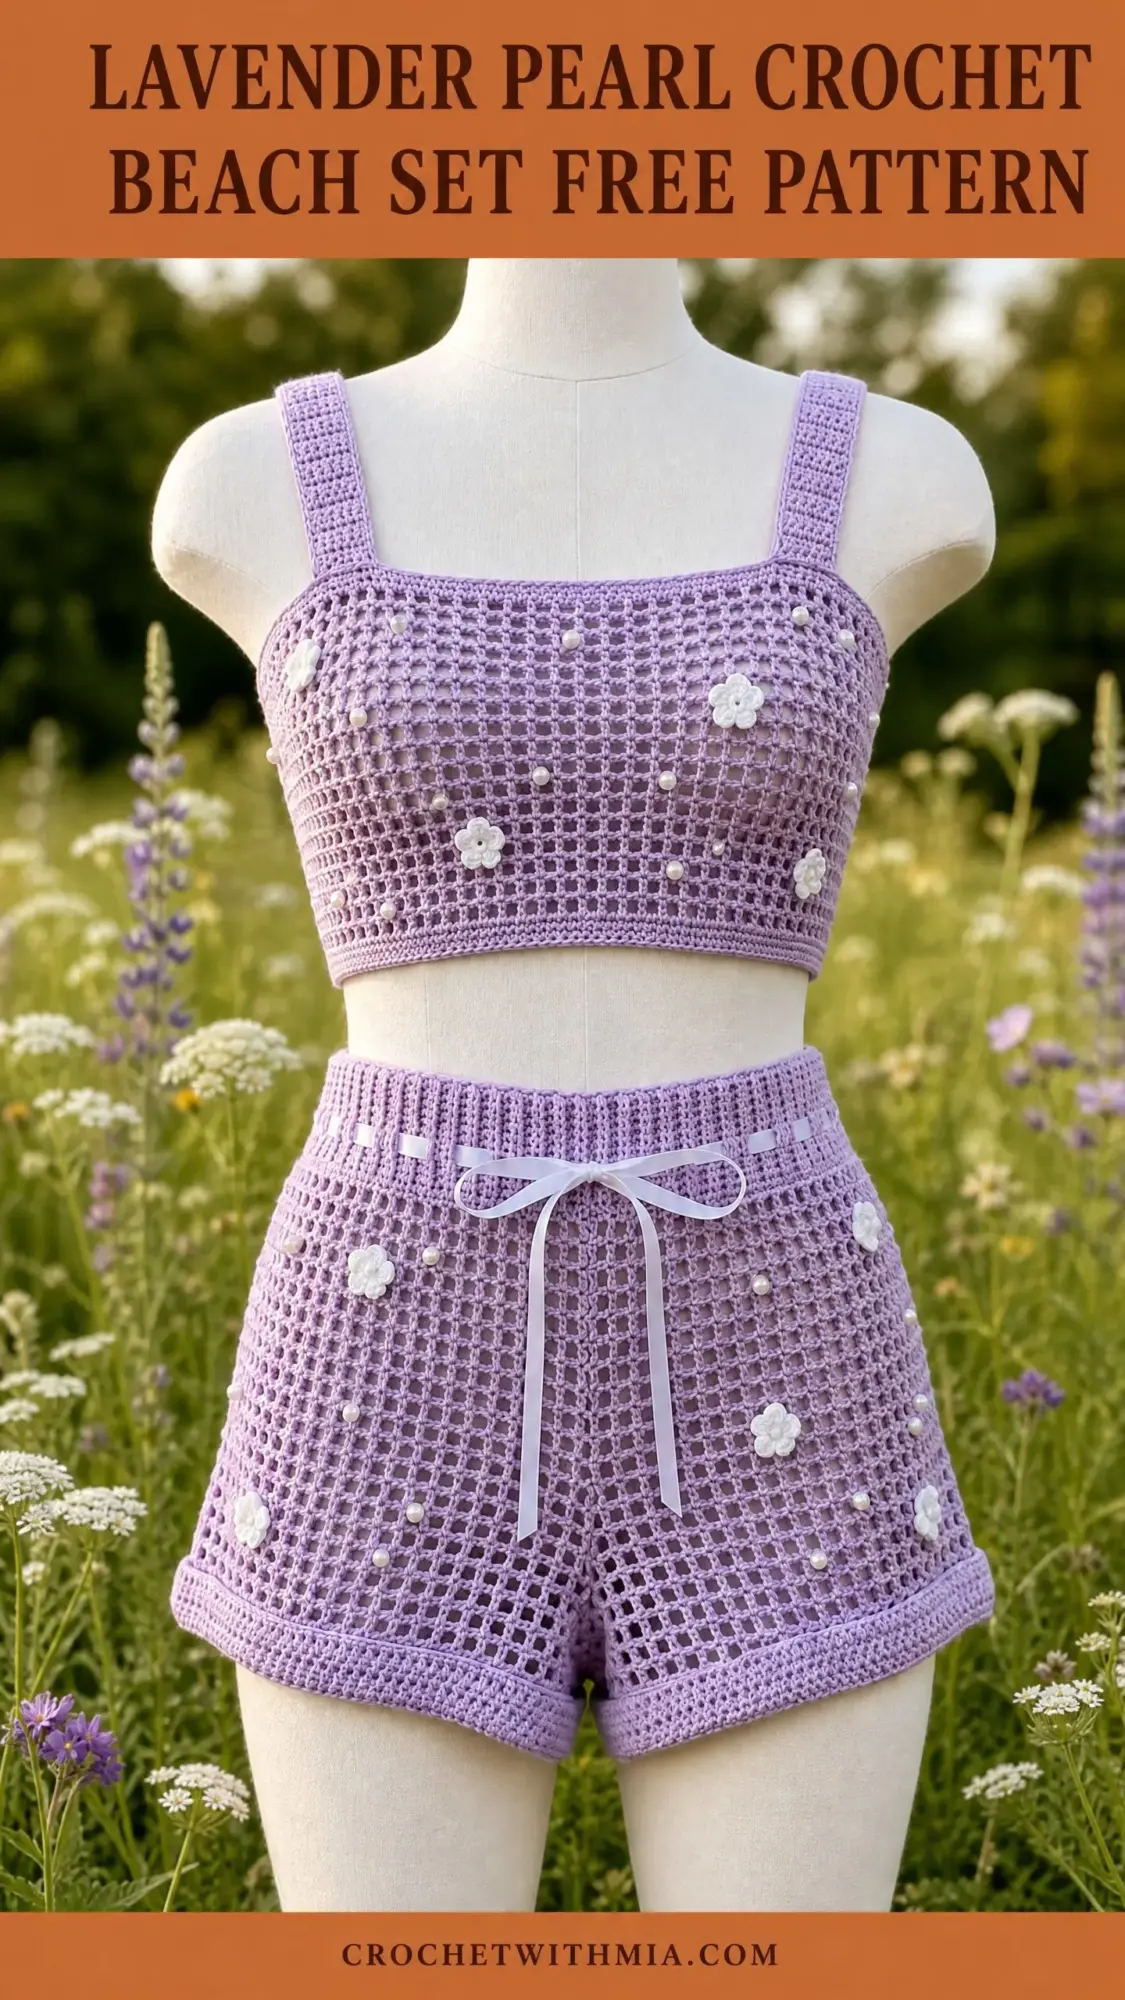
This two-piece coordinating set features a cropped square-neck tank top and high-waisted shorts. Both pieces use the same foundational mesh grid stitch worked flat, then seamed together. The construction is straightforward. You are essentially making rectangles with some simple shaping at the end.
The white three-dimensional crochet flowers and pearl beads are applied after construction as surface embellishments. This means you can complete the garments first, block them properly, and then add the decorative elements without worrying about bead placement while you work.
The waistband of the shorts uses rows of single crochet (sc) for structure before transitioning to the mesh body. This keeps the drawstring channel stable and prevents the ribbon from pulling or distorting the fabric. Smart construction choices like this make the finished piece look polished and professional.
Skill Level
This crochet tutorial is rated intermediate. The main stitch repeat is genuinely simple, but the full project involves shaping for the top straps, working the shorts waistband separately, seaming multiple pieces, making small applied flowers, and attaching bead embellishments.
If you are comfortable reading stitch counts, seaming fabric pieces together, and following basic shaping instructions, you will complete this set confidently. Take your time. There is no rush.
Time Estimate
Plan for approximately 18 to 24 hours for both pieces combined, not including blocking or embellishment time. Allow an additional 2 to 3 hours for making the flowers and attaching the pearl beads.
This is not a weekend project, but it is absolutely achievable if you break it into sessions. Work the top first, then tackle the shorts. Add the embellishments last as a relaxing finishing step.
Finished Measurements
Top (Size Small/Medium)
Shorts (Size Small/Medium)
Size customization guidance is provided at the end of this pattern.
Materials Needed
Yarn: Approximately 550 yards / 503 m of DK weight (light weight #3) cotton or cotton-blend yarn in lavender
Crochet Hooks:
Notions:
Yarn Suggestions
Option 1: Paintbox Yarns Simply DK (100% cotton, 137 yd / 125 m per 50 g ball). Recommended colorway: Dusty Lilac. Sturdy stitch definition, minimal stretch, holds embellishments well.
Option 2: Lion Brand 24/7 Cotton DK (100% mercerized cotton, 186 yd / 170 m per 100 g ball). Recommended colorway: Lilac. Widely available, smooth texture allows beads to slide easily.
Option 3: Drops Safran (70% cotton, 30% polyamide, 175 yd / 160 m per 50 g ball). Recommended colorway: Lavender. The polyamide content adds slight sheen, which complements the pearl embellishments beautifully.
Substitution note: Use any DK weight yarn that achieves gauge. Cotton or cotton-blend is strongly recommended for drape and stitch clarity. Avoid yarns with excessive halo or texture, as these obscure the open mesh pattern and interfere with bead attachment.
Gauge (Critical for Fit)
With E-4 / 3.5 mm hook in Grid Mesh Stitch:
With D-3 / 3.25 mm hook for Flower Motifs:
Gauge is mandatory for this garment. Even a small deviation will significantly alter fit. Swatch at least a 5 inch / 13 cm square in grid mesh and measure after a light wet block.
Abbreviations
Special Stitches Explained
Grid Mesh Stitch (Worked Flat in Rows)
This is the primary stitch pattern used for both the top and the shorts body. It creates an open square grid of double crochets and chain-1 spaces. Think of it like a simple net or lattice.
Foundation chain must be a multiple of 2, plus 3 for turning chain.
Set-up row (Row 1, RS): Ch 3 (counts as first dc here and throughout), skip first 2 chains, dc in 3rd chain from hook, (ch 1, skip 1 ch, dc in next ch) across. Turn.
Row 2 and all following rows: Ch 3, dc in first ch-1 sp, (ch 1, dc in next ch-1 sp) across, dc in top of t-ch. Turn.
The stitch count notation used throughout this pattern counts each dc and each ch-1 sp as one unit. Total units per row will always equal the foundation multiple.
3D Applied Flower Motif
Each flower is made separately with the D-3 / 3.25 mm hook in white yarn and sewn onto the finished fabric.
Rnd 1: Magic ring, ch 1, work 5 sc into ring, sl st to first sc to join. (5 sc)
Rnd 2: (Ch 3, 2 dc in same sc, ch 3, sl st in next sc) 5 times. (5 petals)
Fasten off, leaving an 8 inch / 20 cm tail for sewing. The ch-3 loop and 2 dc cluster form each petal.
Make approximately 30 flowers total (14 for top, 16 for shorts).
Sc2tog (Single Crochet 2 Together)
Insert hook into next st, yo, pull up a loop, insert hook into following st, yo, pull up a loop, yo and draw through all 3 loops on hook. (1 stitch decreased)
Pattern Notes Before You Begin
1. Both pieces are worked flat (back and forth in rows) and seamed at the sides. This creates clean seams and makes size adjustments straightforward.
2. The top straps are worked as extensions of the main body panels, not as separate strips.
3. The shorts waistband is worked first in rows of sc for approximately 1.5 inches / 3.8 cm to create a non-stretching waistband border, then transitions to the grid mesh for the body.
4. The shorts cuff is created by folding the lower edge up approximately 1 inch / 2.5 cm and tacking in place.
5. The ribbon drawstring is woven through a row of ch-1 spaces in the waistband and tied in a bow at the front center.
6. Pearl beads are attached by individually sewing through the bead hole after the fabric is complete.
7. All stitch counts given in parentheses at the end of each row reflect the total number of working stitches.
8. Ch-3 turning chain at the start of mesh rows always counts as the first dc of that row.
9. Block both pieces before assembling and embellishing.
Part One: Cropped Tank Top Step by Step
Top Section A: Front and Back Body Panels (Make 2 Identical Pieces)
Foundation chain: Ch 59.
Row 1 (RS): Dc in 4th ch from hook (beg ch-3 counts as first dc), (ch 1, sk 1, dc in next ch) across. Turn. (57 units: 29 dc posts and 28 ch-1 spaces)
Row 2: Ch 3, dc in first ch-1 sp, (ch 1, dc in next ch-1 sp) across, dc in top of t-ch. Turn. (57)
Rows 3 through 18: Rep Row 2. Turn after each row. (57)
After Row 18, the panel measures approximately 9 inches / 23 cm tall.
Checkpoint: Each panel should measure approximately 16.25 inches / 41 cm wide and 9 inches / 23 cm tall.
Top Section B: Strap Shaping on Front Panel
The straps are positioned beginning 6 units in from each outer edge, leaving the central 33 units unworked at the top. Each strap is 6 units wide.
Left Strap (front panel, as worn):
Row 19 (RS): Ch 3, work in pattern across first 6 units (dc in first ch-1 sp, ch 1, dc in next ch-1 sp, ch 1, dc in next ch-1 sp, ch 1, dc in top of dc below = 6 units). Leave rem stitches unworked. Turn. (6)
Rows 20 through 26: Ch 3, work in pattern across 6 units. Turn. (6)
Fasten off. This creates an 8-row strap (Rows 19 to 26).
Right Strap (front panel):
With RS facing, skip center 33 units (leave unworked for neckline). Reattach yarn at the 7th unit from the right edge.
Row 19 (RS): Ch 3, work in pattern across final 6 units. Turn. (6)
Rows 20 through 26: Ch 3, work in pattern across 6 units. Turn. (6)
Fasten off.
Top Section C: Strap Shaping on Back Panel
Repeat Top Section B instructions exactly on the second body panel. Both strap positions mirror the front exactly.
Top Section D: Flowers for Top (Make 14)
Follow the 3D Applied Flower Motif instructions in Special Stitches using D-3 hook and white yarn. Make 14 flowers. Set aside.
Top Section E: Assembly and Finishing
Step 1: Block both body panels by wet-blocking flat to finished dimensions. Allow to dry completely.
Step 2: Seam sides. With WS together, use a tapestry needle and yarn to whip stitch or sl st seam the two panels along both side edges, working from the lower edge upward, stopping at the Row 18 / Row 19 join. Leave the upper section open for the armhole on each side.
Step 3: Align left front strap with left back strap (right sides together). Whip stitch or sc seam across the top edge of each strap pair. Repeat for right strap.
Step 4: Edging. With E-4 hook and RS facing, join yarn at one side seam along the lower edge. Work 1 rnd of sc evenly around the lower hem. Sl st to first sc to join. Fasten off.
With RS facing, work 1 row of sc evenly along the front neckline, up the inner strap edge, across the strap top seam, down the inner strap back edge, and across the back neckline.
With RS facing, work 1 row of sc along each armhole opening.
Step 5: Scatter pearl beads across both panels. Sew individual beads through their holes using a beading needle. Place approximately 14 to 18 beads on the top, spaced irregularly but roughly every 2 to 3 inches / 5 to 8 cm.
Step 6: Sew applied flowers. Using the tail from each flower, sew 14 flowers to the top panels in a scattered arrangement.
Step 7: Weave in all ends.
Part Two: High-Waisted Shorts Step by Step
Shorts Section A: Waistband (Make 2 Panels, Front and Back)
Foundation chain: Ch 65.
Row 1 (RS): Sc in 2nd ch from hook and in each ch across. Turn. (64 sc)
Row 2: Ch 1, sc in each sc across. Turn. (64 sc)
Row 3 (drawstring channel row): Ch 1, sc in first sc, (ch 1, sk 1 sc, sc in next sc) across, ending sc in last sc. Turn. (33 sc and 31 ch-1 sps = 64 total working units)
Row 4: Ch 1, sc in first sc, (sc in ch-1 sp, sc in next sc) across. Turn. (64 sc)
Row 5: Ch 1, sc in each sc across. Turn. (64 sc)
Row 6: Ch 1, sc in each sc across. Turn. (64 sc)
After Row 6, the waistband section measures approximately 1.5 inches / 3.8 cm.
Shorts Section B: Mesh Body (Continuing from Waistband)
Row 7 (transition row, RS): Ch 3 (counts as dc), sk first sc, dc in next sc, (ch 1, sk 1 sc, dc in next sc) across. Turn. (64)
Row 8: Ch 3, dc in first ch-1 sp, (ch 1, dc in next ch-1 sp) across, dc in top of t-ch. Turn. (64)
Rows 9 through 22: Rep Row 8. Turn after each row. (64)
Shorts Section C: Crotch Shaping
Row 23 (RS): Ch 3, work in pattern for 56 units. Leave last 8 units unworked. Turn. (56)
Row 24: Ch 3, work in pattern for 48 units. Leave last 8 units unworked. Turn. (48)
Row 25: Ch 3, work in pattern for 40 units. Leave last 8 units unworked. Turn. (40)
Fasten off.
Repeat Sections A through C for the second shorts panel.
Shorts Section D: Crotch Gusset
With RS facing, align front and back panels WS together. Using yarn and tapestry needle, whip stitch the crotch seam (the stepped decrease edges) together along the center bottom.
Shorts Section E: Cuff
After assembly, with RS facing, join yarn at the inner leg seam of one leg opening.
Rnd 1: Work sc evenly around the leg opening. Join with sl st. (approximately 48 sc)
Rnds 2 through 5: Ch 1, sc in each sc around. Join with sl st. (48)
Fasten off. Fold cuff outward and upward by approximately 1 inch / 2.5 cm. Tack fold in place at 4 points around the leg.
Shorts Section F: Assembly and Finishing
Step 1: Block both shorts panels flat. Allow to dry completely.
Step 2: Seam sides. With WS together, whip stitch front and back panels along both side edges, working from waistband top to the bottom corner of the mesh body.
Step 3: Seam crotch as described in Section D.
Step 4: Work cuff edging as described in Section E.
Step 5: Ribbon drawstring. Weave the satin ribbon through the ch-1 holes of the drawstring channel row. Start and end at the front center. Tie in a bow.
Step 6: Waistband top edging. With RS facing, join yarn at one side seam along the waistband top edge. Work 1 rnd of sc evenly across the top. Join with sl st. Fasten off.
Step 7: Scatter pearl beads. Sew approximately 40 to 50 individual pearl beads across both shorts panels.
Step 8: Sew 16 applied flowers to the shorts panels.
Step 9: Weave in all ends.
Size Customization Tips
To size up or down, adjust the foundation chain for both the top body panels and the shorts panels.
Every 2 chains added or removed changes the width by approximately 0.57 inches / 1.5 cm.
For size XS (bust 30 inches / 76 cm): Reduce top foundation chain by 6, starting with Ch 53. Reduce shorts foundation chain by 4, starting with Ch 61.
For size Large (bust 38 inches / 97 cm): Increase top foundation chain by 10, starting with Ch 69. Increase shorts foundation chain by 8, starting with Ch 73.
For length adjustments: Add or remove 2 rows of mesh per 1 inch / 2.5 cm desired.
Blocking and Care Instructions
Wet blocking is required for this project.
Soak each piece in cool water for 15 minutes before assembly. Gently press out excess water in a towel. Do not wring.
Pin pieces flat on a foam blocking mat, stretching lightly to the stated finished dimensions. Pin the mesh open so the grid squares lie flat and even.
Allow to dry completely (typically 12 to 24 hours). Remove pins.
Care: Hand wash in cool water with gentle soap. Lay flat to dry. Do not tumble dry. Do not iron directly over beads or flowers.
Thank you so much for choosing this lavender pearl crochet beach set pattern. I truly hope you enjoy every stitch of the process. If you make this set, I would absolutely love to see your finished piece. Tag me on Instagram or share a photo in our Facebook group.
If this pattern caught your eye, go ahead and save it to your Pinterest boards so you can find it when you are ready to start. And please drop a comment below if you give it a try. I read every single one, and your photos make my day!