
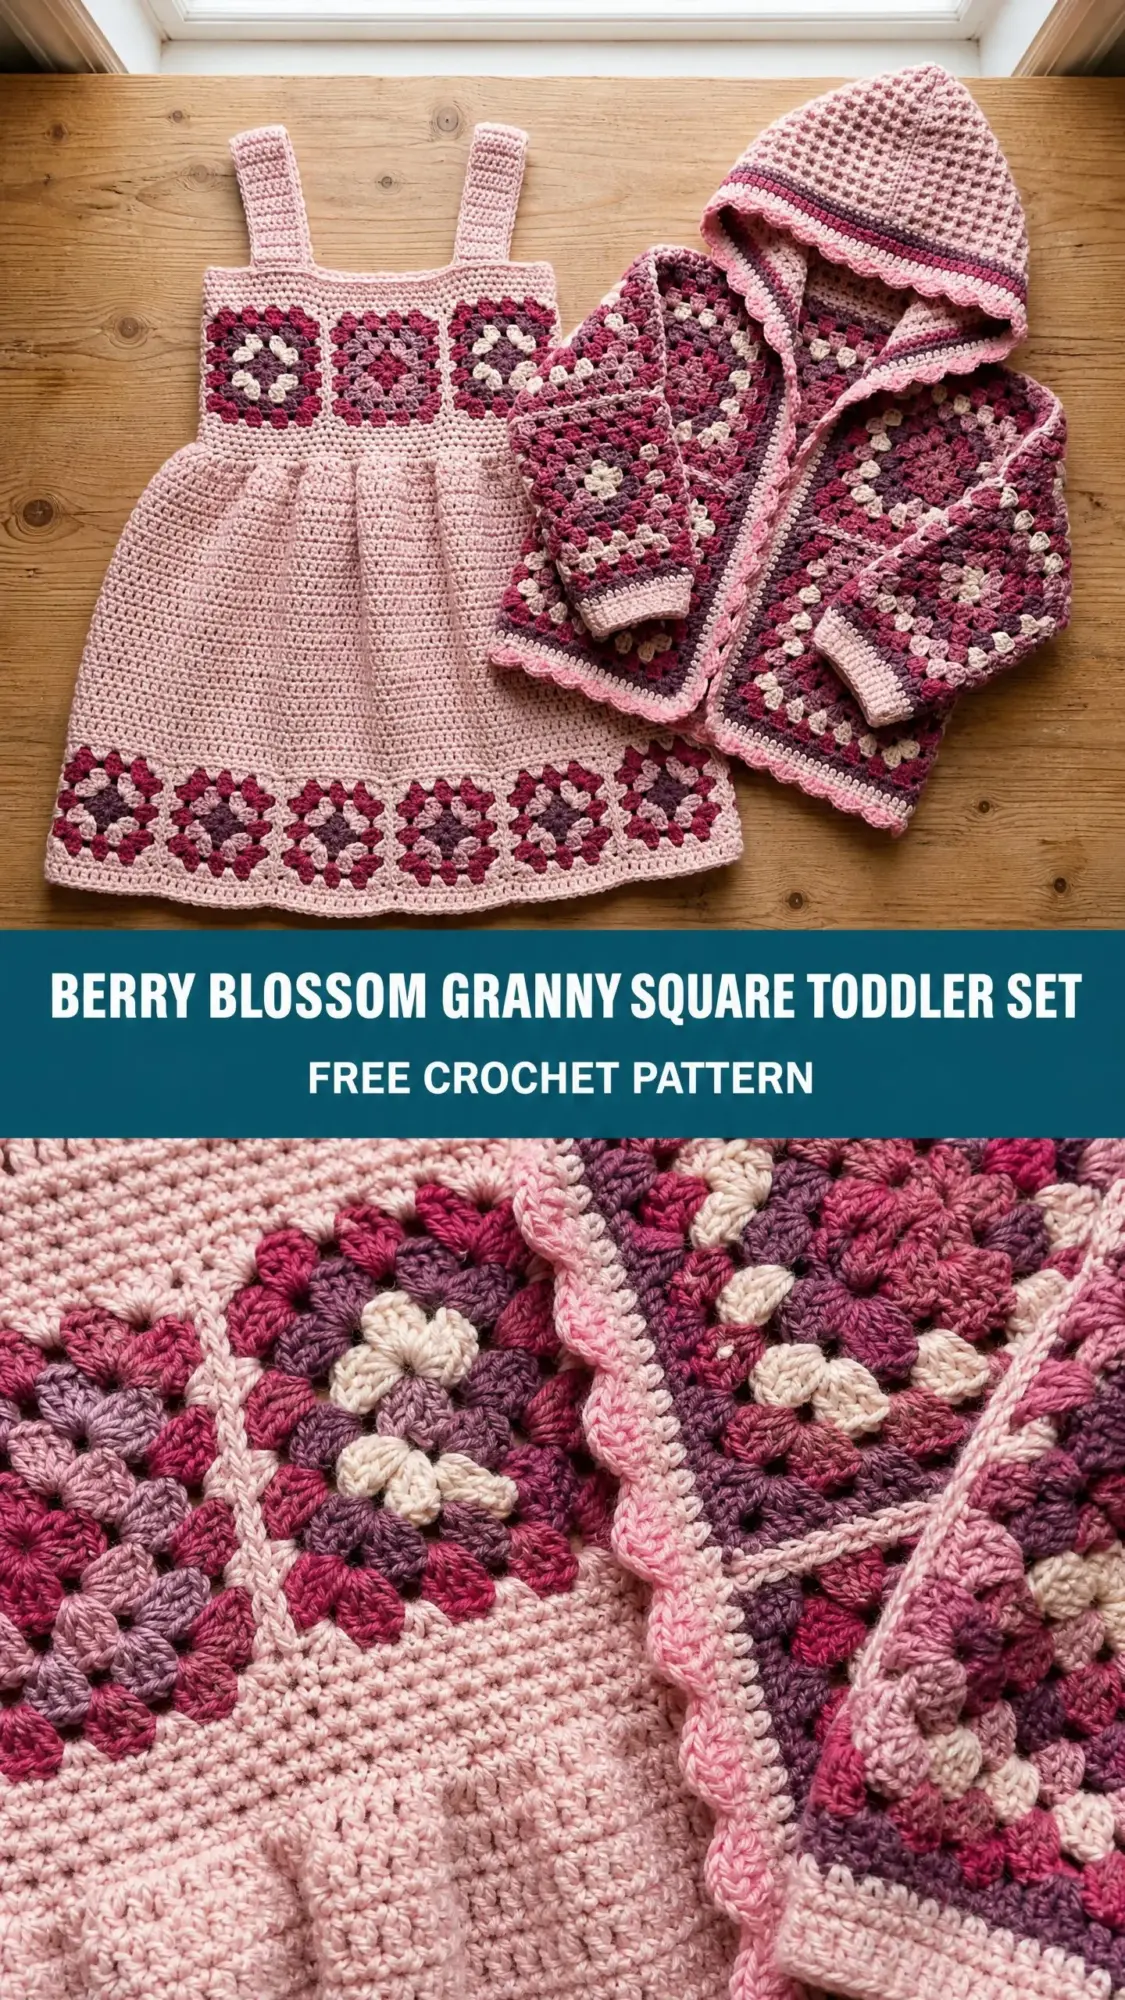
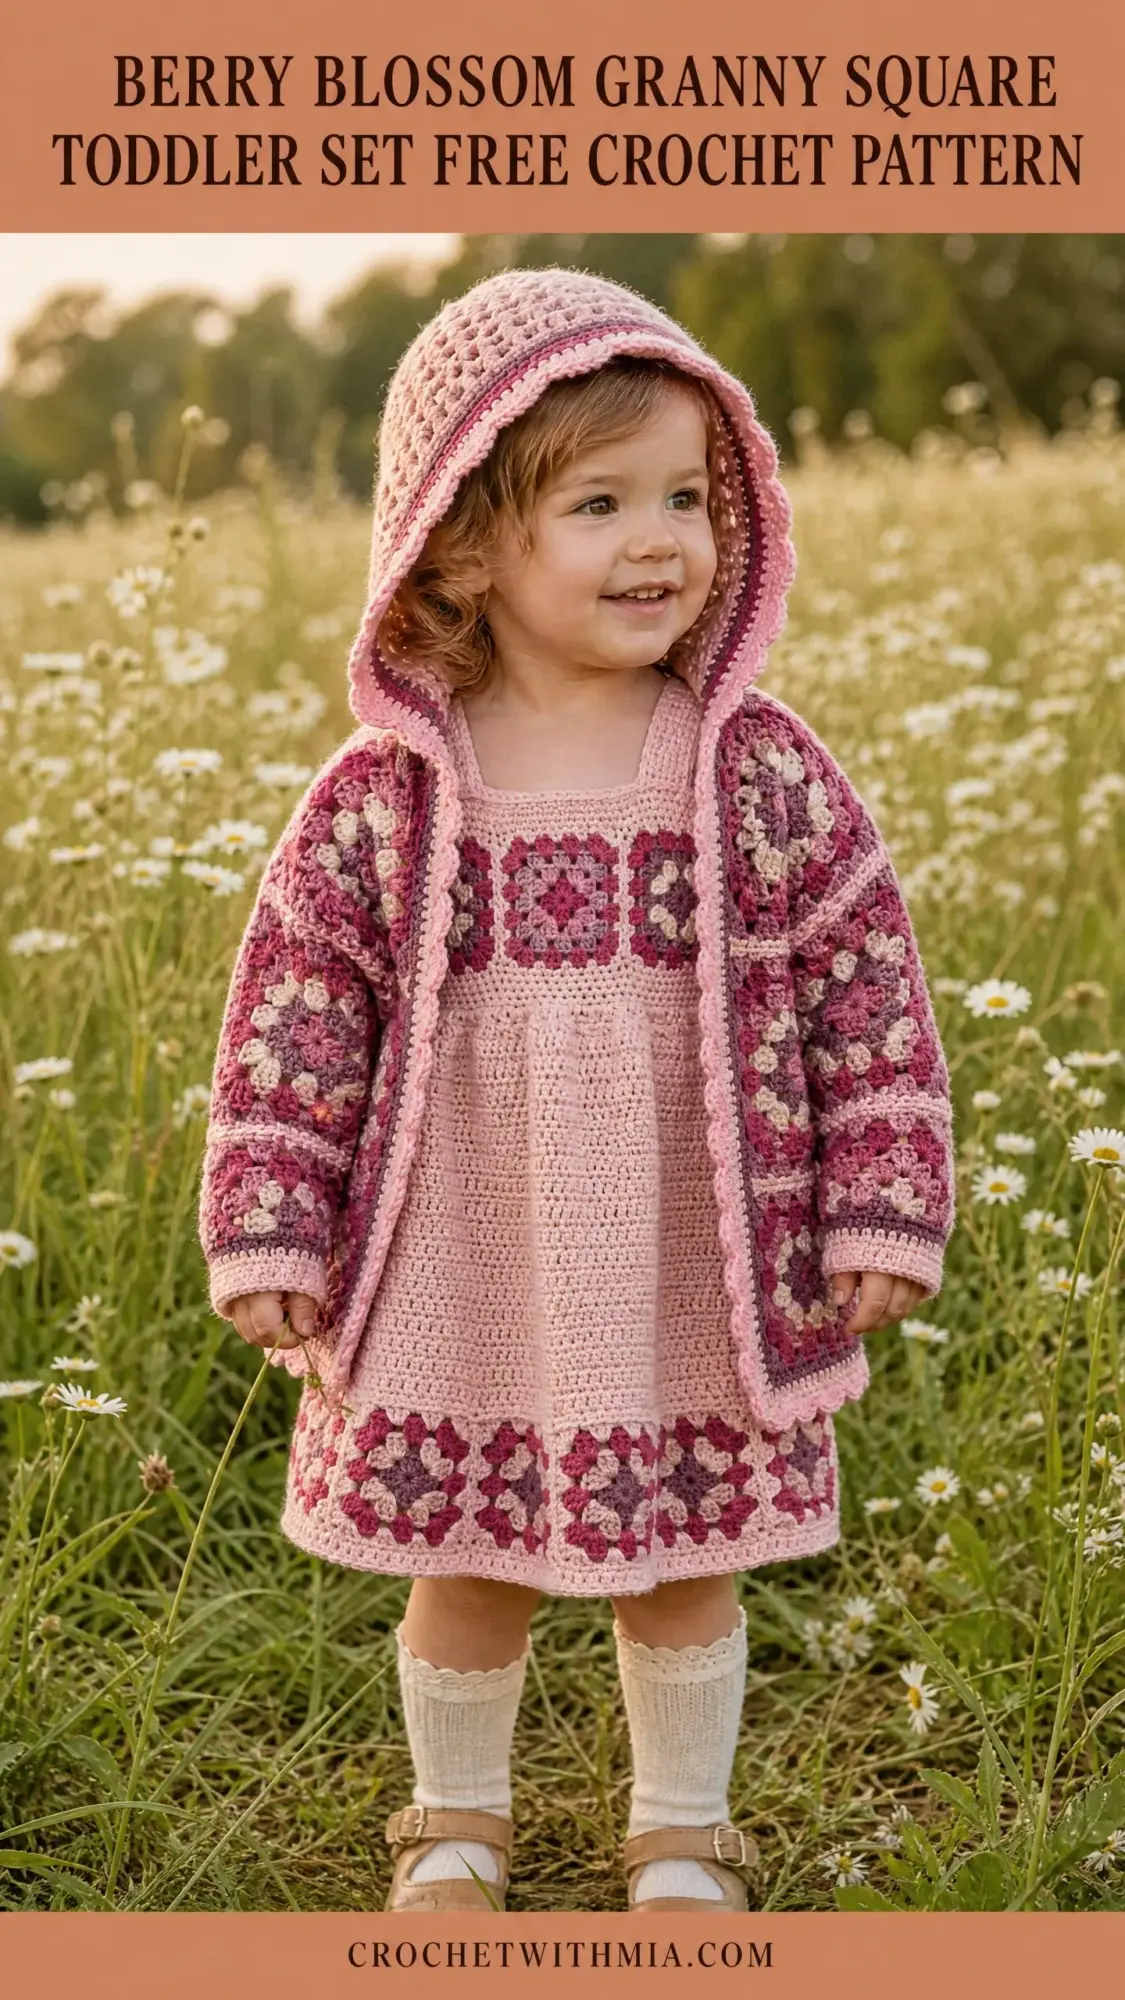
If you have a toddler to keep cozy or a baby shower gift to prepare, this coordinated set delivers on both counts. The Berry Blossom Granny Square Toddler Set pairs a sweet pinafore dress with a hooded cardigan, both featuring classic granny squares in soft pink, berry, and cream tones. The dress works up with a solid double crochet skirt that flares gently into an A-line shape, while the cardigan uses a waffle stitch hood and ribbed cuffs for extra texture.
This crochet pattern sits at an advanced beginner to intermediate level. You will need to be comfortable making granny squares, joining motifs, and working basic garment shaping. If you have completed at least one garment project before, you will find this accessible and rewarding.
The full set takes approximately 30 to 40 hours to complete, making it a perfect project to work on over several weeks. Both pieces fit toddler size 18 to 24 months and make an absolutely beautiful heirloom gift or keepsake for your own little one.
Why You Will Love This Crochet Pattern
The Berry Blossom set combines two of my favorite things in crochet: granny squares and wearable garments. The granny square motifs give you that satisfying, portable project feel where you can make one square at a time. Then the assembly process brings everything together into something truly special.
The color palette uses blush pink as the main color with pops of dusty rose, burgundy, mauve purple, and cream throughout the granny squares. This creates a cohesive look across both pieces without being too matchy. The cardigan even mixes up the outer round colors on some squares for an organic, handmade aesthetic.
What I especially appreciate about this design is the thoughtful construction. The dress anchors its bodice with granny squares at both the top and bottom, with a flared skirt between them. The cardigan builds almost entirely from joined squares, then adds a textured waffle stitch hood and scalloped edging for polish.
Finished Measurements
Dress (Toddler 18 to 24 months):
Cardigan (Toddler 18 to 24 months):
Materials Needed for the Berry Blossom Toddler Set
Yarn
You will need DK weight yarn (weight 3) in six colors. I recommend 100% cotton or a cotton-acrylic blend for excellent stitch definition and easy washing.
Color A, Blush Pink (main color): approximately 450 yards / 411 m for the dress plus 350 yards / 320 m for the cardigan
Color B, Dusty Rose (light granny accent and edging): approximately 80 yards / 73 m total
Color C, Burgundy/Berry (dominant granny square ring): approximately 120 yards / 110 m total
Color D, Mauve Purple (inner granny square ring): approximately 100 yards / 91 m total
Color E, Cream/Off-White (granny square center): approximately 80 yards / 73 m total
Color F, Deep Dusty Rose/Antique Pink (granny square outer ring and cardigan stripe accent): approximately 90 yards / 82 m total
Yarn Suggestions
Paintbox Yarns Cotton DK works beautifully for this pattern. It offers 273 yards per 100 g skein, excellent stitch definition, and machine washability.
Lion Brand 24/7 Cotton in DK weight provides a slightly smoother finish with gentle sheen and lovely drape for the skirt section.
Scheepjes Softfun (60% cotton, 40% acrylic) adds a little stretch, which helps garments stay on an active toddler.
Hooks
Notions
Gauge
With US G-6 / 4.0 mm hook:
14 double crochet stitches x 8 rows = 4 inches / 10 cm in solid double crochet worked flat (turning chain does not count as a stitch)
1 completed granny square (3 rounds) = 3.5 inches / 9 cm square
Please swatch before beginning. Gauge is essential for correct finished dimensions on garments.
Abbreviations Used in This Crochet Pattern
beg = beginning
BLO = back loop only (inserting your hook under only the back loop of a stitch instead of both loops)
BPdc = back post double crochet (yarn over, insert hook from back to front to back around the post of the indicated stitch, complete as a regular double crochet)
ch = chain (yarn over and pull through the loop on your hook)
ch-sp = chain space (the gap created by chain stitches in the previous row or round)
dc = double crochet (yarn over, insert hook, yarn over and pull up a loop, yarn over and pull through 2 loops twice)
dc2tog = double crochet 2 together (a decrease that combines 2 stitches into 1)
FLO = front loop only
FPdc = front post double crochet (yarn over, insert hook from front to back to front around the post of the indicated stitch, complete as a regular double crochet)
hdc = half double crochet
lp(s) = loop(s)
MC = main color (Color A, Blush Pink)
pm = place marker
rem = remaining
rep = repeat
rnd = round
RS = right side
sc = single crochet (insert hook, yarn over and pull up a loop, yarn over and pull through both loops)
sk = skip
sl st = slip stitch (insert hook, yarn over and pull through both the stitch and the loop on your hook)
sp = space
st(s) = stitch(es)
tch = turning chain
tog = together
WS = wrong side
yo = yarn over
Special Stitches and Techniques
The Granny Square (3-Round Version)
This foundational motif appears throughout both pieces. Each completed square measures 3.5 inches / 9 cm.
Round 1 (worked with Color E, Cream):
Make a magic ring (or chain 4 and join with slip stitch to form a ring).
Chain 3 (counts as first double crochet here only).
Work 2 double crochet into the ring.
Chain 2.
[3 double crochet into ring, chain 2] three times.
Join with slip stitch to top of beginning chain-3.
Fasten off Color E. (12 dc, 4 ch-2 corner spaces)
Round 2 (worked with Color D, Mauve Purple):
Join Color D with slip stitch to any ch-2 corner space.
Chain 3 (counts as first double crochet here only).
Work 2 double crochet into same corner space.
Chain 2.
3 double crochet into same corner space.
Chain 1.
[3 dc, ch 2, 3 dc into next corner space, ch 1] three times.
Join with slip stitch to top of beginning chain-3.
Fasten off Color D. (24 dc, 4 ch-2 corner spaces, 4 ch-1 side spaces)
Round 3 (worked with Color C, Burgundy/Berry):
Join Color C with slip stitch to any ch-2 corner space.
Chain 3 (counts as first double crochet here only).
Work 2 double crochet into same corner space.
Chain 2.
3 double crochet into same corner space.
Chain 1.
3 double crochet into ch-1 side space.
Chain 1.
[3 dc, ch 2, 3 dc into next corner space, ch 1, 3 dc into ch-1 side space, ch 1] three times.
Join with slip stitch to top of beginning chain-3.
Fasten off Color C. (36 dc, 4 ch-2 corner spaces, 8 ch-1 spaces)
Color variation note: For the cardigan, approximately one-third of squares have Round 3 worked in Color F (deep dusty rose) instead of Color C. Scatter these across the body and sleeves as desired.
Flat Join (Joining Motifs)
Hold two squares with wrong sides together. Working through both layers, slip stitch through the ch-2 corner space of both squares simultaneously. Then slip stitch through each corresponding ch-1 space and double crochet cluster top across the shared edge. This creates a visible but tidy ridge on the right side.
Scallop Edging
Join Color B with slip stitch to your starting point.
Skip 2 stitches, 5 double crochet into next stitch, skip 2 stitches, slip stitch into next stitch
Repeat from to to end.
Fasten off.
Waffle Stitch (for the Hood)
This textured stitch creates the cozy hood fabric.
Row 1 (RS): Chain 2, double crochet in first stitch, front post double crochet around next stitch, double crochet in next stitch repeat across to last stitch, double crochet in last stitch. Turn.
Row 2 (WS): Chain 2, double crochet in first stitch, back post double crochet around next post stitch, double crochet in next stitch repeat across to last stitch, double crochet in last stitch. Turn.
Repeat Rows 1 and 2 for the waffle texture.
Pattern Notes Before You Begin
The turning chain does not count as a stitch anywhere in this pattern unless explicitly stated. This keeps seaming and stitch counts cleaner throughout.
All granny squares are made separately and joined using the flat join method or whipstitch join on the wrong side.
Block all individual squares before assembly for best results. This evens out any tension differences and makes joining much easier.
Part One: Berry Blossom Pinafore Dress Pattern
Section 1: Top Granny Square Bodice Band
Make 5 standard granny squares following the instructions above.
Join them in a horizontal strip using the flat join method, connecting along one side edge of each square.
The joined strip should measure approximately 17.5 inches / 44.5 cm wide and 3.5 inches / 9 cm tall.
Section 2: Shoulder Straps
With right side facing, join Color A with slip stitch at the top right corner of the rightmost square.
Work 8 single crochet evenly along the top edge of the first square. (8 sc)
Work the right strap:
Row 1: Chain 1, turn. Single crochet across. (8 sc)
Row 2: Chain 1, turn. Single crochet across. (8 sc)
Continue in single crochet for a total of 14 rows. Fasten off. The strap measures approximately 4.5 inches / 11.5 cm.
Skip the center squares for the neckline opening. Join Color A at the beginning of the fifth (leftmost) square top edge. Work 8 single crochet along its top edge. (8 sc)
Work the left strap identically to the right strap for 14 rows. Fasten off.
Section 3: Back Bodice Band
Make 5 more standard granny squares. Join them identically to the front band.
Attach the strap ends to the back bodice band using whipstitch, positioning left front strap to left back shoulder and right front strap to right back shoulder.
Seam the front and back bodice bands together along their side edges using whipstitch. This creates the body tube. Leave the bottom edge open.
Checkpoint: The bodice tube should measure approximately 17.5 inches / 44.5 cm around and approximately 3.5 inches / 9 cm tall.
Section 4: Skirt
The skirt is worked in the round from the lower edge of the bodice tube in Color A.
Setup Round: With right side facing, join Color A with slip stitch to the lower edge of the front bodice band at the right side seam. Work 70 single crochet evenly distributed around the lower edge of both front and back square bands. Join with slip stitch to first single crochet. (70 sc)
Round 1: Chain 2, double crochet in each stitch around. Join with slip stitch to first double crochet. (70 dc)
Rounds 2-3: Chain 2, double crochet in each stitch around. Join. (70 dc)
Round 4 (increase round): Chain 2, [double crochet in next 6 stitches, 2 double crochet in next stitch] 10 times. Join. (80 dc)
Rounds 5-6: Chain 2, double crochet in each stitch around. Join. (80 dc)
Round 7 (increase round): Chain 2, [double crochet in next 7 stitches, 2 double crochet in next stitch] 10 times. Join. (90 dc)
Rounds 8-9: Chain 2, double crochet in each stitch around. Join. (90 dc)
Round 10 (increase round): Chain 2, [double crochet in next 8 stitches, 2 double crochet in next stitch] 10 times. Join. (100 dc)
Rounds 11-12: Chain 2, double crochet in each stitch around. Join. (100 dc)
Round 13 (increase round): Chain 2, [double crochet in next 9 stitches, 2 double crochet in next stitch] 10 times. Join. (110 dc)
Rounds 14-15: Chain 2, double crochet in each stitch around. Join. (110 dc)
Round 16 (increase round): Chain 2, [double crochet in next 10 stitches, 2 double crochet in next stitch] 10 times. Join. (120 dc)
Rounds 17-18: Chain 2, double crochet in each stitch around. Join. (120 dc)
Fasten off Color A.
Checkpoint: The skirt should measure approximately 9.5 inches / 24 cm from the top of the bodice to the lower edge, with a hem circumference of approximately 34 inches / 86 cm.
Section 5: Lower Granny Square Band
Make 10 standard granny squares.
Join them in a horizontal ring to form a tube measuring approximately 35 inches / 89 cm in circumference and 3.5 inches / 9 cm tall.
With Color A and a tapestry needle, whipstitch the top edge of the square band to the last round of double crochet on the skirt, spacing the 10 squares evenly around the 120 double crochet.
Section 6: Dress Finishing
Weave in all ends. Gently steam block or wet block the entire dress.
The armhole openings are the natural gaps created by the side seams. If edges feel rough, work 1 round of single crochet in Color A around each armhole opening.
Part Two: Berry Blossom Hooded Granny Square Cardigan
Section 1: Granny Squares for Cardigan
Make a total of 32 granny squares. Use the standard color formula for approximately 20 of them. Use Color F for Round 3 on the remaining 12 squares for variety.
Panel breakdown:
Section 2: Assembling the Back Panel
Arrange 8 squares in a 4-wide by 2-tall grid. Join squares in each row horizontally first, then join the two rows together.
Back panel measures approximately 14 inches / 35.5 cm wide and 7 inches / 17.8 cm tall.
Section 3: Assembling the Front Panels
Each front panel is 2 squares wide and 2 squares tall.
Join to create two panels, each measuring approximately 7 inches / 17.8 cm wide and 7 inches / 17.8 cm tall.
Section 4: Shoulder Seaming
Place back panel right side up. Place right front panel right side down on top of the right half of the back panel, aligning top edges. Seam the top edge across one square width (approximately 11 stitches) using whipstitch in Color A. Repeat for left front panel.
Section 5: Assembling the Sleeves
For each sleeve, join 8 squares in a 2-wide by 4-tall arrangement. Seam the side edges together to form a tube approximately 7 inches / 17.8 cm in circumference and 14 inches / 35.5 cm tall.
Section 6: Attaching Sleeves
Pin each sleeve tube to its armhole opening, matching the sleeve seam to the side edge of the body. Whipstitch the sleeve cap into the armhole opening using Color A.
Section 7: Side Seams
Seam the side edges of the back panel to the side edges of the front panels, from underarm to lower hem, using whipstitch in Color A.
Section 8: Ribbed Cuffs
Join Color A to the lower edge of one sleeve tube with right side facing.
Work 22 single crochet evenly around the lower edge. Join to work in the round. (22 sc)
Switch to US E-4 / 3.5 mm hook.
Round 1: Chain 1, single crochet in back loop only of each stitch around. Join. (22 sc)
Repeat Round 1 for 8 total rounds. Fasten off.
Repeat for second sleeve.
Section 9: Hood
With US G-6 / 4.0 mm hook and Color A, chain 55.
Foundation row (RS): Single crochet across. Turn. (54 sc)
Row 1 (RS): Chain 2, double crochet in first stitch, front post double crochet around next stitch, double crochet in next stitch repeat across to last stitch, double crochet in last stitch. Turn. (54 sts)
Row 2 (WS): Chain 2, double crochet in first stitch, back post double crochet around next post stitch, double crochet in next stitch repeat across to last stitch, double crochet in last stitch. Turn. (54 sts)
Repeat Rows 1 and 2 alternately for 26 total rows. The hood panel measures approximately 7.5 inches / 19 cm tall and 15.5 inches / 39.5 cm wide.
Fasten off, leaving a long tail.
Fold the panel in half widthwise so the two short edges meet. Seam the top edge closed.
Section 10: Attaching the Hood
Pick up approximately 44 single crochet evenly around the neckline opening using Color A.
Work 2 rows of single crochet in Color A, then 1 row in Color F, then 1 row in Color A (or Color B). This creates the striped band at the hood junction.
Pin the hood’s open bottom edge to the neckline. Whipstitch the hood into the neckline, distributing the 54-stitch hood edge evenly across the 44 neckline stitches and easing extra fullness at the back center.
Section 11: Scallop Edging
Apply scallop edging using Color B along:
For front edges: Join Color B at lower right corner of right front panel. Work single crochet evenly up the entire right front edge, around the hood edge, and down the entire left front edge. Ensure total is divisible by 6.
Apply scallop: Skip 2 single crochet, 5 double crochet into next single crochet, skip 2 single crochet, slip stitch into next single crochet repeat to end. Fasten off.
For lower hem: Join Color B at right side seam. Work single crochet evenly around entire lower edge. Apply scallop edging. Fasten off.
Section 12: Color Accent Stripe on Hood
Using Color F and then Color A, work 2 horizontal rows of single crochet across the exterior of the hood at approximately 1.5 inches / 3.8 cm above the neckline join. This creates the visible horizontal color stripe. Weave in ends.
Size Customization Tips
To size up to 2T/3T: Add one more square to each row of the cardigan panels. Adjust skirt increases proportionally by adding one additional increase round.
To size down to 12 months: Remove one square column from the back panel and reduce front panels. Work 2 fewer increase rounds on the skirt.
To lengthen the dress skirt: Add 2 to 4 more solid double crochet rounds before the lower square band. Each 2 rounds add approximately 1 inch / 2.5 cm to skirt length.
Finishing and Blocking
Wet blocking is strongly recommended for both pieces. Soak each piece in cool water for 20 minutes. Gently squeeze out excess water in a towel. Pin to measurements on a foam blocking mat. Allow to dry completely (12 to 24 hours) before removing pins.
Blocking evens the granny squares, relaxes the skirt drape, and makes seaming lines crisp.
After blocking, check that all granny squares lie flat with no cupping or ruffling. If any square cups, it was worked too tightly and may need reblocking with pins or remaking with a larger hook.
Care Instructions
Machine wash on a gentle cold cycle inside a mesh laundry bag. Lay flat to dry. Do not tumble dry, iron, or dry clean.
The garments will soften with washing and become even more pleasant to wear over time.
You Did It!
Thank you so much for choosing this Berry Blossom Granny Square Toddler Set crochet pattern. I hope you love making these coordinating pieces as much as I loved designing them. The combination of granny squares, textured stitches, and that sweet scalloped edging creates something truly special for a lucky little one.
If you make this set, I would absolutely love to see your finished pieces! Tag me on Instagram or share in my Facebook group. Seeing your color choices and finished projects is one of my favorite parts of sharing patterns.
If this pattern caught your eye, go ahead and save it to your Pinterest boards so you can find it when you are ready to start. And please drop a comment below if you make this set. I love hearing which color combinations you choose and seeing your beautiful finished projects!