
Go dig through your yarn stash right now. I know you have that perfect soft yellow tucked away somewhere, waiting for the right project. This baby dress set is exactly what that skein has been waiting for.
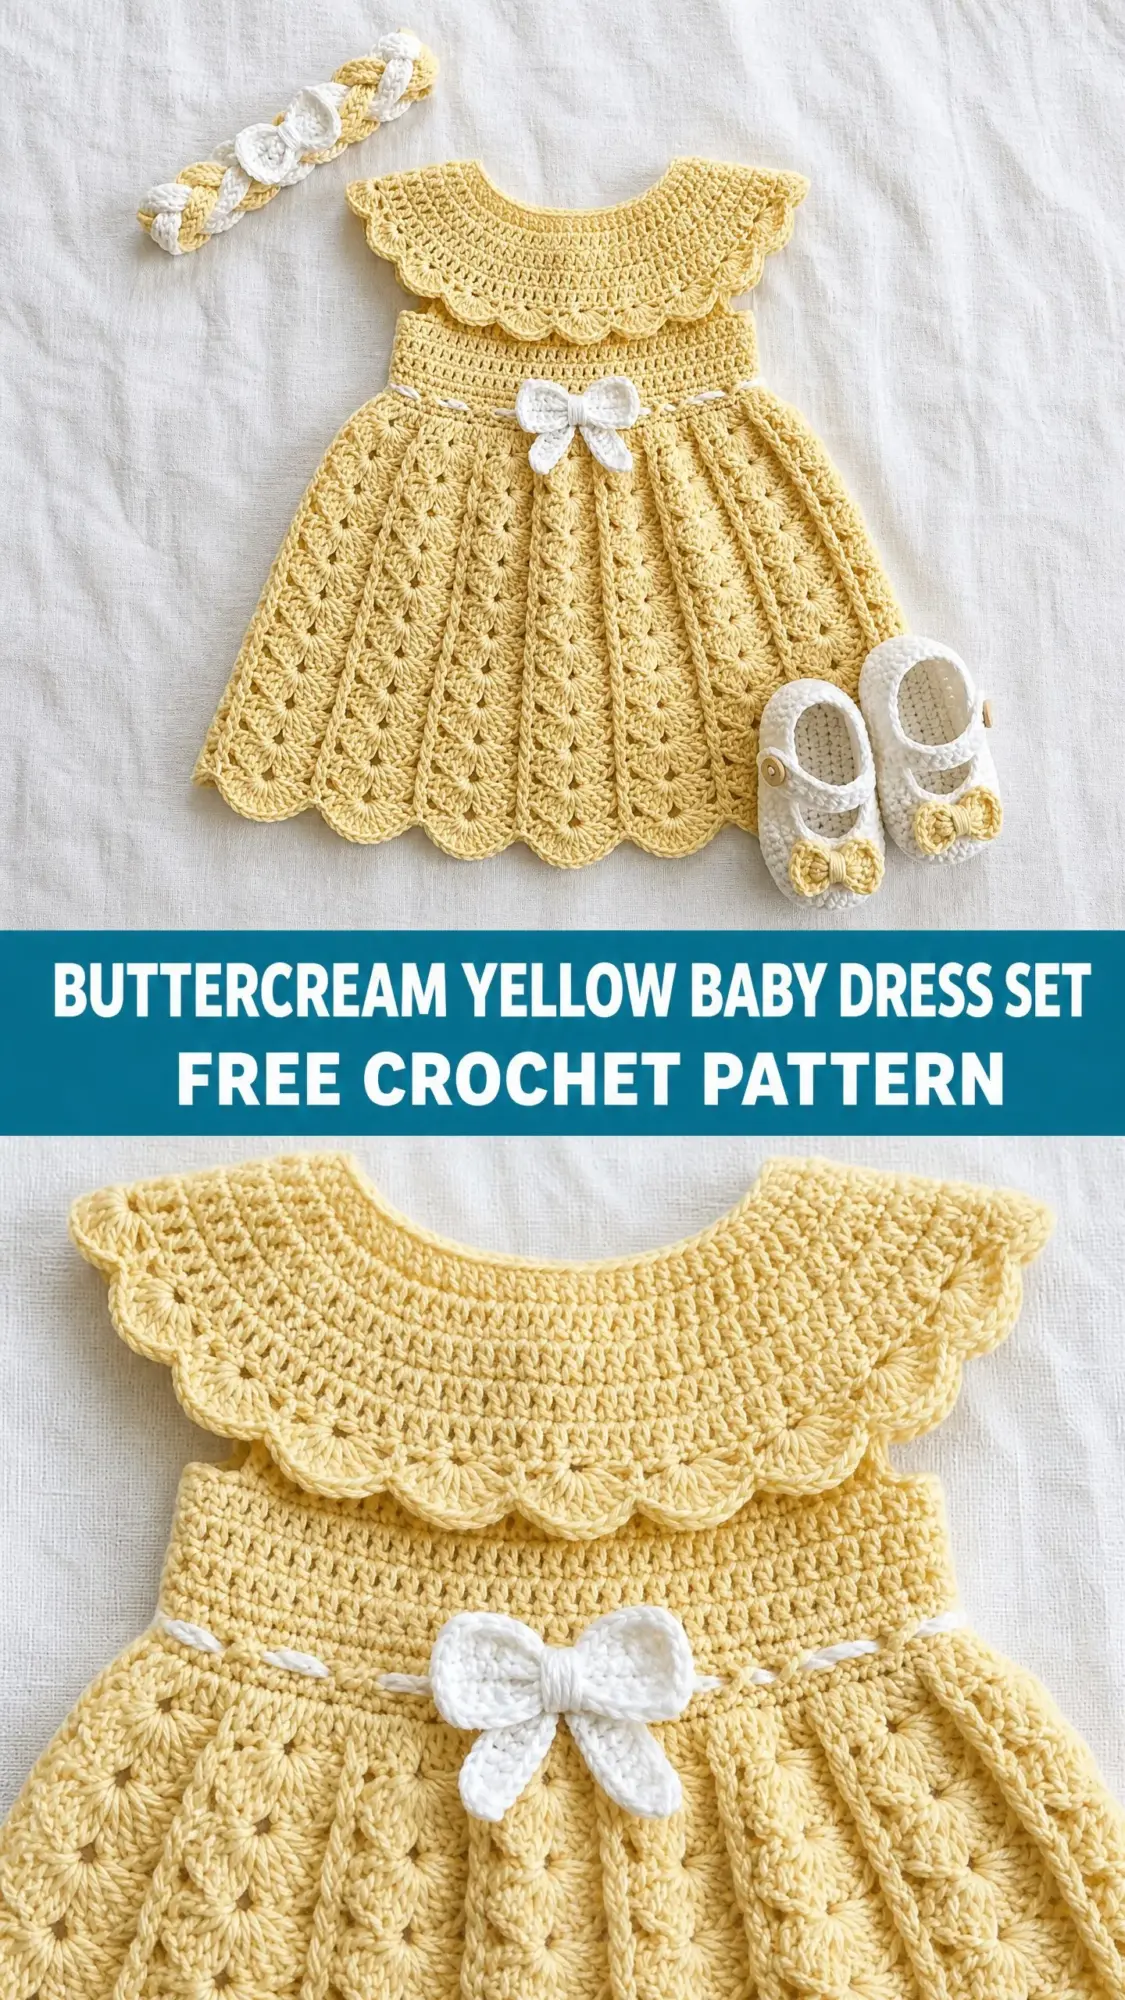
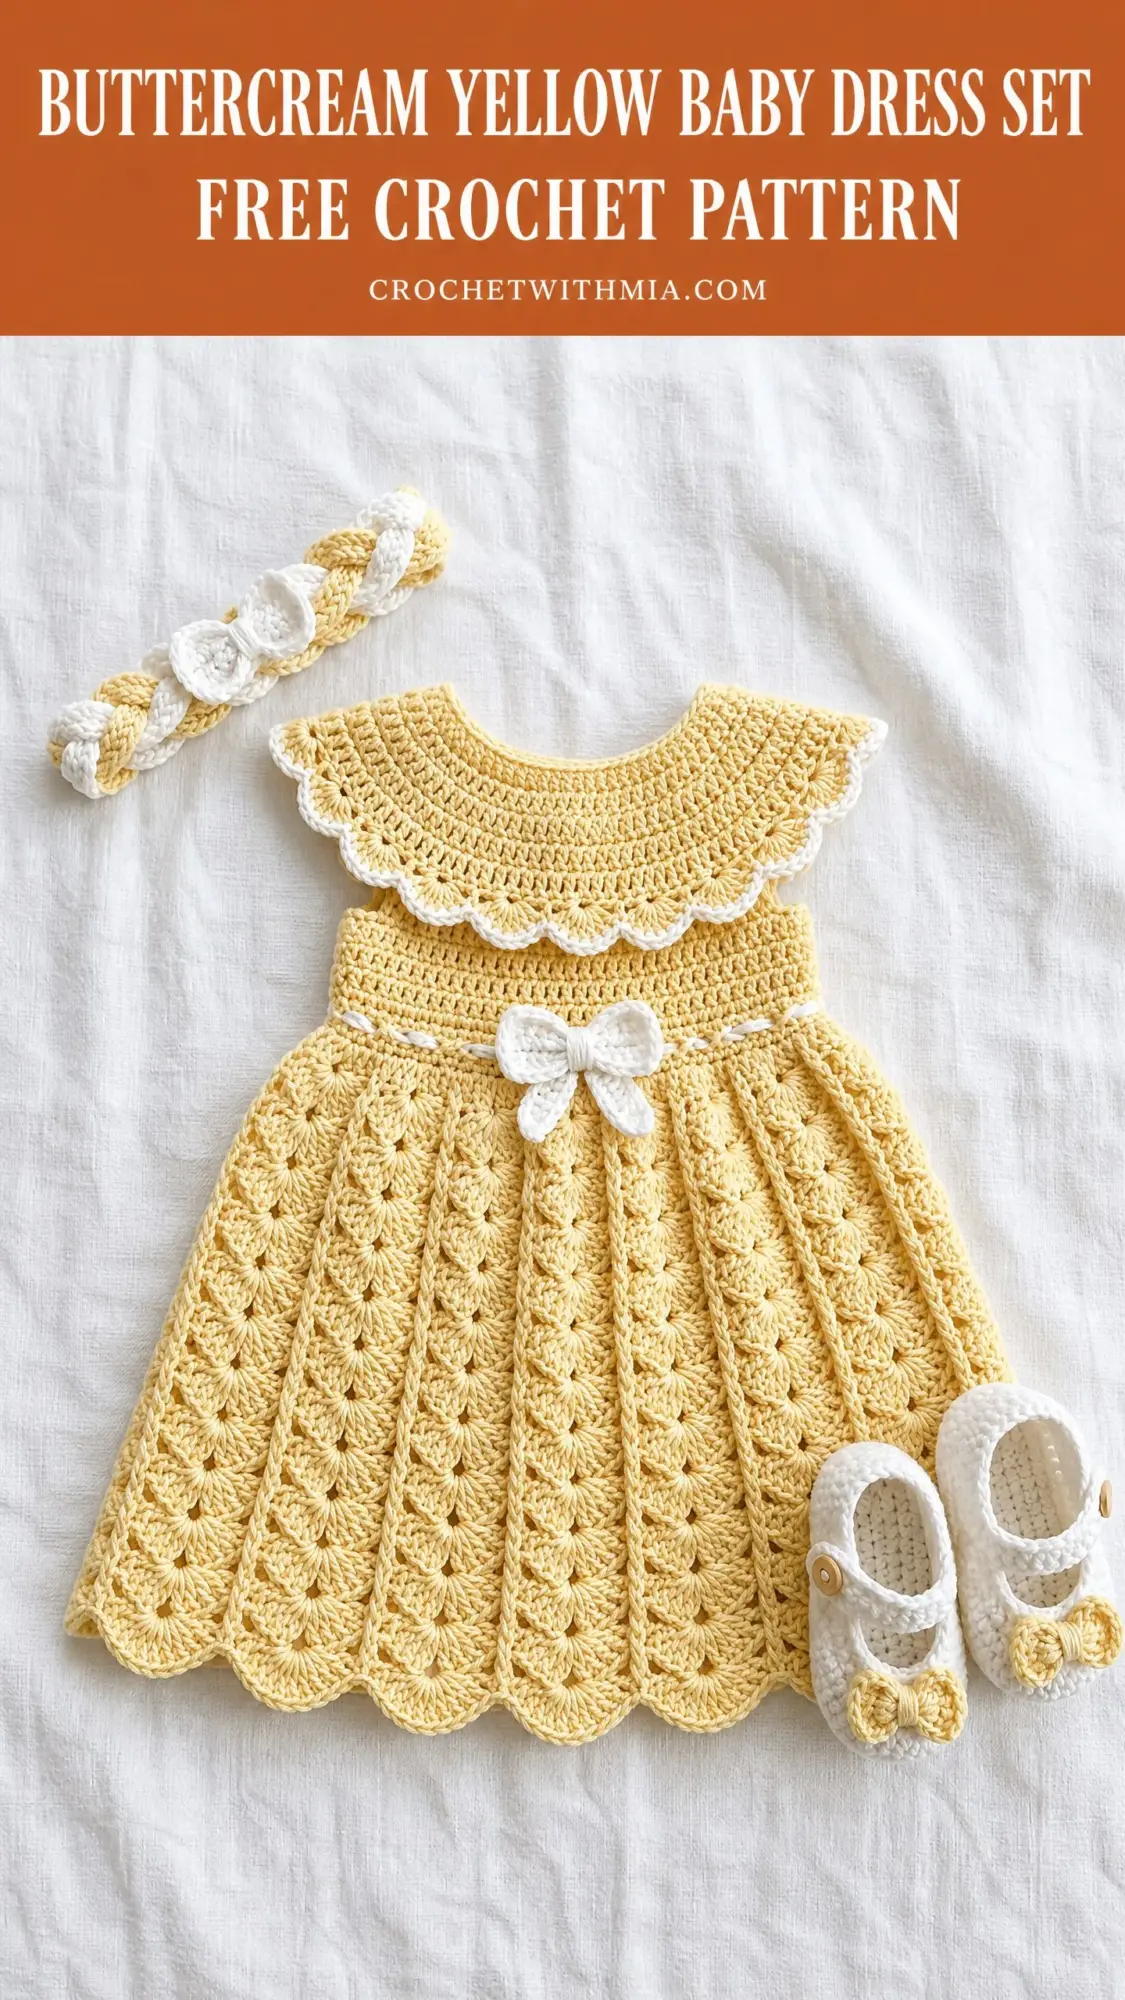
This pattern creates a complete outfit for a little one: a lace yoke dress with a full shell stitch skirt, matching Mary Jane booties, and a sweet braided headband. The construction is genuinely interesting. You will work the dress top down in joined rounds, starting with a scalloped Peter Pan collar, moving through a fitted empire bodice, and finishing with a flared shell stitch skirt that drapes beautifully.
I will be honest about the difficulty level. This is an intermediate project. You need to be comfortable working in the round, following stitch counts carefully through increases, and constructing small three dimensional pieces like the booties. But if you are a confident beginner who takes your time and reads ahead, you can absolutely do this. I will walk you through every step.
Why This Crochet Pattern Works So Well
The butter yellow and white color combination gives this set a timeless vintage feel without looking dated. The shell stitch skirt creates natural movement and a lovely drape, especially if you choose a cotton or cotton blend yarn. The white ribbon at the waist and the matching bows on the booties tie everything together perfectly.
This crochet tutorial produces a complete set sized for a 3 to 6 month old baby. The finished dress measures 16 inches around the chest and 13.5 inches from shoulder to hem. The booties have a 3.75 inch sole, and the headband fits a 14 inch head circumference. Perfect for gift giving or for your own little one.
Materials You Will Need
Yarn:
Recommended Yarn Options:
Choose a smooth sport or light DK weight yarn with good stitch definition. Avoid fuzzy or bouclé yarns because they will hide the beautiful shell stitch pattern.
Hooks:
Notions:
Gauge
With E-4 / 3.5 mm hook in single crochet (sc):
20 sc x 24 rows = 4 inches x 4 inches
With E-4 / 3.5 mm hook in shell stitch pattern:
7 shell repeats = 6.3 inches
Gauge is critical for correct fit. Please swatch before beginning. If your gauge is off, adjust your hook size up or down until you match.
Abbreviations and Stitch Definitions
Before we dive into the step by step instructions, let me define every stitch and abbreviation you will encounter.
Special Stitches Explained
Shell Stitch: A shell is 5 double crochet stitches all worked into the same stitch or space. This creates a fan shaped cluster. To work a shell, simply work 5 dc into the indicated stitch. They will naturally fan out and create that beautiful scalloped texture you see in the skirt.
Scallop Edging: Slip stitch into a stitch, chain 1, work 5 dc into the same stitch, slip stitch into the same stitch. This creates a rounded petal shape used on the collar and hem edges.
Invisible Join: This technique eliminates the visible jog at round joins. Cut yarn leaving a 6 inch tail. Thread tail onto tapestry needle. Insert needle under both loops of the first real stitch of the round (not the turning chain), then insert needle down through the center of the last stitch. Pull snug. The join disappears.
3-dc Cluster: Yarn over, insert hook, yarn over, pull up loop, yarn over, pull through 2 loops (2 loops remain). Repeat two more times in the same stitch (4 loops on hook). Yarn over, pull through all 4 loops. Used for the bow construction.
Pattern Notes Before You Begin
The dress is worked in joined rounds from the top down. Each round is joined with a slip stitch, then you chain up to begin the next round.
The collar is worked as an attached ruffle picked up from the neckline. Stitch counts in parentheses at the end of each round show the working stitch count.
The skirt shell pattern begins in Round 25. Make sure your stitch count at the end of Round 24 is exactly correct. The shell pattern requires divisibility by 6.
The waist ribbon channel is created by working a round in BLO, which leaves the front loops free. You will thread ribbon through those front loops later.
The neckline is wide enough to slip over a baby’s head, so no back button closure is needed at this size.
How to Crochet the Dress: Step by Step Instructions
Section 1: Dress Yoke
Begin with MC and the D-3 / 3.25 mm hook for the collar ruffle. You will switch to the E-4 / 3.5 mm hook after the collar is complete.
Round 1 (Neckline Foundation): With D-3 hook and MC, ch 68, being careful not to twist the chain. Sl st to the first ch to form a ring. Ch 1, sc in each ch around, sl st to first sc to join. (68 sc)
Round 2 (Eyelet Round): Ch 4 (counts as dc plus ch 1), sk 1 sc, dc in next sc, (ch 1, sk 1 sc, dc in next sc) around, sl st to 3rd ch of beg ch-4 to join. (34 dc, 34 ch-1 spaces)
This creates a decorative eyelet at the neckline. You can thread a thin ribbon through this round later if desired.
Round 3: Ch 1, sc in each dc and each ch-1 sp around, sl st to first sc. (68 sc)
Round 4 (Collar Setup): Ch 1, sc in first sc, 2 sc in next sc, (sc in next 2 sc, 2 sc in next sc) 22 times, sl st to first sc. (90 sc)
Collar Ruffle
Round 5 (Shell): Ch 3 (counts as dc), 2 dc in same st, sk 2 sc, sc in next sc, (sk 2 sc, 5 dc in next sc, sk 2 sc, sc in next sc) 14 times, sk 2 sc, 2 dc in base of beg ch-3, sl st to top of beg ch-3. (15 shells, 15 sc)
Round 6 (Expand Shell): Ch 3, 4 dc in same sp, sc in next sc between shells, (5 dc in center dc of next shell, sc in next sc between shells) 14 times, sl st to top of beg ch-3. (15 shells, 15 sc)
Round 7 (Scallop Edging): Ch 1, (sl st in next dc, ch 1, 5 dc in same dc, sl st in same dc) in each of the 5 dc of each shell, sc in sc between shells. Repeat around. Join with sl st to first sl st. Fasten off MC. Weave in ends.
The collar ruffle is complete. Now return to the bodice, working from Round 3 downward.
Section 2: Bodice
Reattach MC to any stitch of Round 3 (the 68 sc round), RS facing. Change to E-4 / 3.5 mm hook.
The bodice uses raglan style increases at 4 points. You will place markers at each raglan point and move them up each round. Each increase round adds 4 sc total.
Round 8 (Inc Rnd 1): Ch 1, sc 16, 2 sc in raglan st, sc 8, 2 sc in raglan st, sc 16, 2 sc in raglan st, sc 8, 2 sc in raglan st, sl st to first sc. (72 sc)
Round 9 (plain): Ch 1, sc in each sc around, sl st to first sc. (72 sc)
Round 10 (Inc Rnd 2): Ch 1, sc 17, 2 sc in raglan, sc 10, 2 sc in raglan, sc 17, 2 sc in raglan, sc 10, 2 sc in raglan, sl st to first sc. (76 sc)
Round 11 (plain): Sc around. (76 sc)
Round 12 (Inc Rnd 3): Sc 18, 2 sc in raglan, sc 12, 2 sc in raglan, sc 18, 2 sc in raglan, sc 12, 2 sc in raglan, sl st. (80 sc)
Round 13 (plain): Sc around. (80 sc)
Round 14 (Inc Rnd 4): Sc 19, 2 sc in raglan, sc 14, 2 sc in raglan, sc 19, 2 sc in raglan, sc 14, 2 sc in raglan, sl st. (84 sc)
Round 15 (plain): Sc around. (84 sc)
Round 16 (Inc Rnd 5): Sc 20, 2 sc in raglan, sc 16, 2 sc in raglan, sc 20, 2 sc in raglan, sc 16, 2 sc in raglan, sl st. (88 sc)
Round 17 (plain): Sc around. (88 sc)
Round 18 (Inc Rnd 6): Sc 21, 2 sc in raglan, sc 18, 2 sc in raglan, sc 21, 2 sc in raglan, sc 18, 2 sc in raglan, sl st. (92 sc)
Round 19 (plain): Sc around. (92 sc)
Sleeve Separation
Round 20: Ch 1, sc in next 11 sts (right front half), skip 20 sleeve sts, ch 4, sc in next 22 sts (back), skip 20 sleeve sts, ch 4, sc in next 11 sts (left front half), sl st to first sc. (44 sc body + 8 ch = 52 working sts)
Round 21: Ch 1, sc in each st and each ch around, sl st to first sc. (52 sc)
Round 22: Ch 1, sc in each sc around, sl st to first sc. (52 sc)
Round 23: Ch 1, 2 sc in first sc, sc in next 12 sc, 2 sc in next sc, sc in next 13 sc, 2 sc in next sc, sc in next 12 sc, 2 sc in next sc, sc in next 10 sc, sl st to first sc. (56 sc)
Round 24 (BLO Waist Ridge): Ch 1, working in BLO only, sc in each sc around, sl st to first sc. (56 sc)
The front loops remain free for threading the waist ribbon later.
Checkpoint: Your piece should measure approximately 5.5 to 6 inches from the neckline foundation to the BLO ridge.
Section 3: Shell Stitch Skirt
Round 25 (Increase for Shell Base): Ch 1, 2 sc in first sc, sc in next 13 sc, 2 sc in next sc, sc in next 14 sc, 2 sc in next sc, sc in next 13 sc, 2 sc in next sc, sc in next 10 sc, sl st to first sc. (60 sc)
Now the shell rounds begin. The pattern alternates between Shell Round A and Shell Round B.
Round 26 (Shell A): Ch 1, sc in first sc, ch 2, 5 dc in next sc, ch 2, (sc in next sc, ch 2, 5 dc in next sc, ch 2) 9 times, sl st to first sc. (10 shells, 10 sc)
Round 27 (Shell B): Ch 3, 2 dc in same st, ch 2, sc in 3rd dc of next shell, ch 2, (5 dc in next sc, ch 2, sc in 3rd dc of next shell, ch 2) 9 times, 2 dc in beg st, sl st to top of ch-3. (10 shells, 10 sc)
Rounds 28-29: Repeat Rounds 26 and 27.
Round 30 (Transitional Increase): Ch 1, (sc in each of 5 dc of shell, sc in next sc, 2 sc in next ch-2 sp, sc in ch-2 sp) 10 times, sl st to first sc. (90 sc)
Round 31 (Shell A, 15 Shells): Ch 1, sc in first sc, ch 2, 5 dc in next sc, ch 2, (sc in next sc, ch 2, 5 dc in next sc, ch 2) 14 times, sl st to first sc. (15 shells, 15 sc)
Round 32 (Shell B, 15 Shells): Ch 3, 2 dc in same st, ch 2, sc in 3rd dc of next shell, ch 2, (5 dc in next sc, ch 2, sc in 3rd dc of next shell, ch 2) 14 times, 2 dc in beg st, sl st to top of ch-3. (15 shells, 15 sc)
Rounds 33-36: Alternate Shell A and Shell B rounds with 15 shells.
Round 37 (Transitional Increase): Ch 1, (sc in each of 5 dc of shell, sc in sc between shells, sc in ch-2 sp, sc in ch-2 sp) 15 times, sl st to first sc. (120 sc)
Round 38 (Shell A, 20 Shells): Ch 1, sc in first sc, ch 2, 5 dc in next sc, ch 2, (sc in next sc, ch 2, 5 dc in next sc, ch 2) 19 times, sl st to first sc. (20 shells, 20 sc)
Round 39 (Shell B, 20 Shells): Ch 3, 2 dc in same st, ch 2, sc in 3rd dc of next shell, ch 2, (5 dc in next sc, ch 2, sc in 3rd dc of next shell, ch 2) 19 times, 2 dc in beg st, sl st to top of ch-3. (20 shells, 20 sc)
Rounds 40-43: Alternate Shell A and Shell B rounds with 20 shells.
Hem Scallop Edging
Round 44: Ch 1. Working across the last Shell B round, sl st into center dc of each shell, ch 1, 5 dc into same center dc, ch 1, sl st into same center dc, sc in next sc between shells. Repeat around. Sl st to join. Fasten off. Weave in ends.
Crocheted Bow for Waist
With CC and E-4 hook:
Ch 26. Hdc in 3rd ch from hook and each ch across. (24 hdc)
Rows 2-6: Ch 2, turn. Hdc in each hdc across. (24 hdc)
Fasten off, leaving a long tail. Fold rectangle in half lengthwise, seam the long edge. Pinch center together and wrap yarn tightly around center several times. Secure and weave in ends. Sew to center front of waist.
Mary Jane Booties
Sole (make 2):
With CC and E-4 hook, ch 10.
Rnd 1: Sc in 2nd ch from hook, sc in next 7 ch, 3 sc in last ch. Working on opposite side of foundation ch, sc in next 7 ch, 2 sc in last ch, sl st to first sc. (20 sc)
Rnd 2: Ch 1, 2 sc in first sc, sc in next 7 sc, 2 sc in each of next 3 sc, sc in next 7 sc, 2 sc in each of last 2 sc, sl st. (26 sc)
Rnd 3: Ch 1, sc in first sc, 2 sc in next sc, sc in next 7 sc, (sc in next sc, 2 sc in next sc) 3 times, sc in next 7 sc, (sc in next sc, 2 sc in next sc) twice, sl st. (32 sc)
Sides:
Rnd 4: Ch 1, working in BLO, sc in each sc around, sl st. (32 sc)
Rnds 5-6: Ch 1, sc in each sc around, sl st. (32 sc)
Toe Shaping:
Rnd 7: Ch 1, sc in next 10 sc, (sc2tog) 6 times, sc in next 10 sc, sl st. (26 sc)
Rnd 8: Ch 1, sc in next 10 sc, (sc2tog) 3 times, sc in next 10 sc, sl st. (23 sc)
Strap:
Ch 12, sl st to opposite side of bootie opening. Fasten off. Sew button to secure strap.
Make small yellow bows using MC and attach to toe of each bootie.
Braided Headband
Cut 6 strands of yarn, 3 MC and 3 CC, each 40 inches long. Knot all strands together at one end. Separate into 3 groups of 2 strands each (alternate colors in each group). Braid to desired length. Knot the other end. Trim excess. Tie or stitch ends together to form a circle that fits baby’s head.
Finishing Your Baby Dress Set
Block all pieces. For cotton or cotton blend yarns, wet block by soaking in cool water, gently squeezing out excess moisture, and pinning to shape on a blocking mat. For acrylic yarn, use steam blocking carefully.
Thread the white satin ribbon or a crocheted chain through the front loops at the waist ridge. Tie in a bow at the center front, or attach the crocheted bow over the ribbon ends.
Weave in all remaining ends. Give everything a final press if needed.
Tips for Success
Take your time with the stitch counts. The shell pattern only works correctly if your base counts are divisible by 6.
Use stitch markers generously, especially during the raglan increases. They will save you from having to rip back.
If this is your first time working shell stitches, practice on a swatch first. The rhythm becomes natural quickly.
When blocking, gently stretch the shell stitches open to show off their lacy texture.
I really hope you enjoy making this sweet little set. It makes such a thoughtful handmade gift for a baby shower or a new arrival. If you make one, I would absolutely love to see it. Go ahead and save this to your Pinterest boards so you can find it when you are ready to start, and please leave a comment below to share your finished project or ask any questions. Happy crocheting!