I call this one "The Charlotte" after my grandmother, who carried a similar lace purse on her wedding day back in 1962. I found a sketch of it tucked inside an old envelope while cleaning out my craft room last spring. The moment I saw those scalloped shells and that dramatic bow, I knew I had to bring it back to life.
Get the Ad-Free PDF Pattern
You can find the free pattern below, or you can purchase the ad-free printable PDF from my shop.
Get the Printable PDF →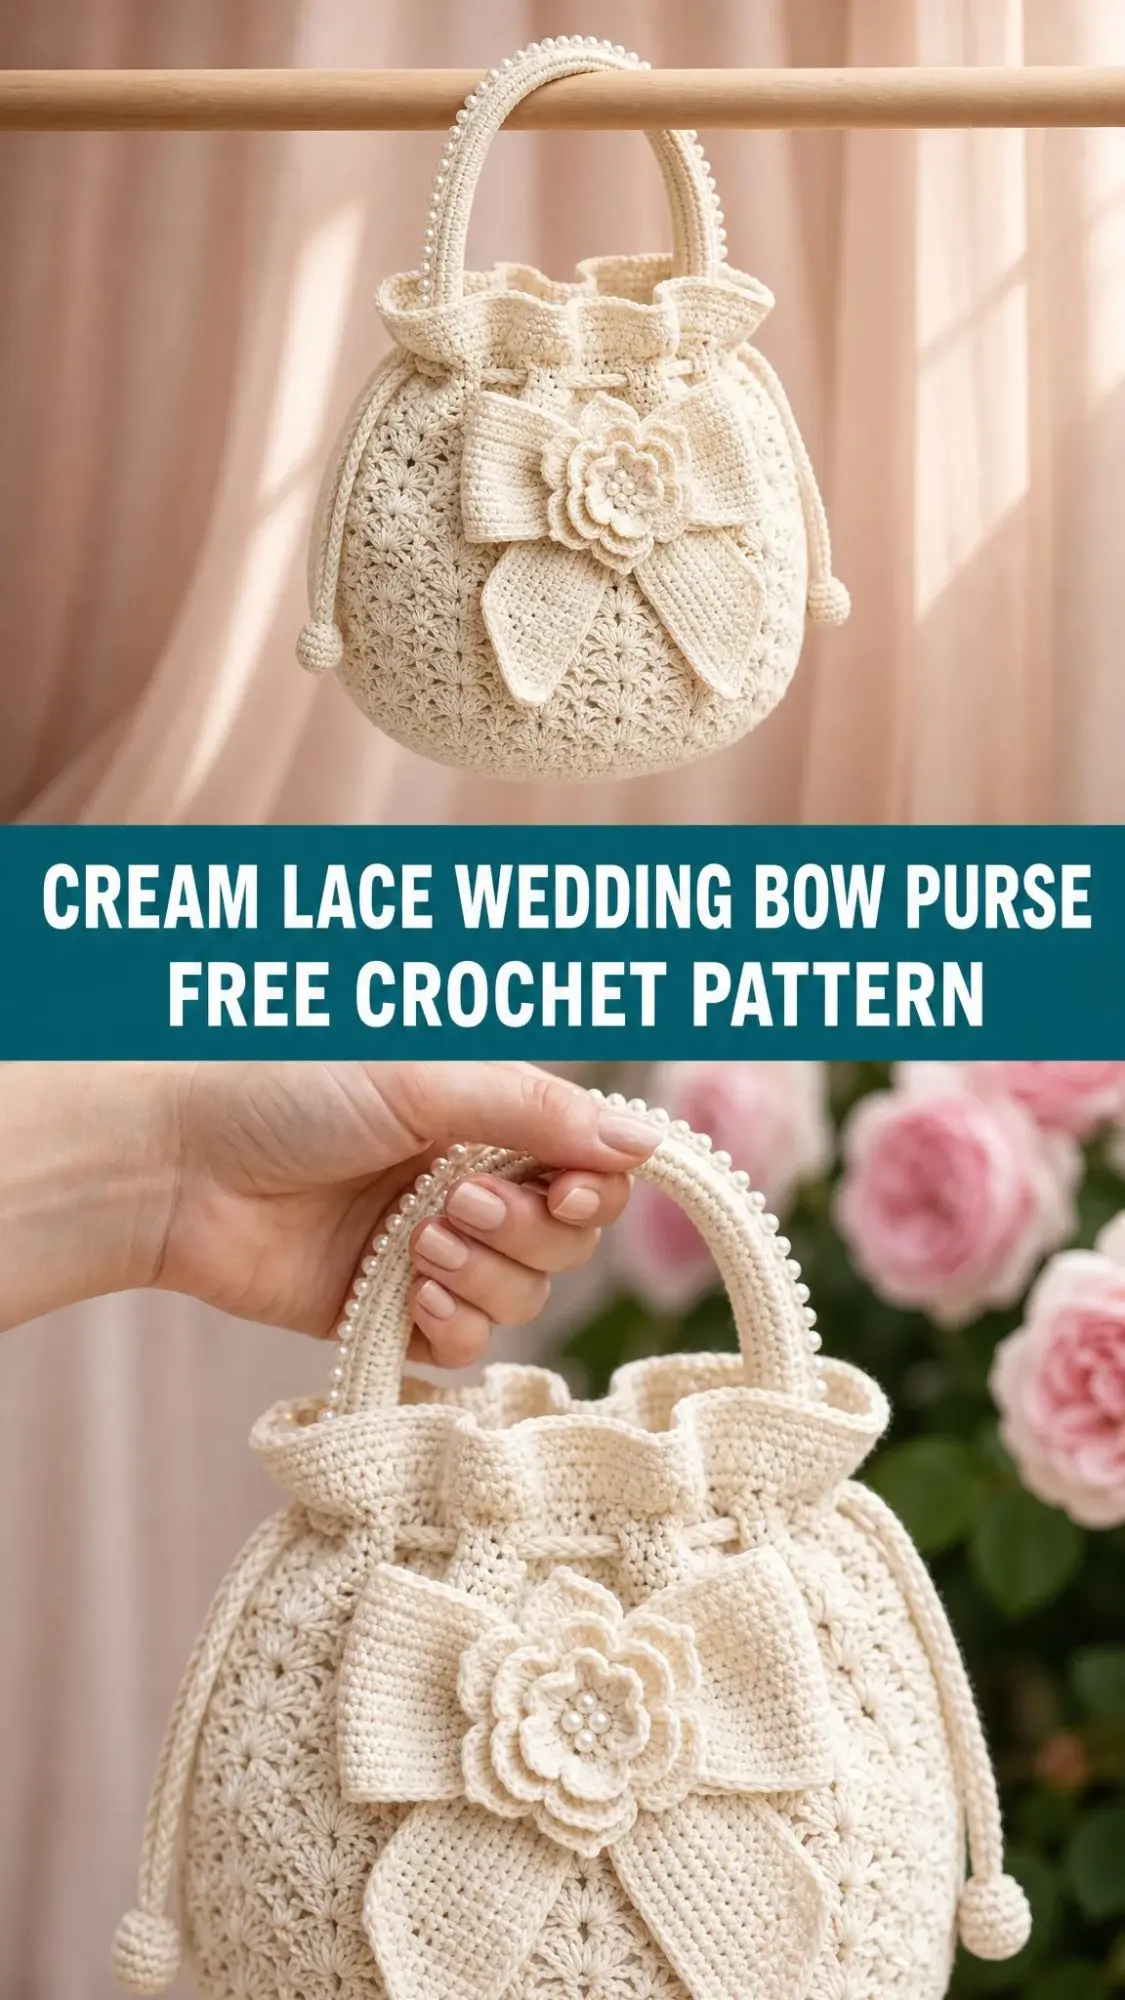
She would have loved seeing this pattern written down properly. Back then, everything was passed along by watching and doing, never written. So this one feels personal to me, like I am preserving a little piece of family history in every stitch.
If you are making this for your own wedding, a bridal shower gift, or just because you love romantic accessories, I think you will fall in love with the process. The lace shells look intricate but follow a simple rhythm once you get going. Let me walk you through everything.
About This Romantic Drawstring Bucket Purse
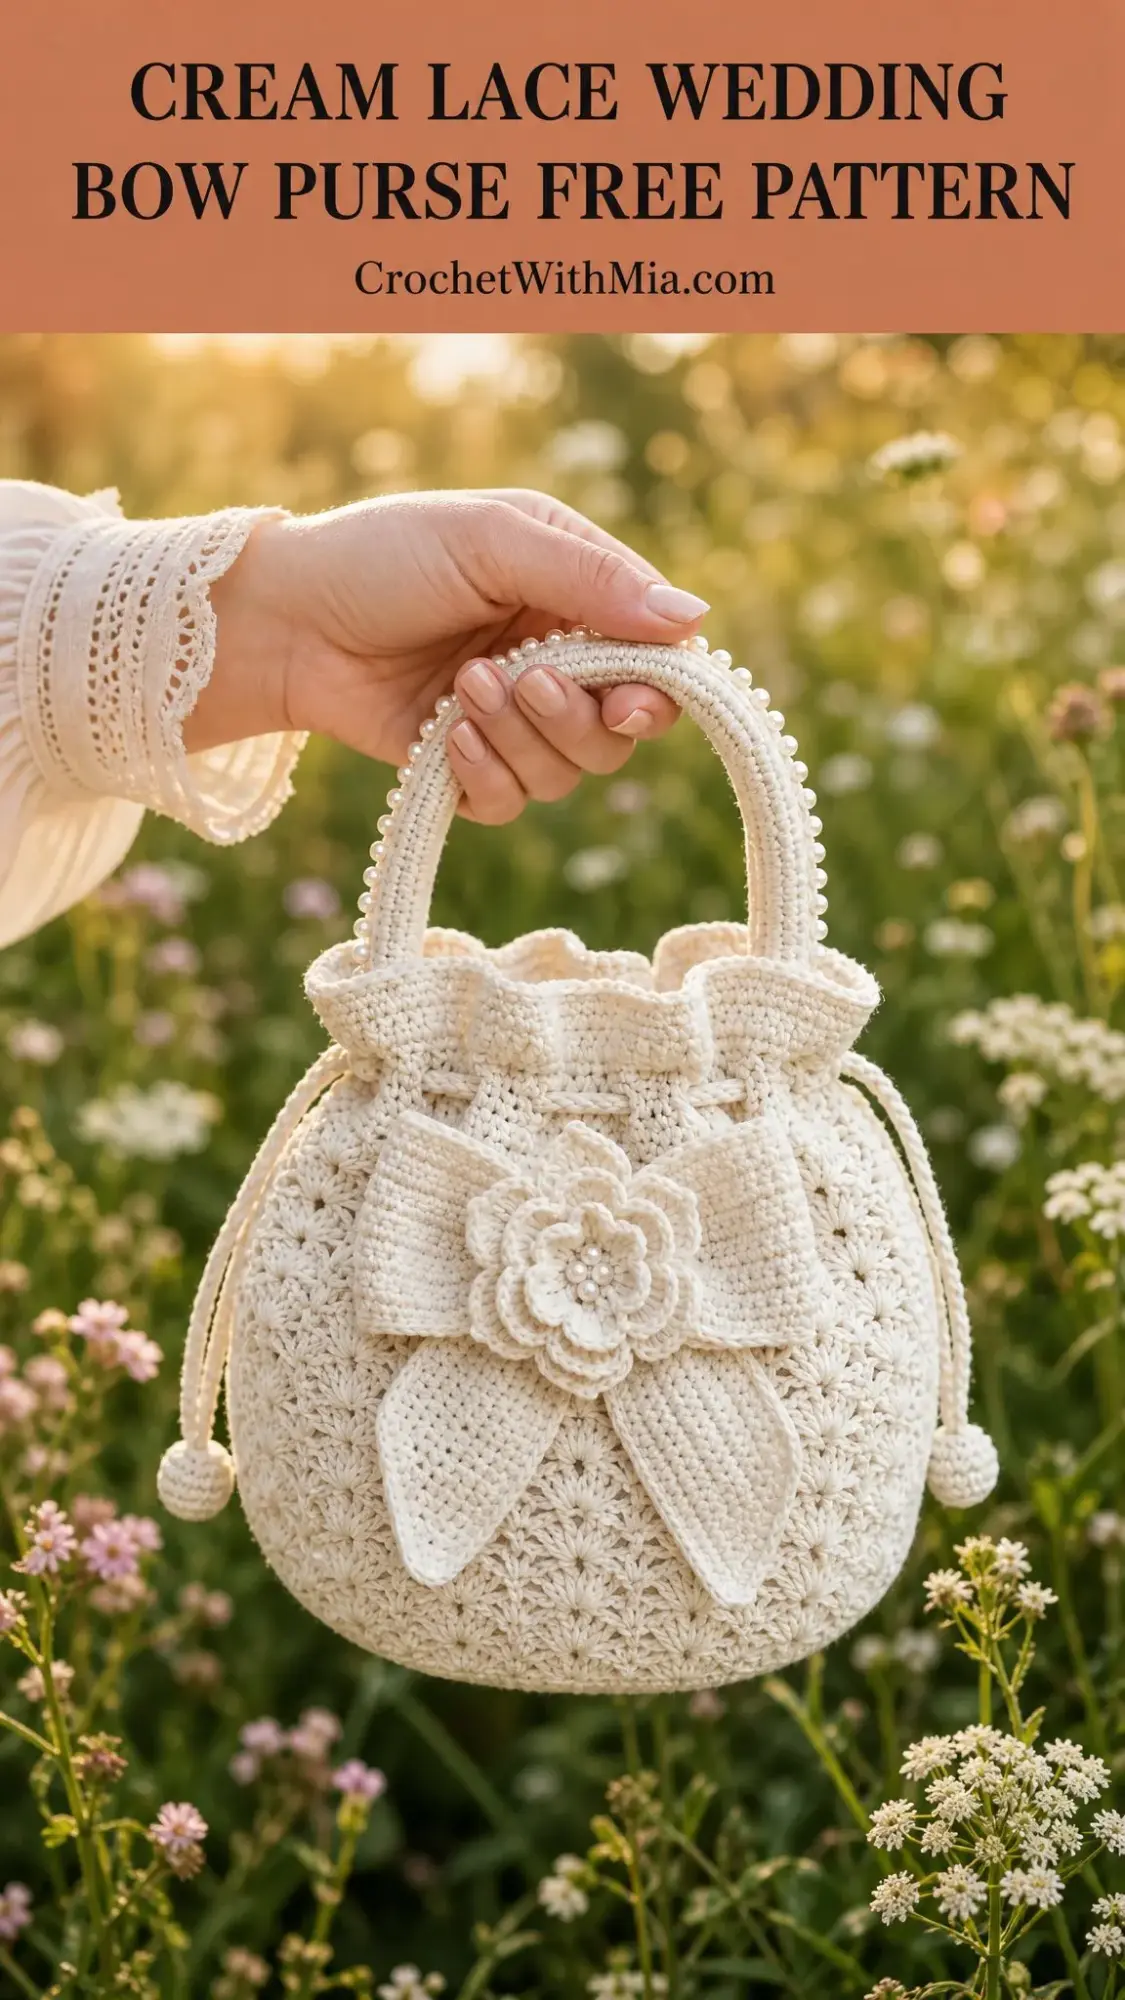
This Cream Lace Wedding Bow Purse is a romantic drawstring bucket purse featuring a beautiful lace shell texture, a pearl trimmed handle, an oversized statement bow, and a layered flower accent. The finished size is approximately 8 inches wide by 7 inches tall, excluding the handle (20 x 18 cm).
The design is worked from the base upward in joined rounds. A firm single crochet (sc) base supports a continuous lace shell body. The top is finished with a drawstring eyelet band, a soft ruffled edge, a padded arched handle, side drawstrings with bobbles, and all those gorgeous decorative elements that make it wedding worthy.
Skill level: Intermediate. You will need comfort with shell repeats, tidy shaping, sewing pieces together, and polished finishing techniques.
Time to complete: 8 to 12 relaxed hours, depending on your pace.
Materials You Will Need
Before starting, gather these supplies:
Yarn Suggestions
Here are some yarns that work beautifully for this pattern:
When substituting yarn, choose a smooth cotton, bamboo cotton, or mercerized cotton that creates a firm fabric at gauge. Avoid very fuzzy yarns because they will hide that lovely lace texture you are working so hard to create.
Gauge Information
Getting gauge right matters for this project since you want the purse to hold its shape beautifully.
Gauge: 20 sc and 22 sc rounds = 4 inches (10 cm) before blocking. In the lace shell pattern, 4 shell repeats and 8 rounds = approximately 4 inches (10 cm).
Checkpoint: After Round 12, your base should measure about 6 to 6.25 inches (15 to 16 cm) across. After Round 28, your purse body should be approximately 6.5 inches (16.5 cm) tall from the base edge.
Abbreviations and Special Stitches
Let me define every stitch and abbreviation you will encounter. All terms are in US crochet terminology.
Standard Abbreviations
Special Stitches
Shell: Work 5 dc in the indicated stitch. This creates that beautiful fan shape you see in the lace body.
Alternating shell round: Work 1 sc in the center dc of each shell and 1 shell in each sc from the previous shell round. This creates the staggered lace effect.
Picot ruffle: Sl st in next st, ch 3, sl st in the same st. Continue around for a delicate pearl like frill at the top edge.
Invisible join: After fastening off, thread your tail through a tapestry needle, skip the first st, insert under both loops of the next st, then back into the center of the last st. This creates a seamless finish.
Important Notes Before You Begin
Work joined rounds unless stated otherwise. The ch 1 turning or joining chains do not count as stitches throughout this pattern.
Place a marker at the first stitch of each round to keep track of your progress. The lace body is a multiple of 6 stitches, and the 96 stitch body creates 16 shell repeats.
Left handed makers: Follow the same instructions. Your rounds will travel in the opposite direction, but all shaping and stitch counts remain unchanged.
One more thing: individual results may vary depending on your yarn, tension, hook size, and finishing technique. You may need to make small adjustments to achieve the closest possible result to the finished project shown.
Purse Base Pattern
The base is worked in joined rounds, increasing evenly to create a flat circle.
Round 1: Magic ring, ch 1, 8 sc in ring, join. (8 sc)
Round 2: Ch 1, inc in each st around, join. (16 sc)
Round 3: Ch 1, [sc in next st, inc] 8 times, join. (24 sc)
Round 4: Ch 1, [sc in next 2 sts, inc] 8 times, join. (32 sc)
Round 5: Ch 1, [sc in next 3 sts, inc] 8 times, join. (40 sc)
Round 6: Ch 1, [sc in next 4 sts, inc] 8 times, join. (48 sc)
Round 7: Ch 1, [sc in next 5 sts, inc] 8 times, join. (56 sc)
Round 8: Ch 1, [sc in next 6 sts, inc] 8 times, join. (64 sc)
Round 9: Ch 1, [sc in next 7 sts, inc] 8 times, join. (72 sc)
Round 10: Ch 1, [sc in next 8 sts, inc] 8 times, join. (80 sc)
Round 11: Ch 1, [sc in next 9 sts, inc] 8 times, join. (88 sc)
Round 12: Ch 1, [sc in next 10 sts, inc] 8 times, join. (96 sc)
Pause here and measure your base. It should be about 6 to 6.25 inches across.
Lace Body Pattern
Now comes the beautiful part. You will transition from the flat base to the lace shell body.
Round 13: Ch 1, sc BLO in each st around to turn the base edge, join. (96 sc)
Working in the back loop only creates a crisp edge where the base meets the body and helps the purse stand up properly.
Round 14: Ch 1, [sc in next st, skip 2 sts, shell in next st, skip 2 sts] 16 times, join. (16 shells / 96 sts)
Rounds 15 through 28: Ch 1, [sc in center dc of next shell, shell in next sc] 16 times, join each round. (16 shells / 96 sts per round)
This is the alternating shell pattern. You are placing a single crochet in the middle of each shell from the previous round, then placing a new shell in each single crochet. Once you get the rhythm, it moves quickly.
Round 29: Ch 1, sc in each st around, placing 1 sc in each sc and each dc of every shell, join. (96 sc)
Body checkpoint: Your purse should now be bucket shaped, with 16 lace columns around the body and a top circumference of approximately 19 inches (48 cm) before drawstring gathering.
Top Band, Drawstrings, and Handle
Top Band
Round 30: Ch 2, dc in each st around, join. The ch 2 does not count as a stitch. (96 dc)
Round 31: Ch 2, [dc in next 4 sts, ch 2, skip 2 sts] 16 times, join. (64 dc + 16 ch 2 spaces)
These ch 2 spaces create the eyelets for your drawstrings.
Round 32: Ch 1, sc in each dc and 2 sc in each ch 2 space, join. (96 sc)
Round 33: [Sl st in next st, ch 3, sl st in same st] around. Fasten off with invisible join. (96 picots)
Drawstrings (Make 2)
1. Ch 110. Sl st in 2nd ch from hook and in each ch across. (109 sl sts)
2. Thread one cord through the eyelets from front to back and the second from back to front, so the purse closes evenly when you pull both cords.
3. Add one bobble to each cord end (4 bobbles total).
Cord End Bobbles (Make 4)
Round 1: Magic ring, 6 sc. (6 sc)
Round 2: Inc around. (12 sc)
Rounds 3 and 4: Sc around. (12 sc)
Round 5: Dec around, stuff lightly with yarn scraps, close. (6 sc)
Sew one bobble to each end of both drawstrings.
Padded Handle
1. Ch 65. Sc in 2nd ch from hook and across. (64 sc)
2. Rows 2 through 5: Ch 1, turn, sc across. (64 sc)
3. Wrap the strip around a firm cord (about 3/16 inch or 5 mm thick) and whipstitch the long edges together. Sew the handle ends to the inside top at the side seams, spanning about 5 inches (13 cm) above the rim.
4. Optional pearl trim: Sew pearls along the outer ridge of the handle at even intervals for that elegant bridal look.
Bow, Flower, and Assembly
Main Bow Rectangle
Ch 35.
Row 1: Sc in 2nd ch from hook and across. (34 sc)
Rows 2 through 16: Ch 1, turn, sc across. (34 sc)
Fasten off, leaving a long tail. Cinch the center tightly and wrap several times to create the bow shape.
Bow Center Band
Ch 8.
Row 1: Sc in 2nd ch from hook and across. (7 sc)
Rows 2 through 24: Ch 1, turn, sc across. (7 sc)
Wrap around the cinched bow center and seam at the back.
Bow Tails (Make 2)
Ch 16.
Row 1: Sc in 2nd ch from hook and across. (15 sc)
Rows 2 through 7: Ch 1, turn, sc2tog, sc across to last 2 sts, sc2tog.
Your counts will be: 13, 11, 9, 7, 5, 3 sc across those rows.
Row 8: Ch 1, turn, sc3tog. (1 sc)
Fasten off. Edge each tail with sl st around all edges for crisp, defined points.
Layered Flower
Center: Magic ring, 6 sc, join. (6 sc)
Petal layer 1: In each st work [sl st, ch 3, 2 dc, ch 3, sl st]. (6 petals)
Petal layer 2: Working behind layer 1, [sl st around next center post, ch 5, 3 tr, ch 5, sl st around same post] 6 times. (6 petals)
Add 3 to 5 pearls to the center if desired for extra sparkle.
Assembly Order
1. Lightly steam block the purse body over a rounded form (a bowl works great), keeping the base flat.
2. Sew the bow to the front center, about 1.5 inches (4 cm) below the ruffled rim.
3. Place the two tails under the bow center, angled downward, and stitch securely.
4. Sew the flower to the bow center. Add pearls to the handle, flower, or bow edges as desired.
5. Optional lining: Sew a simple gathered fabric pouch and hand stitch it just below the eyelet band for a polished interior finish.
Customization Tips
Making It Larger or Smaller
To make the purse wider, add base increase rounds in multiples of 6 stitches. The lace body must remain divisible by 6 for the shell pattern to work correctly.
To make it taller, add or remove alternating shell rounds before Round 29.
For a longer handle, add chains before Row 1 but keep the same row count for width.
For a smaller bow, start with fewer chains and fewer rows while keeping a firm rectangle shape.
Troubleshooting Common Issues
Base cups upward: Your base is too tight. Go up a hook size for Rounds 1 through 12 or block more firmly.
Body ruffles outward too much: Your shell rounds are loose. Use a smaller hook for the lace body.
Eyelets pull unevenly: Thread two drawstrings in opposite directions and tighten both sides together.
Bow droops: Add a felt or fabric rectangle behind the bow before sewing to the purse for extra support.
Handle stretches: Use an inner cord and sew through the handle ends several times for durability.
Finishing and Care Instructions
Weave in all ends on the wrong side and split tails through nearby stitches for security.
Pin the base flat and shape the sides over a bowl or small form. Steam lightly without pressing the shells flat, as you want to preserve that dimensional texture.
Allow the purse to dry fully before adding pearls, lining, or closure hardware.
Care instructions: Spot clean gently with cool water and mild soap. Do not wring. Reshape while damp and dry flat. If pearls or lining are added, hand washing is recommended.
Final Thoughts on This Wedding Bow Purse Crochet Pattern
I hope you love making this Cream Lace Wedding Bow Purse as much as I loved designing it. There is something so satisfying about watching those lace shells stack up round after round, and the finished piece truly looks like an heirloom.
Whether you are carrying it down the aisle yourself, gifting it to a bride to be, or just treating yourself to something beautiful, this purse deserves to be shown off.
Thank you so much for choosing this pattern. If you make one, I would absolutely love to see it! Save this pattern to your Pinterest boards so you can find it when you are ready to start, and please leave a comment below sharing your finished purse. Your photos always make my day.
Want a Quick & Easy Printable Version?
Get a clean, beautifully formatted PDF of this pattern — easy to follow step by step, ready to print or save on any device. No scrolling, no distractions, just the pattern.
Get the Printable PDF →