
I call this one the "Fireside Wrap" because it reminds me of those cozy evenings curled up by a crackling fire. The original sketch for this cardigan has been living in one of my oldest notebooks for nearly four years. I drew it after spotting a vintage shearling coat at a thrift store that was three sizes too small but absolutely gorgeous.
Back then, I kept thinking about how to capture that luxurious shearling trim look using crochet techniques. The camel and cream color combination haunted me in the best way. I finally pulled out that crumpled notebook page last winter and decided it was time to bring this design to life.
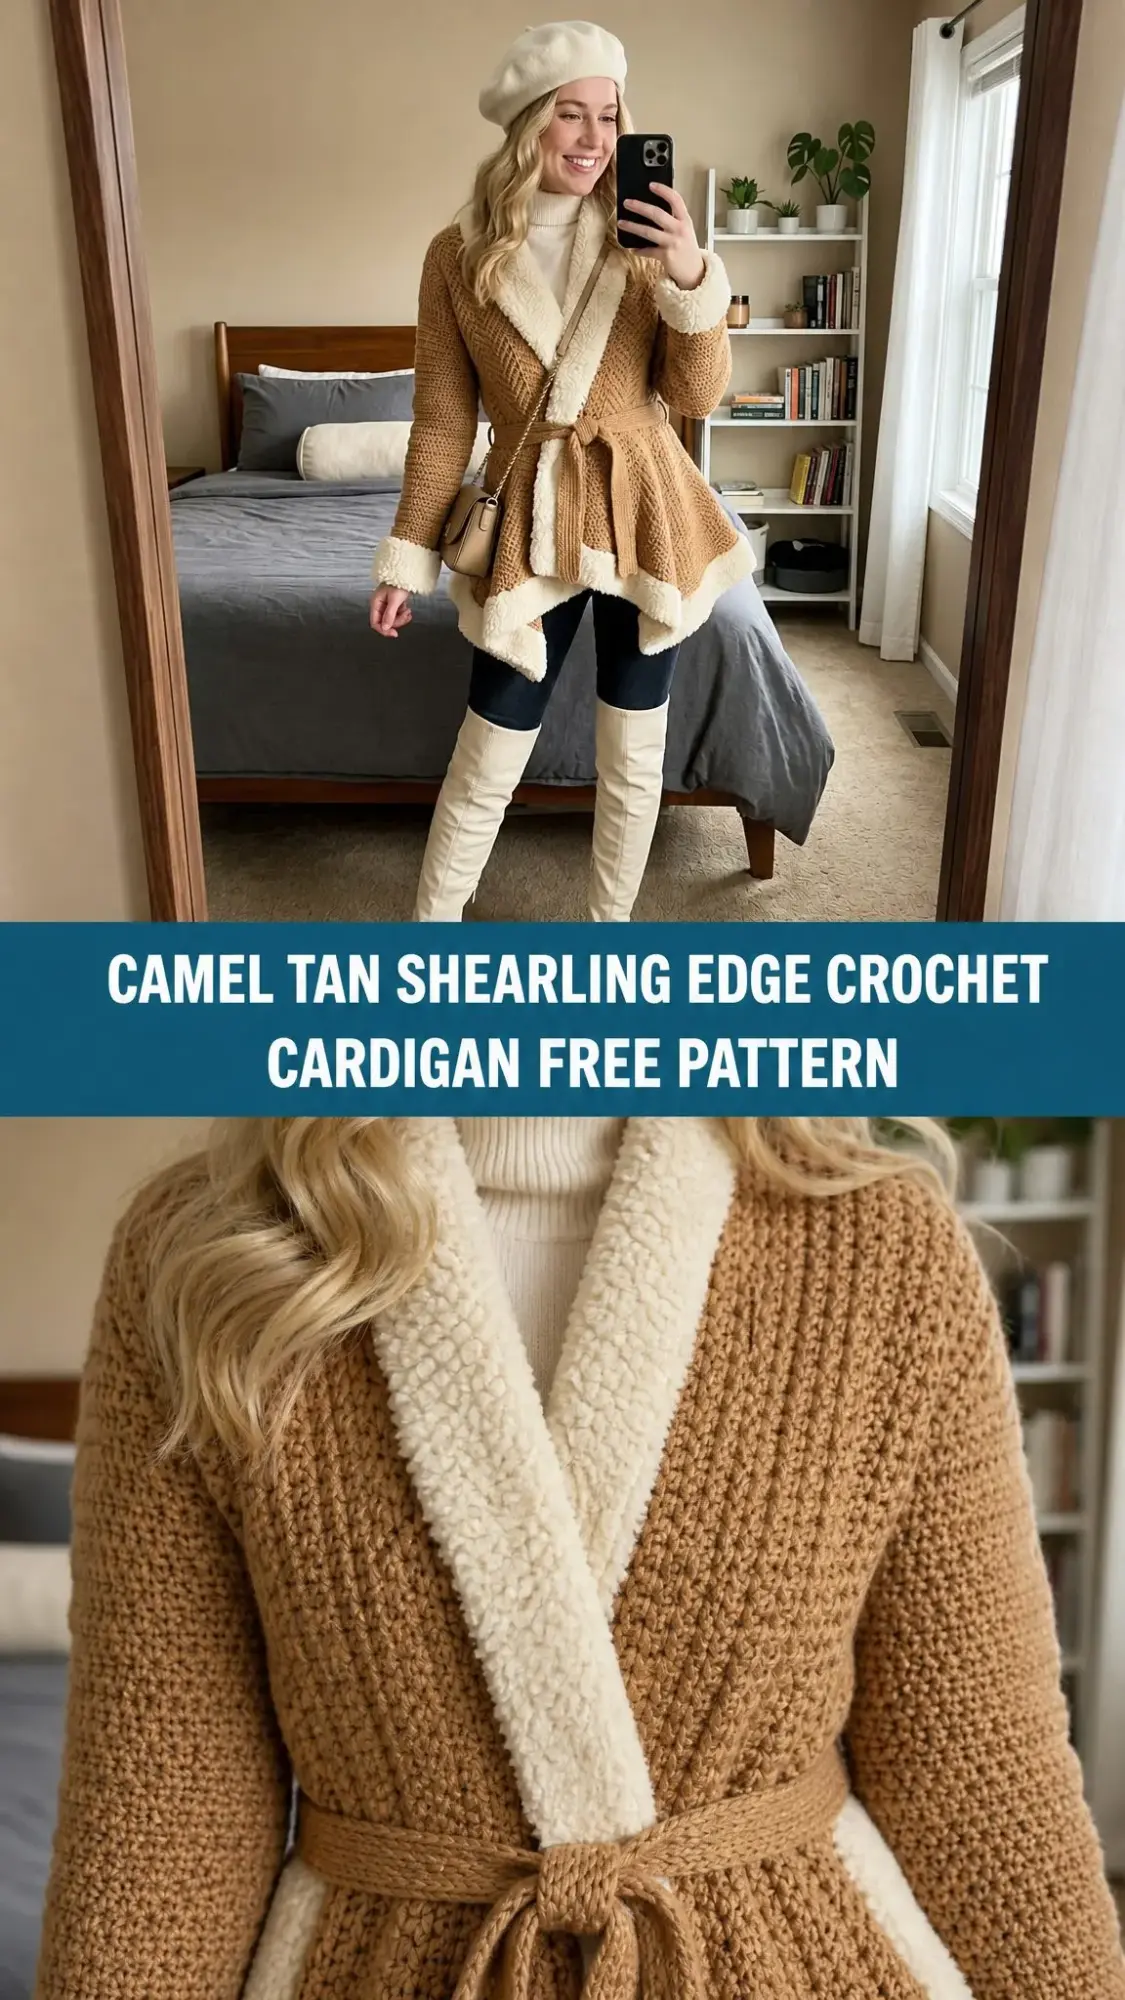
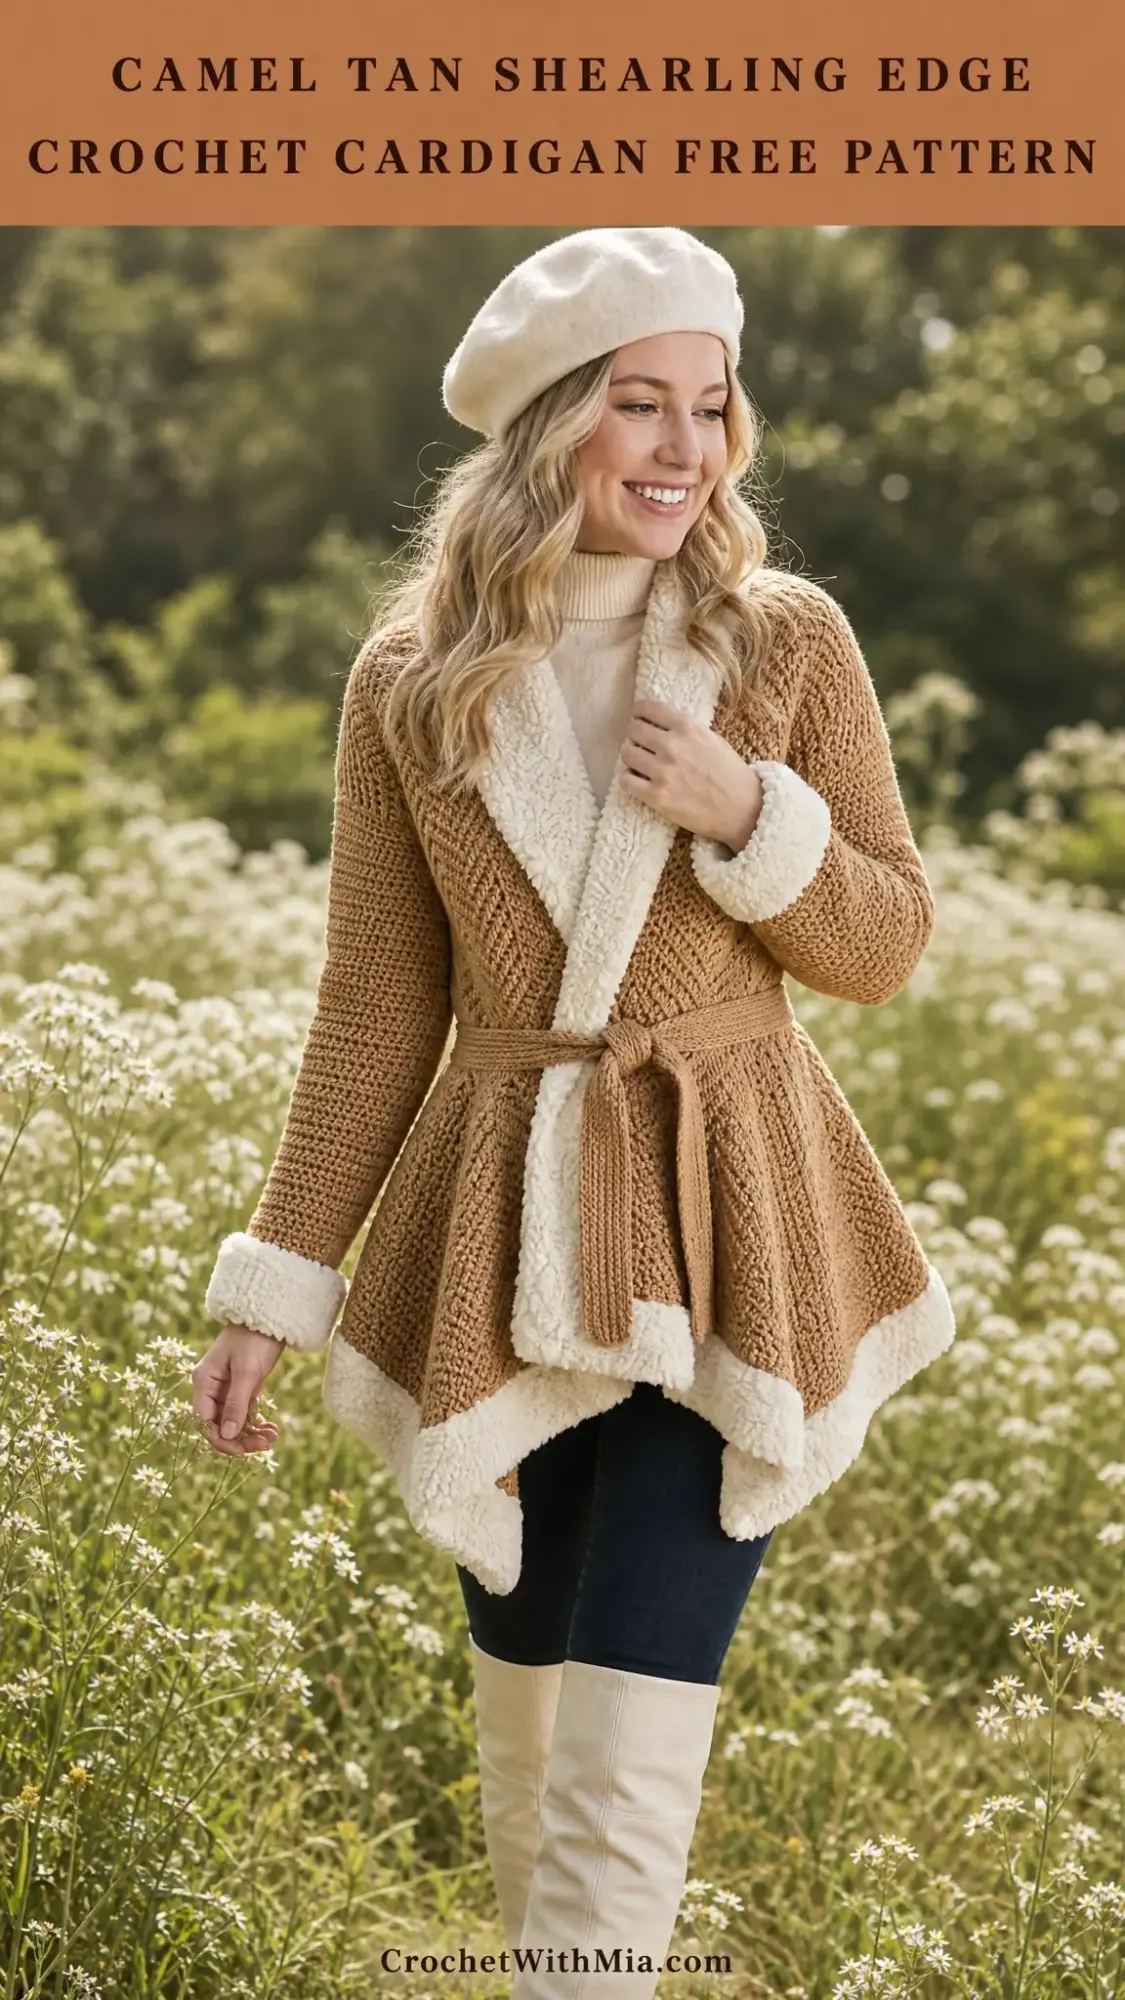
What emerged is this belted wrap cardigan with its dramatic handkerchief hem and plush boucle trim that genuinely looks like shearling. Every time I wear it, someone asks if the edges are real sheepskin. They are not. They are just clever yarn choices and simple single crochet worked in a fluffy boucle. I am so proud of how this turned out, and I cannot wait to share every detail with you.
Why This Crochet Cardigan Pattern Works
This cardigan hits all the marks for a statement piece that actually gets worn. The fitted waist created by the tie belt gives it shape, while the flared skirt and pointed hem add movement and drama. The cream shearling-style trim at the collar, cuffs, and hem elevates the entire piece from "homemade sweater" to "where did you buy that" territory.
The construction is straightforward even though the finished piece looks complex. You will work five flat panels, seam them together, pick up stitches for the collar, and attach the trim last. If you have made a basic cardigan before, you can absolutely handle this crochet pattern.
The woven texture stitch creates the dense, slightly textured fabric you see in the photos. It looks like handwoven knit fabric but is worked entirely in crochet using half double crochet through the back loop and slip stitches through the front loop in alternating rows.
Skill Level and Time Commitment
This is an intermediate to advanced intermediate project. You should be comfortable with garment construction, seaming multiple pieces, and maintaining consistent gauge across large panels. If you have never made a crocheted garment before, I would suggest starting with a simpler cardigan first.
Plan for approximately 35 to 50 hours of work depending on your speed and familiarity with the yarns. This is not a weekend project, but it is absolutely achievable over a few weeks of dedicated evening crafting.
The trickiest parts are maintaining gauge across the large body panels and shaping the handkerchief hem correctly. I will walk you through both step by step.
Finished Measurements
This pattern is written for a size Medium (US 8 to 10) with notes for adjusting to other sizes.
Materials You Will Need
Yarn
Main Color (MC): Camel tan, bulky weight (weight 5) yarn with a slight wool or acrylic blend for stitch definition. You will need approximately 1,400 to 1,600 yards / 1,280 to 1,463 meters.
Contrast Color (CC): Cream or off-white boucle, loop, or sherpa-texture yarn in bulky weight (weight 5). You will need approximately 400 to 500 yards / 365 to 457 meters.
Yarn Suggestions
Option 1: Lion Brand Wool-Ease Thick and Quick in "Caramel" (MC) and Lion Brand Pound of Love in "Antique White" (CC). Note that Pound of Love is worsted weight, so you may need to hold it doubled for the trim.
Option 2: Paintbox Yarns Simply Chunky in "Caramel Brown" (MC) and Paintbox Yarns Simply DK held tripled in "Cream" (CC).
Option 3: Cascade Yarns Magnum in "Camel" (MC) and Cascade Yarns Cloud in "Cream" (CC). Cloud has a subtle halo that mimics shearling beautifully and is the closest match to my original vision.
Substitution tip: For MC, choose any bulky weight yarn with good stitch definition and low halo. Hairy or fluffy MC yarns will obscure the woven texture. For CC, choose a yarn with boucle, loop pile, sherpa texture, or strong halo so the trim reads as shearling.
Hooks
Notions
Gauge (Critical for Fit)
Main Body (MC, K-10.5 hook, woven texture stitch):
14 stitches x 16 rows = 4 in / 10 cm
This gauge MUST be met for the garment to fit correctly. Work a minimum 6-inch swatch, wash and block it, then measure the center 4 inches. Adjust hook size up or down as needed before beginning.
Trim (CC, J-10 hook, single crochet):
12 stitches x 14 rows = 4 in / 10 cm
I know swatching feels tedious, but please do not skip this step. A cardigan that does not fit is heartbreaking after 40 hours of work.
Abbreviations
Let me define every abbreviation you will encounter in this crochet tutorial:
Special Stitches
Woven Texture Stitch (WTS)
This is the signature stitch that creates the hand-woven appearance in the body of this crochet cardigan pattern. It alternates between two row types.
WTS Row A (RS row): Ch 1, turn. Work 1 hdc through the back loop only in each stitch across. Do not count the turning chain as a stitch.
WTS Row B (WS row): Ch 1, turn. Work 1 sl st through the front loop only in each stitch across. Because slip stitches are short, maintain loose tension or your fabric will curl. The slip stitches create the horizontal woven line visible on the right side.
After completing Row B, the next row is again Row A. This two-row repeat is the entire body texture.
Important note: Every pair of WTS rows (one hdc row plus one sl st row) equals approximately 0.5 in / 1.3 cm in height. When counting stitches, always count at the top of an hdc row. Do not count after a slip stitch row as compression makes counting unreliable.
Shearling Trim Strip (CC)
Work a foundation chain in CC to the length specified in each section. Row 1: sc in the 2nd ch from hook and in each ch across. Ch 1, turn. Row 2: sc in each st across. Ch 1, turn. Fasten off leaving a long tail for seaming.
The strip is 2 rows tall and attaches along its long edge. The boucle texture of CC means both rows together read visually as a plush band.
Slip Stitch Seam
Hold two pieces with right sides together. Working through both thicknesses simultaneously, insert hook through the outermost loop of each corresponding stitch or row end, yo, draw through all loops on hook. This creates a flat seam visible from the wrong side only.
Construction Overview
Before diving into the step by step instructions, here is how this cardigan comes together:
1. Work the back panel from top (shoulders) down to hem
2. Work the right front panel from top down to hem
3. Work the left front panel from top down to hem
4. Work two sleeves from cap down to cuff
5. Block all pieces
6. Seam shoulders, sides, and sleeves
7. Pick up and work the shawl collar
8. Work and attach all shearling trim strips
9. Work and attach the belt
Pattern Instructions
Back Panel
The back panel is worked from the top (neckline/shoulder) downward to the hem. This top-down approach allows you to try on the piece and adjust length before adding the decorative hem shaping.
Foundation:
Chain 75. (This gives 74 working stitches plus 1 turning chain replacement. Do not skip any chains.)
Foundation Row (RS): Hdc in the 2nd chain from hook and in each chain across. Ch 1, turn. (74 hdc)
This foundation row establishes the full shoulder width.
Back Body, Working Downward:
Work in WTS (alternating Row A and Row B) for the following rows. Maintain 74 stitches on every row until shaping begins.
Rows 1 through 30 (15 WTS pairs): Work even in WTS. No increases or decreases. (74 sts each row)
Checkpoint: After Row 30, your piece should measure approximately 9 to 9.5 in / 23 to 24 cm from the foundation row. This represents the area from shoulder to just below underarm.
Waist Shaping for Back (Rows 31 through 44)
Row 31 (RS, Row A type): Ch 1, turn. Hdc2tog over first 2 sts, hdc-blo in each st across to last 2 sts, hdc2tog over last 2 sts. Ch 1, turn. (72 sts)
Row 32 (WS, Row B type): Sl st-flo in each st across. Ch 1, turn. (72 sts)
Row 33 (RS): Hdc2tog, hdc-blo across to last 2 sts, hdc2tog. Ch 1, turn. (70 sts)
Row 34 (WS): Sl st-flo across. Ch 1, turn. (70 sts)
Row 35 (RS): Hdc2tog, hdc-blo across to last 2 sts, hdc2tog. Ch 1, turn. (68 sts)
Row 36 (WS): Sl st-flo across. Ch 1, turn. (68 sts)
Row 37 (RS): Hdc-blo in each st across. Ch 1, turn. (68 sts)
Row 38 (WS): Sl st-flo across. Ch 1, turn. (68 sts)
Rows 39 through 44 (3 additional WTS pairs): Work even. (68 sts each row)
Checkpoint: After Row 44, your piece should measure approximately 14 in / 35.5 cm from the foundation row.
Waist to Hip Flare (Rows 45 through 54)
Row 45 (RS): Ch 1, turn. 2 hdc-blo in first st, hdc-blo in each st across to last st, 2 hdc-blo in last st. Ch 1, turn. (70 sts)
Row 46 (WS): Sl st-flo across. Ch 1, turn. (70 sts)
Row 47 (RS): 2 hdc-blo in first st, hdc-blo across to last st, 2 hdc-blo in last st. Ch 1, turn. (72 sts)
Row 48 (WS): Sl st-flo across. Ch 1, turn. (72 sts)
Row 49 (RS): 2 hdc-blo in first st, hdc-blo across to last st, 2 hdc-blo in last st. Ch 1, turn. (74 sts)
Row 50 (WS): Sl st-flo across. Ch 1, turn. (74 sts)
Row 51 (RS): 2 hdc-blo in first st, hdc-blo across to last st, 2 hdc-blo in last st. Ch 1, turn. (76 sts)
Row 52 (WS): Sl st-flo across. Ch 1, turn. (76 sts)
Row 53 (RS): Work even hdc-blo across. Ch 1, turn. (76 sts)
Row 54 (WS): Sl st-flo across. Ch 1, turn. (76 sts)
Checkpoint: After Row 54, the piece should measure approximately 18 in / 45.7 cm from the foundation row.
Handkerchief Hem Shaping for Back (Rows 55 through 72)
The back hem continues straight on the sides while the center back drops into a V point. Place a marker at stitch 38 (center of the 76-stitch row).
Row 55 (RS): Hdc-blo across to 2 sts before center marker, hdc2tog, sm, hdc2tog, hdc-blo to end. Ch 1, turn. (74 sts)
Row 56 (WS): Sl st-flo across. Ch 1, turn. (74 sts)
Row 57 (RS): Hdc-blo to 2 sts before marker, hdc2tog, sm, hdc2tog, hdc-blo to end. Ch 1, turn. (72 sts)
Row 58 (WS): Sl st-flo across. Ch 1, turn. (72 sts)
Continue this pattern through Row 72:
Row 59: (70 sts) | Row 60: (70 sts)
Row 61: (68 sts) | Row 62: (68 sts)
Row 63: (66 sts) | Row 64: (66 sts)
Row 65: (64 sts) | Row 66: (64 sts)
Row 67: (62 sts) | Row 68: (62 sts)
Row 69: (60 sts) | Row 70: (60 sts)
Row 71: (58 sts) | Row 72: Sl st-flo across. Fasten off. (58 sts)
Back panel total from foundation to side edge: approximately 18 in / 45.7 cm.
Back panel total from foundation to center back point: approximately 26 in / 66 cm.
Right Front Panel
The right front panel (as worn) sits on your right side when wearing the garment. It is worked top-down matching the back panel construction.
Foundation:
Chain 43. (Gives 42 working stitches.)
Foundation Row (RS): Hdc in 2nd chain from hook and in each chain across. Ch 1, turn. (42 hdc)
Rows 1 through 30 (15 WTS pairs): Work even in WTS. (42 sts each row)
Waist Shaping for Right Front (Rows 31 through 44)
Row 31 (RS): Hdc2tog, hdc-blo to last 2 sts, hdc2tog. Ch 1, turn. (40 sts)
Row 32 (WS): Sl st-flo across. Ch 1, turn. (40 sts)
Row 33 (RS): Hdc2tog, hdc-blo to last 2 sts, hdc2tog. Ch 1, turn. (38 sts)
Row 34 (WS): Sl st-flo across. Ch 1, turn. (38 sts)
Row 35 (RS): Hdc2tog, hdc-blo to last 2 sts, hdc2tog. Ch 1, turn. (36 sts)
Row 36 (WS): Sl st-flo across. Ch 1, turn. (36 sts)
Rows 37 through 44 (4 WTS pairs): Work even in WTS. (36 sts each row)
Hip Flare for Right Front (Rows 45 through 54)
Row 45 (RS): 2 hdc-blo in first st, hdc-blo to last st, 2 hdc-blo in last st. Ch 1, turn. (38 sts)
Row 46 (WS): Sl st-flo across. Ch 1, turn. (38 sts)
Row 47 (RS): 2 hdc-blo in first st, hdc-blo to last st, 2 hdc-blo in last st. Ch 1, turn. (40 sts)
Row 48 (WS): Sl st-flo across. Ch 1, turn. (40 sts)
Row 49 (RS): 2 hdc-blo in first st, hdc-blo to last st, 2 hdc-blo in last st. Ch 1, turn. (42 sts)
Row 50 (WS): Sl st-flo across. Ch 1, turn. (42 sts)
Row 51 (RS): 2 hdc-blo in first st, hdc-blo to last st, 2 hdc-blo in last st. Ch 1, turn. (44 sts)
Row 52 (WS): Sl st-flo across. Ch 1, turn. (44 sts)
Rows 53 through 54 (1 WTS pair): Work even. (44 sts each row)
Handkerchief Hem for Right Front (Rows 55 through 72)
The point falls at the outer side seam edge. Decreases are worked at the center front edge only.
Row 55 (RS): Hdc-blo across to last 2 sts, hdc2tog at center front edge. Ch 1, turn. (43 sts)
Row 56 (WS): Sl st-flo across. Ch 1, turn. (43 sts)
Continue this pattern, decreasing at the center front edge every RS row:
Row 57: (42 sts) | Row 58: (42 sts)
Row 59: (41 sts) | Row 60: (41 sts)
Row 61: (40 sts) | Row 62: (40 sts)
Row 63: (39 sts) | Row 64: (39 sts)
Row 65: (38 sts) | Row 66: (38 sts)
Row 67: (37 sts) | Row 68: (37 sts)
Row 69: (36 sts) | Row 70: (36 sts)
Row 71: (35 sts) | Row 72: Sl st-flo across. Fasten off. (35 sts)
Left Front Panel
Work as Right Front Panel with shaping mirrored. On RS rows, the center front opening is at your left. All decreases in the handkerchief hem section are worked at the first 2 stitches of RS rows instead of the last 2 stitches.
Foundation Chain: 43. (42 working stitches)
Foundation Row (RS): Hdc in 2nd ch from hook and in each ch across. Ch 1, turn. (42 hdc)
Rows 1 through 30: Work even WTS. (42 sts)
Work waist shaping Rows 31 through 44 exactly as the right front panel.
Work hip flare Rows 45 through 54 exactly as the right front panel.
Handkerchief Hem for Left Front (Rows 55 through 72)
Row 55 (RS): Hdc2tog at center front edge (first 2 sts), hdc-blo to end. Ch 1, turn. (43 sts)
Row 56 (WS): Sl st-flo across. Ch 1, turn. (43 sts)
Continue this pattern, decreasing at the beginning of RS rows through Row 72, ending with (35 sts). Fasten off.
Sleeves (Make 2 Identical)
The sleeve is worked flat from the top (sleeve cap) downward to the cuff.
Foundation Chain: 51. (50 working stitches at widest cap point.)
Foundation Row (RS): Hdc in 2nd ch from hook and in each ch across. Ch 1, turn. (50 hdc)
Cap Shaping (Rows 1 through 10):
Row 1 (RS): Hdc2tog, hdc-blo to last 2 sts, hdc2tog. Ch 1, turn. (48 sts)
Row 2 (WS): Sl st-flo across. Ch 1, turn. (48 sts)
Row 3 (RS): Hdc2tog, hdc-blo to last 2 sts, hdc2tog. Ch 1, turn. (46 sts)
Row 4 (WS): Sl st-flo across. Ch 1, turn. (46 sts)
Row 5 (RS): Hdc2tog, hdc-blo to last 2 sts, hdc2tog. Ch 1, turn. (44 sts)
Row 6 (WS): Sl st-flo across. Ch 1, turn. (44 sts)
Row 7 (RS): Hdc2tog, hdc-blo to last 2 sts, hdc2tog. Ch 1, turn. (42 sts)
Row 8 (WS): Sl st-flo across. Ch 1, turn. (42 sts)
Row 9 (RS): Hdc-blo across. Ch 1, turn. (42 sts)
Row 10 (WS): Sl st-flo across. Ch 1, turn. (42 sts)
Continue working the sleeve body in WTS, tapering gradually toward the wrist. Work even until sleeve measures approximately 22 in / 56 cm from foundation, then work final rows even at approximately 35 stitches for the cuff opening.
Assembly and Finishing
Blocking
Wet-block or steam-block all five panels before seaming. Pin to measurements and allow to dry completely. This step makes seaming significantly easier and gives you a more polished finished garment.
Seaming Order
1. Shoulder seams: Using slip stitch seam method, join back panel to front panels at shoulders
2. Side seams: Join front panels to back panel from underarm to the start of hem shaping
3. Sleeve seams: Fold each sleeve and seam from underarm to cuff
4. Set in sleeves: Attach sleeves to armhole openings, matching cap shaping to shoulder seam
Shawl Collar
After seaming, pick up stitches along the right front edge, across the back neck, and down the left front edge. Work in WTS for approximately 3 to 4 inches of collar depth. The collar naturally folds over when worn.
Shearling Trim Attachment
Work shearling trim strips in CC for the collar outer edge, both cuffs, and the entire hem. Measure each edge before chaining to ensure proper fit. Whip stitch or slip stitch the trim in place with the boucle side facing outward.
Belt
Chain approximately 200 in MC. Work 2 rows of sc. Fasten off and weave in ends. The belt threads through the waist area and ties at the front.
Pattern Notes and Tips
Turning chains never count as stitches in this pattern. Always work your first stitch directly into the first stitch of the previous row.
Mark your right side at the very beginning with a stitch marker. The side from which you worked the first hdc foundation row is your right side.
When working with boucle yarn, use a slightly smaller hook than you would normally to keep the stitches controlled. The texture of the yarn does most of the visual work.
If your fabric curls after the slip stitch rows, your tension is too tight. Practice maintaining a looser tension on Row B specifically.
Thank you so much for choosing this crochet cardigan pattern. I truly hope you love making and wearing your Fireside Wrap as much as I loved designing it. If you have any questions as you work through the pattern, do not hesitate to reach out.
If you make this cardigan, I would absolutely love to see it. Tag me on Instagram or share a photo in my Facebook group. Seeing your finished projects genuinely makes my day.
This is definitely a pattern worth saving for later. Pin it to your favorite Pinterest board so you can find it when you are ready to cast on, and please drop a comment below if you decide to make one. I would love to hear which yarn you choose and how your shearling trim turns out.