
I don’t know about you, but I absolutely melt when I see babies dressed as tiny animals. There’s something about chubby little legs poking out of a penguin outfit that just gets me every single time.
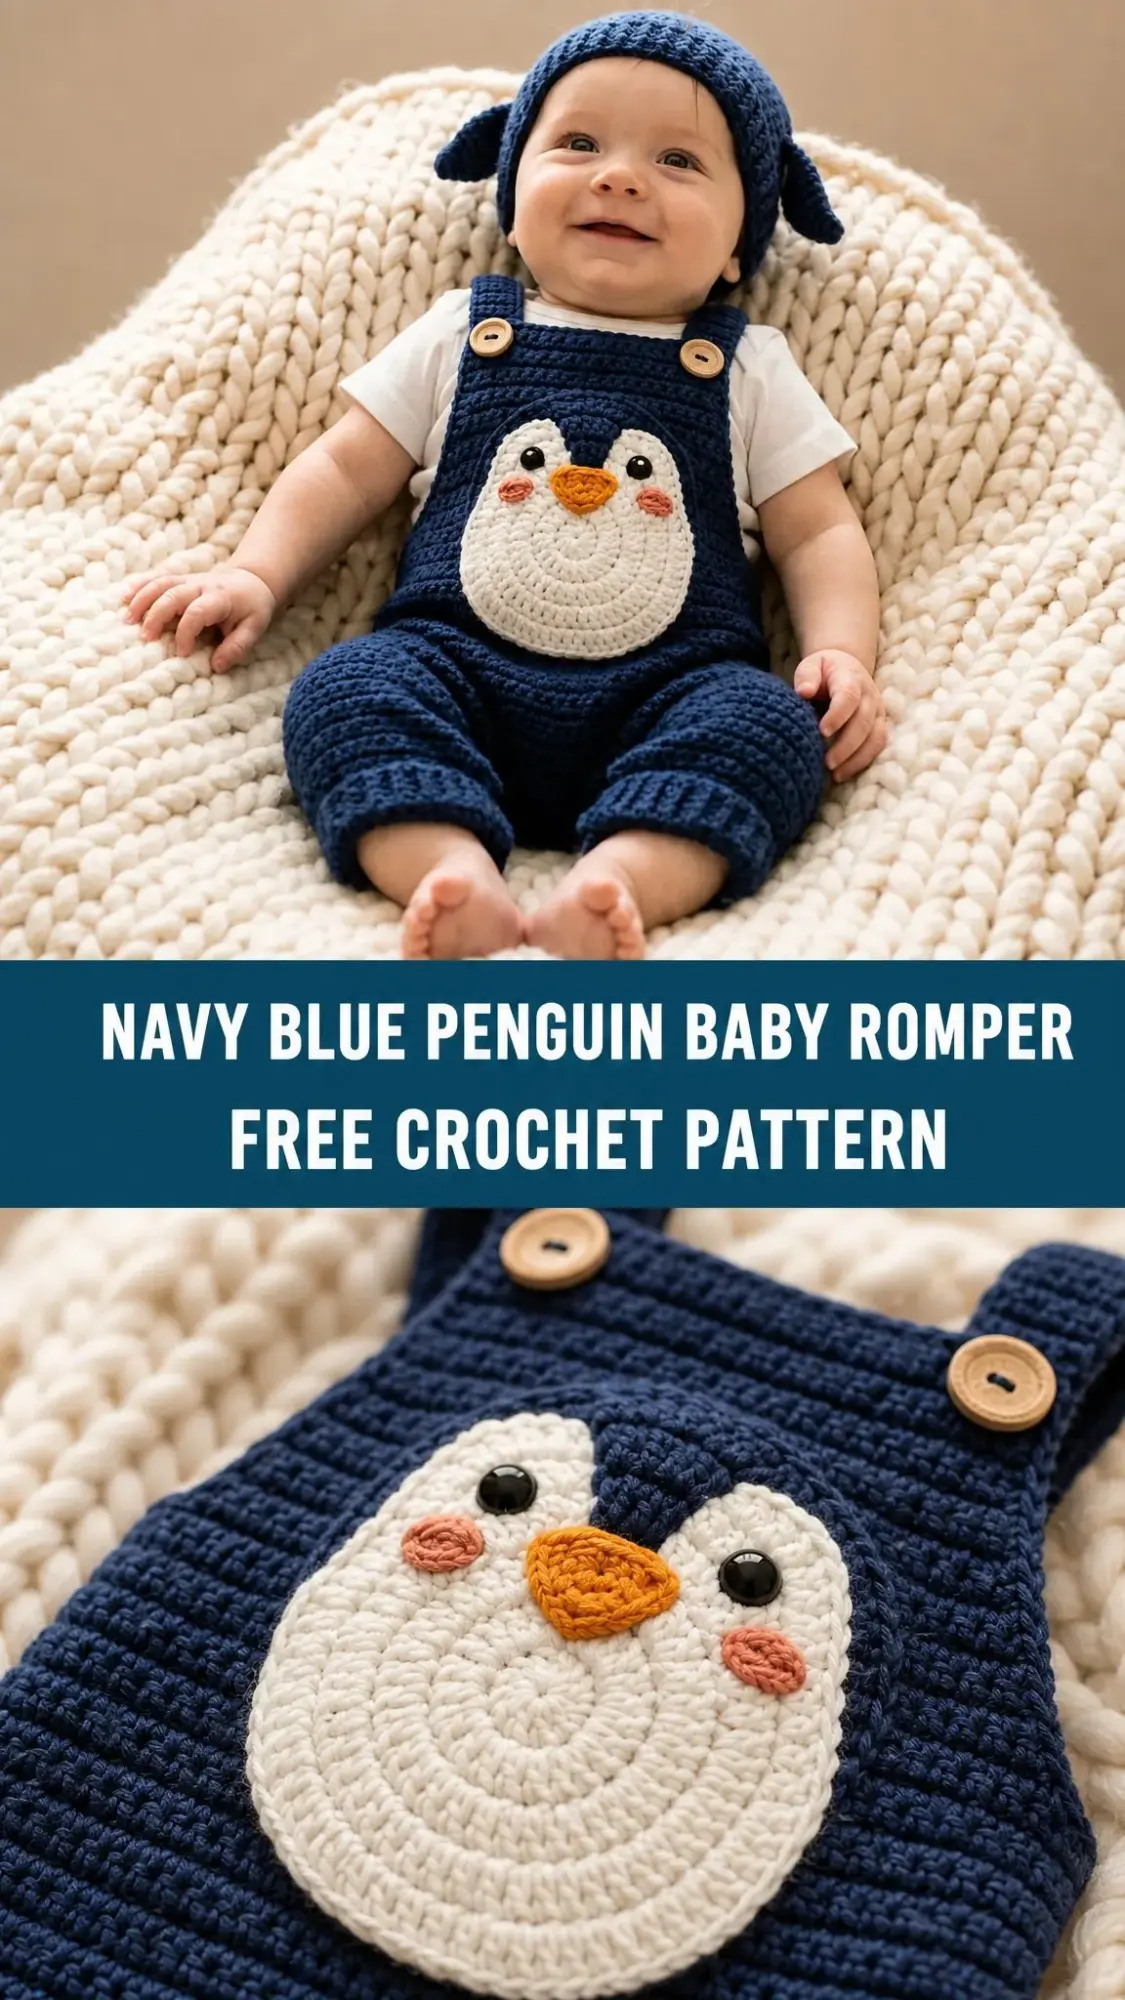
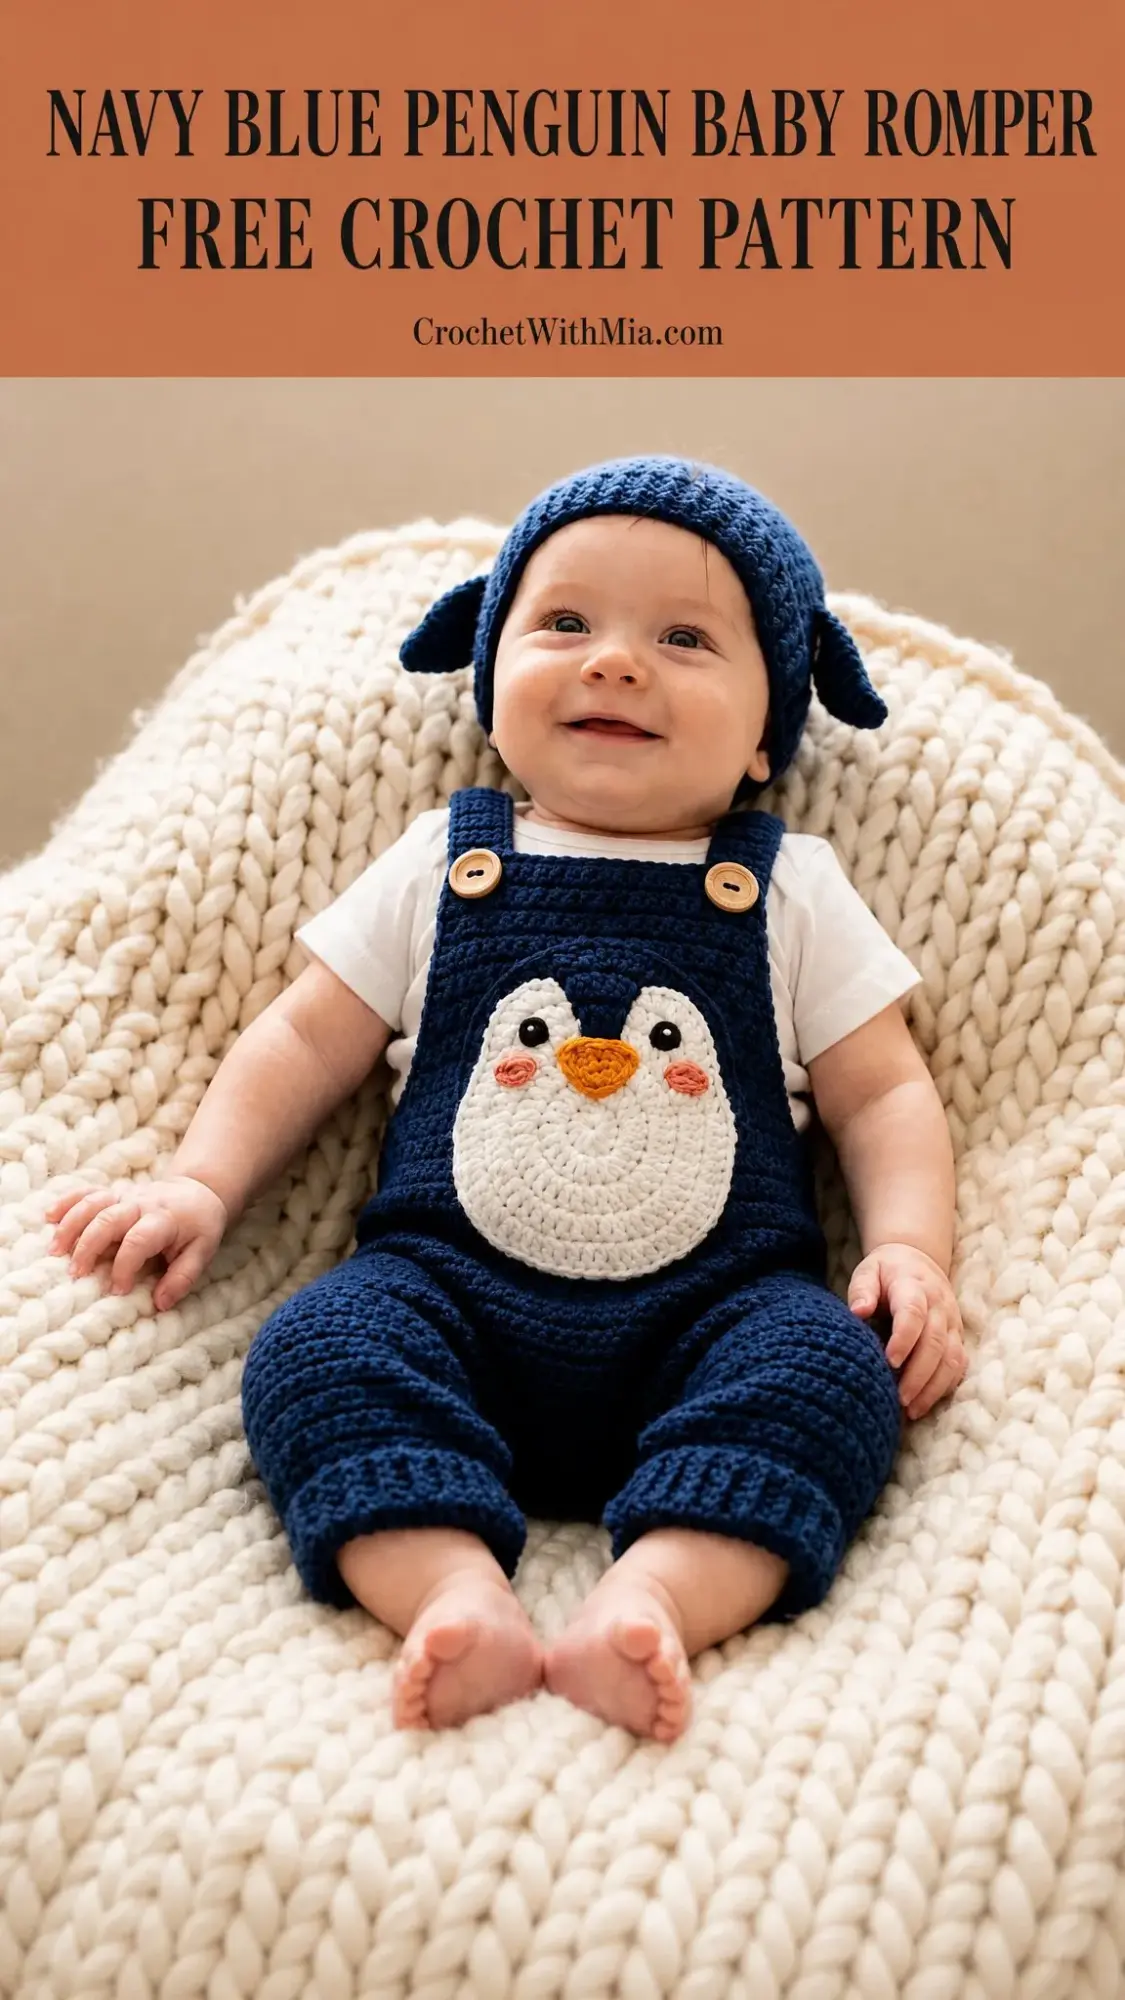
This romper delivers all the adorable without any of the complicated construction nightmares. The penguin belly sits right on the bib front, complete with that sweet orange beak and rosy cheeks. And yes, there’s a matching hat with little ear points that make babies look like the world’s cutest Antarctic explorers.
If you’ve been wanting to try garment crochet but felt intimidated, this is your project. Working in the round means minimal seaming, and the penguin details are simple appliques you attach at the end. Let me walk you through every stitch.
Why This Penguin Romper Works So Well
The construction on this piece is genuinely clever. You start each leg as a tube, working from the ankle up. Then you join those two tubes together at the crotch with a small chain bridge. From there, the body continues seamlessly in the round until you reach the underarms.
That’s where things get interesting. The front bib rises higher than the back, giving you that classic overall silhouette. The shoulder straps have built in buttonholes that fasten to wood buttons on the back panel. It’s adjustable, it’s practical, and it looks absolutely precious.
The penguin face uses basic circles and ovals that you work separately and sew on at the end. No color changes in the middle of rows. No complicated intarsia. Just simple shapes assembled into one irresistible design.
Skill Level and Time Estimate
This pattern sits solidly at intermediate level. You’ll need to be comfortable working in the round, transitioning to flat rows, shaping armholes, and seaming pieces together. If you’ve completed at least one garment before, you can absolutely handle this.
Expect to spend 12 to 18 hours across multiple sessions. The leg tubes and body work up fairly quickly since it’s all single crochet in the round. The applique pieces take maybe an hour total. Assembly and finishing add another session or two.
Don’t rush the finishing. Careful seaming makes the difference between homemade and handmade.
Finished Measurements
This romper fits babies 3 to 6 months old.
Chest circumference: approximately 17 inches / 43 cm
Total length (shoulder to crotch): approximately 12 inches / 30.5 cm
Leg length (ankle to crotch): approximately 5 inches / 12.7 cm
Hat circumference: approximately 15 inches / 38 cm
Size customization tips appear at the end of the pattern for sizing up or down.
Materials You’ll Need
Yarn:
Hooks:
Notions:
Yarn Suggestions
Lion Brand Pound of Love works beautifully here. It’s worsted weight, 100% acrylic, machine washable, and budget friendly for baby items.
Paintbox Yarns Simply DK held double gives a worsted weight equivalent with exceptional stitch clarity and a lovely matte finish.
Cascade 220 Superwash is soft against baby skin, machine washable, and shows the stitch texture beautifully.
Any worsted weight yarn achieving gauge will work. Prioritize machine washable fibers. Avoid fuzzy or bouclé textures since stitch definition matters for the dense fabric and applique edges.
Gauge
With US G-6 / 4.0 mm hook and Yarn A:
18 sc x 20 rows = 4 inches / 10 cm worked in single crochet (sc), blocked.
Gauge is mandatory for this garment. Even one stitch per 4 inches difference will result in a romper that doesn’t fit. Make a swatch at least 5 inches square, wet block it, let it dry completely, then measure the center.
Ribbing gauge with US F-5 / 3.75 mm hook:
16 sc x 20 rows = 4 inches / 10 cm
Abbreviations and Stitch Definitions
Let me define every stitch before we begin. These use US crochet terms.
blo (back loop only): Insert your hook under just the back loop of the stitch instead of both loops.
ch (chain): Yarn over, pull through the loop on your hook. This creates one chain.
sc (single crochet): Insert hook in stitch, yarn over, pull up a loop (2 loops on hook), yarn over, pull through both loops.
sl st (slip stitch): Insert hook in stitch, yarn over, pull through both the stitch and the loop on your hook in one motion.
inc (single crochet increase): Work 2 sc in the same stitch. This adds one stitch to your count.
dec (single crochet decrease): Insert hook in next stitch, pull up a loop, insert hook in following stitch, pull up a loop (3 loops on hook), yarn over, pull through all 3 loops. This removes one stitch from your count.
MC (main color): Yarn A, Navy Blue.
RS (right side): The side that faces outward when worn.
WS (wrong side): The side that faces the body when worn.
rnd (round): Working in a continuous circle without turning.
pm (place marker): Put a stitch marker in the indicated stitch.
Pattern Notes Before You Begin
The romper body works in the round with no side seams. Place a stitch marker at the beginning of each round and move it up as you go.
Both leg tubes are worked separately, then joined to form the lower body. The crotch join uses a small chain bridge of 4 stitches to connect them.
Turning chains do NOT count as a stitch except in the ribbing sections. When the pattern says "ch 1, sc in each sc around," you have the same stitch count you started with.
Right and left refer to the wearer’s right and left.
Safety note: If using safety eyes, secure them before attaching the applique to the romper. Once the applique is sewn flat to the bib, there’s no access to the back. For unsupervised wear, embroider the eyes instead.
Right Leg Instructions
Foundation: With MC and G-6 hook, ch 29. Sl st in first ch to form a ring. Be careful not to twist.
Rnd 1: Ch 1, sc in each ch around. Join with sl st to first sc. (29 sc)
Rnds 2 through 5: Ch 1, sc in each sc around. Join with sl st to first sc. (29 sc each round)
Rnd 6: Ch 1, sc in next 14 sc, inc in next sc, sc in next 14 sc. Join with sl st to first sc. (30 sc)
Rnds 7 through 10: Ch 1, sc in each sc around. Join with sl st to first sc. (30 sc each round)
Rnd 11: Ch 1, sc in next 14 sc, inc in next sc, sc in next 15 sc. Join with sl st to first sc. (31 sc)
Rnds 12 through 15: Ch 1, sc in each sc around. Join with sl st to first sc. (31 sc each round)
Rnd 16: Ch 1, sc in next 15 sc, inc in next sc, sc in next 15 sc. Join with sl st to first sc. (32 sc)
Rnds 17 through 20: Ch 1, sc in each sc around. Join with sl st to first sc. (32 sc each round)
Rnd 21: Ch 1, sc in next 15 sc, inc in next sc, sc in next 16 sc. Join with sl st to first sc. (33 sc)
Rnds 22 through 24: Ch 1, sc in each sc around. Join with sl st to first sc. (33 sc each round)
Rnd 25 (final leg round, do NOT join yet): Ch 1, sc in each sc around. Do not join. (33 sc) Fasten off. Place a stitch marker in the last stitch worked and another marker in the 17th stitch of this round. This marks the inner leg / crotch point.
Set right leg aside.
Checkpoint: The right leg tube should measure approximately 5 inches / 12.7 cm in length. The circumference at the top should be approximately 7.3 inches / 18.5 cm.
Left Leg Instructions
Work exactly as right leg through Rnd 24. (33 sc)
Rnd 25 (final leg round): Ch 1, sc in each sc around. Do not join. (33 sc) Do not fasten off. Place a marker in the 17th stitch (inner leg / crotch point).
Joining Legs and Forming Body
Now you’ll join the left leg to the right leg using a chain bridge at the crotch, creating one continuous round for the body.
Setup: With left leg still on hook and yarn attached, ch 4. With RS facing, insert hook into the marked stitch of the right leg (the 17th stitch, which is the inner leg point), sl st to join.
Rnd 1 of Body: Ch 1, sc in each of the 33 sc around the right leg, sc in each of the 4 ch stitches of the bridge, sc in each of the 33 sc around the left leg, sc in each of the 4 ch stitches on the opposite side of the bridge. Join with sl st to first sc. (74 sc)
Place a stitch marker at the beginning of each body round. Move marker up each round.
Rnds 2 through 4 of Body: Ch 1, sc in each sc around. Join with sl st to first sc. (74 sc each round)
Rnd 5 of Body: Ch 1, sc in next 17 sc, inc in next sc, sc in next 37 sc, inc in next sc, sc in next 18 sc. Join with sl st to first sc. (76 sc)
Rnds 6 through 8 of Body: Ch 1, sc in each sc around. Join with sl st to first sc. (76 sc each round)
Rnd 9 of Body: Ch 1, sc in next 18 sc, inc in next sc, sc in next 38 sc, inc in next sc, sc in next 18 sc. Join with sl st to first sc. (78 sc)
Rnds 10 through 12 of Body: Ch 1, sc in each sc around. Join with sl st to first sc. (78 sc each round)
Rnd 13 of Body: Ch 1, sc in next 18 sc, inc in next sc, sc in next 39 sc, inc in next sc, sc in next 19 sc. Join with sl st to first sc. (80 sc)
Rnds 14 through 16 of Body: Ch 1, sc in each sc around. Join with sl st to first sc. (80 sc each round)
Checkpoint: After completing Body Rnd 16, the piece from crotch join to current edge should measure approximately 4 to 4.5 inches / 10 to 11.5 cm.
Separating Front and Back Panels
The 80 stitches are now divided: 40 for the back and 40 for the front. The front bib will rise higher than the back.
Mark the first 40 stitches as the FRONT and the following 40 stitches as the BACK.
Back Panel
Turn the work so WS faces you. You will now work flat across the back 40 stitches only.
Row 1 (WS): Ch 1, sc in next 40 sc, turn. (40 sc)
Row 2 (RS): Ch 1, sc in each sc across, turn. (40 sc)
Rows 3 through 12: Rep Row 2. (40 sc each row)
Back armhole shaping:
Row 13 (RS): Ch 1, sc in next 8 sc for left back strap anchor, turn, leaving remaining 32 sts unworked. (8 sc)
Rows 14 through 16: Ch 1, sc in each sc across, turn. (8 sc each row)
Fasten off.
Right back strap anchor: Rejoin yarn in the 33rd stitch of Row 12 (counting from left edge), so you have 8 sts remaining to the right edge.
Row 13 (RS): Ch 1, sc in each of these 8 sc, turn. (8 sc)
Rows 14 through 16: Ch 1, sc in each sc across, turn. (8 sc each row)
Fasten off.
These two 8-stitch anchor bands will have the wood buttons sewn to them.
Front Bib Panel
Rejoin MC to the first of the 40 front stitches with RS facing at the right front edge.
Row 1 (RS): Ch 1, sc in each of the 40 front sc, turn. (40 sc)
Row 2 (WS): Ch 1, sc in each sc across, turn. (40 sc)
Rows 3 through 20: Rep Row 2. (40 sc each row)
Checkpoint: After Row 20, the bib should measure approximately 4 inches / 10 cm tall above the body separation row.
Bib Neck Shaping and Left Shoulder Strap
Row 21 (RS): Ch 1, sc in next 10 sc, turn. This forms the left shoulder strap. (10 sc)
Rows 22 through 34: Ch 1, sc in each sc across, turn. (10 sc each row)
Row 35 (buttonhole row, RS): Ch 1, sc in next 4 sc, ch 2, sk 2 sc, sc in next 4 sc, turn. (8 sc + 1 ch-2 sp)
Row 36: Ch 1, sc in next 4 sc, 2 sc in ch-2 sp, sc in next 4 sc, turn. (10 sc)
Row 37: Ch 1, sc in each sc across, turn. (10 sc)
Fasten off.
Right Shoulder Strap
Rejoin yarn to the 31st stitch of Row 20, leaving the center 20 stitches unworked for the front neck opening.
Row 21 (RS): Ch 1, sc in next 10 sc, turn. (10 sc)
Rows 22 through 34: Ch 1, sc in each sc across, turn. (10 sc each row)
Row 35 (buttonhole row, RS): Ch 1, sc in next 4 sc, ch 2, sk 2 sc, sc in next 4 sc, turn. (8 sc + 1 ch-2 sp)
Row 36: Ch 1, sc in next 4 sc, 2 sc in ch-2 sp, sc in next 4 sc, turn. (10 sc)
Row 37: Ch 1, sc in each sc across, turn. (10 sc)
Fasten off.
Leg Cuff Ribbing (Make 2)
The cuffs are worked as flat strips, then seamed and attached.
With MC and F-5 hook, ch 7.
Row 1: Sc in second ch from hook and each ch across, turn. (6 sc)
Row 2: Ch 1, sc in blo of each sc across, turn. (6 sc)
Repeat Row 2 until the ribbing strip measures 6 inches / 15.2 cm long (approximately 30 rows).
Fasten off, leaving a long tail for seaming.
Seam the short ends of the ribbing strip together using whipstitch to form a ring. Attach the cuff ring to the bottom edge of the leg tube using whipstitch, easing any fullness evenly around.
Work both cuffs identically.
Penguin Belly Applique
With Yarn B (White/Cream) and G-6 hook, make an adjustable magic ring.
Rnd 1: Ch 1, 6 sc in ring. Join with sl st to first sc. Pull ring closed. (6 sc)
Rnd 2: Ch 1, inc in each sc around. Join with sl st to first sc. (12 sc)
Rnd 3: Ch 1, (sc in next sc, inc in next sc) rep 6 times. Join with sl st to first sc. (18 sc)
Rnd 4: Ch 1, (sc in next 2 sc, inc in next sc) rep 6 times. Join with sl st to first sc. (24 sc)
Rnd 5: Ch 1, (sc in next 3 sc, inc in next sc) rep 6 times. Join with sl st to first sc. (30 sc)
Rnd 6: Ch 1, (sc in next 4 sc, inc in next sc) rep 6 times. Join with sl st to first sc. (36 sc)
Rnd 7: Ch 1, (sc in next 5 sc, inc in next sc) rep 6 times. Join with sl st to first sc. (42 sc)
Rnd 8: Ch 1, (sc in next 6 sc, inc in next sc) rep 6 times. Join with sl st to first sc. (48 sc)
Rnd 9: Ch 1, (sc in next 7 sc, inc in next sc) rep 6 times. Join with sl st to first sc. (54 sc)
Fasten off, leaving a long tail for attaching.
The finished belly applique should be approximately 4 inches / 10 cm in diameter.
Penguin Beak
With Yarn C (Orange/Amber) and G-6 hook, ch 6.
Row 1: Sc in second ch from hook, sc in next 3 ch, 3 sc in last ch (this is the tip of the beak). Rotate work, sc in the other side of the 4 remaining foundation chs. Do not turn. Join with sl st to first sc. (11 sc total around)
Row 2: Ch 1, sc in next 4 sc, 3 sc in center tip sc, sc in next 4 sc, sl st to join. (13 sc)
Fasten off, leaving a tail for attaching.
Cheek Circles (Make 2)
With Yarn E (Rose/Blush Pink) and G-6 hook, make an adjustable magic ring.
Rnd 1: Ch 1, 8 sc in ring. Join with sl st to first sc. Pull ring closed. (8 sc)
Fasten off leaving a tail for attaching.
Eyes
Using Yarn D (Black) and yarn needle, embroider a satin stitch circle approximately 0.5 inch / 1.3 cm in diameter on the belly applique. Position them symmetrically on either side of center, approximately 0.5 inch / 1.3 cm above center and 0.75 inch / 2 cm apart.
If using 9 mm safety eyes, secure them before attaching the applique to the romper.
Assembling Penguin Face on Applique
Position belly applique on the front bib, centered horizontally, with the top approximately 1 inch / 2.5 cm below the neck opening.
Set the eyes in the upper third of the applique circle.
Position the beak centered horizontally, just below the eyes.
Position the cheek circles on either side of the beak, level with the bottom of the beak.
Using whipstitch and matching yarn tails, sew the beak and cheek circles to the belly applique.
Sew the entire assembled belly applique to the bib front using whipstitch all around the edge.
Penguin Hat
With MC and G-6 hook, make an adjustable magic ring.
Rnd 1: Ch 1, 6 sc in ring. Join with sl st to first sc. Pull ring closed. (6 sc)
Rnd 2: Ch 1, inc in each sc around. Join with sl st to first sc. (12 sc)
Rnd 3: Ch 1, (sc in next sc, inc in next sc) rep 6 times. Join with sl st to first sc. (18 sc)
Rnd 4: Ch 1, (sc in next 2 sc, inc in next sc) rep 6 times. Join with sl st to first sc. (24 sc)
Rnd 5: Ch 1, (sc in next 3 sc, inc in next sc) rep 6 times. Join with sl st to first sc. (30 sc)
Rnd 6: Ch 1, (sc in next 4 sc, inc in next sc) rep 6 times. Join with sl st to first sc. (36 sc)
Rnd 7: Ch 1, (sc in next 5 sc, inc in next sc) rep 6 times. Join with sl st to first sc. (42 sc)
Rnd 8: Ch 1, (sc in next 6 sc, inc in next sc) rep 6 times. Join with sl st to first sc. (48 sc)
Rnd 9: Ch 1, (sc in next 7 sc, inc in next sc) rep 6 times. Join with sl st to first sc. (54 sc)
Rnd 10: Ch 1, (sc in next 8 sc, inc in next sc) rep 6 times. Join with sl st to first sc. (60 sc)
Rnds 11 through 24: Ch 1, sc in each sc around. Join with sl st to first sc. (60 sc each round)
Do not fasten off yet.
Hat Ear Points (Make 2)
Identify two positions on Rnd 10 approximately 10 stitches apart, centered on the front of the hat.
Ear Point 1:
Rejoin Yarn A to one ear position.
Row 1: Ch 1, sc in next 4 sc, turn. (4 sc)
Row 2: Ch 1, dec, dec, turn. (2 sc)
Row 3: Ch 1, dec. (1 sc)
Fasten off.
Ear Point 2:
Skip 8 sts from end of Ear Point 1 base. Rejoin Yarn A.
Work Rows 1 through 3 same as Ear Point 1.
Fasten off.
Hat Ribbed Brim (Optional)
Join Yarn A to any stitch of Rnd 24 with RS facing.
Rnd 1 of Brim: Ch 1, sc in blo of each sc around. Join with sl st to first sc. (60 sc)
Rnds 2 and 3 of Brim: Ch 1, sc in blo of each sc around. Join with sl st to first sc. (60 sc each round)
Fasten off and weave in end.
Finishing and Assembly
Weave in all yarn ends throughout the romper body, bib panels, and straps.
Sew the ribbed leg cuffs to the bottom edges of each leg tube.
Attach the assembled penguin belly applique to the front bib.
Fold the front shoulder straps over the shoulder to the back. Sew one wood button to the center of each back anchor band, positioning so the buttonholes align when straps are laid naturally over the shoulders.
Blocking Your Finished Romper
For wet blocking, submerge the finished romper in cool water with gentle wool wash. Gently squeeze out water by rolling in a clean towel. Lay flat and stretch to finished dimensions. Allow to dry completely, 12 to 24 hours.
For steam blocking (best for acrylic), hold a steam iron 1 to 2 inches above the surface. Never touch the iron directly to the fabric. Allow to cool before handling.
Care Instructions
Hand wash in cool water with gentle detergent. Lay flat to dry. For machine washable yarns, use gentle cycle with cold water and lay flat to dry. Never machine dry.
I really hope you love making this penguin romper as much as I loved designing it. The look on people’s faces when they see a baby waddle around in this outfit is absolutely priceless.
If you make this pattern, I would love to see it! Save this to your Pinterest boards so you can find it when you’re ready to start, and please drop a comment below to share your finished project. Happy crocheting!