
When I sat down to design this little poncho, I had a clear vision in my head. I wanted something that would work across multiple baby sizes, feature that gorgeous lacy texture that makes handmade baby clothes feel so special, and still be approachable for crocheters who have moved beyond basic scarves. The shell stitch was the obvious choice because it creates such beautiful fan-shaped clusters without requiring complicated techniques.
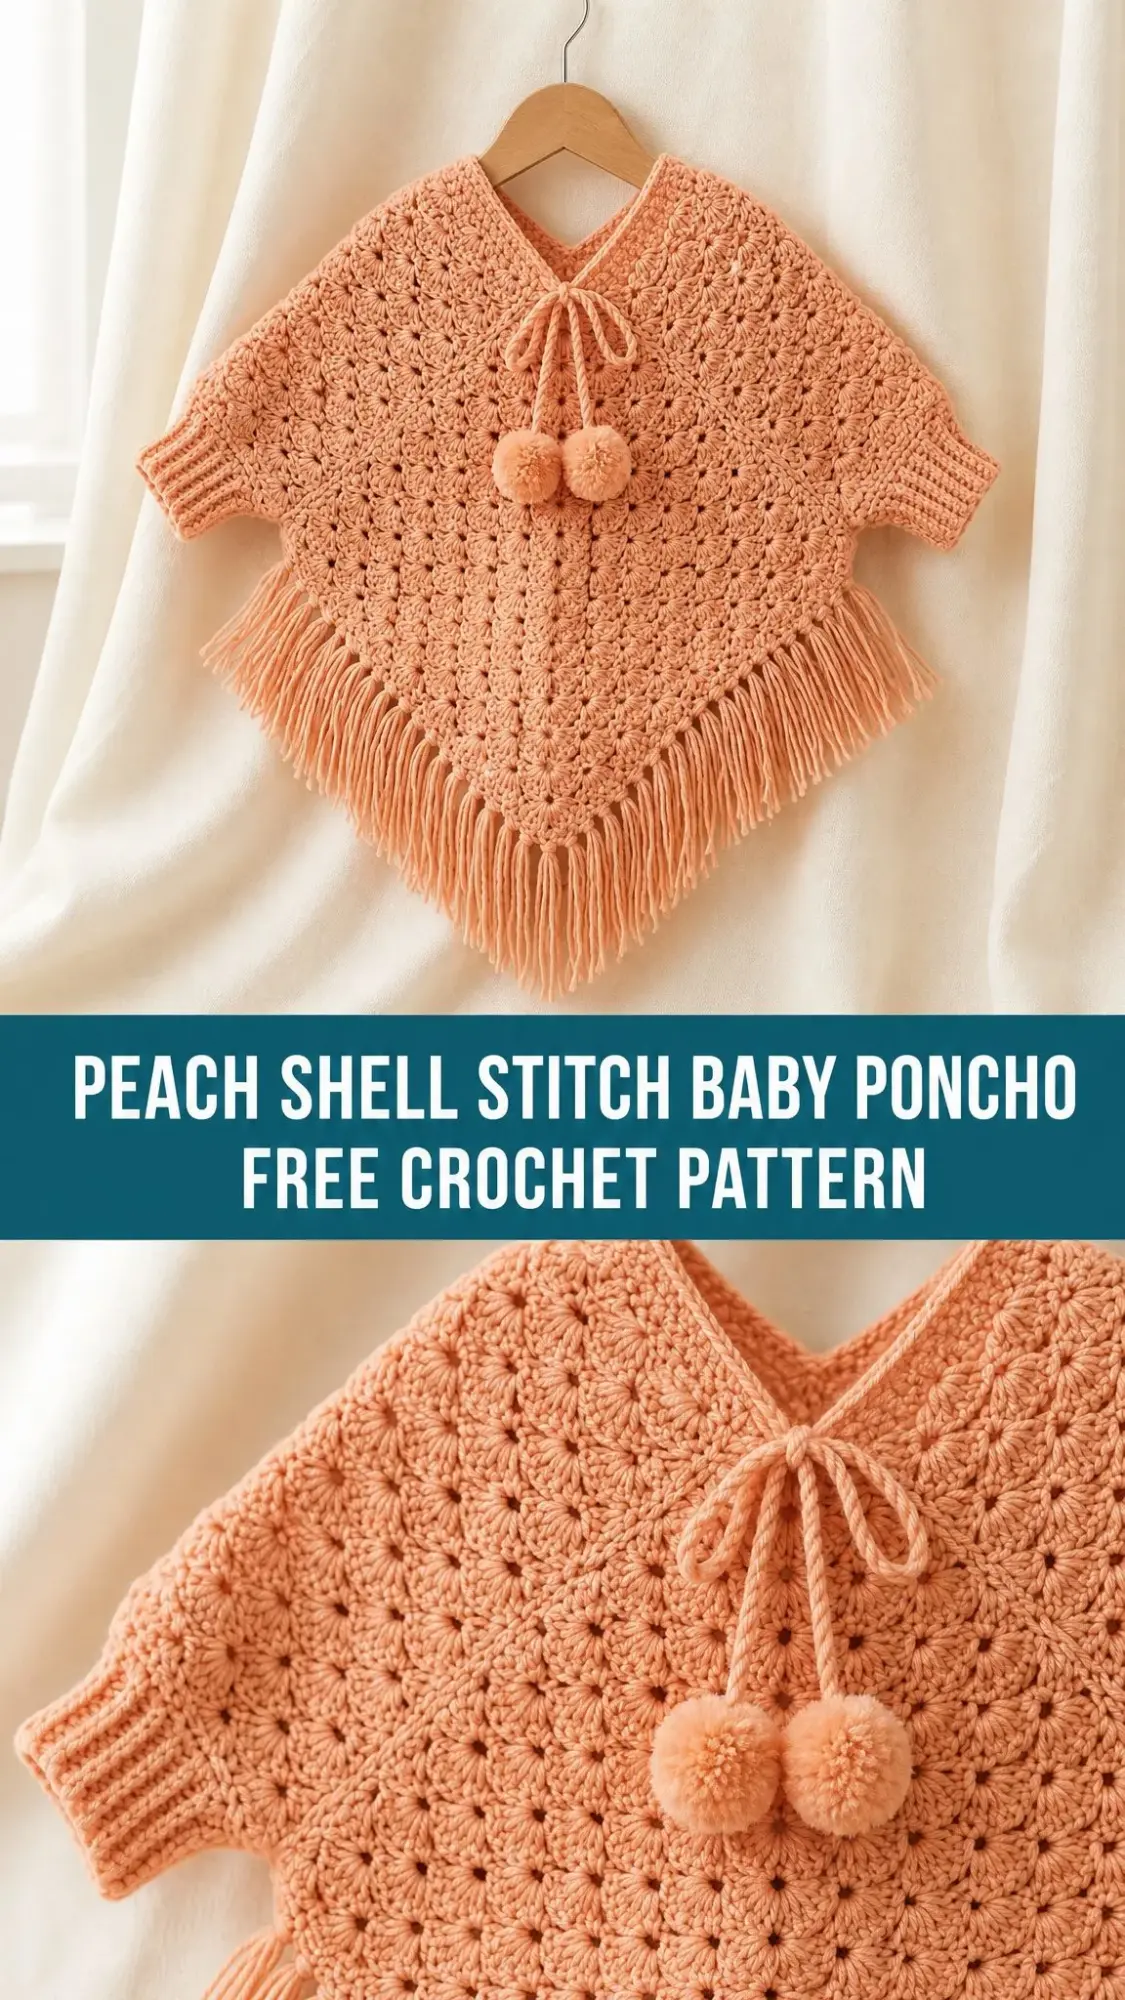
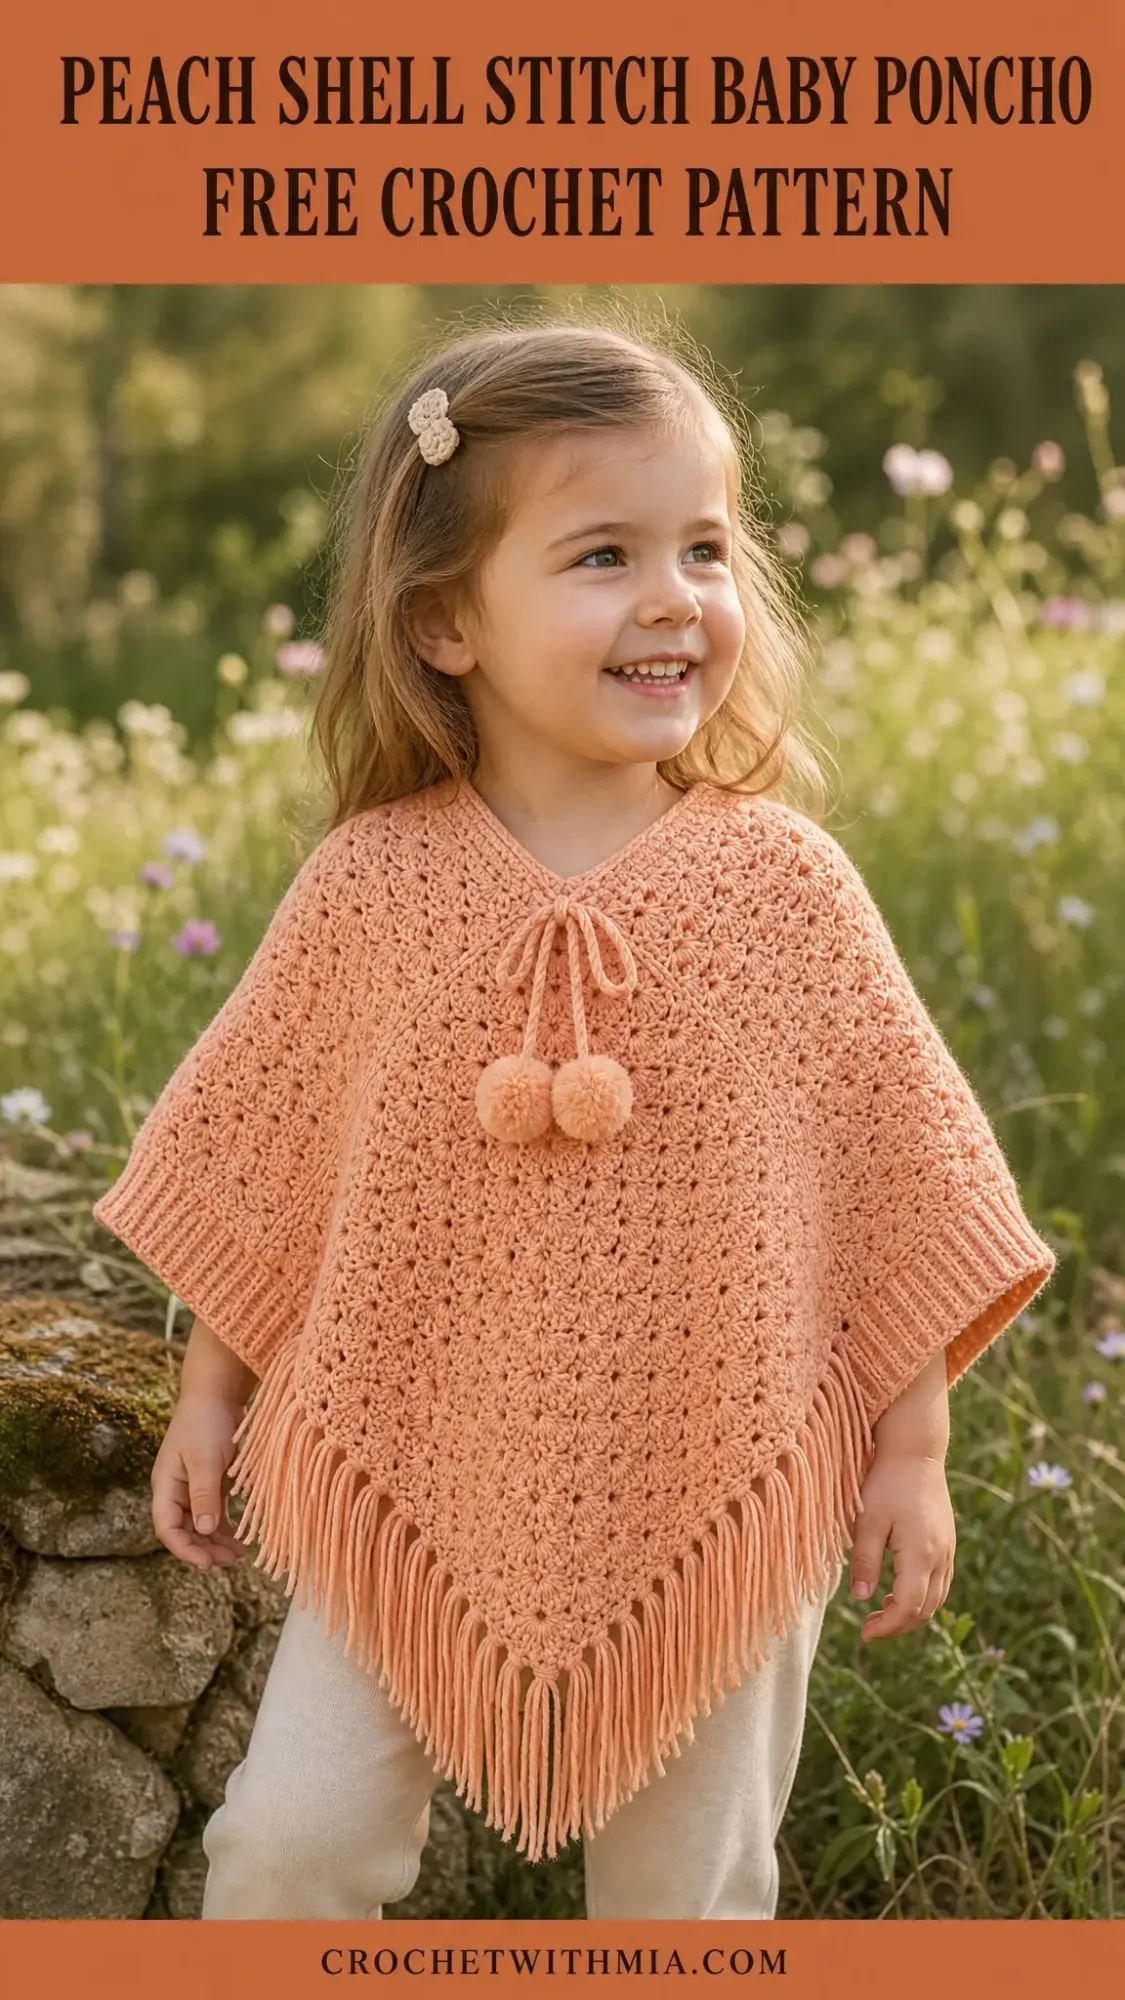
I also really wanted this piece to feel like a complete garment, not just a simple rectangle with a hole cut in it. So I built in proper shoulder shaping, cute little ribbed sleeve cuffs, a drawstring neckline with pompoms, and that dreamy fringe along the bottom hem.
I am SO pleased with how this turned out. The peach color photographs beautifully, the construction is straightforward once you understand the panel system, and the finished poncho looks like something you would find in a boutique baby shop. Let me walk you through every single step.
What You Are Making
This baby poncho consists of two identical flat panels worked from the top down. Each panel starts narrow at the neckline and gradually widens into a triangle shape through strategic increases. You will seam these panels together at the shoulders to create the garment, then add ribbed sleeve cuffs, a neckline edging with a drawstring channel, two fluffy pompoms, and generous fringe along the entire hem.
The all-over texture comes from a classic shell stitch pattern. A shell is simply five double crochets worked into the same stitch, creating a fan-shaped cluster. These shells are separated by chain spaces and single crochets, giving the fabric that lacy, open quality you can see in the photos.
The finished poncho fits babies from newborn through 12 months depending on which size you work. The instructions below are written for the 3 to 6 month size, with notes for adjusting smaller or larger.
Skill Level
This pattern is rated intermediate. You should be comfortable with double crochet, single crochet, chain stitches, and reading row-by-row instructions with stitch counts. You will also need to manage increasing stitch counts across multiple rows, seam two panels together, and pick up stitches to work ribbed cuffs.
If you have made a few blankets and maybe a simple garment or two, you are ready for this project. The shell stitch repeat is actually quite rhythmic once you get into it.
Time Estimate
Plan for 8 to 12 hours of work for an experienced intermediate crocheter. This includes both panels, seaming, sleeve cuffs, neckline finishing, fringe attachment, and pompom making. Allow extra time for blocking and assembly if this is your first garment project.
Finished Measurements
Newborn to 3 months: Chest circumference approximately 16 inches (41 cm), length from shoulder to hem point approximately 10 inches (25 cm) excluding fringe.
3 to 6 months: Chest circumference approximately 18 inches (46 cm), length approximately 11 inches (28 cm) excluding fringe.
6 to 12 months: Chest circumference approximately 20 inches (51 cm), length approximately 12 inches (30 cm) excluding fringe.
Materials Needed
Yarn: Worsted weight yarn (weight category 4), approximately 300 to 350 yards (275 to 320 meters) total in one color. The sample is worked in a solid warm peach with no color changes.
Hook: US size I-9 / 5.5 mm crochet hook, or whatever size you need to match gauge.
Notions: Yarn needle for seaming and weaving ends, scissors, 4 stitch markers, cardboard or pompom maker for two pompoms (finished at approximately 1.5 inches / 4 cm diameter), measuring tape.
Yarn Suggestions
Lion Brand Pound of Love (worsted, 100% acrylic, 1020 yards per 16 oz skein) gives you plenty of yardage for all sizes plus fringe. The soft finish works beautifully for baby garments and holds stitch definition well.
Paintbox Yarns Simply DK used at a slightly looser tension can achieve worsted gauge nicely. This smooth, plied yarn produces crisp shell stitch detail and is machine washable.
Drops Safran (DK weight, 100% cotton) works well at worsted gauge on a 5.5 mm hook. The cotton adds breathability, which is perfect for a layering piece.
Choose any smooth, plied yarn in your preferred fiber. Avoid heavily textured or variegated yarns because they will hide the pretty shell stitch detail.
Gauge
In shell stitch pattern: 4 shell repeats equals approximately 4.5 inches (11.5 cm) wide. 5 rows of shell pattern equals approximately 3 inches (7.5 cm) tall.
Alternatively, in single crochet (sc): 14 stitches by 8 rows equals a 4 inch (10 cm) square using the same hook.
Gauge matters here. This is a fitted baby garment, not a blanket where a little variation is fine. Please swatch before starting.
Abbreviations
Let me define every abbreviation you will encounter. I am using US crochet terms throughout.
beg = beginning
ch = chain. This is wrapping your yarn over the hook and pulling through the loop on your hook to create a new loop.
ch-sp = chain space. The gap created by a chain in a previous row, which you will work into.
dc = double crochet. Yarn over, insert hook, yarn over and pull up a loop (3 loops on hook), yarn over and pull through 2 loops (2 loops remain), yarn over and pull through final 2 loops.
hdc = half double crochet. Yarn over, insert hook, yarn over and pull up a loop (3 loops on hook), yarn over and pull through all 3 loops at once.
rep = repeat
RS = right side (the front of your work)
sc = single crochet. Insert hook, yarn over and pull up a loop (2 loops on hook), yarn over and pull through both loops.
sk = skip
sl st = slip stitch. Insert hook, yarn over and pull through both the stitch and the loop on your hook in one motion.
sp = space
st(s) = stitch(es)
t-ch = turning chain
WS = wrong side (the back of your work)
yo = yarn over
BLO = back loop only. Instead of inserting your hook under both loops at the top of a stitch, you only go under the back loop.
Special Stitches
Shell Stitch: Work 5 dc all into the same stitch or space. This creates that beautiful fan shape you see repeated across the poncho body.
V-Stitch (V-st): Work (dc, ch 2, dc) all into the same stitch or space. This stitch appears at the central spine of each panel and marks where your increases happen.
Beginning Shell (beg-shell): Chain 3 (this counts as your first dc), then work 4 dc into the same stitch or space. Use this when a shell falls at the turning edge of a row.
Fringe: Cut yarn strands approximately 10 inches (25.5 cm) long. Use 8 strands per fringe bundle. Fold the bundle in half, insert the folded loop through a hem stitch from front to back, pull the cut ends through the loop, and tighten. Trim everything even after all fringe is attached.
Pattern Notes Before You Begin
Read through these notes. They will save you confusion later.
1. You are making two identical panels worked flat. Both start at the neck edge and work downward. Keep your right side facing up when you seam them together.
2. Each panel begins with a foundation chain that forms one side of the V-neckline. The V-stitch at the center of every row is your spine increase that creates the triangular shape.
3. Your turning chain of 3 counts as the first double crochet throughout all body rows. At the start of every row, chain 3, turn, then work your remaining stitches.
4. For the sleeve seam, you will join approximately 5 rows (about 3 inches / 7.5 cm) along the upper side edges. Leave the remaining side edges open.
5. Fringe goes along the full lower hem edge after both panels are joined and blocked.
6. Pompoms are made separately and attached to the drawstring ends.
Panel Instructions (Make 2)
Shoulder Section (Rows 1 through 6)
This solid double crochet section creates the shoulder area and will be partially seamed.
Row 1 (RS): Ch 5. Dc in 4th ch from hook and in last ch. Turn. (3 dc)
The chain 3 at the beginning counts as your first dc.
Row 2 (WS): Ch 3, turn. Dc in same st (increase made), dc in next dc, 2 dc in top of t-ch (increase made). Turn. (5 dc)
Row 3 (RS): Ch 3, turn. Dc in same st (increase), dc in each dc across to last st, 2 dc in last st (increase). Turn. (7 dc)
Row 4 (WS): Ch 3, turn. Dc in same st (increase), dc in each dc across to last st, 2 dc in last st (increase). Turn. (9 dc)
Row 5 (RS): Ch 3, turn. Dc in same st (increase), dc in each dc across to last st, 2 dc in last st (increase). Turn. (11 dc)
Row 6 (WS): Ch 3, turn. Dc in same st (increase), dc in each dc across to last st, 2 dc in last st (increase). Turn. (13 dc)
Checkpoint: Your shoulder section should measure approximately 3 inches (7.5 cm) tall and approximately 4 inches (10 cm) wide. This solid dc area forms the shoulder and sleeve region.
Body Section with Shell Stitch (Rows 7 onward)
Now you will transition into the beautiful shell stitch pattern. With 13 dc after row 6, you have the perfect stitch count for 2 full shell repeats per row (13 equals 6 times 2 plus 1).
Row 7 (RS, begin shell pattern): Ch 1, turn. Sc in first dc. (Ch 2, sk 2 dc, shell of 5 dc in next dc, ch 2, sk 2 dc, sc in next dc) across. Last sc falls in top of t-ch. Turn. (2 shells, 3 sc)
Row 8 (WS): Ch 6 (counts as dc plus ch 2, creating an edge extension increase). Turn. Sc in first sc. (Shell in next ch-2 sp, ch 2, sc in 3rd dc of shell, ch 2) across to last sc. Shell in last sc. Ch 2, dc in last sc (edge increase). Turn. (3 shells plus 2 edge dc plus 2 ch-2 sps at edges)
The ch-6 at the start creates a new ch-2 edge space and dc, adding one shell position at the right edge. The dc at the end mirrors this at the left edge.
Row 9 (RS): Ch 1, turn. Sc in first dc (of edge dc). Ch 2, shell in ch-2 sp at edge, ch 2, sc in 3rd dc of first shell. (Ch 2, shell in next ch-2 sp, ch 2, sc in 3rd dc of shell) across to last ch-2 sp. Ch 2, shell in last ch-2 sp, ch 2, sc in top of t-ch. Turn. (4 shells, 5 sc)
Row 10 (WS): Ch 6, turn. Sc in first sc. (Shell in next ch-2 sp, ch 2, sc in 3rd dc of shell, ch 2) across to last sc. Shell in last sc. Ch 2, dc in last sc. Turn. (5 shells plus 2 edge dcs)
Row 11 (RS): Ch 1, turn. Sc in first dc. Ch 2, shell in ch-2 sp, ch 2, sc in 3rd dc of first shell. (Ch 2, shell in next ch-2 sp, ch 2, sc in 3rd dc of shell) across to last ch-2 sp. Ch 2, shell in last ch-2 sp, ch 2, sc in top of t-ch. Turn. (6 shells, 7 sc)
Row 12 (WS): Ch 6, turn. Sc in first sc. (Shell in next ch-2 sp, ch 2, sc in 3rd dc of shell, ch 2) across to last sc. Shell in last sc. Ch 2, dc in last sc. Turn. (7 shells plus 2 edge dcs)
Row 13 (RS): Ch 1, turn. Sc in first dc. Ch 2, shell in ch-2 sp, ch 2, sc in 3rd dc of shell. (Ch 2, shell in next ch-2 sp, ch 2, sc in 3rd dc of shell) across to last ch-2 sp. Ch 2, shell in last ch-2 sp, ch 2, sc in top of t-ch. Turn. (8 shells, 9 sc)
Row 14 (WS): Ch 6, turn. Sc in first sc. (Shell in next ch-2 sp, ch 2, sc in 3rd dc of shell, ch 2) across to last sc. Shell in last sc. Ch 2, dc in last sc. Turn. (9 shells plus 2 edge dcs)
Row 15 (RS): Ch 1, turn. Sc in first dc. Ch 2, shell in ch-2 sp, ch 2, sc in 3rd dc of shell. (Ch 2, shell in next ch-2 sp, ch 2, sc in 3rd dc of shell) across to last ch-2 sp. Ch 2, shell in last ch-2 sp, ch 2, sc in top of t-ch. Turn. (10 shells, 11 sc)
Checkpoint: After row 15, each panel should measure approximately 9 inches (23 cm) wide at the widest point and approximately 8 inches (20 cm) tall. The shell stitch pattern should be clearly visible in fans across the fabric.
Row 16 (WS, final body row): Ch 6, turn. Sc in first sc. (Shell in next ch-2 sp, ch 2, sc in 3rd dc of shell, ch 2) across to last sc. Shell in last sc. Ch 2, dc in last sc. Turn. (11 shells plus 2 edge dcs)
Row 17 (RS, hem row): Ch 1, turn. Sc in first dc. Ch 2, shell in ch-2 sp, ch 2, sc in 3rd dc of shell. (Ch 2, shell in next ch-2 sp, ch 2, sc in 3rd dc of shell) across to last ch-2 sp. Ch 2, shell in last ch-2 sp, ch 2, sc in top of t-ch. Turn. (12 shells, 13 sc)
Fasten off. Weave in ends on this panel.
Repeat all rows 1 through 17 for the second panel. Do not fasten off the second panel if you want to continue directly to joining.
Final Checkpoint: Both panels are complete. Each should be a rough right triangle with the narrowest point at the top (neckline corner) and the widest straight edge at the bottom (hem). Each panel is approximately 9 inches (23 cm) along the hem edge and 11 inches (28 cm) along the longest slanted side edge.
Joining the Panels
Hold both panels with right sides facing up. Align the panels so the straight top edges (rows 1 through 6, the shoulder section) of each panel are placed together.
Shoulder Seam: Using your yarn needle and mattress stitch (or slip stitch seam with your hook), join the two panels along the first 6 rows of each straight side edge. This creates the shoulder seam and forms the neck opening between the two V-shaped neckline edges. The joined shoulder seam on each side measures approximately 3 inches (7.5 cm).
Sleeve Seam: After the shoulder join, continue seaming approximately 2 inches (5 cm) down each side edge into the shell stitch section (approximately rows 7 through 9). This closes the sleeve tube. Leave the remainder of the side edges open. These open edges form the sides of the poncho and hang loose.
Fasten off and weave in all seaming ends.
Sleeve Cuffs (Make 2)
With right side facing and working along the open end of each sleeve tube, join yarn at the seam.
Rnd 1: Ch 1, sc evenly around the sleeve opening, placing approximately 24 sc total. Join with sl st to first sc. (24 sc)
Adjust your sc count to the nearest even number if needed. 24 sc divides evenly for ribbing.
The cuff is worked back and forth in rows (not rounds) to create a flat ribbed band.
Row 1 (RS): Ch 8. Hdc in 3rd ch from hook and in each ch across. Sl st in next 2 sc of sleeve opening to anchor. Turn. (6 hdc)
Row 2 (WS): Ch 2, turn. Hdc in back loop only (BLO) of each hdc across. Do not sl st. Turn. (6 hdc)
Row 3: Ch 2, turn. Hdc in BLO across. Sl st in next 2 sc of sleeve opening. Turn. (6 hdc)
Repeat rows 2 and 3, anchoring 2 sc of the sleeve opening every RS row, until all 24 sc have been attached (approximately 12 RS rows total). Join the short ends of the ribbing strip with a sl st or mattress stitch seam.
Fasten off. Repeat for second sleeve.
Neckline Edging and Drawstring
With right side facing, join yarn at right shoulder seam.
Rnd 1: Ch 1, sc evenly around the entire neckline V-shaped opening. Place approximately 2 sc per row along each slanted edge, working into row ends. At the inner point of each V, work 3 sc in the bottom corner space to keep the neckline flat. Join with sl st to first sc. Do not fasten off.
Rnd 2 (drawstring channel): Ch 3, (dc, ch 1) evenly around neckline, keeping total a multiple of 2. Join with sl st to top of beg ch-3.
Drawstring: Cut a length of yarn approximately 36 inches (91 cm). Thread onto yarn needle and weave in and out through ch-1 sps of rnd 2 all the way around the neckline. Pull both ends out at the center front of the neckline V.
Tie an overhand knot at each end of the drawstring to secure, then attach one pompom to each end.
Pompoms (Make 2)
Wrap yarn approximately 60 times around a 1.5 inch (4 cm) wide piece of cardboard (or use a pompom maker). Slide wraps off cardboard and tie tightly around center with a 12 inch (30 cm) length of yarn. Cut loops on both sides. Trim to a round shape, leaving the tie ends long for attaching.
Attach one pompom to each end of the drawstring by threading the tie ends through the knot and tying securely.
Fringe
Cut yarn strands 10 inches (25.5 cm) long. Use 8 strands per fringe bundle.
Attach fringe evenly across the entire hem edge of both panels combined (the lower hem forms a V-shape when the poncho is laid flat). Space bundles approximately every other shell or every ch-2 sp along the hem. Trim all fringe to even length after attaching. Finished fringe should be approximately 4 inches (10 cm) after folding and knotting.
Size Customization Tips
For newborn to 3 months: Work only to row 15 (10 shells) and skip rows 16 and 17. Reduce sleeve seam length to approximately 1.5 inches (4 cm). Work shoulder section rows 1 through 5 only.
For 6 to 12 months: After row 17, work 2 more WS extension rows (rows 18 and 19) following the established pattern of ch 6 starts and edge increases. This adds approximately 1 inch to the length and 2 more shells to the width.
Finishing and Care
Block your completed poncho before attaching fringe. Wet blocking works well for most fibers. Lay flat, gently stretch to measurements, and allow to dry completely.
For washing, check your yarn label. Most worsted weight acrylics are machine washable on gentle cycle. Cotton and cotton blends may need hand washing. Store flat or loosely folded to maintain the shell stitch texture.
Troubleshooting Tips
Panels curling at edges: This is normal for shell stitch fabric. Blocking will relax the curl significantly.
Stitch count seems off: Count your shells at the end of each row. You should gain one shell per side every two rows in the body section.
Shoulder seam too tight: Use a slightly larger hook for seaming, or try a looser mattress stitch technique.
Sleeve cuff won’t fit: Adjust your sc count in rnd 1 to fit your actual sleeve opening. The ribbing will stretch slightly.
I hope you love making this sweet little poncho as much as I enjoyed designing it. The shell stitch creates such a pretty texture, and those pompoms on the drawstring add the perfect finishing touch. This makes a beautiful baby shower gift or a special handmade piece for your own little one.
If you found this pattern helpful, I would love it if you saved it to your Pinterest boards so you can find it easily later. And please drop a comment below if you make one. I always enjoy seeing your finished projects and hearing which color you chose!