
When I sat down to design this butterfly, I had a very specific vision in mind. I wanted something delicate enough to look almost like jewelry, but substantial enough to show off beautiful crochet stitches. I spent hours playing with color combinations until I landed on this mint and blush pairing, and honestly, I am SO thrilled with how it turned out.
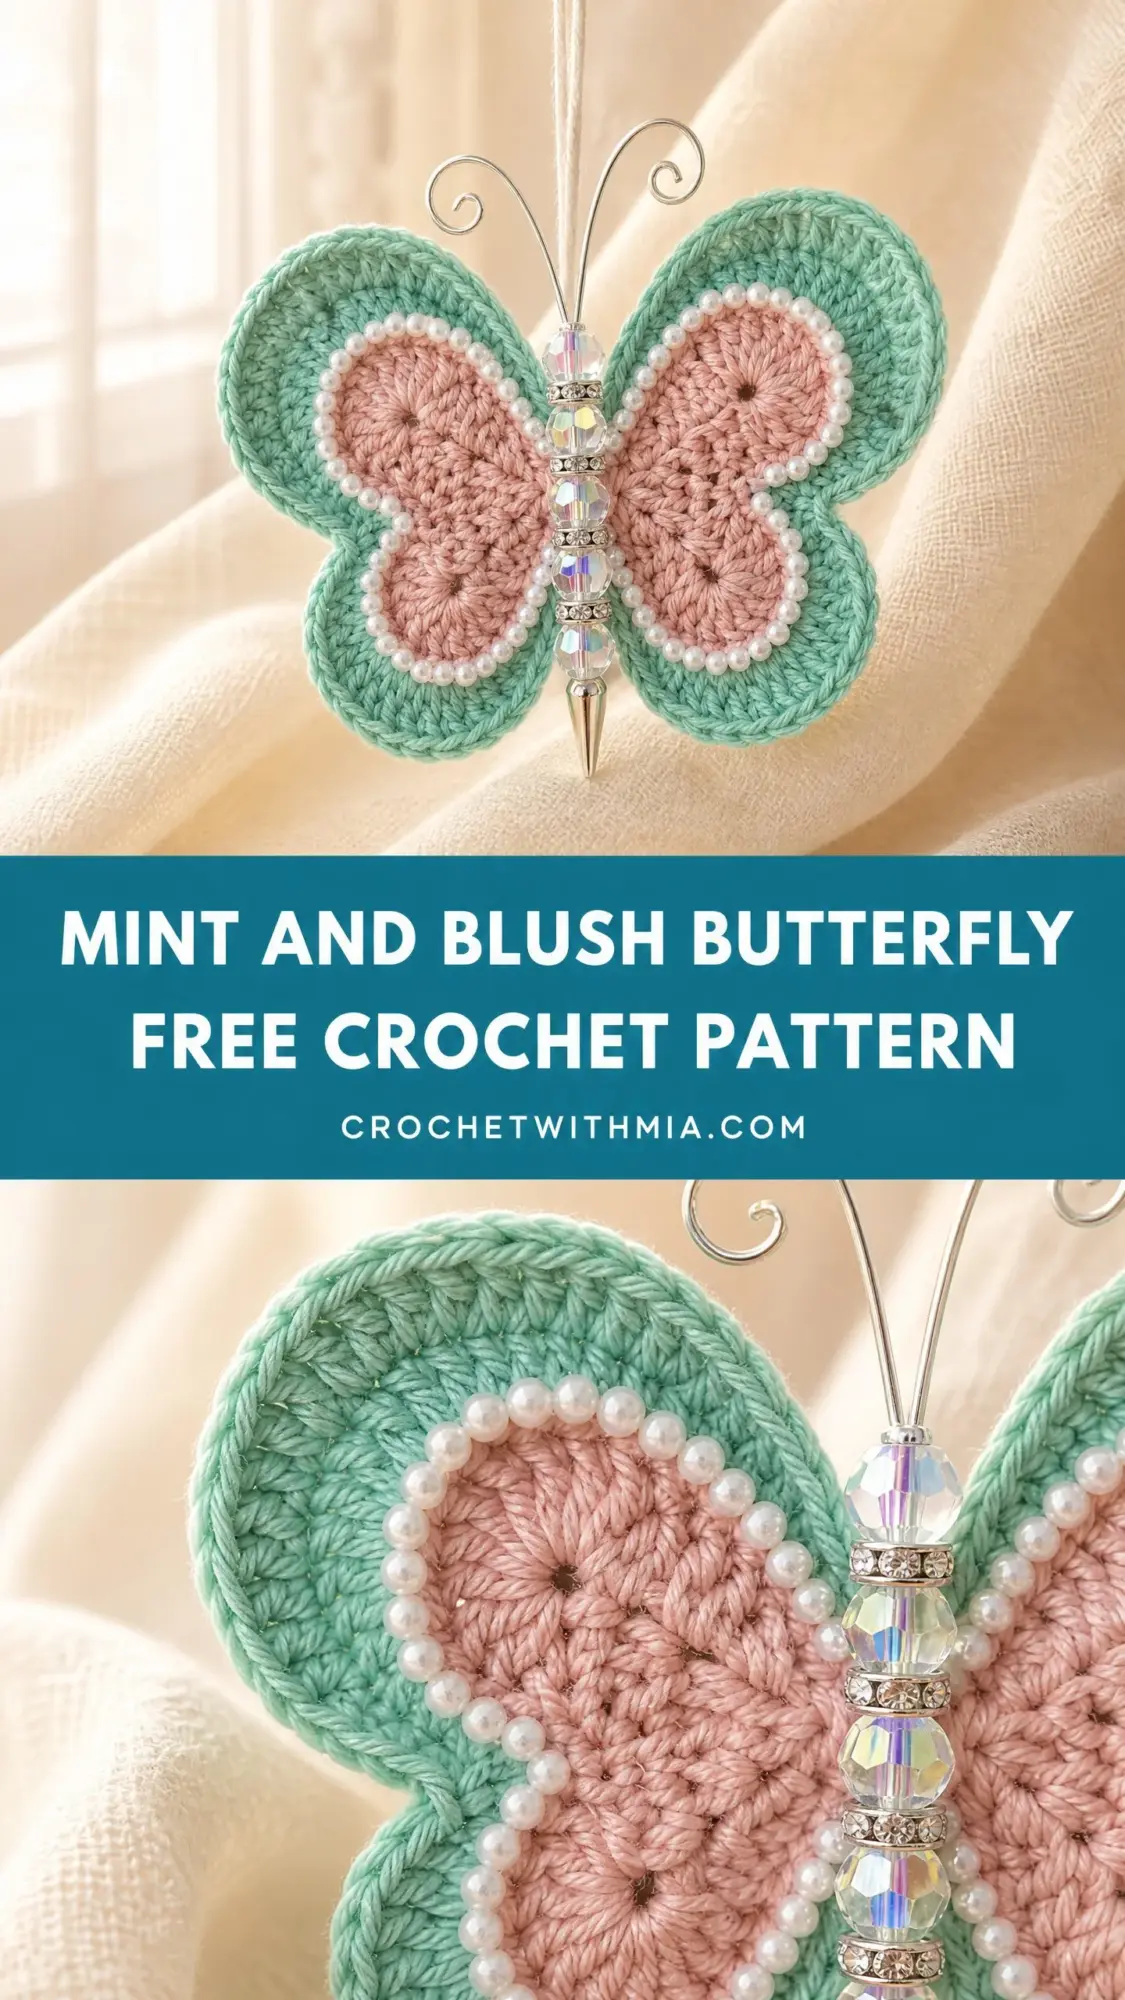
The double-layered construction was a deliberate choice because I wanted both sides to look equally polished. No wrong side showing here. The pearl bead edging and crystal body take this from a simple crochet motif to something truly special.
Whether you display it on a shelf, attach it to a gift, or turn it into a brooch, this little butterfly packs a serious wow factor. Let me walk you through every single step.
About This Crochet Butterfly Pattern
This decorative butterfly combines classic crochet techniques with beautiful embellishments for a finished piece that looks far more complex than it actually is. The construction method is clever but approachable. You will create eight separate wing motifs, layer them in pairs, then assemble everything around a sparkling beaded body.
The finished butterfly measures approximately 3.5 inches wide by 2.75 inches tall, not including the wire antennae. Those curly antennae add another 1.5 inches to the total height. It fits perfectly in the palm of your hand and makes an absolutely stunning decorative accent.
I would rate this pattern as intermediate level. You should feel comfortable working in continuous rounds, joining motifs together, and handling small embellishments like beads and wire. Nothing here is technically difficult, but neat tension and careful finishing will make all the difference in your final piece.
Plan for about 4 to 6 hours of work time if you are an experienced crocheter. This includes all the finishing touches and bead work.
Materials You Will Need
Gathering your supplies before you start will make this project so much more enjoyable. Here is everything you need.
Yarn:
Hook:
Notions:
Yarn Suggestions
Choosing the right yarn matters for small decorative pieces like this. You want smooth cotton or cotton-blend yarns with excellent stitch definition. Avoid fuzzy or hairy yarns because the stitches will get lost at this small scale.
Here are my top recommendations:
DMC Natura Just Cotton in N49 Turquoise or N76 Bamboo for Color A, and N06 Rose Layette for Color B. This yarn has wonderful stitch definition and comes in a gorgeous color range.
Scheepjes Catona in color 397 Old Green or 385 Crystalline for Color A, and color 238 Powder Pink for Color B. The mercerized finish gives a beautiful sheen that is perfect for decorative projects.
Paintbox Yarns Cotton Fingering in Spearmint for Color A and Vintage Pink for Color B. This option is widely available and budget-friendly.
Gauge Information
Using a US B-1 (2.25 mm) hook with fingering weight cotton yarn:
Here is the good news. Gauge does not need to be exact for this decorative project. However, your wing pairs absolutely must match each other so they layer together cleanly. Consistency is more important than hitting a specific measurement.
Abbreviations and Stitch Definitions
Let me walk you through every abbreviation used in this pattern. If you are newer to crochet, read through this section carefully before starting.
Special Stitches
Joining sc (joining single crochet): Instead of slip stitching to close a round, insert your hook into the first single crochet of the round, yarn over, pull up a loop, yarn over, pull through both loops. This creates a neater, less visible join.
Shell stitch: Work (2 dc, ch 1, 2 dc) all into the same stitch or space.
Important Pattern Notes Before You Begin
Please read through these notes before picking up your hook. Understanding the construction will make everything easier.
1. The butterfly consists of eight crocheted wing pieces total: two upper wing motifs and two lower wing motifs for the right side, plus two upper wing motifs and two lower wing motifs for the left side. The right side faces outward on both the top and bottom of each wing sandwich.
2. Wing motifs for the right and left sides are identical in construction. The wings are mirrored when assembled, not when crocheted.
3. Work all rounds on the right side. Do not turn unless instructed.
4. Each wing pair (front and back) is slip stitched together around the outer edge with Color A after the Color B motif center is complete. This creates a clean double-layered wing.
5. The pearl bead border is sewn around the inner edge of the Color A section (the border between Color A and Color B) on the front-facing side only after assembly.
6. Fasten off and weave in all ends before assembling wings together.
7. The body of the butterfly is a pre-assembled or purchased beaded pen or decorative skewer. The wings are glued and sewn to the body at the center join point.
Step by Step Crochet Pattern Instructions
Now for the fun part. Follow these instructions carefully, and you will have a beautiful butterfly in no time.
Upper Wing Motif
Make 4 total (two for the right upper wing, two for the left upper wing).
Begin with Color B.
Round 1: Make a MR. Ch 3 (counts as first dc), work 11 dc into the MR. Pull ring closed. Join to top of ch-3 with sl st. (12 dc)
Round 2: Ch 3 (counts as first dc), dc in same st. 2 dc in each st around. Join to top of ch-3 with sl st. (24 dc)
Round 3: Ch 3 (counts as first dc), dc in same st. Dc in next st. (2 dc in next st, dc in next st) rep around. Join to top of ch-3 with sl st. (36 dc)
Fasten off Color B. Join Color A with sl st to any st.
Round 4: Ch 1. Sc in same st. Sc in each st around. Join with sl st to first sc. (36 sc)
Round 5: Ch 1. (Sc in next 2 sts, 2 sc in next st) rep around. Join with sl st to first sc. (48 sc)
Round 6: Ch 1. Sc in each st around. Join with sl st to first sc. (48 sc)
Fasten off and weave in ends.
Checkpoint: Each completed upper wing motif should measure approximately 1.4 inches (3.5 cm) in diameter and lie completely flat. If your motif is cupping or ruffling, adjust your tension and try again.
Lower Wing Motif
Make 4 total (two for the right lower wing, two for the left lower wing).
Begin with Color B.
Round 1: Make a MR. Ch 3 (counts as first dc), work 11 dc into the MR. Pull ring closed. Join to top of ch-3 with sl st. (12 dc)
Round 2: Ch 3 (counts as first dc), dc in same st. 2 dc in each st around. Join to top of ch-3 with sl st. (24 dc)
Fasten off Color B. Join Color A with sl st to any st.
Round 3: Ch 1. Sc in same st. Sc in each st around. Join with sl st to first sc. (24 sc)
Round 4: Ch 1. (Sc in next st, 2 sc in next st) rep around. Join with sl st to first sc. (36 sc)
Fasten off and weave in ends.
Checkpoint: Each completed lower wing motif should measure approximately 1 inch (2.5 cm) in diameter and lie completely flat.
Joining Wing Pairs to Create Double-Layered Wings
You will create four wing sandwiches: right upper, right lower, left upper, and left lower.
For each pair, hold two matching motifs together with wrong sides facing each other (right sides facing outward on both sides). Using Color A and your crochet hook, slip stitch through both layers around the entire outer edge. Insert your hook through corresponding stitches of both layers simultaneously. Work 1 slip stitch into each stitch around.
Important: Leave a small opening of approximately 4 to 6 stitches unworked at one point on each upper wing and one point on each lower wing. These open sections will be the points where the wings meet the body at the center seam. Do not close these sections yet. You will use them for positioning during assembly.
After joining, gently steam or spray block each wing sandwich flat. Allow to dry fully before proceeding.
Assembly Instructions
Step 1: Prepare the Body
If you are using a purchased decorative beaded pen or skewer, make sure it is approximately 3 inches long with a pointed tip at the base and crystal beads at the top (which will become the butterfly’s head area).
If building your own body, thread silver rhinestone rondelles and iridescent AB crystal beads onto a headpin in the following order from top to bottom: one crystal bead, one rondelle spacer, one crystal bead, one rondelle spacer, one crystal bead. Add the bullet tip finding at the base and secure with pliers or glue. This forms the abdomen.
Step 2: Prepare the Antennae
Cut two pieces of 20-gauge silver craft wire, each approximately 4 inches long. Using round-nose pliers, curl one end of each wire into a tight circular spiral (approximately 3 to 4 loops). The straight end will be inserted into the top of the body bead assembly and glued in place.
Step 3: Attach Antennae to Body
Apply a small amount of jewelry glue to the straight ends of both antenna wires. Insert them side by side into the top bead finding, or secure them by wrapping around the headpin at the top of the body above the topmost bead. Allow to dry completely before handling.
Step 4: Arrange Wings on Body
Lay the body unit vertically on your work surface. Position the right upper wing sandwich on the right side of the upper body and the right lower wing sandwich on the right side of the lower body. Repeat for left upper and left lower wings. The inner straight edge of each wing (where the open stitches remain) should sit flush against the body.
Step 5: Secure Wings to Body
Apply fabric glue along the inner open edge of each wing sandwich. Press the open seam edges firmly around the body bead column. Allow to dry.
For extra security, use your yarn needle and Color A yarn to whip stitch through the open edge stitches, catching the wing fabric around the body. Fasten off and weave in ends carefully.
Step 6: Final Slip Stitch Closure
Once the wings are secured to the body, close any remaining open edge stitches on each wing sandwich by slip stitching through both layers with Color A. Fasten off invisibly and weave in all remaining ends.
Adding the Pearl Bead Edging
This step transforms your butterfly from lovely to absolutely stunning. Take your time here.
Using a sharp hand-sewing needle and white thread, sew pearl beads one at a time around the inner Color A border of each wing on the front-facing side only. Position beads along the round where Color B ends and Color A begins. For the upper wings, this is between Round 3 and Round 4. For the lower wings, this is between Round 2 and Round 3.
Space beads evenly, approximately 1 bead per stitch. Adjust as needed to achieve a smooth, continuous bead border. Knot securely at the start and end of each wing and bury the thread tail between the two wing layers so it stays hidden.
Approximate bead count per wing:
You can add an additional 12 to 20 beads along the outer wing edges if you want extra sparkle.
Size Customization Tips
Want to make your butterfly larger or smaller? Here are some easy adjustments.
To make the butterfly larger: Work the upper wing motif to Round 7 or 8 in Color A. Add one increase round by working 2 sc in every third stitch for Round 7, then one plain sc round for Round 8 before fastening off. Extend the lower wing motif by one additional round as well. Your body bead unit will need to be proportionally longer to match.
To make the butterfly smaller: Stop the upper wing motif at Round 4 (skip Rounds 5 and 6) and stop the lower wing motif at Round 3 (skip Round 4). This creates a petite miniature ornament perfect for jewelry applications like brooches or earrings.
To adjust for different yarn weight: Fingering weight gives the most detailed result. Sport weight (size 2) on a 2.75 mm hook will produce a butterfly approximately 20 to 25 percent larger. Adjust your bead quantities accordingly.
Finishing and Blocking
Proper finishing makes all the difference in how polished your butterfly looks.
Weave in all yarn ends before closing your wing sandwiches. After joining each wing pair, pin the piece flat on a foam blocking board and mist with water or fabric stiffener. Shape into a smooth circle and allow to dry completely before assembly.
This step is important because it locks the wing shape and prevents curling or warping once the butterfly is complete and on display.
Once your butterfly is fully assembled, a light mist of fabric stiffener on the completed piece (avoiding the metal components and beads) will help the wings hold their shape permanently.
Care Instructions
This butterfly is a decorative piece and is not intended for regular laundering. If cleaning becomes necessary, spot clean gently with a damp cloth and mild soap on the yarn portions only. Do not submerge in water because this may loosen the glue holding the wing assembly together.
Keep your butterfly away from prolonged direct sunlight to prevent color fading in the cotton yarn. Store flat or hanging to maintain the wing shape over time.
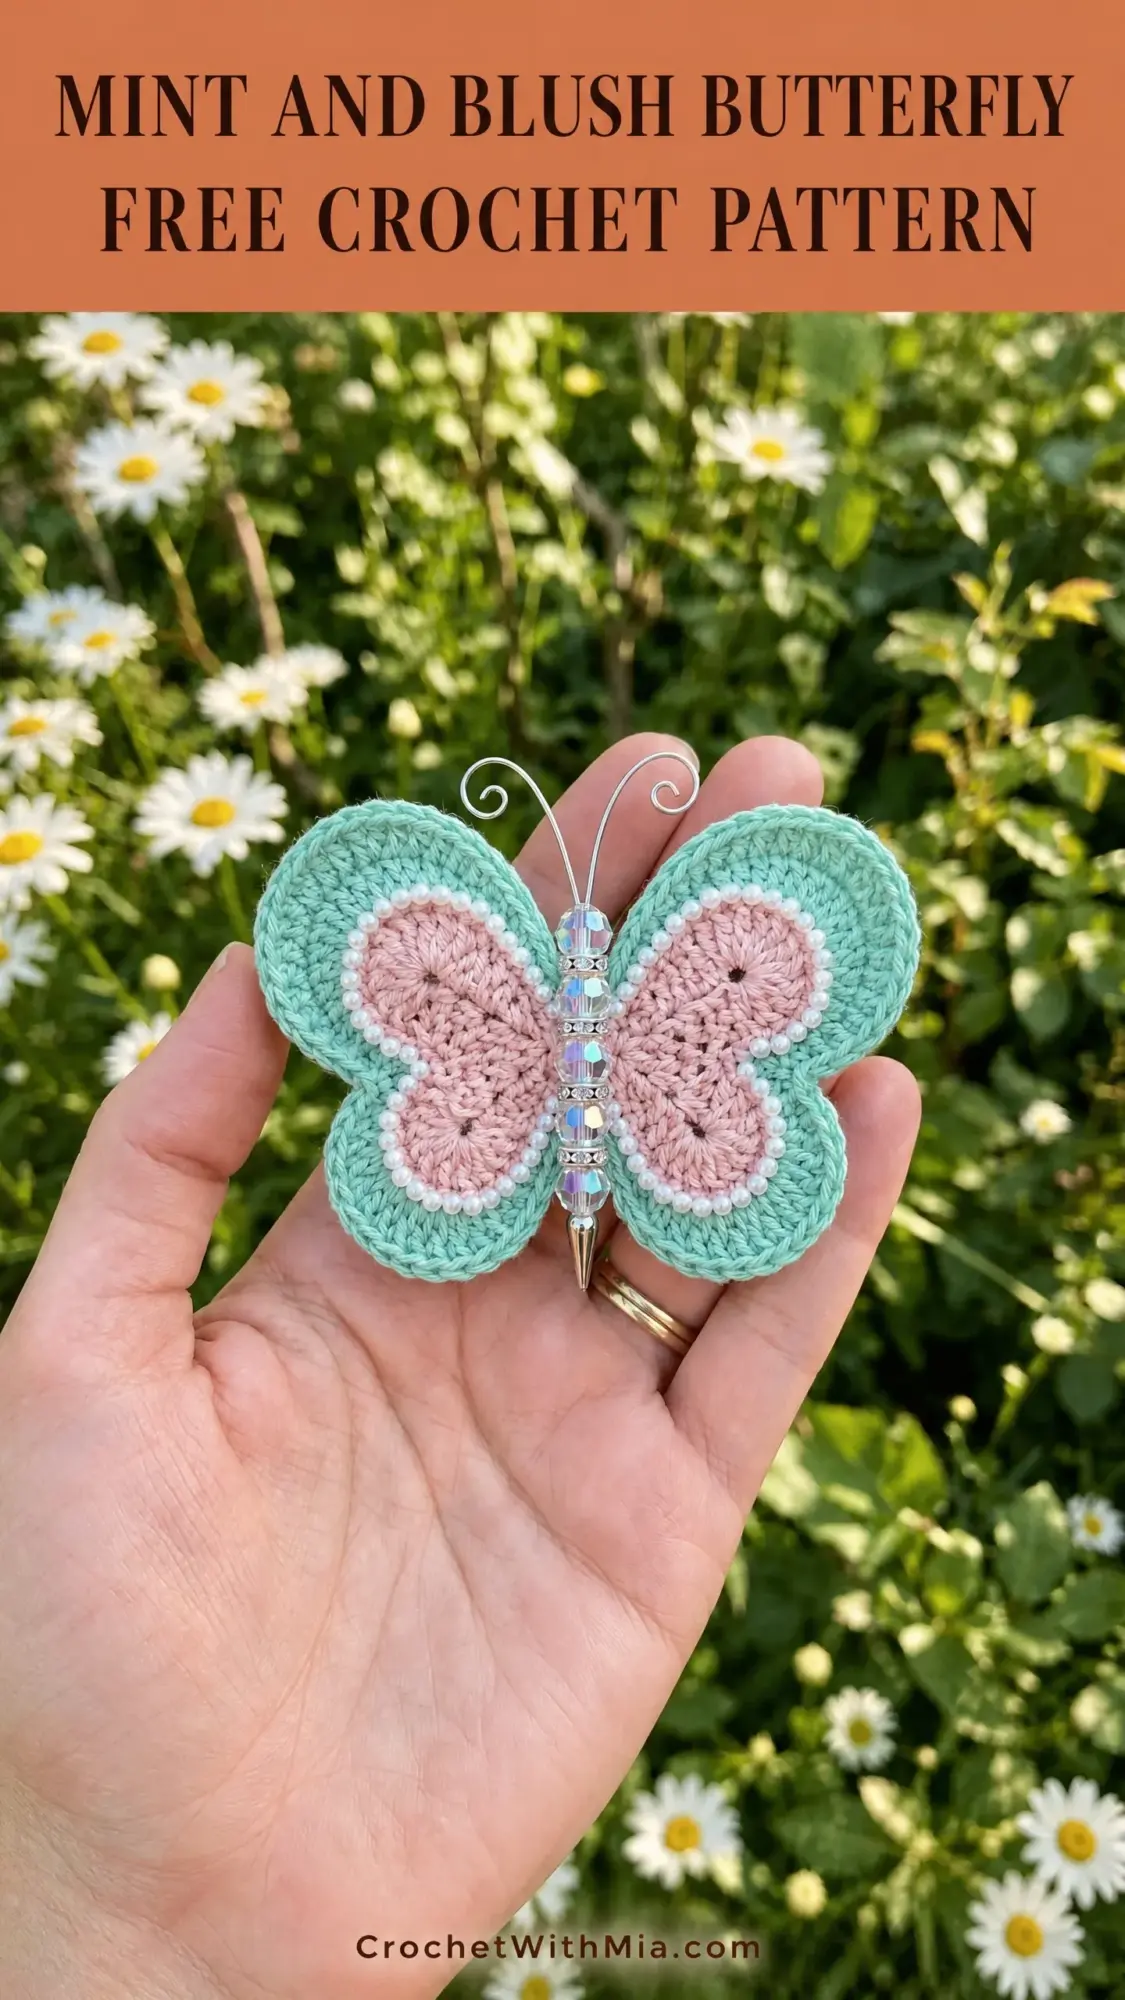
You Did It!
Thank you so much for choosing this pattern for your next crochet project. I really hope you love making this butterfly as much as I loved designing it. If you create one, I would absolutely love to see your finished piece. Tag me on Instagram or share a photo in our Facebook group. Seeing your makes truly makes my day.
If this pattern inspired you, go ahead and save it to your Pinterest boards so you can find it easily when you are ready to start. And please drop a comment below if you make one. I read every single comment and love hearing how your projects turn out!