
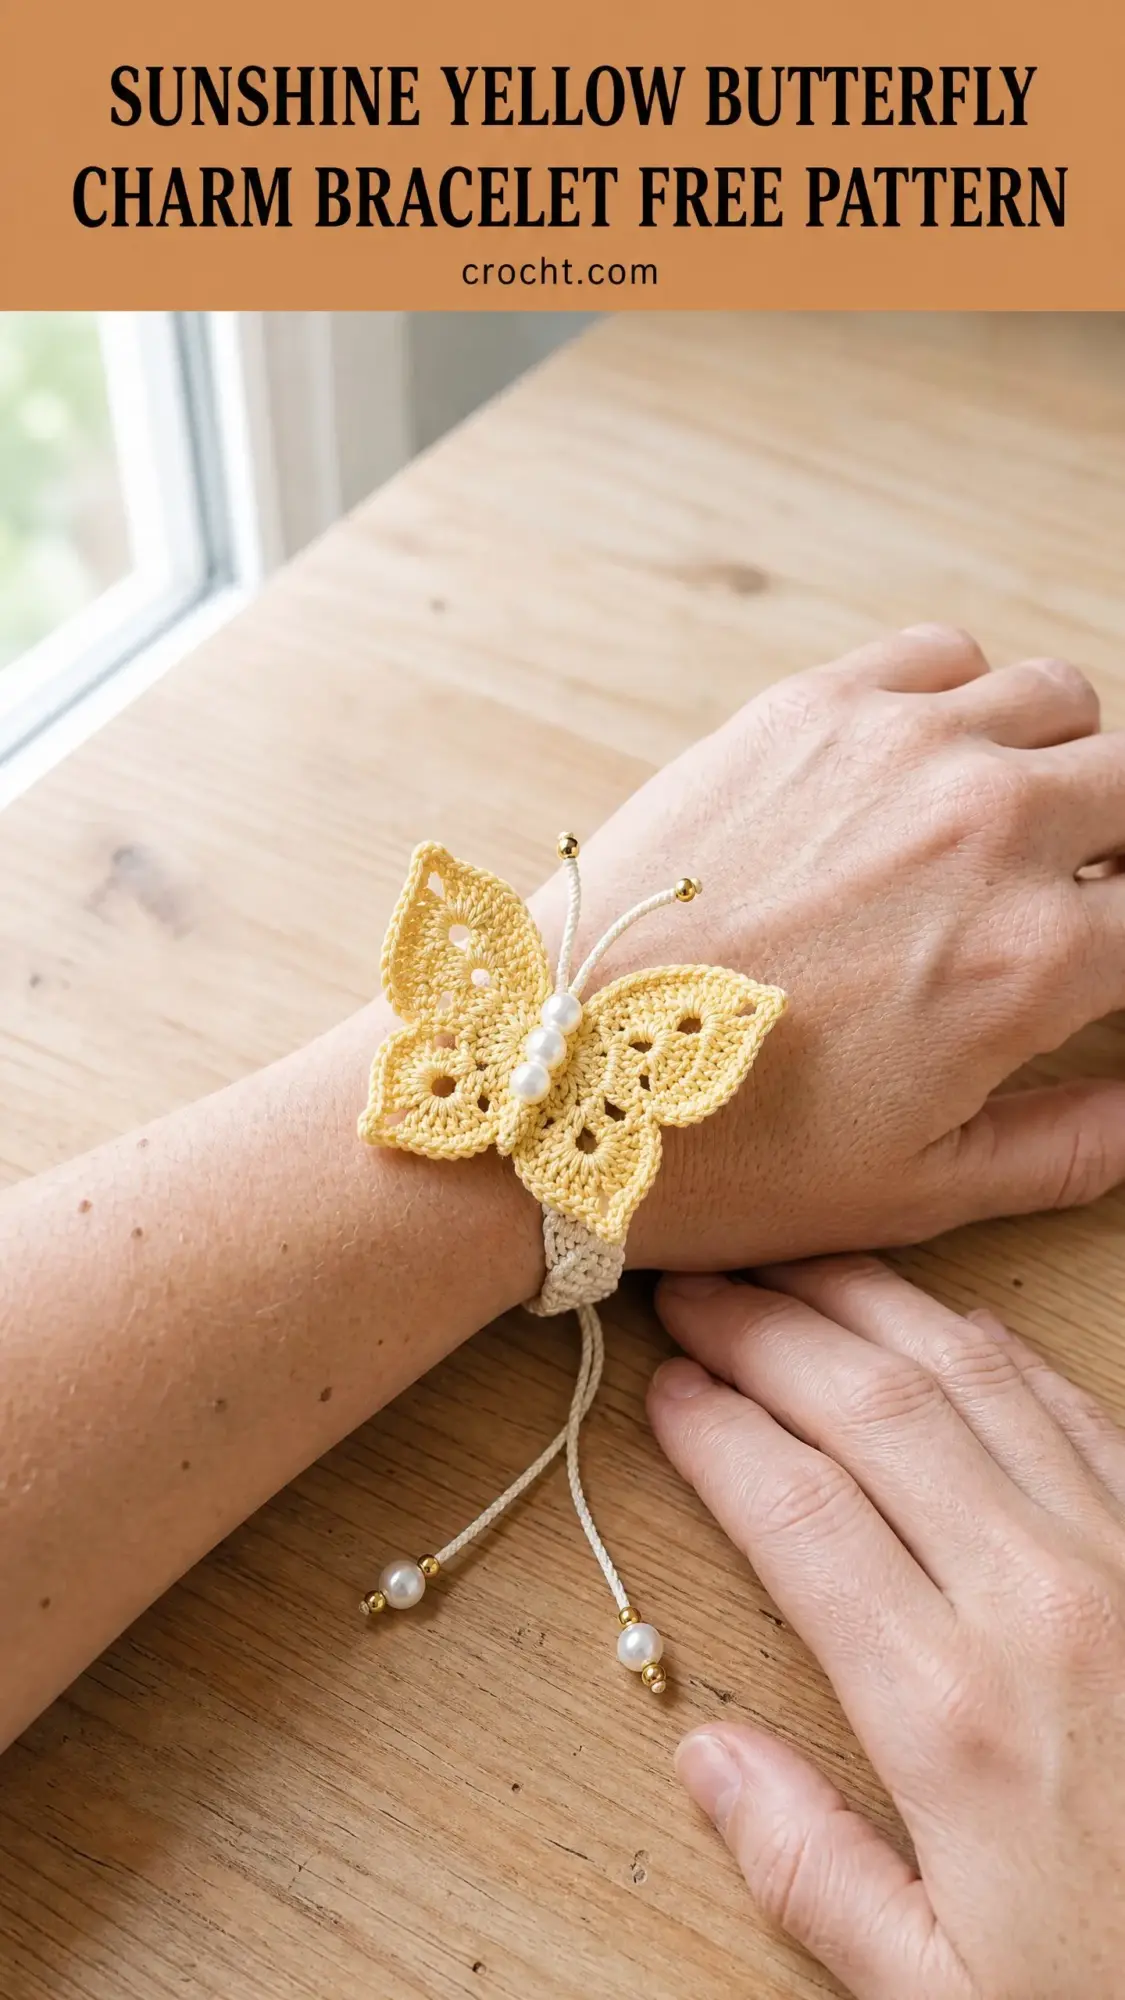
I designed this little butterfly bracelet years ago for my niece’s spring recital. She wanted something delicate that matched her costume, and I sketched the idea in a dog-eared notebook that still lives on my craft table. The pattern sat tucked between those pages until last month when I finally wrote it all down properly. I call her the Sunshine Butterfly because of the cheerful yellow thread I originally used, though the blush pink version you see here might be even prettier.
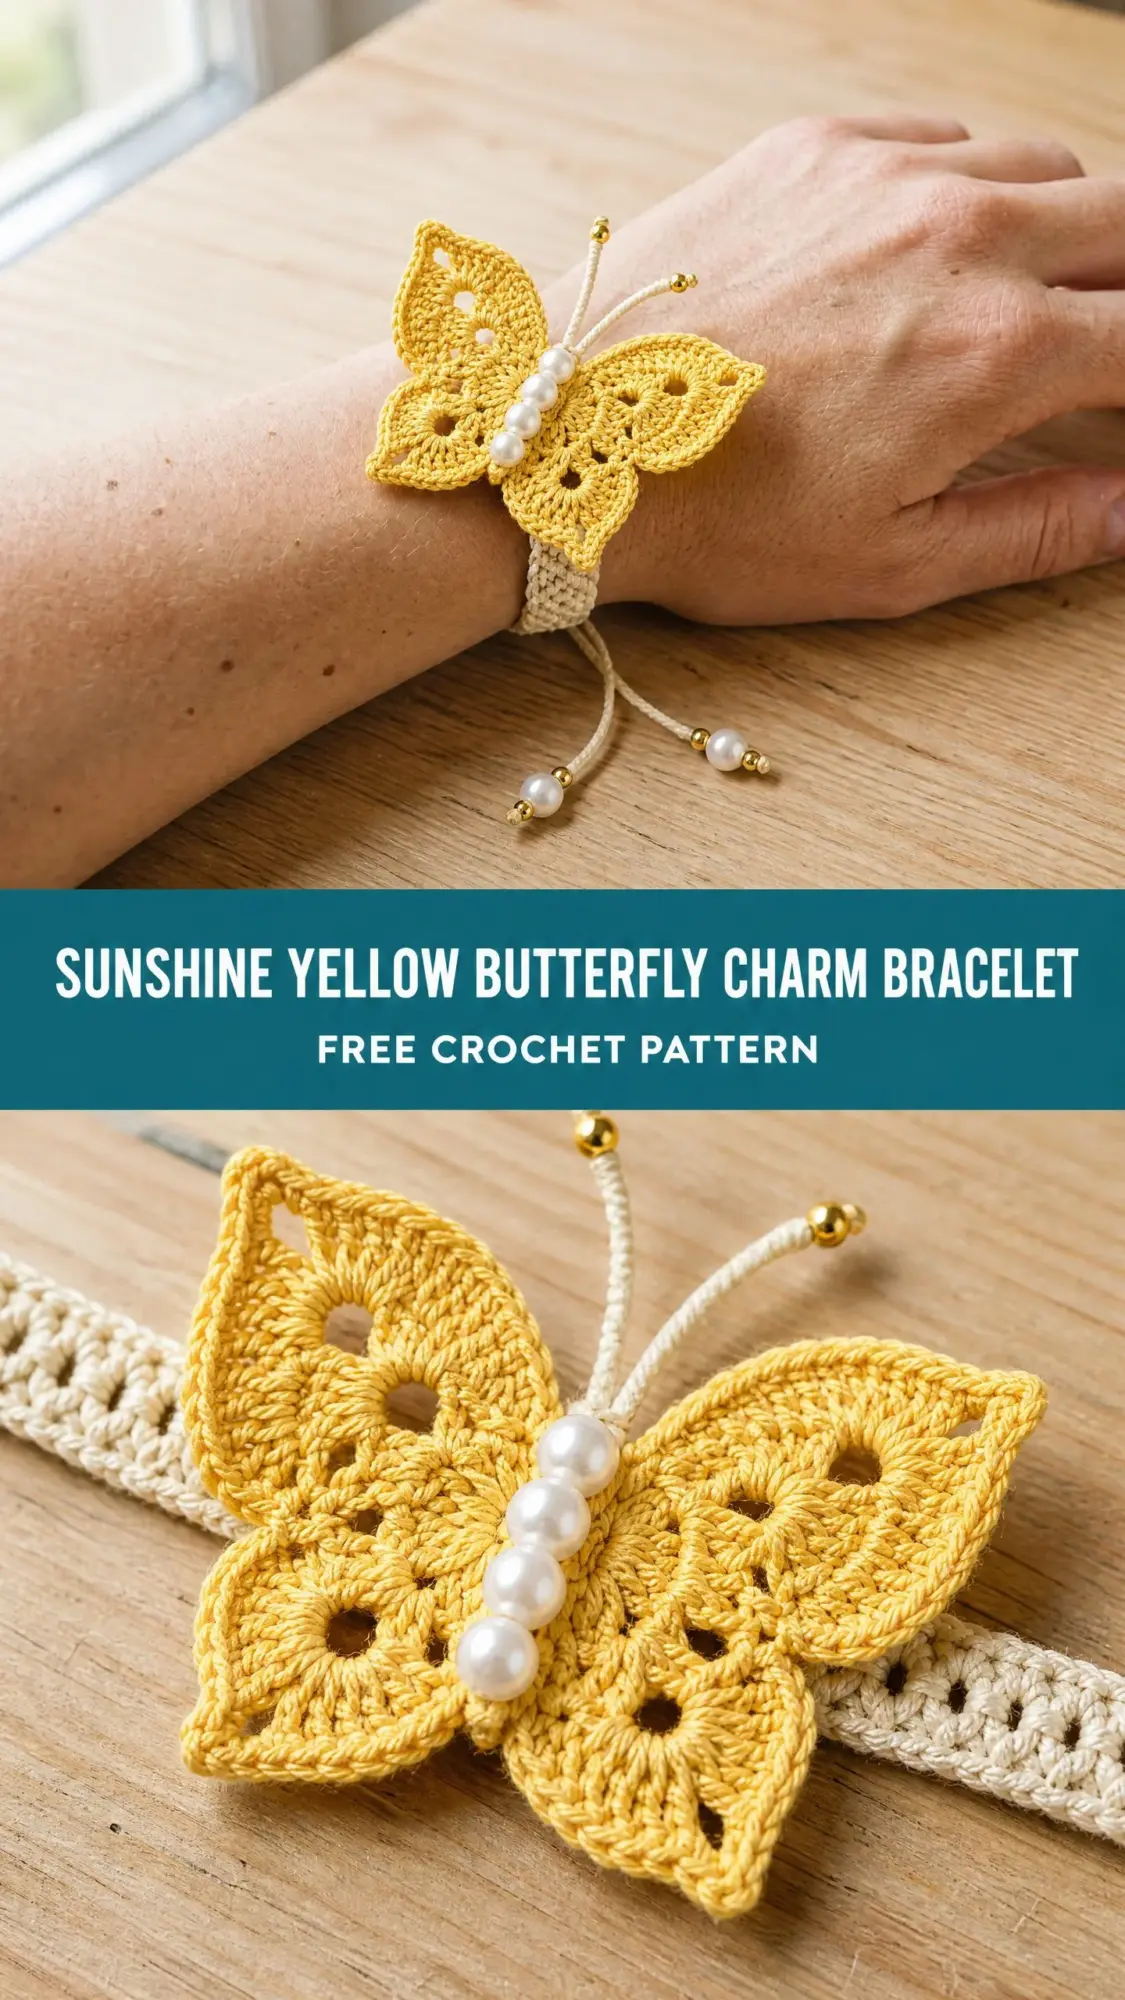
This project combines fine thread crochet with simple jewelry techniques to create a wearable piece of art. The butterfly motif features open lacework wings, a pearl bead body, and sweet little antennae tipped with gold. It sits on an adjustable macrame-style band that fits most adult wrists comfortably.
If you have been curious about thread crochet but felt intimidated, this is a wonderful place to start. The stitches are all basics you probably already know. The magic happens in the assembly.
Why You Will Love This Pattern
This butterfly bracelet looks far more complicated than it actually is. Each wing uses familiar stitches like double crochet (dc) and simple shells. The lacework eyelets come from strategic chain spaces, not tricky techniques. Once you make one wing, you have essentially learned the whole motif.
The finished butterfly measures approximately 2.75 inches wide by 2.25 inches tall. The adjustable band fits wrists from about 6 inches to 8 inches around, making it suitable for most adults. The sliding closure means no fiddly clasps to deal with.
Total project time runs between 3 to 5 hours, with the butterfly taking the bulk of that. The band works up quickly, and assembly is straightforward once you get the hang of it.
Skill Level
I rate this pattern as Advanced Beginner to Intermediate. Here is what that means practically. If you can comfortably work chain stitches, single crochet, double crochet, and slip stitches, you have the technical skills. The challenge comes from working with fine thread, which requires lighter tension and more attention to stitch counts.
Do not let the fine thread scare you. I will walk you through everything. Take your time, work in good lighting, and you will be fine.
Materials You Will Need
Thread
Main Color (MC): Size 10 crochet cotton thread in Sunshine Yellow or your chosen butterfly color, approximately 40 yards (37 m)
Contrast Color (CC): Size 10 crochet cotton thread in Cream or your chosen band color, approximately 25 yards (23 m)
Size 10 cotton thread is sometimes called crochet cotton or bedspread weight thread. You will find it in craft stores near the embroidery floss, not with the regular yarn. One ball of each color gives you plenty with some left over.
Thread Recommendations
Aunt Lydia’s Classic Crochet Thread Size 10 works beautifully. It is 100 percent mercerized cotton with excellent stitch definition and comes in tons of colors. Widely available and affordable.
DMC Cebelia Crochet Cotton Size 10 is a French thread that produces slightly more drape. This gives the wing lace a refined, delicate appearance.
Lizbeth Crochet Cotton Thread Size 10 by Handy Hands is tightly twisted and holds its shape wonderfully after blocking.
Do not substitute acrylic or wool yarn. They will not produce the crisp lace texture this design needs.
Hooks
Steel crochet hook size 7 (1.65 mm) for the butterfly motif
Steel crochet hook size 6 (1.80 mm) for the bracelet band
Steel hooks are numbered opposite from regular hooks. Higher numbers mean smaller hooks. The slightly larger size 6 for the band gives a rounder, firmer texture.
Notions
Gauge
Using MC and size 7 steel hook:
6 double crochet stitches and 4 rows = 1 inch (2.5 cm)
One complete wing measures approximately 1.25 inches wide by 1 inch tall after blocking.
Gauge matters here. If your butterfly comes out too big or too small, it will look out of proportion on the band. Take a few minutes to check before diving in.
Abbreviations and Stitch Definitions
ch = chain: Yarn over, pull through the loop on your hook. The foundation of most crochet.
sl st = slip stitch: Insert hook, yarn over, pull through both the stitch and the loop on your hook in one motion. Used for joining and invisible movement.
sc = single crochet: Insert hook, yarn over, pull up a loop (2 loops on hook), yarn over, pull through both loops.
dc = double crochet: Yarn over, insert hook, yarn over, pull up a loop (3 loops on hook), yarn over, pull through 2 loops, yarn over, pull through remaining 2 loops.
hdc = half double crochet: Yarn over, insert hook, yarn over, pull up a loop (3 loops on hook), yarn over, pull through all 3 loops at once.
tr = treble crochet: Yarn over twice, insert hook, yarn over, pull up a loop, then yarn over and pull through 2 loops three times.
ch-sp = chain space: The gap created by chain stitches in a previous row. You work into the space itself, not into individual chains.
sk = skip: Pass over the indicated stitch without working into it.
st/sts = stitch/stitches
rep = repeat
rnd = round
RS = right side: The "public" side of your work that faces outward.
WS = wrong side: The back of your work.
MC = main color (butterfly)
CC = contrast color (band)
Special Stitches
Shell Stitch
Work 5 double crochets all into the same stitch or space. This creates a fan-shaped cluster that forms the rounded lobe of each wing section. When the pattern says "shell," this is what you do.
Picot
Chain 3, then slip stitch into the first chain made (the chain closest to your hook). This creates a small decorative loop at the wing edge. Picots add that pretty scalloped finish.
Foundation Chain Ring
Chain the specified number, then join with a slip stitch to the first chain to form a closed ring. All Round 1 stitches work into the center of this ring, not into individual chains.
Pattern Notes Before You Begin
Read through the entire pattern before starting. I know that sounds tedious, but it really helps with thread crochet projects.
The butterfly has four separate wing pieces: two upper wings and two lower wings. All pieces are worked flat, beginning with a foundation chain. The wings join at the center, then you add the body beads.
Upper wings are slightly larger than lower wings. Both upper wings are identical. Both lower wings are identical. The mirror image happens naturally when you arrange them for joining.
When working with size 10 thread, keep consistent tension. Thread pulls tighter than yarn naturally. Relax your grip and let the hook do the work.
Instructions: Upper Wing (Make 2)
The upper wing is a rounded teardrop shape. You start at the narrow tip and expand outward to the wide curved edge, then finish with a picot border.
Row 1: Using MC and size 7 hook, ch 4. Dc 4 times into the 4th chain from the hook (the skipped 3 chains count as the first dc). (5 dc)
Row 2: Turn. Ch 3 (counts as dc throughout). Dc in the first st (increase made). Dc in each of the next 3 sts. Work 2 dc in the last st (increase made). (7 dc)
Row 3: Turn. Ch 3. Dc in the first st (increase). Dc in each of the next 5 sts. 2 dc in the last st (increase). (9 dc)
Row 4: Turn. Ch 3. Dc in the first st (increase). Dc in each of the next 7 sts. 2 dc in the last st (increase). (11 dc)
Row 5: Turn. Ch 3. Dc in the first st (increase). Dc in each of the next 2 sts. Ch 2, sk 2 sts, dc in next st, ch 2, sk 2 sts, dc in each of the next 2 sts. 2 dc in the last st (increase). (9 dc plus 2 ch-2 spaces)
Those two chain-2 spaces create the open lace eyelet details visible in the wing surface. They are the pretty holes you see in the finished piece.
Row 6 (Edging Row, RS facing): Do not turn. Rotate your work so the outer curved edge faces you.
Starting at the top right corner of Row 5, sl st to join at the outer corner. Ch 3. Work 2 dc in same corner. Picot. Work (3 dc, picot) 2 times evenly spaced along the top edge of Row 5. At the far corner, work (3 dc, picot, 3 dc). Continue down the left side edge, working (3 dc, picot) 2 times evenly spaced. End with 3 dc at the narrow bottom tip. Sl st to close.
Do not fasten off. Leave a 6-inch tail for joining.
Checkpoint: Each upper wing should measure approximately 1.25 inches wide and 1 inch tall. The lace eyelets should be clearly visible in the center of the wing.
Instructions: Lower Wing (Make 2)
The lower wing is shorter and rounder than the upper wing.
Row 1: Using MC and size 7 hook, ch 4. Work 5 dc into the 4th chain from the hook. (6 dc, counting the turning ch as first dc)
Row 2: Turn. Ch 3. Dc in the first st. Dc in each of the next 4 sts. 2 dc in the last st. (8 dc)
Row 3: Turn. Ch 3. Dc in the first st. Dc in each of the next 2 sts. Ch 2, sk 2 sts, dc in next st. Dc in each of the next 1 st. 2 dc in the last st. (7 dc plus 1 ch-2 space)
Row 4 (Edging Row, RS facing): Do not turn. Rotate work so the outer curved edge faces you.
Sl st to join at top right corner. Ch 3. Work 2 dc in same st. Picot. Work (3 dc, picot) once along the top. At the outer curve corner, work (3 dc, picot, 3 dc). Work (3 dc, picot) once down the left side. End with 3 dc at the narrow base tip. Sl st to close.
Do not fasten off. Leave a 6-inch tail for joining.
Checkpoint: Each lower wing should measure approximately 1 inch wide and 0.75 inches tall. It looks like a smaller, rounder version of the upper wing.
Joining the Wings and Adding the Body
Arrange all four wings face-up on a flat surface. Place the two upper wings side by side with narrow tips touching at center. Place the two lower wings below them, tips also touching at center. The arrangement should look like a symmetrical butterfly.
Thread a tapestry needle with a 12-inch length of MC thread. Working through the narrow base tips of all four wings, stitch them together with 4 to 6 firm whipstitches. Pull snugly so the tips gather at the center point. This is the body junction.
String 3 pearl beads (6 mm) onto the thread. Pass the needle back through the body junction from the other side, creating a vertical column of 3 pearls at the butterfly center. Stitch through the junction 2 more times to secure the beads firmly. Knot and weave in the tail.
Checkpoint: The joined butterfly should measure approximately 2.75 inches wide by 2.25 inches tall. The pearl column should sit centered between the four wings.
Making the Antennae
Cut 2 lengths of CC thread, each 5 inches long.
Fold one length in half. Insert the fold through the body junction at the top center between the two upper wings using a tapestry needle. Pull the ends through the loop to create a lark’s head knot. The strands should extend upward approximately 1.25 inches.
Repeat with the second thread, positioning it about 2 mm beside the first.
Thread one gold bead onto each antenna’s paired strands. Knot firmly just below the bead. Trim the tail to approximately 1 mm. Apply a tiny drop of fray check if desired.
Gently curve the antennae upward and slightly outward.
Bracelet Band Instructions
Using CC and size 6 hook, ch 5.
Row 1: Sc in 2nd ch from hook. Sc in each remaining ch across. (4 sc)
Row 2: Ch 1, turn. Sc in each st across. (4 sc)
Repeat Row 2 until the band measures 10 inches total length. Fasten off, leaving a 6-inch tail.
Checkpoint: The finished band should be a flat strip approximately 10 inches long and 0.25 inches wide. It should feel firm and even.
Creating the Sliding Closure
Cut 1 length of CC, 8 inches long.
Fold the bracelet band in half to find the center point. Mark this with a stitch marker.
Overlap the two tail ends of the band by approximately 1 inch at the closure point, forming a loop.
Wrap the 8-inch CC length around both overlapping band sections 6 to 8 times, wrapping snugly. Knot the wrapping thread firmly. This creates the sliding toggle. Test that it slides smoothly. If not, loosen the wraps by one turn.
Trim the band tail ends to approximately 1.5 inches below the toggle on each side.
Onto each tail end, thread: 1 gold bead, 1 pearl bead, 1 gold bead. Knot firmly below the lowest bead. Trim to 2 mm below the knot.
Attaching the Butterfly
Position the butterfly face-up on top of the band center.
Thread a tapestry needle with a 15-inch length of MC. Stitch through the butterfly base and through the band, then back up through both layers. Repeat 6 to 8 times, pulling firmly. The butterfly should sit securely without tilting.
Knot on the underside. Weave in the tail along the band for at least 1 inch before trimming.
Finishing and Blocking
Weave in all tails at least 1 inch in two different directions. Size 10 thread is slippery.
Wet block the butterfly by wetting it gently in cool water, squeezing excess moisture in a towel, and pinning face-up on a foam mat. Allow to dry completely.
Do not block the band. It should stay flexible.
Care Instructions
Hand wash only in cool water with gentle soap. Do not scrub or wring. Lay flat to dry away from direct sunlight. Store flat or loosely coiled to protect the antennae.
Size Adjustments
Smaller wrist (under 6 inches): Reduce band length by working fewer rows.
Larger wrist (over 8 inches): Work additional rows before fastening off.
Smaller butterfly: Use size 20 thread with a size 10 or 11 steel hook for a motif about 30 percent smaller.
Larger butterfly: Use size 5 crochet cotton with a size 5 or 4 steel hook for a motif about 40 percent larger.
I hope this butterfly bracelet brings you as much joy to make as it did for me to design all those years ago. Save this pattern to your Pinterest boards so you can find it when you are ready to start, and please leave a comment below if you make one. I would absolutely love to see your finished bracelets!