
I set out to design something truly special for this pattern. I wanted a piece that would capture the warmth of fall foliage, feel like wearable art, and challenge my micro crochet skills in the best way possible. The goal was to create an ear climber that curves naturally along the outer ear, mixing delicate crocheted maple leaves with tiny five-petal flowers in those rich autumn tones I love so much.
Every design decision came down to balance. How do you make something intricate without making it impossible? How do you keep botanical details crisp at such a small scale? And honestly, how do you make jewelry from crochet thread that actually holds its shape?
I am SO pleased with how this turned out. The brass hardware adds just the right amount of warmth, and those little pearl drops at the bottom give it movement and elegance. If you have been curious about micro crochet or jewelry-making, this Autumn Maple Ear Climber crochet pattern might just be your perfect next project.
What Makes This Ear Climber Special
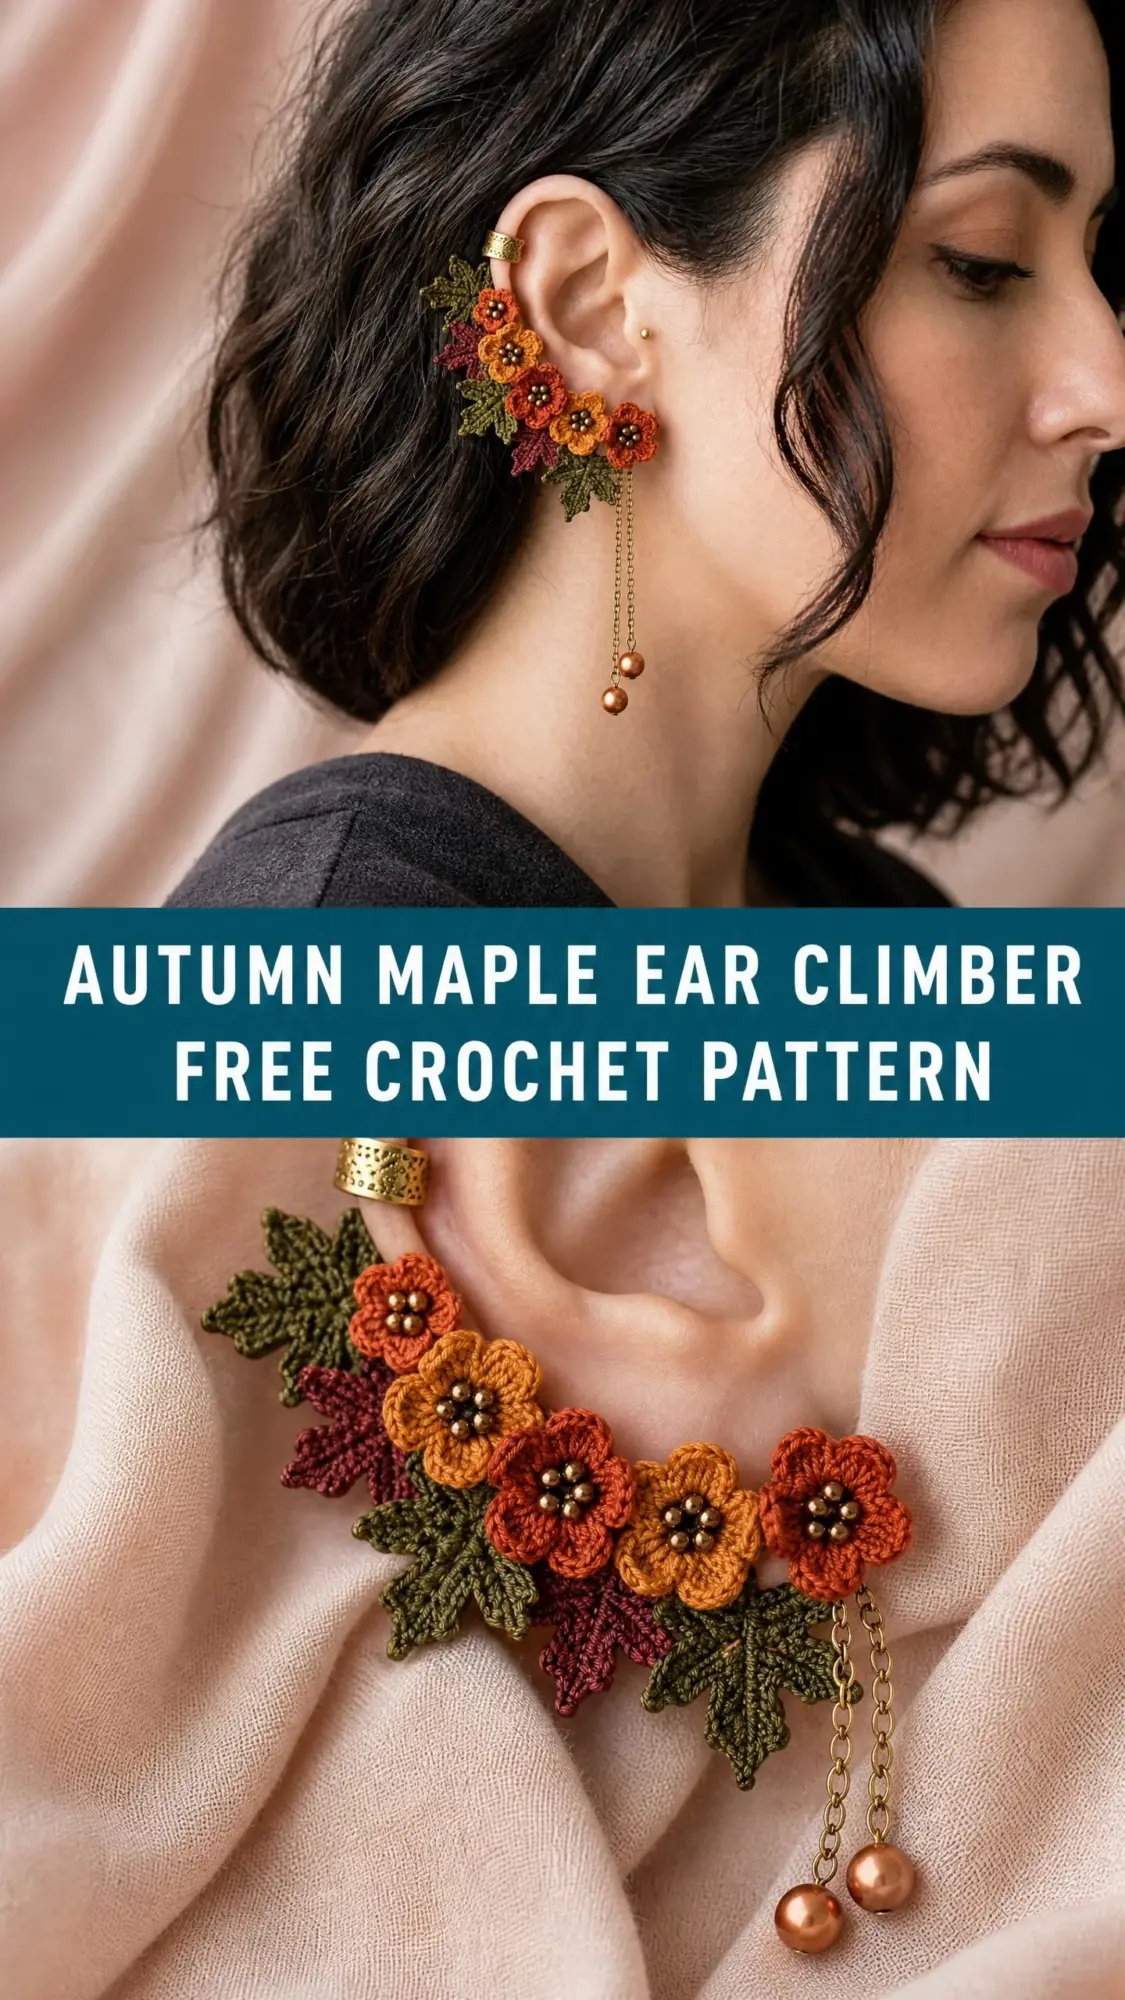
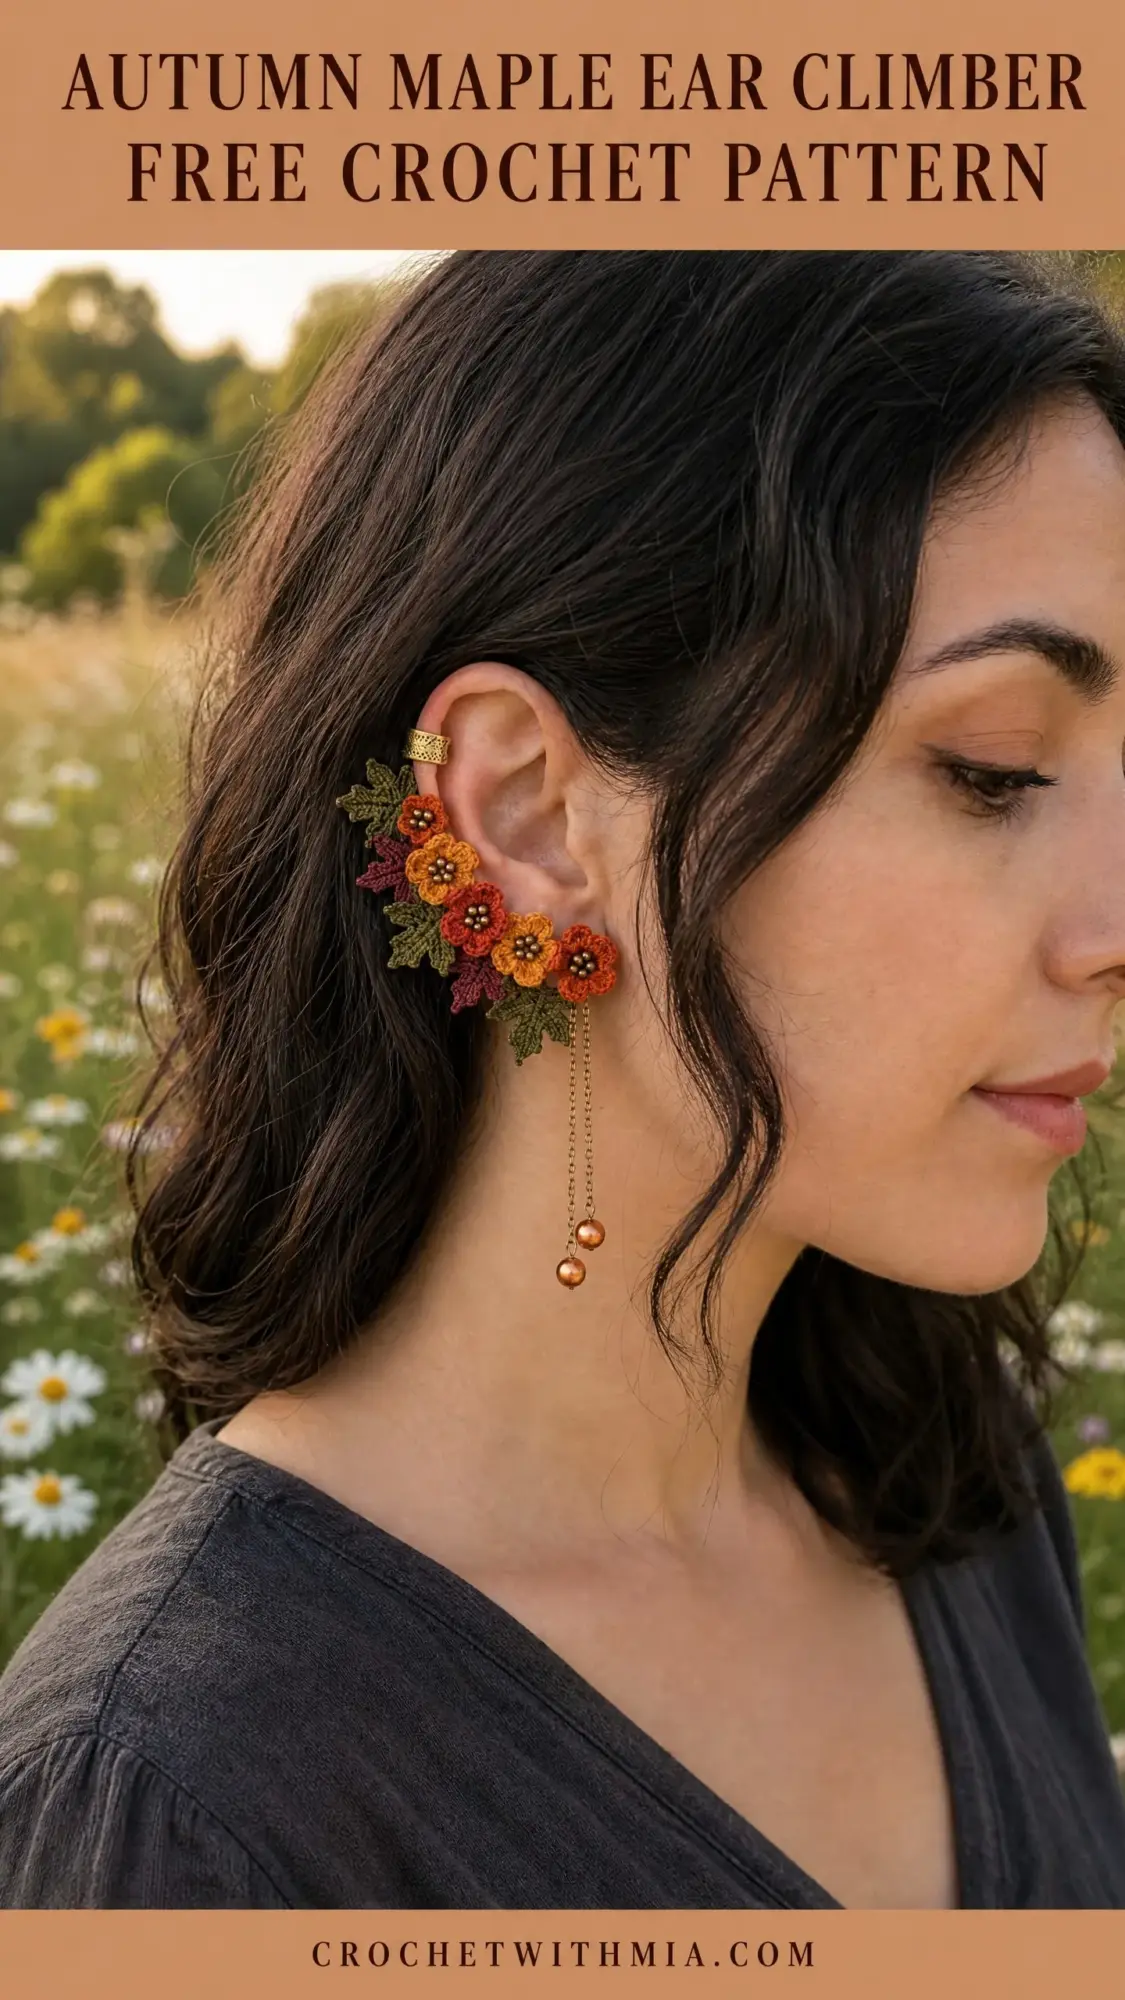
This is not your typical crochet project. You are creating botanical jewelry that combines traditional fiber arts with metalwork and beading. The finished piece spans approximately 3.5 inches along the outer ear curve, with a delicate chain dropping about 2 inches below the earlobe.
The design features five small crocheted flowers in burnt orange, golden yellow, and burgundy, nestled among seven to nine olive green maple leaf motifs. Each flower gets a tiny brass bead center, and the whole assembly attaches to a brass ear cuff at the top and a stud or clip finding at the lobe.
Working at this scale requires patience, but the individual motifs are actually quite beginner-friendly. The complexity comes from precise assembly and finishing, not from complicated stitches.
Skill Level and Time Estimate
I would call this an intermediate level pattern. You should feel comfortable working in the round, joining small motifs, and handling jewelry findings. If you have never done micro crochet before, give yourself extra grace and time.
Expect to spend 6 to 10 hours completing a single ear climber. This includes blocking, stiffening, and assembly. The actual crocheting goes faster than you might think. It is the finishing work that takes the most time and care.
Materials You Will Need
Crochet Thread and Hook
You will work with size 10 crochet cotton thread in the following colors:
Use a steel crochet hook size 7 (1.65 mm). Adjust if needed to match gauge.
Hardware and Embellishments
Optional Supplies
Thread Recommendations
DMC Cebelia Size 10 Crochet Cotton is my top choice. This mercerized cotton gives crisp stitch definition and takes stiffener beautifully. Your motifs will hold their shape without becoming brittle.
Aunt Lydia’s Classic Crochet Thread Size 10 works wonderfully too. It is widely available, affordable, and consistent. The slight sheen enhances the botanical look.
For a premium option, try Lizbeth Size 10 Egyptian Cotton Thread. The color saturation and smooth texture are exceptional for fine jewelry work.
Important: Stick with size 10 crochet cotton. Do not substitute heavier thread or lightweight yarn. The scale of these tiny motifs depends on that fineness. Synthetic threads may not absorb fabric stiffener as effectively as cotton.
Gauge
Gauge matters here. At this small scale, even slight variations will affect how your motifs fit together and curve along the ear.
Small flower motif (5 petals, worked flat): approximately 0.75 inch (19 mm) across when stiffened and dry.
Maple leaf motif: approximately 0.75 inch (19 mm) tall and 0.625 inch (16 mm) wide at the widest point.
If your motifs are larger, go down one hook size. If smaller, go up one hook size. Take time to check before making all your pieces.
Abbreviations (US Terms)
Special Stitches
Picot: Chain 3, slip stitch into the first chain of the chain-3. This creates a small decorative point at leaf tips.
Petal stitch (for 5-petal flower): Chain 4, work 4 double crochet into the 4th chain from hook, slip stitch into the base stitch. This creates one rounded petal.
Leaf point increase: Work 3 single crochet into one stitch to create a sharp outward point at leaf lobes.
sc2tog (single crochet two together): Insert hook into next stitch, pull up a loop, insert hook into following stitch, pull up a loop, yarn over and pull through all 3 loops on hook. This decreases by one stitch.
Pattern Notes Before You Begin
The ear climber consists of five flower motifs and seven to nine maple leaf motifs. Everything is crocheted separately, then arranged, sewn together, and attached to hardware.
All motifs are worked flat. Keep the right side facing you on flower rounds.
Make five flowers total: two in Color B (burnt orange), two in Color C (golden yellow), and one in Color D (burgundy).
Make seven maple leaf motifs in Color A (olive green). Two or three of these may have accent stitches in Color D for autumn color variation.
Stiffen all motifs before assembly. Block and pin them into shape while damp with stiffener. Let them dry completely, at least 4 hours or overnight, before assembling.
The pattern is written for the left ear as shown. To make for the right ear, reverse the curve direction when assembling.
Flower Motif Instructions
Make 5 total: 2 in Color B, 2 in Color C, 1 in Color D.
Foundation: Make a magic ring (MR).
Round 1: Chain 1, work 5 single crochet into the MR, slip stitch into first sc to join, pull MR closed. (5 sc)
Round 2: Chain 1. In each sc around, work one petal stitch as follows: Chain 4, work 4 dc into the 4th chain from hook (this forms the rounded petal head), slip stitch into the same sc at the base to close the petal. Repeat in each of the remaining 4 sc. (5 petals made)
Round 3 (optional petal outline for crisper definition): Slip stitch to the base of any petal. Chain 1. Working along the outside edge of the petal: sc into the side of each dc across the petal (4 sc), sc into the tip chain space (1 sc), sc down the other side (4 sc), slip stitch into the base of the same petal. Slip stitch along the base to the next petal and repeat. Work this outline on all 5 petals.
Fasten off, leaving a 6-inch tail for sewing.
Checkpoint: Each finished flower should measure approximately 0.75 inch across. The center hole should be small and tight. If petals are cupping rather than lying flat, block face-down under a heavy book while stiffener is wet.
Using your tapestry needle and the tail, weave through the center stitches once more and pull slightly to close any gap at the center before fastening off fully.
Attach one brass flower center bead to each flower using jewelry wire or needle and thread. Pull the bead snug against the center sc rounds. Knot securely on the wrong side and dab with clear glue if desired.
Maple Leaf Motif Instructions
Make 7 in Color A. Optionally add Color D accent on 2 to 3 leaves.
The maple leaf is worked in rows, beginning at the base of the stem and building outward to three main lobes and two side lobes.
Foundation chain: Chain 8.
Row 1 (RS, stem and base): Sc into 2nd chain from hook, sc into each of the next 5 chains, 3 sc into the last chain (this is the base of the leaf where lobes will branch). Do not turn. Working back along the underside of the foundation chain: sc into each of the 6 remaining chain loops. (15 sc total along the oval base)
Do not join. This creates the central vein of the leaf as a flat oval base.
Row 2 (first right lobe): With RS facing, slip stitch to the 8th stitch of the base oval (the top center point). Chain 1. Chain 7, sc into 2nd chain from hook, sc into next 2 chains, hdc into next chain, dc into next chain, tr into last chain, slip stitch into the top-center base stitch to anchor lobe. (6 sts in lobe arm, 1 sl st anchor)
Row 3 (first right lobe outer edge): Chain 1, turn to work back along the outer edge of the right lobe. Sc into each of the 6 stitches, work picot at the lobe tip (chain 3, slip stitch into first chain of chain-3), sc back down the other side (6 sc), slip stitch into base. (13 sts along outer edge plus 1 picot)
Row 4 (central top lobe): From the top-center base stitch, chain 9. Sc into 2nd chain from hook, sc into next 3 chains, hdc into next chain, dc into next chain, tr into next chain, tr into last chain, slip stitch back into the top-center base stitch. (8 sts in central lobe arm, 1 sl st anchor)
Row 5 (central lobe outer edge): Chain 1, turn. Sc along outer edge of central lobe (8 sc), picot at tip, sc back down other side (8 sc), slip stitch into base. (17 sts along outer edge plus 1 picot)
Row 6 (first left lobe): From the top-center base stitch, chain 7. Sc into 2nd chain from hook, sc into next 2 chains, hdc into next chain, dc into next chain, tr into last chain, slip stitch back into base stitch. (6 sts in lobe arm, 1 sl st anchor)
Row 7 (first left lobe outer edge): Chain 1, turn. Sc along outer edge (6 sc), picot, sc back down (6 sc), slip stitch into base. (13 sts plus 1 picot)
Row 8 (lower right side lobe): Slip stitch along the base oval down to the 4th stitch from center (approximately 4 slip stitches to reposition). Chain 5. Sc into 2nd chain from hook, sc into next chain, hdc into next chain, dc into last chain, slip stitch back into base. (4 sts in mini-lobe arm, 1 sl st anchor)
Row 9 (lower right side lobe outer edge): Chain 1, turn. Sc along outer edge (4 sc), picot, sc back (4 sc), slip stitch into base. (9 sts plus 1 picot)
Row 10 (lower left side lobe): Slip stitch along the base oval to the corresponding position on the left side (approximately 4 slip stitches to reposition). Chain 5. Sc into 2nd chain from hook, sc into next chain, hdc into next chain, dc into last chain, slip stitch back into base. (4 sts in mini-lobe arm, 1 sl st anchor)
Row 11 (lower left side lobe outer edge): Chain 1, turn. Sc along outer edge (4 sc), picot, sc back (4 sc), slip stitch into base. (9 sts plus 1 picot)
Border round (optional but recommended): Starting at the stem tip, sc evenly around the entire leaf perimeter, working 1 sc per stitch, 3 sc at outer lobe points, and sc2tog at inner valleys between lobes. Work 1 slip stitch to join at stem tip. Fasten off.
Fasten off, leaving a 6-inch tail for sewing.
Optional Color D accent: For 2 to 3 leaves, join Color D with a slip stitch at one lower side lobe base before working the outer edge row of that lobe only (Rows 9 or 11). Work the outer edge in Color D, then fasten off Color D and return to Color A. This creates the impression of a single lobe turning deep red, mimicking a turning autumn maple leaf.
Checkpoint: Each finished leaf should measure approximately 0.75 inch tall and 0.625 inch wide. If lobes are not distinct, use a pin to ease each lobe point open while the stiffener is wet and re-pin until dry.
Blocking and Stiffening All Motifs
Mix fabric stiffener to a medium-stiff consistency, or dilute PVA glue 50/50 with water. Submerge each motif briefly, squeeze out excess, and pin to blocking foam in the correct shape.
For flowers, pin the center flat and ease each petal outward. For leaves, pin each lobe point outward and ease the stem straight. Allow to dry completely.
Once dry, all motifs should be firm and hold their shape without pinning. This rigidity is essential for the ear climber to maintain its curve along the ear.
Assembly Instructions
Step 1: Lay out all 5 flowers and 7 leaves on a flat surface. Arrange them in a gentle diagonal curve, working from top (helix end) to bottom (lobe end):
Step 2: Using sewing needle and matching thread, sew each motif to its neighbors where they overlap. Use small, invisible stitches on the wrong side. Sew through both layers at every overlap point. The assembled piece should curve gently and lie flat without buckling.
Step 3: Attach the brass ear cuff finding to the back of the topmost leaf using a small length of 28-gauge gold wire. Thread the wire through the stitches at the back of the leaf twice and then through the cuff opening, twist wire ends together on the inside of the cuff, and trim.
Step 4: Attach the lobe finding to the back of the bottommost flower using 28-gauge wire or strong thread. If using a stud post, use jewelry glue to affix the flat pad to the back of the motif and allow to cure fully. If using a clip finding, sew it securely with wire.
Step 5: Cut the gold-tone chain into two equal lengths of approximately 2 inches each. Using a jump ring or by looping the chain link directly, attach both chain lengths to the loop on the lobe finding below the bottom flower.
Step 6: Thread one pearl bead onto a short length of 28-gauge wire. Bend the wire into a wrapped loop above the bead. Attach the wrapped loop to the bottom end of both chains, joining them together so both chains terminate at the same pearl. Trim wire ends neatly. Alternatively, attach one pearl to each chain separately for a twin-drop look.
Step 7: Check the full assembled piece. The flowers should face forward with petals open. The leaves should angle behind and beside the flowers, with picot tips visible at the edges. The chain should hang freely. The cuff should be oriented to clip over the helix.
Final Checkpoint: Hold the assembled climber along your own ear to verify the curve sits naturally. The topmost motif should reach the upper helix area. The bottom flower should sit at or just above the lobe.
Size Customization Tips
For a longer climber that reaches higher on the helix, add one or two additional leaf and flower pairs in the center of the arrangement.
For a shorter, minimalist version, reduce to three flowers and five leaves.
For a children’s size or smaller ear, reduce the foundation chain on the leaf from chain 8 to chain 6 and reduce the lobe arms by one chain each. Adjust hook to 1.5 mm (steel size 8) for finer scale.
To change the color palette, the pattern works equally well in cool tones (dusty purple, sage, soft pink) for a spring version, or in red, gold, and white for a winter version.
Care Instructions
Do not wash or immerse in water. The stiffener will dissolve and motifs will lose their shape.
Wipe gently with a barely damp cloth if needed and allow to air dry flat.
Store flat in a small box or jewelry case, not folded or pressed under other items.
Keep away from humidity for extended periods to preserve stiffness and prevent tarnish on the brass hardware.
If brass hardware tarnishes over time, polish lightly with a dry brass polishing cloth, taking care not to snag the crochet thread.
If any motif lifts or loses its crispness after several wearings, apply a small amount of additional fabric stiffener to that motif only, re-pin to shape, and allow to dry before wearing again.
You Did It!
Thank you so much for choosing this Autumn Maple Ear Climber crochet pattern. I hope you love making it as much as I loved designing it. This little piece of wearable art is a true labor of love, and seeing it come together stitch by tiny stitch is incredibly satisfying.
If you make this ear climber, I would absolutely love to see it! Tag me on Instagram or share your photo on Facebook. Seeing your creations is the best part of sharing patterns.
Before you go, save this pattern to your Pinterest boards so you can find it when you are ready to start. And please drop a comment below if you make one. I would love to hear how it turned out and which color palette you chose!