
I’ve been looking for the perfect spring dress pattern for little ones, and this tiered ruffle design is my absolute favorite. The color combination of sunny yellow, sage green, and creamy white reminds me of a garden in full bloom.
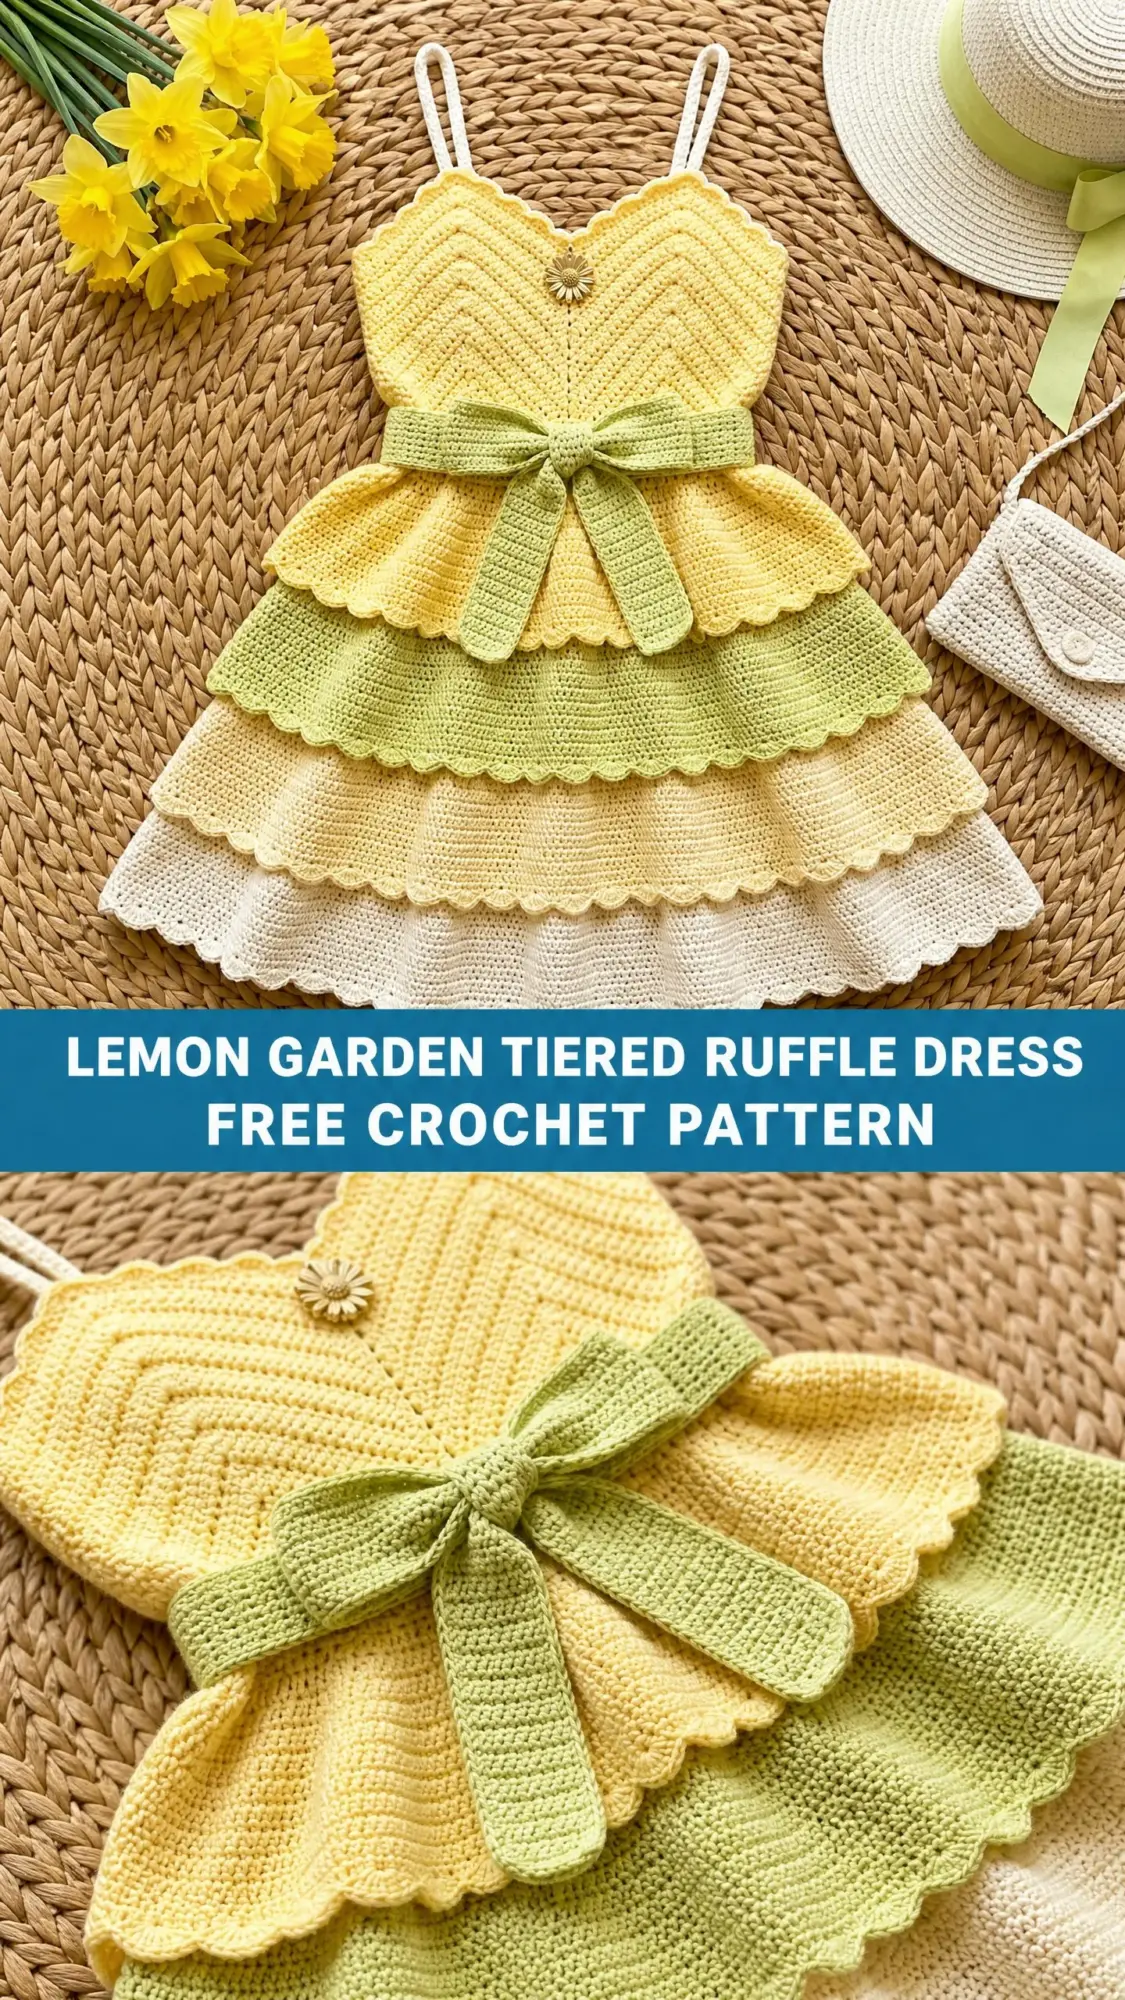
After testing dozens of children’s dress patterns over the years, I rounded up everything I love about toddler garments and put it into this one project. The chevron bodice adds visual interest without being fussy. The gathered ruffles create that dreamy, twirly silhouette that little ones adore. And the fitted waistband with its bow detail brings the whole look together.
This dress works up beautifully for Easter celebrations, garden parties, birthday photos, or any warm weather occasion where you want your little one to shine. Let me walk you through every single step.
About This Crochet Pattern
This tiered ruffle dress is designed for children aged approximately 2 to 3 years. The construction might sound complicated at first glance, but I promise it breaks down into manageable pieces. You work the bodice front and back separately as flat pieces, join them at the side seams, then add each ruffle tier working downward from the waist.
Finished Measurements:
The defining features include a chevron textured bodice with spaghetti straps, a sage green waistband tied in a front bow, and four graduated ruffle tiers. Each tier ends in a pretty shell stitch scalloped edge. A small daisy button sits at the center front neckline for that perfect finishing touch.
Skill Level
This pattern falls into the intermediate category. You should feel comfortable working flat in rows, joining pieces in the round, executing chevron or ripple stitch correctly, working shell stitches for scalloped edges, and managing multiple color changes.
If you have only worked with basic stitches so far, this is a wonderful stretch project. Just take your time with each section and read through the entire instructions before starting.
Time Estimate: Plan for approximately 15 to 22 hours total, spread over multiple sessions. The bodice takes roughly 5 to 7 hours, the waistband and bow about 1 hour, and each ruffle tier approximately 2 to 3 hours.
Materials Needed
Yarn
You will need DK weight yarn (light #3) in four colors:
Yarn Suggestions:
Paintbox Yarns Simply DK works wonderfully for this project. It is 100% acrylic with 137 yards per 50 g skein. Machine washable and available in perfect lemon and sage colorways.
Lion Brand Yarn Pound of Love offers excellent value. This 100% premium acrylic comes in a large 1020 yard skein. One skein of yellow and one of white will cover most of your color needs.
Scheepjes Softfun provides beautiful drape with its 60% cotton and 40% acrylic blend. The cotton content makes it more breathable for warm weather wear.
Any DK weight yarn that achieves gauge will work. Avoid yarn with too much stretch like pure superwash wool since the ruffle tiers need to hold their shape. Choose machine washable fiber for a child’s garment.
Hook
US size E-4 (3.5 mm) crochet hook
Adjust as needed to match gauge.
Notions
Gauge
18 single crochet stitches and 20 rows = 4 inches (10 cm) worked flat in single crochet.
Chevron pattern gauge: 18 stitches across one full chevron repeat equals approximately 4 inches (10 cm).
Shell scallop gauge: One 5 double crochet shell measures approximately 0.9 inches (2.3 cm) wide.
Making a gauge swatch: Chain 22 with Color A and your hook. Work single crochet across for at least 20 rows. Block lightly and measure the center 4 inches. If your swatch is too small, go up a hook size. If too large, go down a hook size.
Gauge matters for garments. Please do not skip this step.
Abbreviations and Stitch Definitions
Let me explain every abbreviation before we begin:
Special Stitches
Chevron Single Crochet (Ripple SC)
This stitch creates the V shaped wave pattern on the bodice. Here is how it works:
Work to the peak stitch of the chevron. Work 3 single crochet all into the same stitch. This is the increase peak. Then work single crochet across to the valley stitch. At the valley, work sc2tog as described above. This forms the valley decrease.
Continue alternating peaks (3 sc in one stitch) and valleys (sc2tog) across the row. The number of stitches stays constant because each peak adds 2 stitches and each valley removes 2 stitches.
Shell Stitch Scallop
Skip 2 stitches. Work 5 double crochet all into the next stitch. This forms one shell. Skip 2 stitches. Slip stitch into the next stitch. Repeat across the edge.
Each shell unit uses 6 stitches total. Adjust your foundation so the stitch count is a multiple of 6.
Pattern Instructions
Section 1: Bodice Front
Using Color A and hook E-4, begin at the neckline.
Foundation chain: Chain 49. This gives 48 working stitches.
Row 1 (RS): Sc in second ch from hook and in each ch across. Turn. (48 sc)
Row 2 (WS): Ch 1, sc in each st across. Turn. (48 sc)
Now establish the chevron pattern. The bodice front uses 4 full chevron repeats across 48 stitches.
Row 3 (RS, chevron begins): Ch 1. Work (sc2tog, sc in next 3 sts, 3 sc in next st, sc in next 4 sts, sc2tog) 4 times. Turn. (48 sc)
Rows 4 through 24: Ch 1. Work (sc2tog, sc in next 3 sts, 3 sc in next st, sc in next 4 sts, sc2tog) 4 times. Turn. (48 sc)
Waist Shaping
On Rows 25 through 30, reduce stitch count slightly to shape the waist.
Row 25 (decrease): Work (sc2tog, sc in next 2 sts, 3 sc in next st, sc in next 4 sts, sc2tog) 4 times. Turn. (44 sc)
Rows 26 through 30: Continue with 44 stitch chevron pattern. Turn. (44 sc)
Fasten off, leaving a long tail for seaming.
Checkpoint: Your bodice front should measure approximately 7 inches from top to bottom and about 9.5 inches wide unstretched. The four chevron peaks and valleys should be clearly visible.
Section 2: Bodice Back
The bodice back is worked identically to the front but without sweetheart neckline shaping.
Using Color A and hook E-4, chain 49.
Row 1 (RS): Sc in second ch from hook and in each ch across. Turn. (48 sc)
Rows 2 through 24: Ch 1. Work (sc2tog, sc in next 3 sts, 3 sc in next st, sc in next 4 sts, sc2tog) 4 times. Turn. (48 sc)
Rows 25 through 30 (waist shaping): Same as front.
Row 25: Work (sc2tog, sc in next 2 sts, 3 sc in next st, sc in next 4 sts, sc2tog) 4 times. Turn. (44 sc)
Rows 26 through 30: Continue with 44 stitch pattern. Turn. (44 sc)
Fasten off, leaving a long tail for seaming.
Back Neckline Scallop Edging
With RS facing, attach Color A to top right corner of bodice back. Work across the top edge: sl st in first st, (skip 2 sts, 5 dc in next st, skip 2 sts, sl st in next st) across. Fasten off. (8 shells across 48 stitches)
Front Neckline Scallop Edging
With RS facing, attach Color A to top right corner of bodice front. Work scallop edge identically to back. Fasten off. (8 shells)
Section 3: Join Side Seams
Lay bodice front and back with wrong sides together. Using yarn needle and Color A, whipstitch or mattress stitch the side seams from underarm to waist on both sides. Leave the top open for the neckline and the bottom open for skirt attachment.
After joining, the dress body forms a tube at the waist with circumference of approximately 19 inches when lightly blocked.
Section 4: Spaghetti Straps
Make 2 straps in Color A.
Each strap: Chain 41 (approximately 7 inches). Sl st in second chain from hook, sl st in each chain across. Fasten off, leaving tails for attachment. (40 sl sts)
Attach one end of each strap to the top front corners of the bodice at the outer peaks of the chevron. Attach the other end to the corresponding back corners. Sew securely with yarn needle.
Section 5: Waistband
Using Color B and hook E-4, chain 121.
Row 1: Sc in second ch from hook, sc in each ch across. Turn. (120 sc)
Rows 2 through 4: Ch 1, sc in each st across. Turn. (120 sc)
Fasten off after Row 4.
The waistband strip measures approximately 26 inches long by 0.8 inches tall.
Center the waistband strip around the waist of the joined bodice. Position the long edge at the junction between the bodice body and where the ruffles will attach. Sew or slip stitch the waistband to the bodice, overlapping at center front so the ends form bow tails.
Bow Center Piece
Using Color B, chain 11. Sc in second ch from hook, sc in each ch across. Turn. (10 sc)
Work 4 rows of 10 sc. Fasten off.
Wrap this small piece around the center of the waistband knot. Sew the ends together at the back to form the classic bow center knot appearance.
Section 6: Ruffle Tier 1 (Peplum, Color A)
The waist circumference at attachment is 88 stitches total (44 stitches times 2 sides joined).
With RS facing and Color A, join yarn at right side seam of waist lower edge.
Round 1: Sc 2 in each st around. (176 sc)
Work all rounds in the round with RS facing.
Rounds 2 through 8: Sc in each st around. (176 sc per round)
Work shell scallop edging on final round, adjusting to a multiple of 6 stitches for clean shell math.
Section 7: Ruffle Tier 2 (Color B, Sage Green)
Attach Color B to the lower edge of Tier 1. Work the tier body same as Tier 1, maintaining the gathered fullness. End with shell scallop edging.
Section 8: Ruffle Tier 3 (Color C, Pale Yellow)
Attach Color C to the lower edge of Tier 2. Work same as previous tiers. End with shell scallop edging.
Section 9: Ruffle Tier 4 (Hem, Color D, White)
Attach Color D to the lower edge of Tier 3. Work same as previous tiers. End with shell scallop edging.
Fasten off and weave in all ends.
Finishing
Sew the small daisy button to center front neckline between the two chevron peaks.
Block the entire dress lightly. Lay flat on blocking mat, gently shape the ruffles, and allow to dry completely.
Pattern Notes and Tips
All turning chains in single crochet rows count as 0 stitches. They are turning chains only and not worked into on the return row.
The scalloped edges on each tier are worked as a finishing round after the tier body is complete.
Color placement follows this sequence: Tier 1 (peplum) is Color A bright yellow. Tier 2 is Color B sage green. Tier 3 is Color C pale yellow. Tier 4 (hem) is Color D white.
Read all instructions for a section completely before beginning that section. This prevents surprises and helps you understand how the pieces fit together.
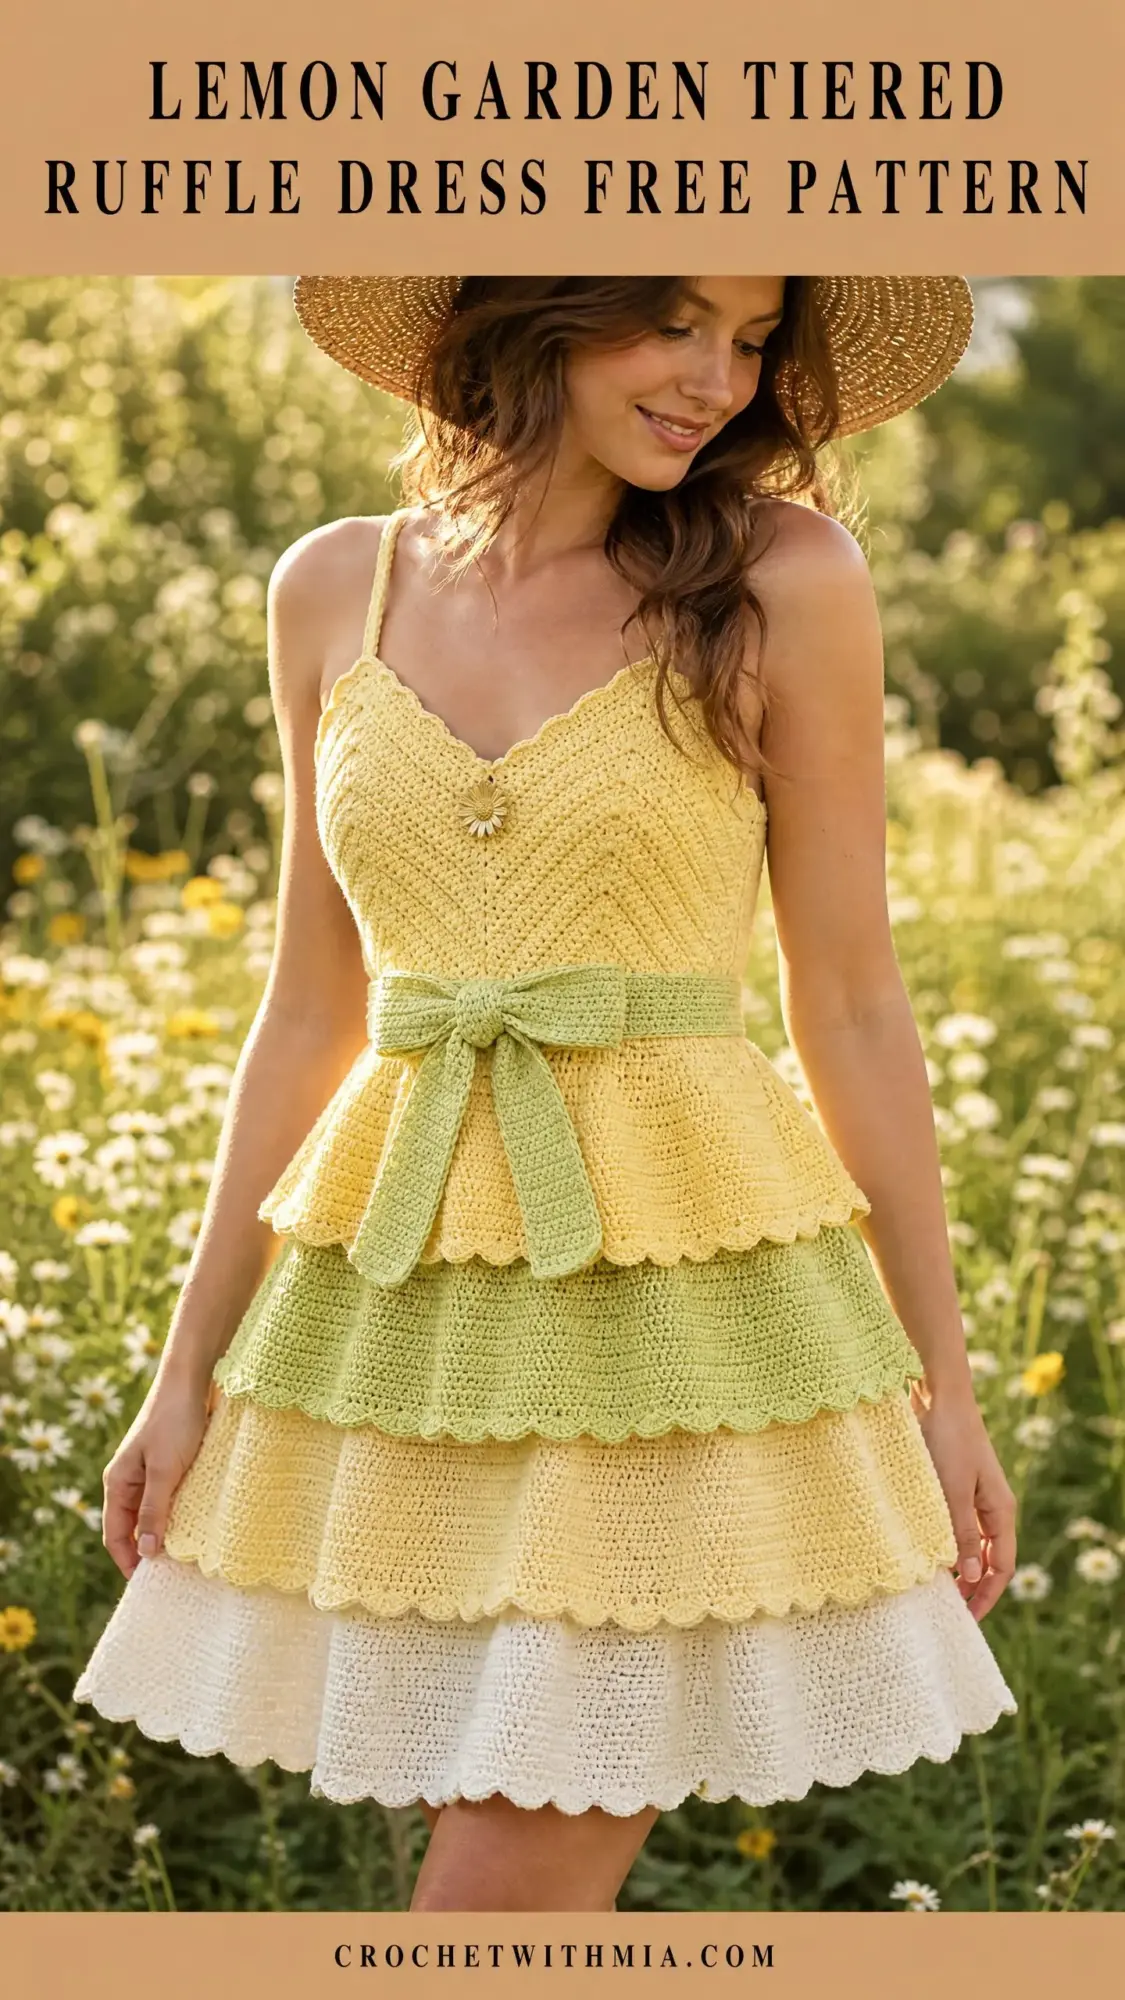
Wrapping Up Your Lemon Garden Tiered Ruffle Dress
This crochet pattern brings together so many lovely elements. The chevron texture, the tiered ruffles, the gentle color gradient from sunny yellow down to crisp white. Every little detail works together to create something truly special.
I hope you enjoy making this dress as much as I enjoyed designing it. The finished piece makes an incredible gift for baby showers, birthdays, or holidays. Or keep it for your own little one and watch their face light up when they see all those twirly ruffles.
Thank you so much for choosing this pattern. I would absolutely love to see your finished dresses, so please tag me on Instagram or share in our Facebook group. Seeing your creations honestly makes my whole week.
If you loved this tiered ruffle dress, go ahead and save it to your Pinterest boards so you can find it easily when you are ready to start. And please drop a comment below if you make one. I read every single comment and love hearing how your projects turn out. Happy crocheting, friend!