
I’ve been looking for the perfect special occasion baby dress pattern for months now. Something with drama, something with texture, something that makes people gasp when they see it. This Buttercream Rosette Baby Dress is my absolute favourite find.
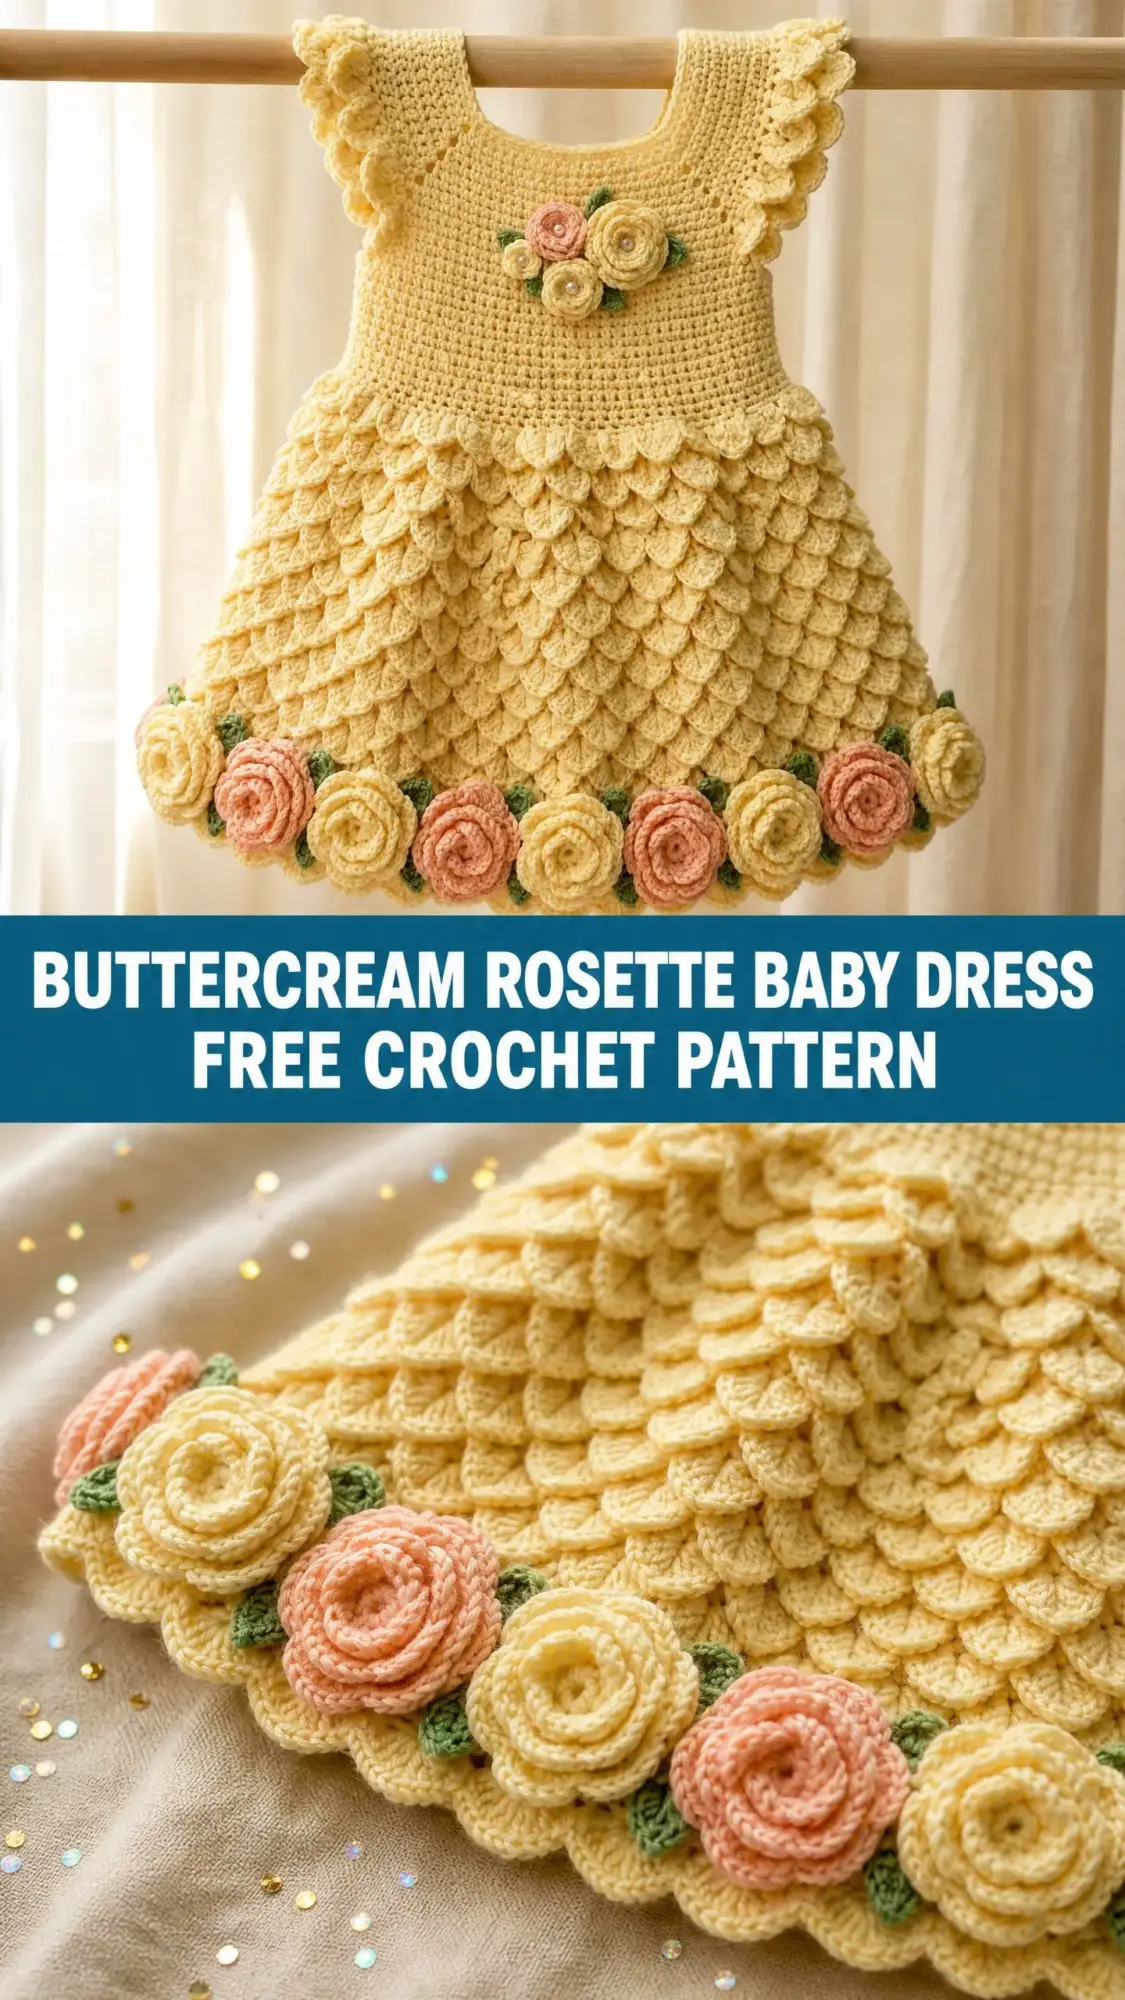
The crocodile stitch skirt creates this incredible layered effect that looks impossibly intricate but follows a simple repetitive rhythm once you get started. Add those dimensional rolled roses along the hem and suddenly you have a dress worthy of christenings, first birthdays, and every photo opportunity in between.
If you’re ready to create a true heirloom piece, grab your hook and let’s make something beautiful together.
About This Crochet Pattern
This baby dress combines several techniques into one stunning garment. The bodice uses basic single crochet worked top down in the round. Nothing fancy there. The magic happens when you transition into the crocodile stitch skirt, which creates overlapping scales that fan out like petals.
The finished dress fits infants approximately 6 to 12 months old. You’ll end up with a chest circumference of about 18 inches and a total length of roughly 13 inches from neckline to hem. The skirt flares dramatically at the bottom to approximately 34 inches around.
Skill level: Experienced beginner to intermediate. If you can work in the round and follow stitch counts carefully, you can absolutely make this dress. The crocodile stitch requires learning one special technique, but it becomes highly repetitive once you understand the mechanics.
Time estimate: Plan for 20 to 28 hours total. The bodice takes 6 to 8 hours, the skirt runs 10 to 14 hours, roses and leaves need 3 to 4 hours, and assembly takes another 1 to 2 hours. This is definitely a project to spread across several crafting sessions.
Materials You’ll Need
Yarn
Main Color (MC): Light yellow or buttercream, approximately 450 yards of DK weight yarn (CYCA 3)
Contrast Color A (CCA): Soft peach, approximately 60 yards of DK weight yarn
Contrast Color B (CCB): Pale yellow, approximately 40 yards of DK weight yarn (you can use MC instead)
Contrast Color C (CCC): Sage green or light olive, approximately 30 yards of DK weight yarn
Recommended Yarn Brands
Paintbox Yarns Simply DK works beautifully for this project. Try Buttercup Yellow for the main color, Blush Pink for the peach roses, and Pistachio Green for the leaves. This yarn is 100% acrylic, machine washable, and gives excellent stitch definition for the crocodile stitch.
Lion Brand Pound of Love in Sunny Yellow offers exceptional softness and great value. It’s budget friendly and widely available at most craft stores.
Paintbox Yarns Cotton DK in Banana Cream is perfect for warmer climates or summer celebrations. Cotton produces a slightly stiffer crocodile stitch with beautiful definition.
Substitution note: Choose any DK weight yarn. For baby items, prioritize machine washable fiber. Avoid yarns with heavy texture or halo like mohair or bouclé since these obscure the scales and make stitch counting difficult.
Hooks
Notions
Gauge
Getting gauge right is critical for a fitted garment like this. Please work a swatch before beginning.
Bodice gauge (with D-3 / 3.25 mm hook, working single crochet in the round): 20 sc x 22 rounds = 4 inches / 10 cm
Skirt gauge (with E-4 / 3.5 mm hook): One full crocodile stitch scale measures approximately 0.85 inches wide. Four rows of crocodile stitch equal approximately 2 inches tall.
Adjust hook size as needed to match these measurements.
Abbreviations and Stitch Definitions
Let me walk you through every abbreviation you’ll see in this pattern. I’ll give you the full name, the abbreviation, and a plain English explanation of what to actually do.
Single crochet (sc): Insert hook into stitch, yarn over, pull up a loop (2 loops on hook), yarn over, pull through both loops. This creates a short, dense stitch.
Double crochet (dc): Yarn over, insert hook into stitch, yarn over, pull up a loop (3 loops on hook), yarn over, pull through 2 loops, yarn over, pull through remaining 2 loops. This creates a taller stitch.
Half double crochet (hdc): Yarn over, insert hook into stitch, yarn over, pull up a loop (3 loops on hook), yarn over, pull through all 3 loops at once. Height falls between sc and dc.
Chain (ch): Yarn over, pull through loop on hook. Creates foundation or turning chains.
Slip stitch (sl st): Insert hook, yarn over, pull through stitch and loop on hook in one motion. Used for joining or moving yarn position.
Increase (inc): Work 2 sc in the same stitch. This adds one stitch to your count.
Single crochet 2 together (sc2tog): Insert hook in first stitch, pull up loop, insert hook in next stitch, pull up loop (3 loops on hook), yarn over, pull through all 3 loops. This decreases by one stitch.
Magic ring (MR): An adjustable starting loop that can be pulled tight to close any gap.
Skip (sk): Pass over the indicated number of stitches without working into them.
Space (sp): The gap created by chain stitches in previous rows.
Place marker (pm): Put a stitch marker in the indicated stitch to track important positions.
Special Techniques
Crocodile Stitch Scale
This is the star technique of the entire dress. Don’t let it intimidate you. Once you understand the mechanics, you’ll work these scales almost on autopilot.
The crocodile stitch creates overlapping scales by working double crochets around the posts (vertical bars) of a foundation row. Here’s how it works:
Foundation Setup: First you create pairs of dc stitches separated by ch 1 spaces. Each pair consists of 2 dc worked into the same stitch, ch 1, skip 1, 2 dc in next stitch. This creates the "spine" that each scale wraps around.
Working One Scale:
1. With right side facing, join yarn to the top of the first dc in a pair. Work 5 dc down the post of that first dc, working from top to bottom. Turn your work 90 degrees clockwise.
2. Work 1 sc into the ch-1 space at the base between the two posts. Turn work another 90 degrees.
3. Work 5 dc up the post of the second dc in the pair, working from bottom to top.
4. Sl st to the top of that second dc to close the scale.
Each completed scale uses one dc pair as its foundation. The scales naturally overlap and create that gorgeous layered petal effect.
Scallop Edging
Work this along any edge for a decorative finish: (Sl st, ch 1, 4 dc, ch 1, sl st) all in the same stitch, skip 1 stitch. Repeat across.
Dimensional Rolled Rose (Large)
These roses measure approximately 1.5 inches in diameter.
Foundation: Ch 36 loosely.
Row 1: Sc in 2nd ch from hook and in each ch across. (35 sc)
Row 2: Ch 3, turn. 2 dc in first st, 3 dc in each st across. (105 dc)
Fasten off, leaving a long tail.
To form the rose: Hold the end of Row 2 and begin rolling the strip tightly inward, with Row 2 (the ruffled edge) on the outside. As you roll, use the tail to tack the base every few stitches with whipstitches to secure. Continue rolling and tacking until the full strip is consumed. The base should be flat and secure.
Dimensional Rolled Rose (Small)
These measure approximately 0.75 inch in diameter.
Foundation: Ch 21 loosely.
Row 1: Sc in 2nd ch from hook and in each ch across. (20 sc)
Row 2: Ch 3, turn. 2 dc in first st, 3 dc in each st across. (60 dc)
Fasten off and assemble the same way as the large rose.
Leaf
With CCC, ch 8.
Row 1: Sc in 2nd ch from hook, hdc in next, dc in next 2, hdc in next, sc in next, 3 sc in last ch (working around to opposite side of foundation chain), sc in next, hdc in next, dc in next 2, hdc in next, sc in last, sl st to first sc. Fasten off, leaving tail for sewing.
Pattern Notes Before You Begin
1. The bodice is worked top down in the round on the right side throughout.
2. Stitch markers are placed at the four raglan corners and moved up each round.
3. The back opening is created by working flat rows to form a button band.
4. The skirt transitions from single crochet into crocodile stitch rounds.
5. Ruffle sleeves are worked by picking up stitches along the armhole edge.
6. All roses and leaves are made separately and sewn on at the end.
7. The dress is worked with MC throughout unless specified otherwise.
8. Ch 1 at the beginning of a single crochet round does NOT count as a stitch.
9. Ch 3 at the beginning of a double crochet row counts as 1 dc.
Step by Step Instructions
Section 1: Bodice (Worked Top Down in the Round)
Begin at the neckline.
Rnd 1: With MC and D-3 / 3.25 mm hook, ch 64, sl st to first ch to form a ring (take care not to twist). Ch 1, sc in each ch around. (64 sc)
Place markers at the following positions to define raglan sections:
The four marker positions (at stitches 11, 23, 39, 51) represent the raglan lines. On each increase round, work inc at each marked stitch. Move markers up each round.
Rnd 2 (increase round): Sc to 1 st before marker, inc in marked st, sc in marked st, inc in next st; rep from 4 times, sc to end of round. (72 sc)
Rnd 3: Sc in each st around. (72 sc)
Rnd 4 (increase round): Sc to 1 st before marker, inc in marked st, sc in marked st, inc in next st; rep from 4 times, sc to end of round. (80 sc)
Rnd 5: Sc in each st around. (80 sc)
Rnd 6 (increase round): Sc to 1 st before marker, inc in marked st, sc in marked st, inc in next st; rep from 4 times, sc to end of round. (88 sc)
Rnd 7: Sc in each st around. (88 sc)
Rnd 8 (increase round): Sc to 1 st before marker, inc in marked st, sc in marked st, inc in next st; rep from 4 times, sc to end of round. (96 sc)
Rnd 9: Sc in each st around. (96 sc)
Rnd 10 (increase round): Sc to 1 st before marker, inc in marked st, sc in marked st, inc in next st; rep from 4 times, sc to end of round. (104 sc)
Rnd 11: Sc in each st around. (104 sc)
Rnd 12 (increase round): Sc to 1 st before marker, inc in marked st, sc in marked st, inc in next st; rep from 4 times, sc to end of round. (112 sc)
Rnd 13: Sc in each st around. (112 sc)
Checkpoint: After Rnd 13, the neckline ring should measure approximately 12.5 inches in circumference. The piece from neckline to current working row should measure approximately 2.5 inches.
Separating Sleeves from Body
Rnd 14 (separation round): Sc across 28 back sts, ch 4 (underarm bridge), skip next 22 sleeve sts, sc across 28 front sts, ch 4, skip next 22 sleeve sts, sl st to first sc of round to close. (56 sc body + 8 ch = 64 working sts)
Rnd 15: Sc in each sc and each ch around. (64 sc)
Section 2: Lower Bodice (Waist Shaping)
Rnds 16 to 22: Sc in each st around, 7 rounds even. (64 sc each round)
Rnd 23 (waist decrease round): Sc 14, sc2tog; rep from 3 more times. (60 sc)
Rnd 24: Sc in each st around. (60 sc)
Rnd 25 (waist decrease round): Sc 13, sc2tog; rep from 3 more times. (56 sc)
Rnds 26 to 28: Sc in each st around, 3 rounds even. (56 sc each round)
Checkpoint: After Rnd 28, the bodice from neckline to current round should measure approximately 5.5 inches. The waist circumference should be approximately 11.5 inches.
Section 3: Skirt Foundation Round
Switch to E-4 / 3.5 mm hook.
Rnd 29 (skirt increase round): Sc 1, inc; rep from around. (84 sc)
Rnd 30 (establish crocodile stitch foundation): Ch 3 (counts as dc), dc in same st, ch 1, sk 1, 2 dc in next st; rep from around, ch 1, sk 1, sl st to top of beg ch-3 to join. (42 dc pairs, 42 ch-1 sps)
Section 4: Skirt in Crocodile Stitch
Crocodile Stitch Round 1:
Working on right side, join MC to top of first dc of any pair. Work one crocodile stitch scale on each dc pair around. After completing each scale, sl st into the next ch-1 space to move to the next pair. Complete 42 scales total. Sl st to base of first scale to close round. (42 scales)
Bridging Row 1 (Rnd 31): Sl st to top of first scale. Ch 3, dc in same sp, ch 1, sk to next scale top, 2 dc in top of that scale; rep from around, ch 1, sl st to top of beg ch-3. (42 dc pairs)
Crocodile Stitch Round 2:
Work 42 crocodile stitch scales over the new dc pairs from Rnd 31. (42 scales)
Rnd 32 (increase bridging row): Sl st to top of first scale. Ch 3, dc in same sp, ch 1, 2 dc in same sp, ch 1, sk to next scale top, 2 dc in top of that scale, ch 1, 2 dc in same sp; rep from around, ch 1, sl st to top of beg ch-3. (84 dc pairs)
By working 2 dc pairs out of each scale top, you double the number of working pairs, expanding the circumference for the next scale row.
Crocodile Stitch Round 3:
Work 84 crocodile stitch scales over the pairs from Rnd 32. (84 scales)
Bridging Row 2 (Rnd 33): Sl st to top of first scale. Ch 3, dc in same sp, ch 1, sk to next scale top, 2 dc in top of that scale; rep from around, ch 1, sl st to top of beg ch-3. (84 dc pairs)
Crocodile Stitch Round 4:
Work 84 crocodile stitch scales over the pairs from Rnd 33. (84 scales)
Bridging Row 3 (Rnd 34): Sl st to top of first scale. Ch 3, dc in same sp, ch 1, sk to next scale top, 2 dc in top of that scale; rep from around, ch 1, sl st to top of beg ch-3. (84 dc pairs)
Crocodile Stitch Round 5 (final layer):
Work 84 crocodile stitch scales over the pairs from Rnd 34. (84 scales)
Checkpoint: After completing all 5 crocodile stitch scale rounds, the skirt should measure approximately 7.5 inches from the waist join. Total dress length from neckline should be approximately 13 inches.
Section 5: Hem Scallop Edging
Rnd 35: Sl st to top of first scale. Join MC. Work scallop edging: (Sl st, ch 1, 4 dc, ch 1, sl st) in top of each scale around. Work 1 scallop per scale top. (84 scallops)
Fasten off and weave in end.
Section 6: Sleeve Ruffles
Work separately on each armhole.
With right side facing and D-3 / 3.25 mm hook, join MC to underarm bridge chain.
Pick up and sc in each of the 4 underarm chain sts, then sc in each of the 22 held sleeve sts. (26 sc total)
Row 1 (RS): Ch 1, turn. Sc in each st across. (26 sc)
Row 2 (WS, ruffle foundation): Ch 3, turn. 2 dc in each st across. (52 dc)
Row 3 (ruffle flare): Ch 3, turn. Dc in first st, 2 dc in next st, dc in next st; rep from across to last st, dc in last st. (77 dc)
Fasten off. Repeat for second sleeve.
Checkpoint: Each ruffle sleeve should measure approximately 2.5 inches wide at the base and ruffle out to approximately 3.5 inches.
Section 7: Back Button Band
With right side facing and D-3 / 3.25 mm hook, join MC at the top right back opening edge.
Row 1: Ch 1. Sc evenly down the right back opening edge, approximately 1 sc per row end. Work approximately 28 sc total. Fasten off. (28 sc)
Join MC at the bottom left back opening edge.
Row 1: Ch 1. Sc evenly up the left back opening edge. (28 sc)
Row 2 (buttonhole row): Ch 1, turn. Sc 3, ch 2, sk 2, sc 7; rep from 2 more times, sc to end. (3 buttonholes made)
Row 3: Ch 1, turn. Sc across, working 2 sc into each ch-2 sp. (28 sc)
Fasten off. Sew 3 buttons onto right back band opposite buttonholes.
Section 8: Neckline Finishing Edge
With right side facing and D-3 / 3.25 mm hook, join MC at back left neckline corner.
Rnd 1: Ch 1. Sc evenly around the neckline, working 1 sc per st across the original 64 neckline chain stitches and 1 sc per row end along any back opening edges. Work corner sc2tog at each back upper corner. (approximately 68 sc)
Rnd 2: Sk 1, 3 dc in next st, sk 1, sl st in next st; rep from around. (approximately 17 scallops)
Fasten off and weave in ends.
Roses and Leaves
Large Roses for Hem: Make 8 total. Make 4 in CCA (peach) and 4 in MC or CCB (buttercream/pale yellow). Follow the Dimensional Rolled Rose (Large) instructions.
Small Roses for Chest: Make 2 total. Make 1 in CCA (peach) and 1 in MC. Follow the Dimensional Rolled Rose (Small) instructions.
Leaves: Make 22 total in CCC (sage green). Follow the Leaf instructions.
Assembly
Step 1: Lay dress flat with right side up. Position 8 large roses evenly along the hem scallop edging, alternating peach and yellow. Space them evenly around the full hem circumference. Pin in place.
Step 2: Tuck 2 to 3 leaves behind and between each large rose so leaf tips peek out from under rose edges. Pin.
Step 3: Using MC threaded on yarn needle, whipstitch each rose and leaf firmly to the scallop edging. Stitch through the base multiple times to secure them so they will not droop during wear.
Step 4: Position 2 small roses on the front bodice center, approximately 1 inch below the neckline ruffle, slightly offset left and right of center. Tuck 2 leaves beneath each small rose. Stitch firmly in place.
Step 5: If using pearl beads, thread bead onto a sewing needle with doubled thread and stitch securely into the center of each small chest rose.
Step 6: Weave in all remaining ends.
Size Customization Tips
For a smaller size (0 to 3 months): Reduce starting chain to 56 for neckline. Work only 4 raglan increase rounds instead of 6. Reduce lower bodice rows (Rnds 16 to 22) to 4 rows. Remove Crocodile Rounds D and E so the skirt has 3 scale rows instead of 5. Total length reduces to approximately 10 inches.
For a larger size (12 to 18 months): Begin with ch 72. Work 8 raglan increase rounds instead of 6. Increase lower bodice rows to 10 rounds. Add a 6th scale row to the skirt. Estimated total length: approximately 15 inches.
For width adjustment: Each additional 4 stitches in the starting chain adds approximately 0.75 inch to the neckline and proportionally increases lower body width through the raglan increases.
Blocking and Finishing
Wet blocking is strongly recommended to open the crocodile stitch scales fully.
1. Hand wash the completed dress in cool water with gentle wool wash or baby-safe soap. Do not wring.
2. Gently squeeze out excess water. Roll in a clean towel to remove most moisture.
3. Lay flat on a foam blocking board or clean towel. Gently tug and pin the skirt hem into a smooth, even circle.
4. Use pins to hold the neckline open and round.
5. Gently open each crocodile stitch scale with fingertips so they fan outward fully.
6. Allow to dry completely, approximately 12 to 24 hours.
The roses do not require blocking.
Care Instructions
Machine washable acrylic yarns: Machine wash on gentle/delicate cycle in a mesh laundry bag, cold water. Lay flat to dry. Do not tumble dry.
Cotton or cotton-blend yarns: Hand wash in cool water. Lay flat to dry.
All versions: Do not iron directly on the roses. Store the dress folded gently with tissue paper between the rose layers.
Final Thoughts
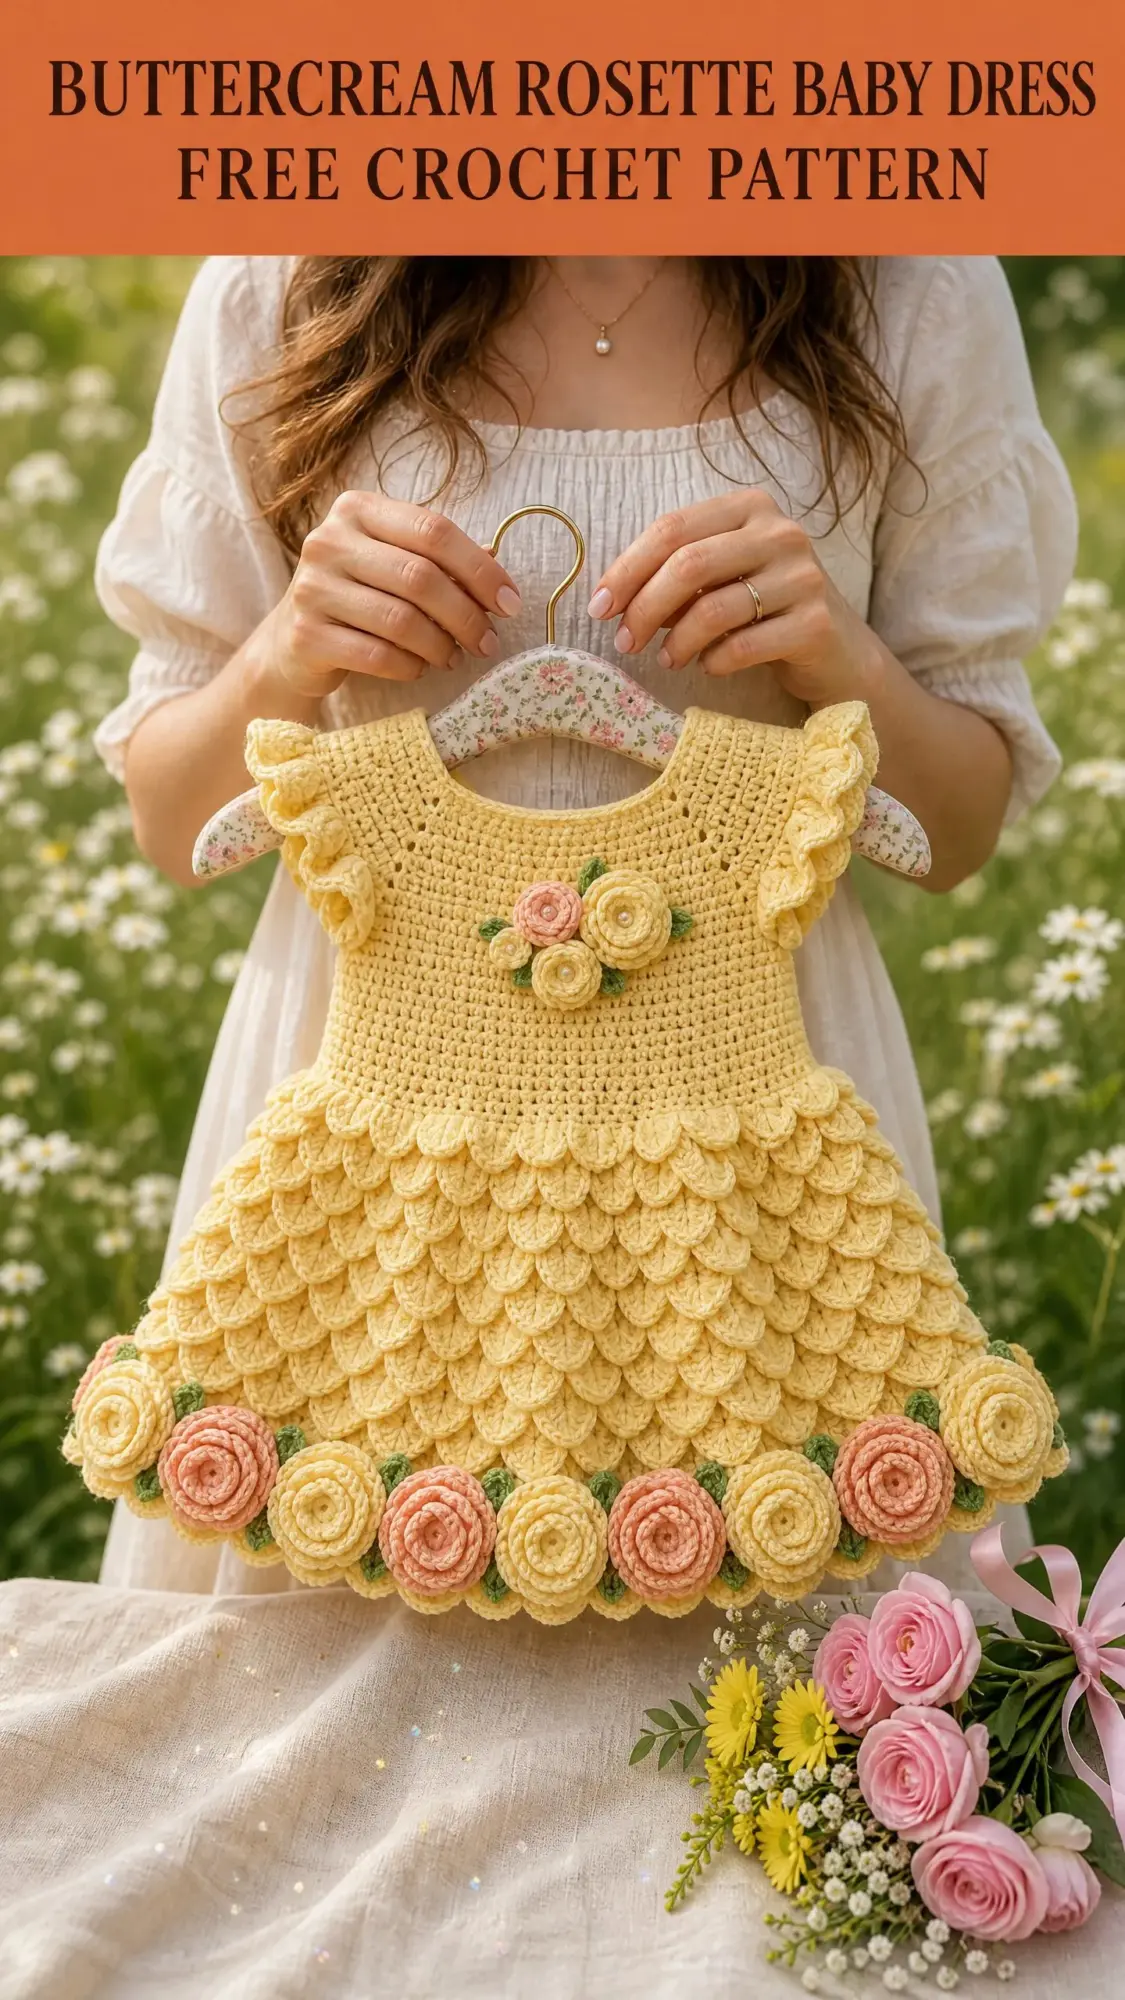
Thank you so much for choosing this Buttercream Rosette Baby Dress crochet pattern. This project takes time and patience, but the result is truly spectacular. Every crocodile stitch scale, every rolled rose, every tiny leaf adds up to a dress that will be treasured for generations. I would absolutely love to see your finished dresses. Tag me on Instagram or share your photos on Facebook so I can celebrate your beautiful work with you.
If you love this pattern, go ahead and save it to your Pinterest boards so you can find it whenever you’re ready to start. And please drop a comment below if you make this dress. I read every single one and your feedback means the world to me. Happy crocheting!