
I call this one the "Lilac Dreams" sweater, and it has quite the backstory. I sketched the original design in a beat-up notebook about three years ago while sitting in a coffee shop, watching the sunset turn the sky from deep purple to pale pink to cream. I wanted to capture that exact gradient in yarn. The notebook sat in a drawer for ages until my niece mentioned she wanted something "whimsical but cozy" for her birthday. I pulled out those old sketches, refined the construction, and finally brought this dreamy piece to life.
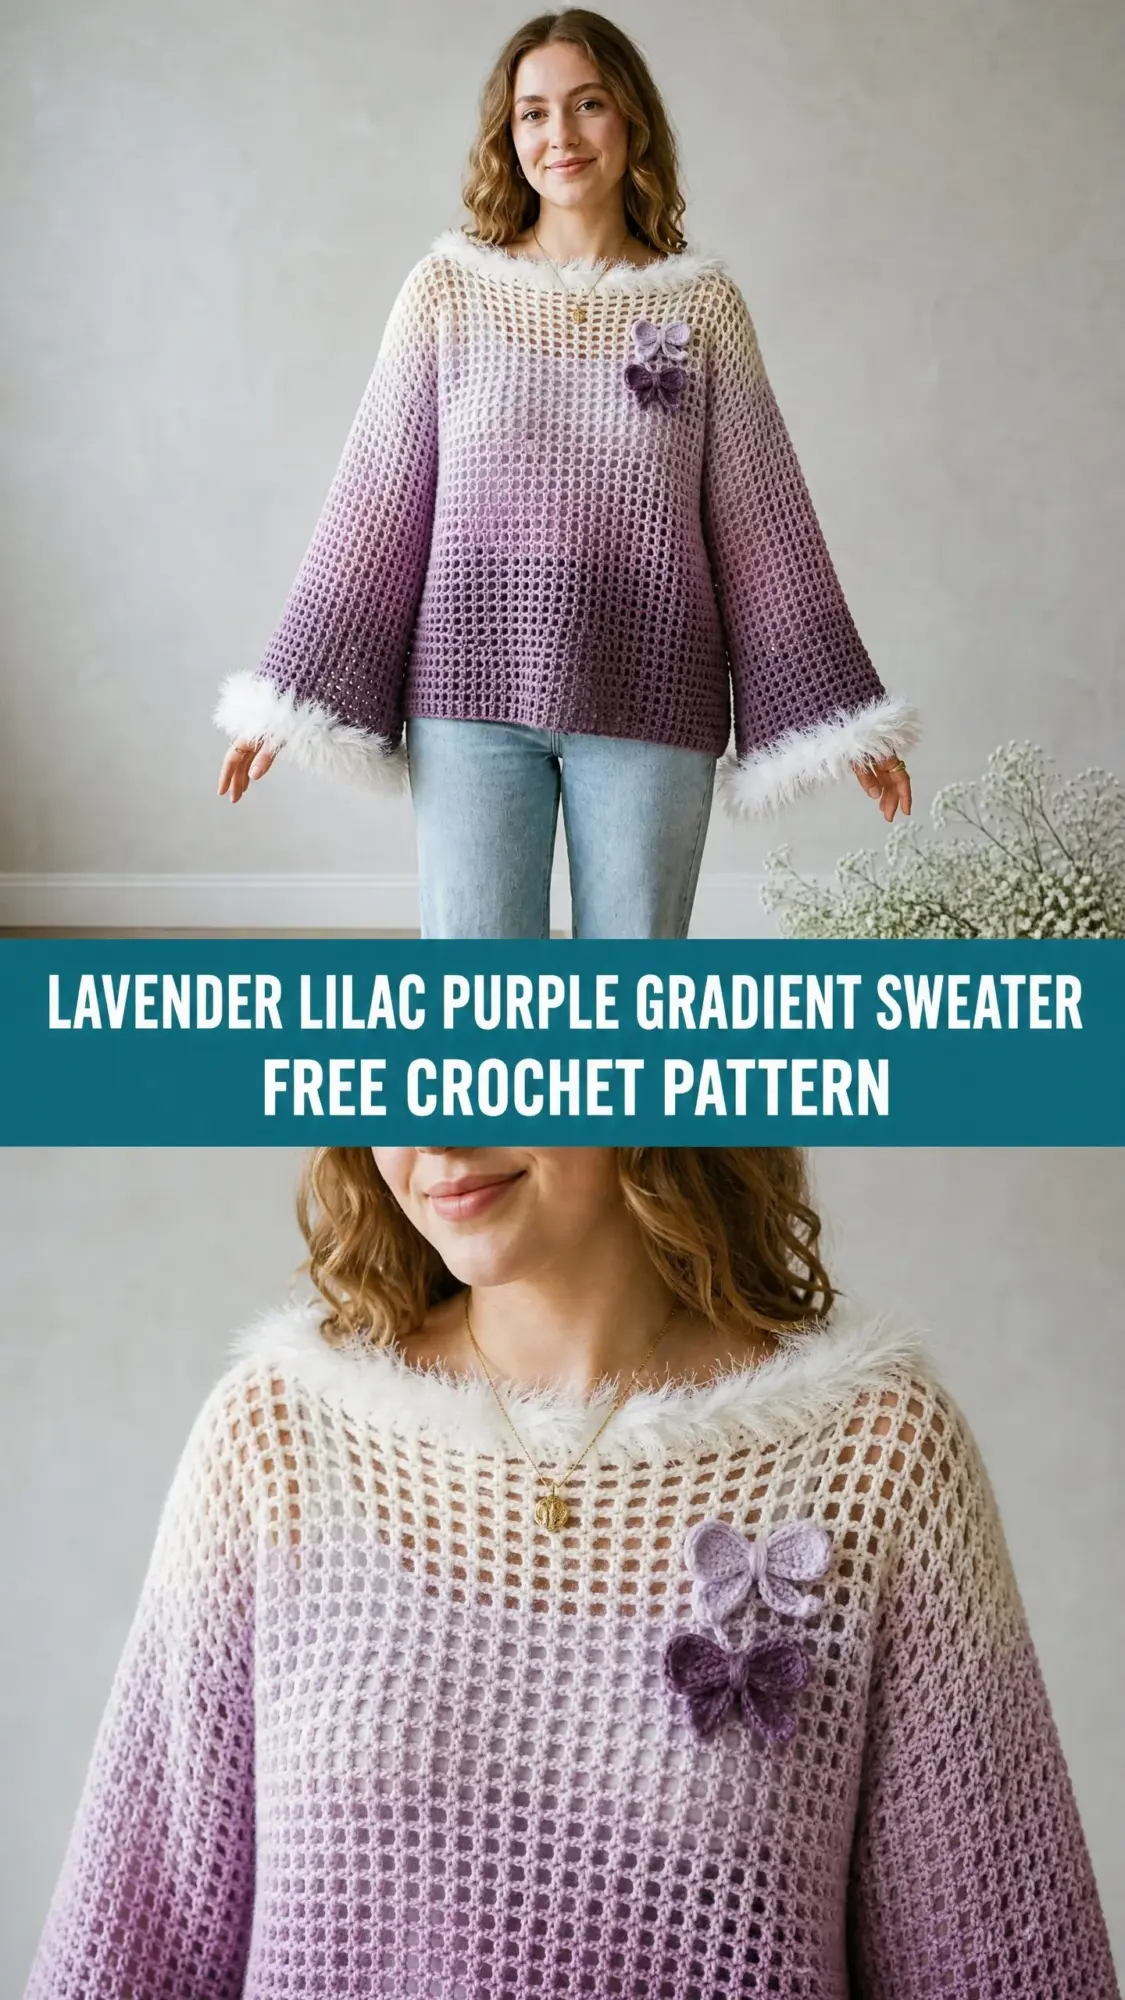
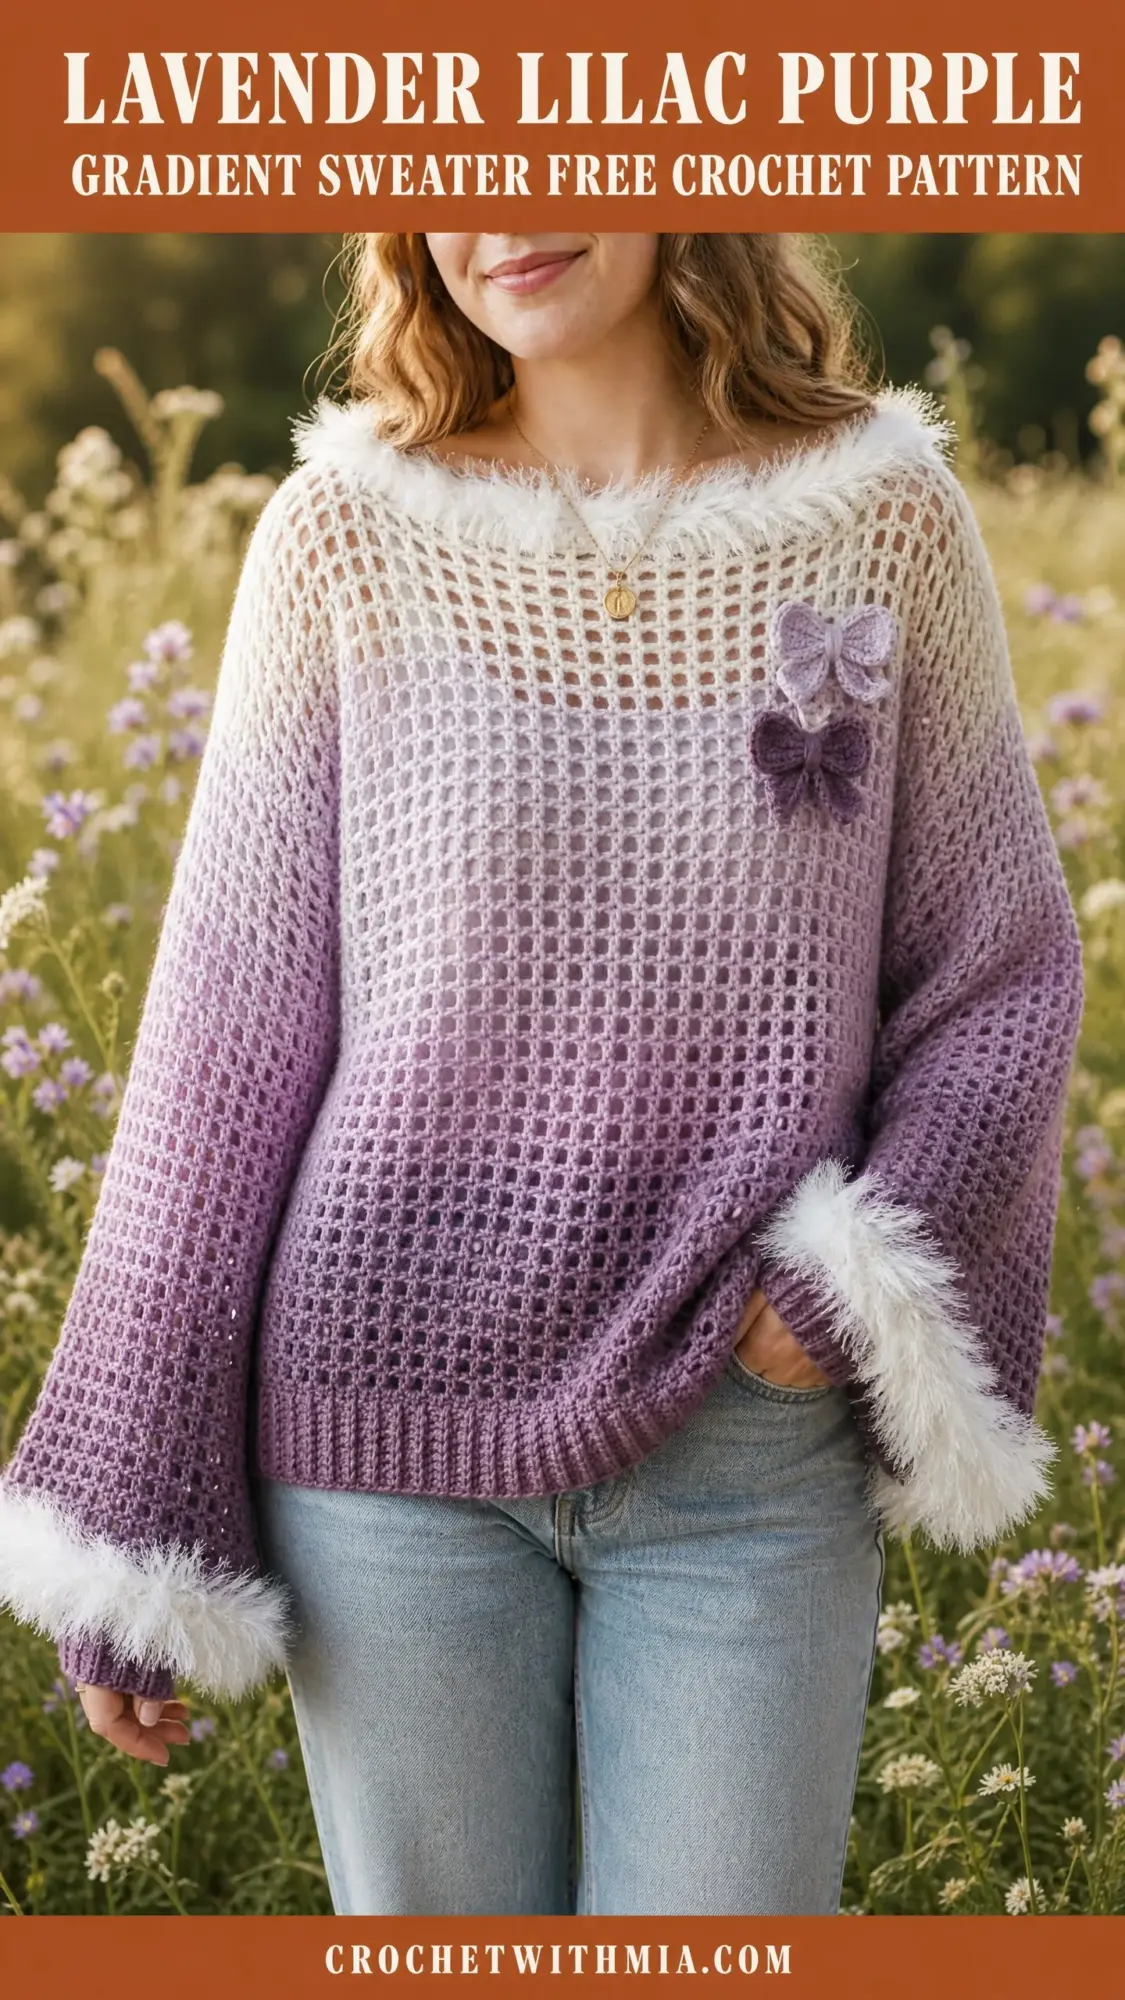
The result exceeded every expectation I had. That ombre effect flowing from dusty purple at the hem up through soft lavender and into creamy white at the shoulders creates such a stunning visual statement. And those fluffy white cuffs and neckline trim? They add just the right touch of playfulness.
This is absolutely a project worth your time if you have intermediate crochet skills under your belt. The mesh stitch pattern itself is simple, but you will need comfort with seaming garment pieces, managing color transitions, and adding trim with novelty yarn. Let me walk you through everything you need to know.
Why This Gradient Crochet Sweater Pattern Works So Well
The construction of this oversized pullover is straightforward once you understand the pieces. You will work four flat panels: a front body, a back body, and two sleeves. All pieces use the same open mesh stitch pattern throughout, which creates an airy fabric perfect for layering over a camisole or fitted top.
The gradient magic happens naturally if you use a self-striping ombre skein, or you can create your own color transitions using separate solid skeins. Either approach works beautifully. The sweater is worked from the hem upward, so your darkest purple starts at the bottom and gradually lightens as you work toward the shoulders.
Those dramatic bell sleeves are one of my favorite features. They start narrow at the cuff and flare out with regular increases to create that eye-catching silhouette. The white eyelash yarn trim at the neckline and cuffs adds texture and whimsy without overwhelming the gradient effect.
Materials You Will Need
Yarn A (main gradient yarn): Approximately 700 to 800 yards of DK weight (3) yarn in a gradient colorway transitioning from cream through soft lavender to medium dusty purple. If using solid colors, you will need approximately 200 yards of cream, 200 yards of soft lavender, and 350 yards of dusty purple.
Yarn B (trim yarn): Approximately 80 to 100 yards of white eyelash or faux-fur yarn. Look for yarn with 1 to 2 inch fibers for maximum fluffiness.
Yarn C (ribbing and bow): Approximately 50 to 60 yards of DK weight yarn in the deepest purple shade.
Hooks: US size G-6 (4.0 mm) for main mesh body and eyelash trim, US size E-4 (3.5 mm) for ribbing bands.
Notions: Yarn needle, stitch markers, scissors, blocking mats and pins, seaming pins.
Yarn Suggestions: Paintbox Yarns Simply DK in a hand-dyed gradient set pairs wonderfully with Lion Brand Fun Fur in White. Malabrigo Rios DK in colorway Purpuras also creates gorgeous results with Bernat Pipsqueak in Snow White for trim.
Gauge Information
With Yarn A and US G-6 (4.0 mm) hook in mesh pattern: 16 stitches x 16 rows = 4 inches x 4 inches (10 cm x 10 cm)
Count both the single crochet stitches (sc) and the chain spaces as stitches for gauge purposes. In 4 inches you should have 8 mesh repeats. Each repeat equals 1 sc plus 1 chain, so 16 stitch units across.
Always make a gauge swatch at least 5 inches square. Wash and block it before measuring because the open mesh will grow with moisture.
Finished Measurements
This pattern is written for size Small/Medium, fitting bust 34 to 38 inches (86 to 97 cm).
Abbreviations and Stitch Definitions
ch: chain, the foundation stitch that creates loops on your hook
sl st: slip stitch, a flat joining stitch
sc: single crochet, insert hook, yarn over, pull through, yarn over, pull through both loops
sc2tog: single crochet two together, a decrease that combines two stitches into one
BLO: back loop only, working into just the back loop of a stitch to create ribbed texture
RS: right side, the side that faces outward when worn
WS: wrong side, the inside of the garment
st(s): stitch or stitches
sp(s): space or spaces
sk: skip
tch: turning chain
ch-sp: chain space
Special Stitches Explained
Mesh Stitch (worked flat in rows)
This creates a uniform grid of small open squares. It is the primary pattern for the entire sweater.
Foundation row setup: Work into the foundation chain as follows. After making your foundation chain, work a sc into the 4th chain from the hook. The skipped chains count as a ch-1 space plus the first sc. Then work (ch 1, sk 1 ch, sc in next ch) across. At end, ch 2, turn.
Working rows: Ch 2, turn. Sc into the first ch-sp, (ch 1, sc into next ch-sp) across, ending with sc into the turning-chain space of the previous row. Ch 2, turn.
Each "mesh unit" consists of 1 sc and 1 ch-sp. When stitch counts are given, the count refers to the number of mesh units.
Ribbing (worked in BLO sc)
All ribbing is worked in rows in BLO sc. Working only in the back loop creates horizontal ridges and stretchy, elastic texture.
Row setup: Ch the required number, sc in 2nd ch from hook and in each ch across. Ch 1, turn.
Subsequent rows: Sc in BLO of each st across. Ch 1, turn.
Pattern Notes Before You Begin
The gradient is created by working from the HEM (darkest purple) upward toward the SHOULDER (lightest cream). If using a pre-wound gradient skein, work from the darkest end first.
Gradient color placement when working from hem upward:
If using a gradient skein, let the skein determine color placement naturally. Slight variations are intentional and desirable.
The turning chain of ch 2 at the beginning of each mesh row counts as the first ch-1 space, not as a stitch.
Back Body Panel Instructions
The Back Body is a rectangle worked from hem to shoulder.
Foundation Chain: Using Yarn A (beginning with darkest purple) and G-6 hook, ch 95.
Foundation Mesh Row (Row 1 RS): Sc in 4th ch from hook, (ch 1, sk 1 ch, sc in next ch) across. (46 mesh units) Ch 2, turn.
Row 2 (WS): Ch 2, turn. Sc into first ch-sp, (ch 1, sc into next ch-sp) across, ending with sc into the tch-sp. (46 mesh units) Ch 2, turn.
Rows 3 to 56: Rep Row 2, maintaining pattern. (46 mesh units each row)
Follow the gradient color placement notes above. Continue until the piece measures approximately 22 inches (56 cm) from the foundation chain, or 56 rows total are complete.
Fasten off and weave in ends.
Checkpoint: The Back Body should measure approximately 23 inches (58 cm) wide and 22 inches (56 cm) tall before blocking.
Front Body Panel Instructions
Foundation Chain: Using Yarn A (beginning with darkest purple) and G-6 hook, ch 95.
Rows 1 to 46 (Body): Work exactly as Back Body Rows 1 to 46. (46 mesh units) Ch 2, turn.
At end of Row 46, the piece should measure approximately 17 inches (43 cm) from hem. This is where neckline shaping begins.
Neckline Shaping for Left Shoulder
Row 47 (RS): Ch 2, turn. Sc into first ch-sp, (ch 1, sc into next ch-sp) 14 times, ch 1, sc into next ch-sp. (15 mesh units) Ch 2, turn. Leave remaining stitches unworked.
Rows 48 to 52: Work in pattern over 15 mesh units only. (15 mesh units each row) Ch 2, turn.
Rows 53 to 56: Work in pattern over 15 mesh units, switching to cream/white yarn per gradient schedule. (15 mesh units) Fasten off.
Neckline Shaping for Right Shoulder
Skip the center 16 mesh units. This creates the open boat neck. With RS facing, join yarn in the 33rd mesh unit from the right edge.
Row 47 (RS): Ch 2, sc in same ch-sp where you joined, (ch 1, sc in next ch-sp) 14 times. (15 mesh units) Ch 2, turn.
Rows 48 to 56: Work in pattern over 15 mesh units. (15 mesh units each row)
Fasten off.
Left Sleeve Instructions
The sleeve is worked from the cuff upward, increasing to create the dramatic bell flare.
Foundation Chain: Using Yarn A (beginning with darkest purple) and G-6 hook, ch 31.
Foundation Mesh Row (Row 1 RS): Sc in 4th ch from hook, (ch 1, sk 1 ch, sc in next ch) across. (14 mesh units) Ch 2, turn.
Rows 2 to 4: Work in mesh pattern across. (14 mesh units each row)
Increase Row Instructions
Work increases by making 2 mesh units into the first and last mesh spaces of the row, adding 1 mesh unit at each end.
Increase Row: Ch 2, turn. Sc into first ch-sp, ch 1, sc into SAME ch-sp again (increase at right edge), (ch 1, sc into next ch-sp) across to last ch-sp, ch 1, sc into last ch-sp, ch 1, sc into same ch-sp again (increase at left edge).
Work increases every 4th row as follows:
Row 5 Increase Row: (16 mesh units)
Rows 6 to 8: Work even. (16 mesh units)
Row 9 Increase Row: (18 mesh units)
Rows 10 to 12: Work even. (18 mesh units)
Row 13 Increase Row: (20 mesh units)
Rows 14 to 16: Work even. (20 mesh units)
Row 17 Increase Row: (22 mesh units)
Rows 18 to 20: Work even. (22 mesh units)
Row 21 Increase Row: (24 mesh units)
Rows 22 to 24: Work even. (24 mesh units)
Row 25 Increase Row: (26 mesh units)
Rows 26 to 28: Work even. (26 mesh units)
Row 29 Increase Row: (28 mesh units)
Rows 30 to 32: Work even. (28 mesh units)
Row 33 Increase Row: (30 mesh units)
Rows 34 to 36: Work even. (30 mesh units)
Row 37 Increase Row: (32 mesh units)
Rows 38 to 40: Work even. (32 mesh units)
Row 41 Increase Row: (34 mesh units)
Rows 42 to 44: Work even. (34 mesh units)
Row 45 Increase Row: (36 mesh units)
Continue even until sleeve measures 18 inches (46 cm) total from foundation row or 50 rows total. The last several rows should be in cream/white following the gradient schedule.
Fasten off.
Checkpoint: The completed sleeve should measure approximately 9 inches (23 cm) wide at the cuff end and approximately 18 inches (46 cm) wide at the top, and 18 inches (46 cm) long from foundation to final row.
Right Sleeve: Work identically to Left Sleeve.
Ribbing Bands
Hem Ribbing (make 2)
Using Yarn C (deep purple) and E-4 hook, ch 7.
Row 1: Sc in 2nd ch from hook and in each ch across. (6 sc) Ch 1, turn.
Rows 2 to 48: Sc in BLO of each st across. (6 sc) Ch 1, turn.
The ribbing strip should measure approximately 12 inches (30 cm) long to match your body panel hem width. Fasten off, leaving an 18-inch tail for seaming.
Cuff Ribbing (make 2)
Using Yarn C and E-4 hook, ch 7.
Row 1: Sc in 2nd ch from hook and in each ch across. (6 sc) Ch 1, turn.
Rows 2 to 28: Sc in BLO of each st across. (6 sc) Ch 1, turn.
The cuff ribbing strip should measure approximately 7 inches (18 cm) long. Fasten off, leaving an 18-inch tail.
Assembly Instructions
Block all four pieces before seaming by wet blocking. This step is critical for open mesh fabric.
Step 1 Shoulder Seams: Align shoulder edges of Front and Back panels. Seam the left shoulder section (15 mesh units of Front to the leftmost 15 mesh units of Back) and the right shoulder section using mattress stitch. The center 16 mesh units of Back remain free for the back neckline.
Step 2 Sleeve Attachment: Measure down 9 inches (23 cm) from each shoulder seam along the side edges. Mark these points. Pin the sleeve top edge to the armhole opening, matching centers, and seam using mattress stitch.
Step 3 Side and Sleeve Seams: Seam the right side from hem to underarm, then continue seaming the right sleeve from underarm to cuff. Repeat for left side and sleeve.
Step 4 Attach Cuff Ribbing: Seam short ends of each cuff ribbing strip together to form a ring, then seam the long edge of the ring to each sleeve cuff using whipstitch.
Step 5 Attach Hem Ribbing: Attach the hem ribbing strip along the bottom edge of the Front panel and then along the bottom edge of the Back panel.
Eyelash Trim
Neckline Trim: With Yarn B (white eyelash) and G-6 hook, join at any point along the neckline edge. Ch 1. Work 1 sc in each available mesh stitch and edge stitch around the entire neckline opening. Join with sl st to first sc. Fasten off. Work a second round if desired for extra fluffiness.
Cuff Trim: With Yarn B and G-6 hook, join at the seam of the cuff ribbing ring. Ch 1. Work 1 sc in each stitch of the cuff ribbing edge. Join with sl st. Fasten off. Repeat for second cuff.
Crochet Bow Applique
Bow loop (make 2): Ch 16. Join with sl st to first ch to form a ring. Ch 1. Work 20 sc around the ring. Join with sl st. Fasten off, leaving a short tail. Flatten the loop so it forms an oval.
Center wrap: Ch 4. Sc in 2nd ch from hook and in each ch across. (3 sc) Ch 1, turn. Work 6 more rows of 3 sc each. Fasten off, leaving an 8-inch tail.
Assembly: Place the two flattened loops side by side, touching at their midpoints. Use the center wrap piece to cinch them together in the center, wrapping the small rectangle around both loops 2 to 3 times. Use the tail to sew the wrap securely. The finished bow should be approximately 2.5 inches wide.
Sew the bow to the upper left chest of the sweater, approximately 4 to 5 inches below the neckline edge and 3 to 4 inches to the left of center front.
Final Blocking and Care
Give the completed sweater a final wet block. Soak in cool water with gentle wool wash. Do not wring. Roll in a dry towel and press to remove excess water. Lay flat on blocking mats, pin to finished measurements, and allow to dry fully.
Hand wash in cool water with gentle detergent. Lay flat to dry. Do not tumble dry. Store folded flat, not hung, as the open mesh will stretch under its own weight.
Size Customization Tips
For a smaller size (XS, fits bust 30 to 33 inches): Reduce the foundation chain to ch 87 instead of 95, giving 42 mesh units per row. Reduce the cuff start from 14 to 12 mesh units.
For a larger size (L/XL, fits bust 40 to 44 inches): Increase the foundation chain to ch 103 instead of 95, giving 50 mesh units per row. Increase cuff start to 16 mesh units.
For length adjustments: Add or remove rows from the body panel before neckline shaping begins. Each row adds approximately 0.25 inches of length.
Thank you so much for choosing this lavender gradient sweater crochet pattern for your next project. I truly hope you love making it as much as I loved designing it. If you create your own version, I would absolutely love to see it! Tag me on Instagram or share a photo on Facebook.
If this pattern caught your eye, go ahead and save it to your Pinterest boards so you can find it when you are ready to cast on. And please drop a comment below if you make one. I love hearing how your projects turn out and seeing the color combinations you choose!