
If you need an heirloom-quality christening dress, baptism gown, or portrait outfit for a special little one, this cream vintage lace baby dress delivers everything you want. The design uses a seamless top-down construction with raglan shaping, a ribbed waistband for a polished fit, and stunning circular medallion motifs that create that classic vintage silhouette.
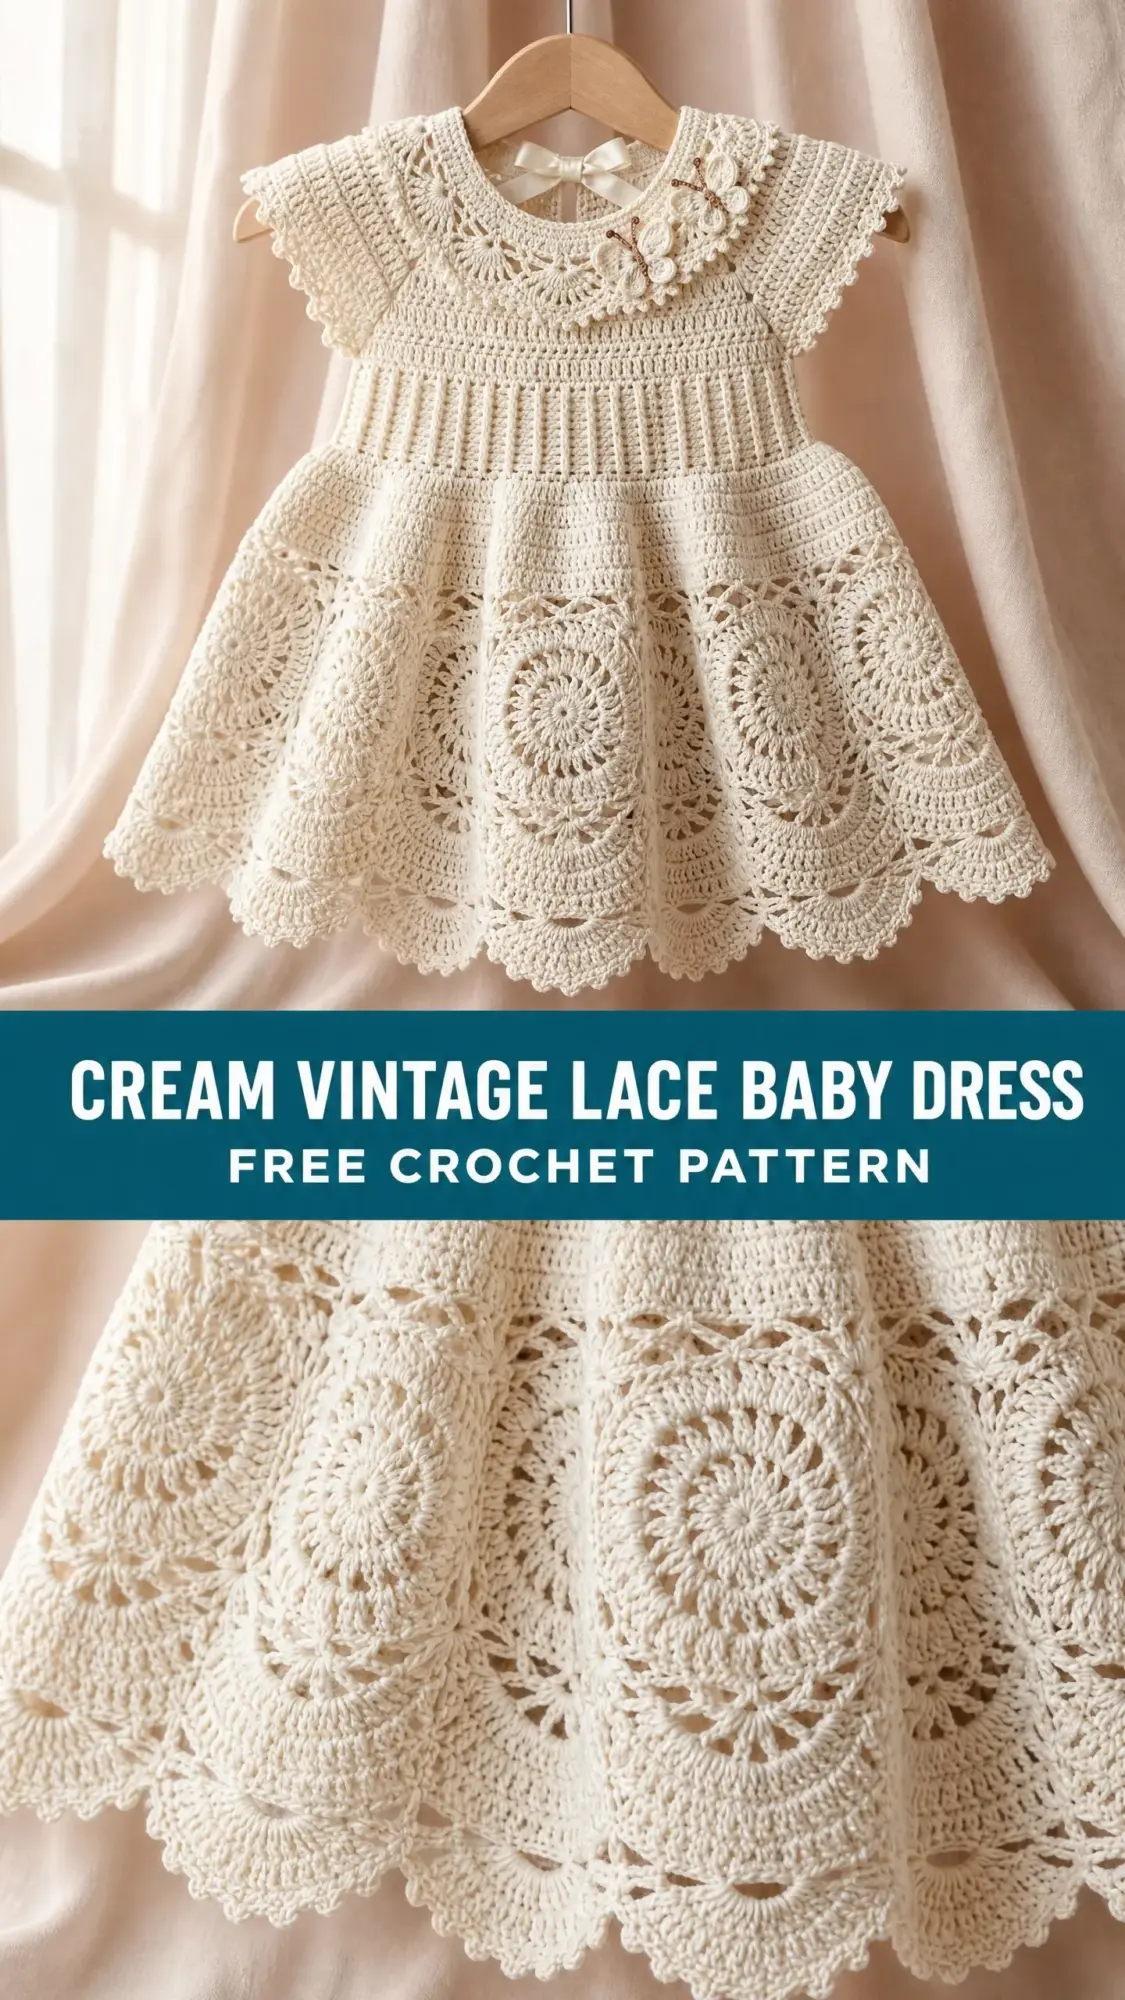
This crochet pattern works up in DK weight cotton yarn, making it perfect for warm-weather ceremonies or layering over a onesie in cooler months. The finished dress fits newborns through 18 months, so you can create a treasured keepsake no matter the baby’s age.
Fair warning: this is an advanced project that takes 20 to 30 hours to complete. But if you are comfortable with joining motifs and working lace patterns, the result is absolutely worth every stitch. It makes an unforgettable baby shower gift or a family heirloom to pass down through generations.
Why This Vintage Baby Dress Pattern Works So Well
I love how this dress combines practical construction with show-stopping details. The top-down approach means you can try it on as you go and adjust the length easily. No seaming the body together at the end, no guessing about fit.
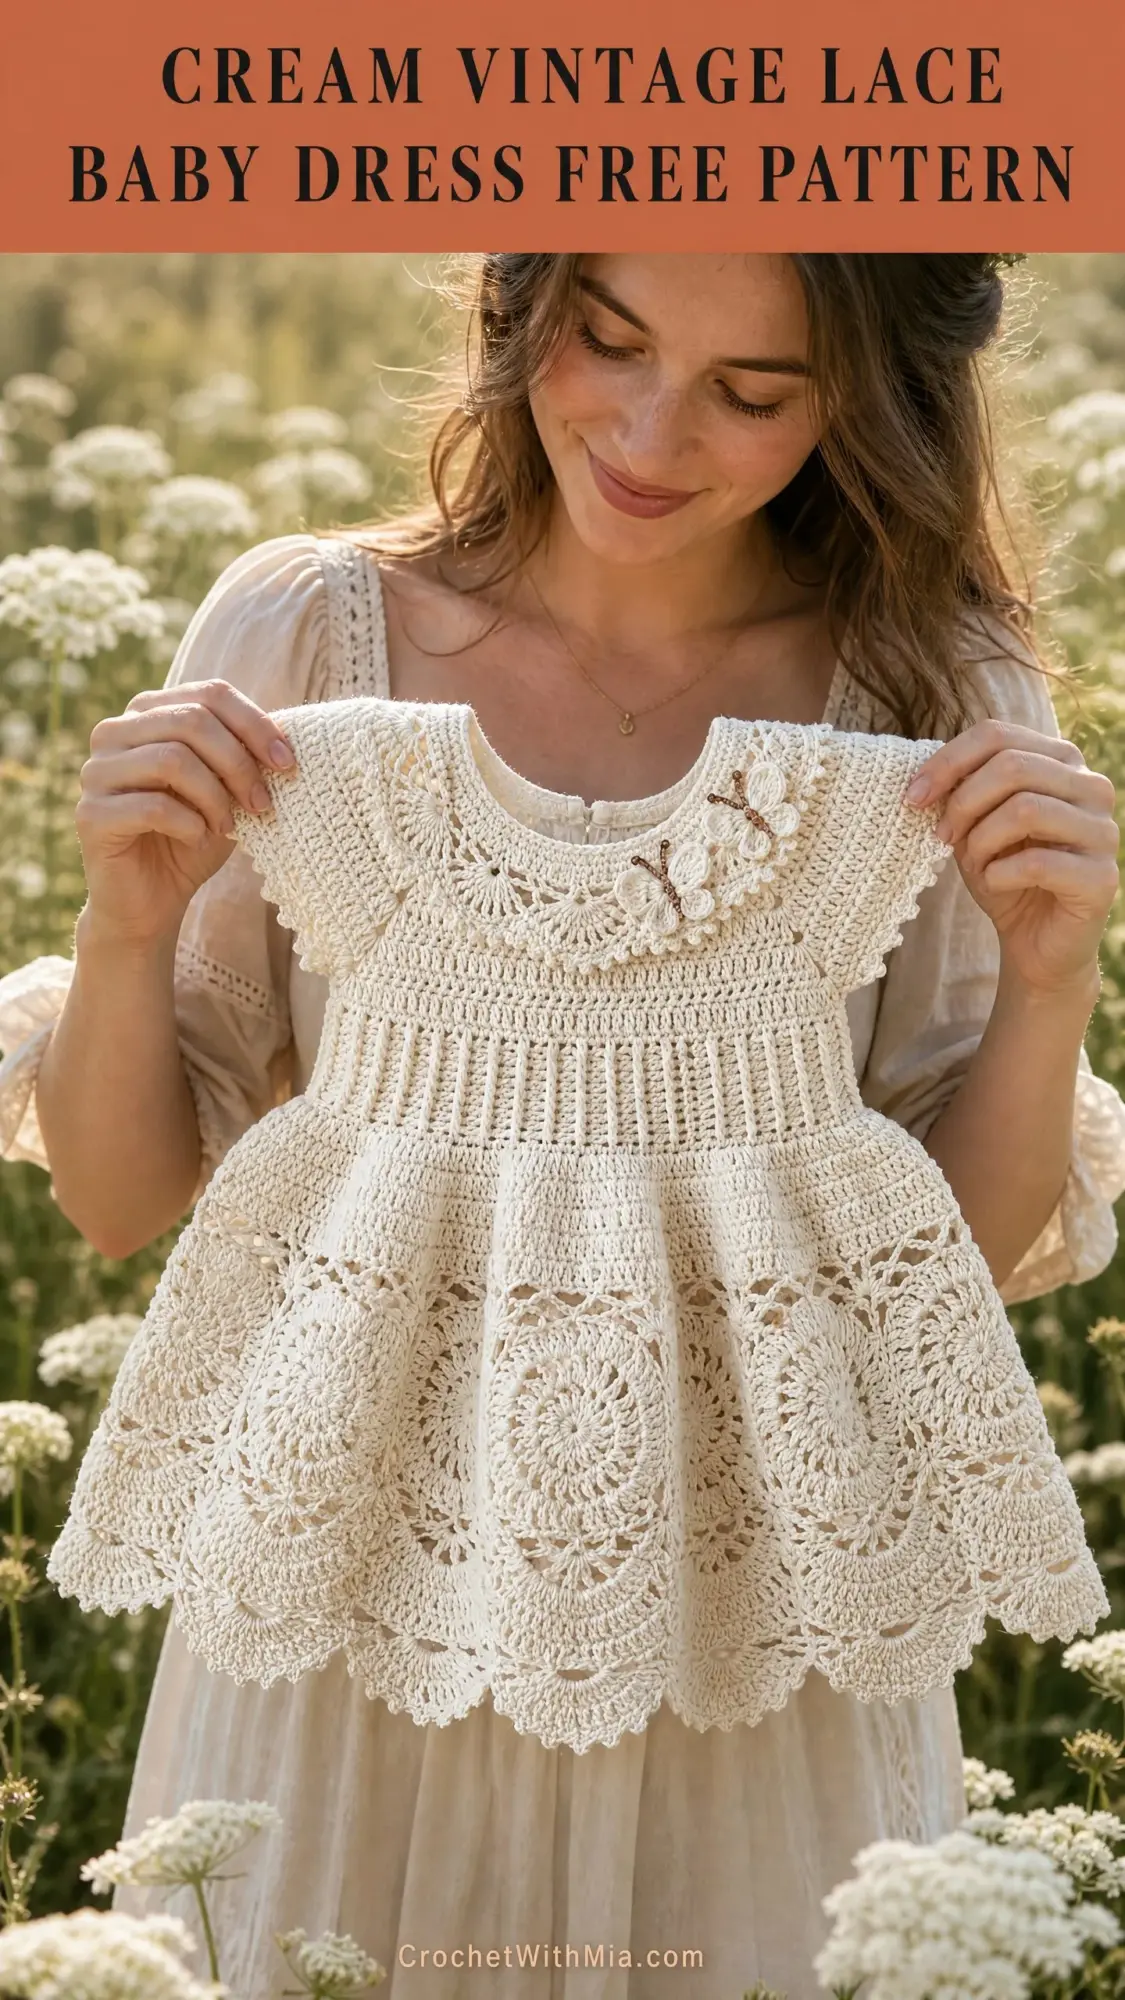
The raglan yoke creates those beautiful diagonal lines across the shoulders while distributing the shaping evenly. The ribbed waistband cinches the bodice naturally without elastic. And those circular medallion motifs on the skirt? They are what give this dress its true vintage character.
The butterfly applique at the neckline adds a sweet dimensional detail that catches the eye without overwhelming the delicate lace.
Skill Level and Time Commitment
This pattern is rated advanced. You will need experience with:
If you have tackled lace shawls or doilies before, you have the skills for this project. The techniques are not mysterious, just numerous. Take your time, read each section before you start crocheting, and you will do beautifully.
Expect to spend 20 to 30 hours on the 3 to 6 month size. Larger sizes take longer due to additional rows and motifs.
Finished Measurements for the Cream Vintage Lace Baby Dress
Newborn (0 to 3 months): Chest 14 inches / 35.5 cm, Length 10 inches / 25.5 cm
3 to 6 Months: Chest 16 inches / 40.5 cm, Length 11.5 inches / 29 cm
6 to 12 Months: Chest 17.5 inches / 44.5 cm, Length 13 inches / 33 cm
12 to 18 Months: Chest 19 inches / 48 cm, Length 14.5 inches / 37 cm
Instructions are written for the 3 to 6 month size. Other sizes appear in parentheses in the order: Newborn (3 to 6 Months, 6 to 12 Months, 12 to 18 Months).
Materials Needed
Yarn: DK weight or light DK (CYCA #3), approximately 450 (550, 650, 750) yards / 410 (500, 595, 685) meters total. A mercerized cotton or cotton-blend yarn produces the crispest stitch definition and best drape for the lace sections.
Hooks:
Notions:
Yarn Suggestions
Paintbox Yarns Simply DK (100% cotton, 137 yards / 125 m per 50 g ball) in Shade Vanilla Cream. This yarn has excellent stitch definition, ideal for showing off the medallion motifs. You will need 4 (5, 5, 6) balls.
Drops Safran (70% cotton, 30% viscose, 175 yards / 160 m per 50 g ball) in Shade Off White. The viscose content adds a subtle sheen that enhances the heirloom appearance. You will need 3 (4, 4, 5) balls.
We Are Knitters The Cotton (100% cotton, 191 yards / 175 m per 100 g ball) in Natural. A slightly heavier hand gives this option a more textured appearance. You will need 3 (3, 4, 4) balls.
Choose any smooth DK weight cotton or cotton-blend yarn. Avoid yarns with high elasticity or heavy texture, as these obscure stitch definition in lace sections.
Gauge
With D/3 (3.25 mm) hook and main stitch pattern:
Lace gauge (medallion section):
Gauge is critical for this garment. A difference of even one stitch per inch will significantly affect sizing. Swatch both the solid sc fabric and a single medallion motif before beginning.
Abbreviations
beg = beginning
BLO = back loop only (inserting your hook under only the back loop of the stitch, leaving the front loop unworked)
ch = chain
ch-sp = chain space (the gap created by a chain in the previous row or round)
dc = double crochet (yarn over, insert hook, pull up loop, yarn over, pull through 2 loops, yarn over, pull through remaining 2 loops)
dc2tog = double crochet 2 together, a decrease that uses 2 stitches and produces 1
hdc = half double crochet
inc = increase (work 2 sc in the same stitch)
MR = magic ring (an adjustable starting ring for working in the round)
pm = place marker
rep = repeat
rnd = round
RS = right side
sc = single crochet (insert hook, pull up loop, yarn over, pull through both loops)
sc2tog = single crochet 2 together, a decrease (insert hook in next stitch, pull up loop, insert hook in following stitch, pull up loop, yarn over, pull through all 3 loops)
sk = skip
sl st = slip stitch
sm = slip marker
sp = space
st(s) = stitch(es)
t-ch = turning chain
tr = treble crochet
WS = wrong side
yo = yarn over
[ ] = work instructions within brackets the number of times indicated
Special Stitches for This Crochet Pattern
Shell: Work 5 dc in the same stitch or space. This creates a fan-shaped cluster that appears throughout the collar and skirt.
Picot: Ch 3, sl st in first ch made. Creates a small decorative loop at the edge of your work.
Puff Stitch: Yo, insert hook in stitch, yo, pull up a loop to height of dc. Repeat 2 more times in the same stitch (6 loops on hook). Yo, pull through all 6 loops. Ch 1 to close.
Front Post Double Crochet (fpdc): Yo, insert hook from front to back to front around the post of the designated stitch in the row below, yo, pull up a loop, [yo, pull through 2 loops] twice.
Back Post Double Crochet (bpdc): Yo, insert hook from back to front to back around the post of the designated stitch in the row below, yo, pull up a loop, [yo, pull through 2 loops] twice.
V-Stitch: Work [dc, ch 2, dc] in the same stitch or space.
Pattern Notes Before You Begin
The dress is worked from the top down in joined rounds with a back center opening. The back opening is maintained throughout the yoke and bodice by working back and forth in rows.
Place a marker at each underarm position, each side seam, the center front, and center back. Stitch markers are essential for this project.
The waistband is worked in BLO ribbing to create a firm, slightly gathered transition between the yoke and the skirt.
The pattern uses a ch-3 as a turning chain that counts as the first dc throughout, unless otherwise specified.
Read each round in full before beginning to crochet it.
Yarn tension should be slightly loose in the lace sections to allow the motifs to block open. Do not pull joins tight.
Section 1: Neckline Foundation
The neckline is worked as a foundation chain with a back opening maintained throughout.
Row 1 (foundation): Ch 68 (62, 72, 80). Do not join. This creates the open-back neckline edge. (67 (61, 71, 79) working sts)
Row 2 (RS, collar setup): Ch 1, turn. Sc in each ch across. (67 (61, 71, 79) sc)
Row 3 (WS, collar picot edge): Ch 1, turn. [Sc in next st, picot] across, sc in last st. (67 (61, 71, 79) sts)
Row 4: Ch 1, turn. Sc in each st across. (67 (61, 71, 79) sc)
Row 5 (collar lace fan row): Ch 3 (counts as dc), turn. Sk 2, [shell in next st, sk 2, sc in next st, sk 2] across to last 4 sts, shell in next st, sk 2, dc in last st. (9 (8, 10, 11) shells + 2 end dc)
Row 6: Ch 1, turn. Sc in first dc, [sc in each of 5 dc of shell, sc in sc between shells] across, sc in top of t-ch. (67 (61, 71, 79) sc)
Checkpoint: The neckline panel should measure approximately 1.5 inches / 4 cm from cast-on edge to end of Row 6.
Section 2: Yoke Construction
The yoke is worked flat in rows to maintain the back center opening, increasing at 4 raglan points on every RS row. Place markers at the 4 raglan points before beginning.
Raglan Stitch Count Setup for 3 to 6 Months:
RS rows (increase rows): Work sc to 1 st before each raglan marker, [inc, sm, inc] at each of the 4 markers. This adds 8 sts per RS row.
WS rows: Sc across without increases.
Row 7 (RS, increase row 1): Ch 1, turn. Sc across with raglan increases as described. (75 (69, 79, 87) sc)
Row 8 (WS): Ch 1, turn. Sc across. (75 (69, 79, 87) sc)
Row 9 (RS, increase row 2): Ch 1, turn. Sc across with raglan increases. (83 (77, 87, 95) sc)
Row 10 (WS): Ch 1, turn. Sc across. (83 (77, 87, 95) sc)
Row 11 (RS, increase row 3): Ch 1, turn. Sc across with raglan increases. (91 (85, 95, 103) sc)
Row 12 (WS): Ch 1, turn. Sc across. (91 (85, 95, 103) sc)
Row 13 (RS, increase row 4): Ch 1, turn. Sc across with raglan increases. (99 (93, 103, 111) sc)
Row 14 (WS): Ch 1, turn. Sc across. (99 (93, 103, 111) sc)
Row 15 (RS, increase row 5): Ch 1, turn. Sc across with raglan increases. (107 (101, 111, 119) sc)
Row 16 (WS): Ch 1, turn. Sc across. (107 (101, 111, 119) sc)
Row 17 (RS, increase row 6): Ch 1, turn. Sc across with raglan increases. (115 (109, 119, 127) sc)
Row 18 (WS): Ch 1, turn. Sc across. (115 (109, 119, 127) sc)
Row 19 (RS, increase row 7): Ch 1, turn. Sc across with raglan increases. (123 (117, 127, 135) sc)
Row 20 (WS): Ch 1, turn. Sc across. (123 (117, 127, 135) sc)
For 6 to 12 Months and 12 to 18 Months: Work 2 additional RS increase rows (Rows 21 and 23, with even WS rows between) before proceeding.
Checkpoint: The yoke should measure approximately 3 inches / 7.5 cm from the neckline for the 3 to 6 Month size.
Section 3: Dividing Body and Sleeves
On the next RS row, sleeve stitches are placed on hold and underarm chains join the front and back body sections.
Division Row (RS): Work across back right 15 sts, place next 29 sleeve sts on a stitch holder or length of yarn, ch 4 for underarm (adds 4 sts), work across 33 front sts, place next 29 sleeve sts on hold, ch 4 for underarm, work across back left 15 sts. Do not turn. (71 body sts: 15 back right + 4 ch + 33 front + 4 ch + 15 back left)
Section 4: Cap Sleeves
Pick up the held 29 sleeve sts and join yarn at underarm.
Round 1: Join yarn to center of underarm ch, sc 2 across underarm ch, sc across 29 sleeve sts, sc 2 across other side of underarm ch. (33 sc)
Round 2: [Sc2tog, sc across to 2 sts before underarm join, sc2tog] around sleeve, working each decrease at each underarm edge. (29 sc)
Round 3: Sc around. (29 sc)
Round 4 (cap sleeve edging): Ch 1, [sc in next 2 sts, picot, sc in next 2 sts] around, join. Fasten off, leaving a 6 inch tail for weaving. (29 sts with picot edging)
Repeat for second sleeve.
Section 5: Bodice Continuation
Rejoin yarn to body sts at back right edge. Work back and forth in rows, sc across all 71 body sts, maintaining the back center opening.
Rows 1 through 5: Ch 1, turn. Sc across. (71 sc)
Row 6 (RS, increase for skirt transition): Ch 1, turn. [Sc in 6, inc] across, sc in last 1. (81 sc)
Row 7 (WS): Ch 1, turn. Sc across. (81 sc)
Checkpoint: The piece from neckline to current row should measure approximately 5.5 inches / 14 cm for the 3 to 6 Month size.
Section 6: Waistband Ribbing
Switch to C/2 (2.75 mm) hook.
Row 1 (RS, ribbing row): Ch 1, turn. Working in BLO, sc across. (81 sc)
Repeat Row 1 for a total of 8 ribbing rows, always working in BLO of the previous row.
After 8 ribbing rows, switch back to D/3 (3.25 mm) hook.
Increase Row (RS): Ch 1, turn. Working through both loops, [sc in 3, inc] across, sc in last st. (101 sc)
Checkpoint: The waistband should measure approximately 0.75 inches / 2 cm in height.
Section 7: Skirt Tier 1
The first skirt tier is worked in joined rounds. Join the back opening with a sl st to the first stitch, creating a ring. Place a marker at the join point (center back).
Round 1: Ch 3 (counts as dc), dc in next 99 sts, 2 dc in last st, join. (102 dc)
Round 2: Ch 1, sc in same st, ch 2, sk 2, [sc in next st, ch 2, sk 2] around, join to first sc. (34 sc, 34 ch-2 sps)
Round 3: Sl st to first ch-2 sp, ch 4 (counts as dc + ch 1), dc in same sp, [V-stitch in next ch-2 sp] around, join to 3rd ch of beg ch-4. (34 V-sts)
Round 4: Sl st to ch-2 sp of first V-st, ch 1, sc in same sp, ch 2, [sc in ch-2 sp of next V-st, ch 2] around, join. (34 sc, 34 ch-2 sps)
Round 5: Sl st to ch-2 sp, ch 3 (counts as dc), 4 dc in same sp (half shell), ch 1, [shell in next ch-2 sp, ch 1] around, join to top of ch-3. (34 shells)
Round 6: Ch 1, sc in top of join, [sc in each of 5 dc of shell, sc in ch-1 sp] around, ending sc in last ch-1 sp, join. (204 sc)
Round 7: Ch 4 (counts as dc + ch 1), sk 1, [dc in next 3, ch 1, sk 1] 50 times, dc in next 2, join to 3rd ch of beg ch-4. (51 ch-1 sps, 153 dc)
Round 8: Ch 1, sc in each dc and each ch-1 sp around, join. (204 sc)
Round 9: Ch 1, [sc in 5, inc] around. (238 sc)
Round 10: Ch 1, sc in each sc around, join. (238 sc)
Large Medallion Motif Instructions
Each medallion is worked in rounds, then joined on the final round when assembling the skirt.
Round 1: MR, ch 3 (counts as dc), 11 dc in ring, join with sl st to top of ch-3. (12 dc)
Round 2: Ch 3 (counts as dc), dc in same st, 2 dc in each st around, join. (24 dc)
Round 3: Ch 1, sc in same st, ch 3, sk 1, [sc in next st, ch 3, sk 1] around, join to first sc. (12 sc, 12 ch-3 sps)
Round 4: Sl st to center of first ch-3 sp, ch 3 (counts as dc), 4 dc in same sp (first shell made), ch 2, [5 dc in next ch-3 sp, ch 2] around, join to top of ch-3. (12 shells, 12 ch-2 sps)
Round 5: Sl st across to ch-2 sp, ch 1, sc in same ch-2 sp, ch 5, [sc in next ch-2 sp, ch 5] around, join. (12 sc, 12 ch-5 lps)
Round 6: Sl st to center of ch-5 lp, ch 3 (counts as dc), 6 dc in same lp, ch 3, [7 dc in next ch-5 lp, ch 3] around, join. (12 groups of 7 dc, 12 ch-3 sps)
Round 7 (joining round): Sl st to ch-3 sp, ch 1, [sc, ch 2, sc, ch 2, sc] in first ch-3 sp for corner, ch 2, sc in 4th dc of next 7-dc group, ch 2. Continue around, joining to adjacent motifs by working [sc, ch 1, sl st to corresponding ch-2 sp of neighboring motif, ch 1, sc] in place of the plain ch-2 picot corner.
Butterfly Applique
Wing 1: Ch 8, sc in 2nd ch from hook, hdc in next, dc in next 2, hdc in next, sc in next, 3 sc in last ch (tip), rotating work, sc in next, hdc in next, dc in next 2, hdc in next, sc in last. Ch 2, sl st in same base st to start second wing.
Wing 2: Ch 8, sc in 2nd ch from hook, hdc in next, dc in next 2, hdc in next, sc in next, 3 sc in last ch, rotating work, sc in next, hdc in next, dc in next 2, hdc in next, sc in last.
Body: Ch 4, sl st in 2nd ch from hook, sl st in each remaining ch. Attach to center of wings with yarn tail.
Antennae: Attach yarn at center top of butterfly body, ch 6, sl st back along chain, ch 6, sl st back along second side. Fasten off. Weave in all ends. Tack butterfly to upper front yoke using yarn needle.
Finishing Your Cream Vintage Lace Baby Dress
Weave in all ends securely. Block the finished dress by soaking it in lukewarm water, gently pressing out excess moisture, and pinning it to blocking mats. Pay special attention to opening up the lace medallions and the scalloped edging. Allow to dry completely before unpinning.
Sew the back opening closed from the waistband down to the hem. Attach button loops along one back edge above the waistband and sew buttons to the opposite edge.
If desired, thread a narrow satin ribbon through the hanger and tie in a bow for display.
Tips for Success with This Crochet Tutorial
Count your stitches at the end of every row during the yoke section. Losing or gaining even one stitch throws off your raglan shaping.
When joining the medallion motifs, work loosely. Tight joins will pucker the skirt.
Use stitch markers generously. Moving them up as you work saves counting time and prevents errors.
If your gauge is off, go up or down a hook size. Do not try to force your tension to match. Cotton yarn has no memory, so your natural tension is what it is.
Block aggressively. Cotton lace really blooms with wet blocking, and you will see the full beauty of those medallion motifs once they are opened up and pinned.
I hope this cream vintage lace baby dress brings joy to you and whoever receives it. It truly is a labor of love, and the finished piece shows every hour of careful work.
If this pattern is calling to you, pin it to your Pinterest boards so you can find it when you are ready to start. And please, leave a comment below when you finish yours. I would absolutely love to see what you create.