
I don’t know about you, but I absolutely melt when I see a matching baby outfit with tiny coordinating accessories. There’s just something about a complete set that makes gift-giving feel so thoughtful and special.
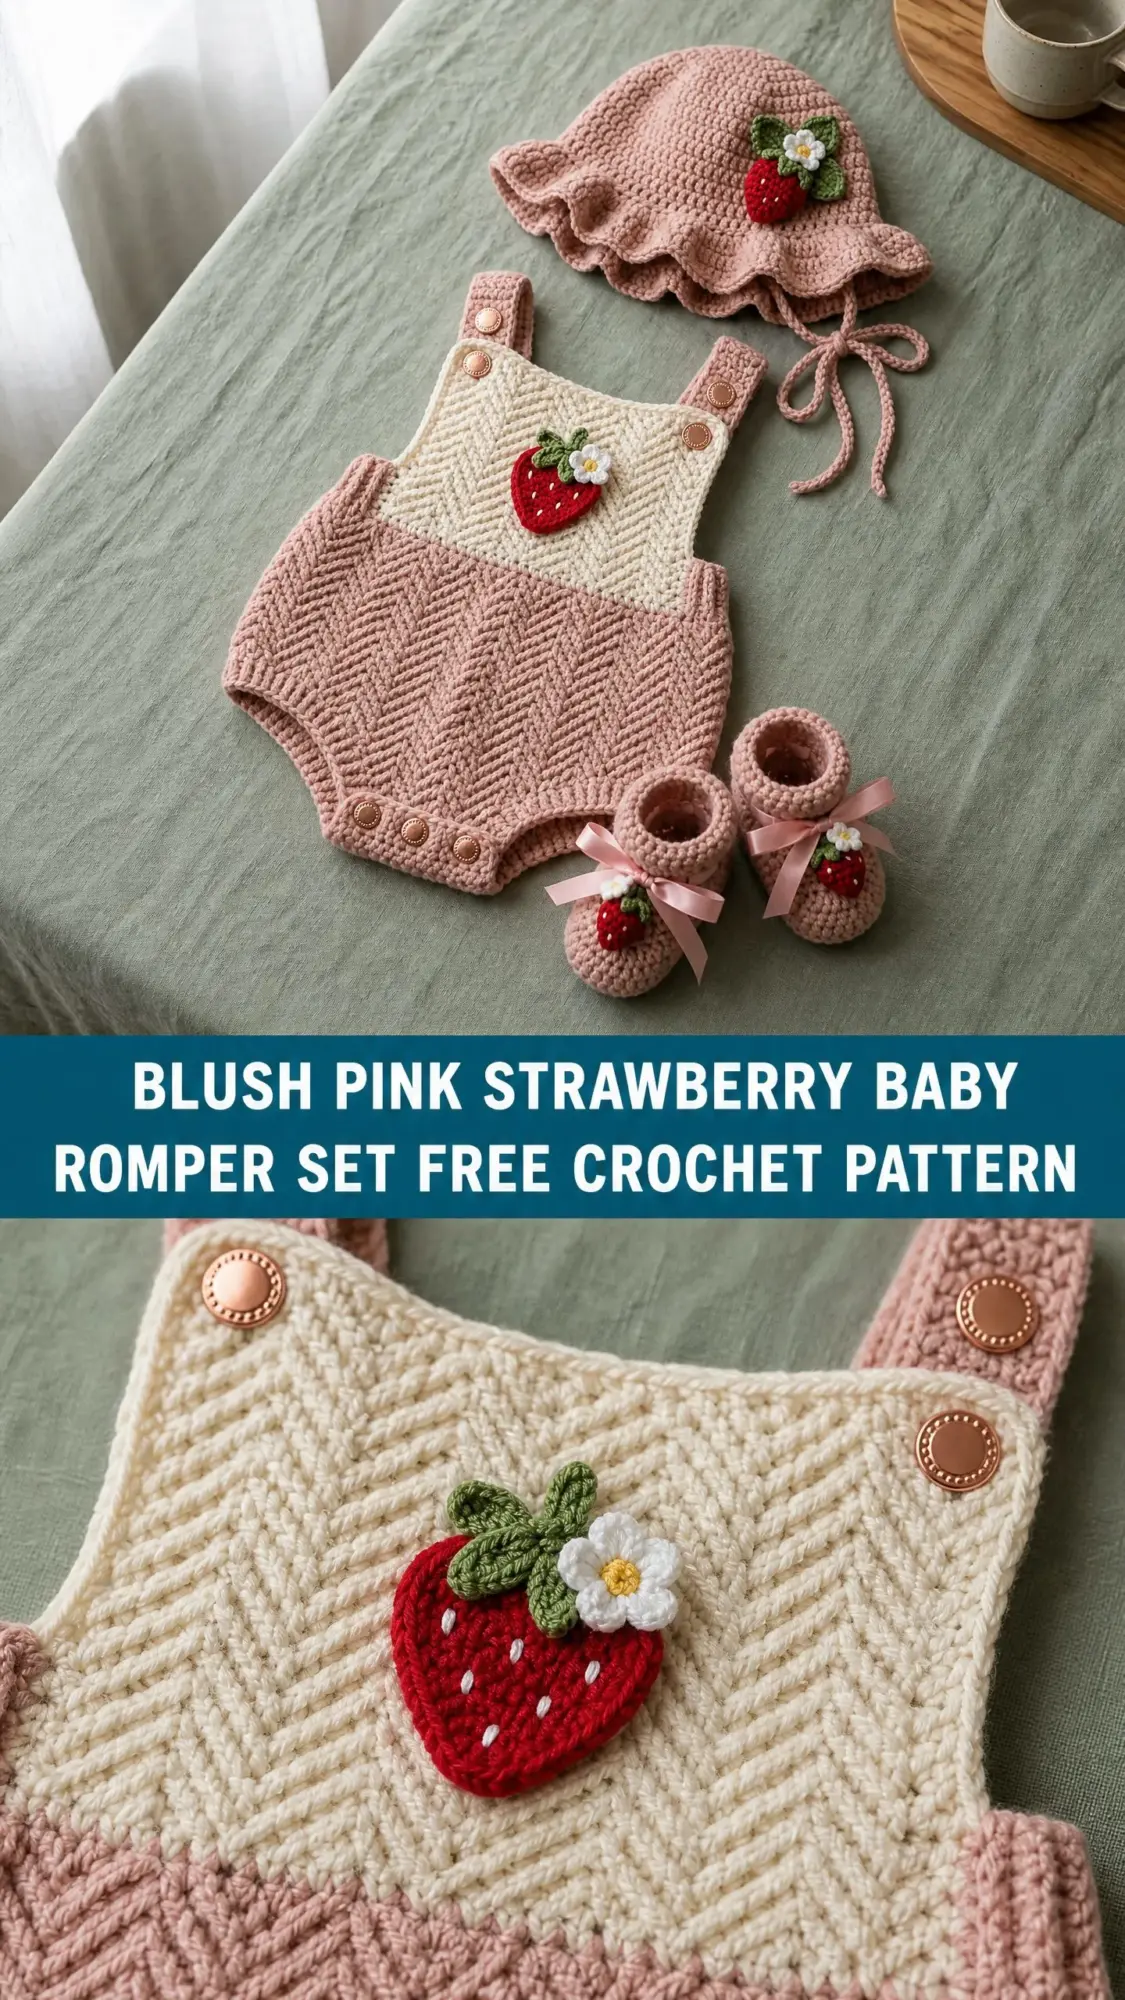
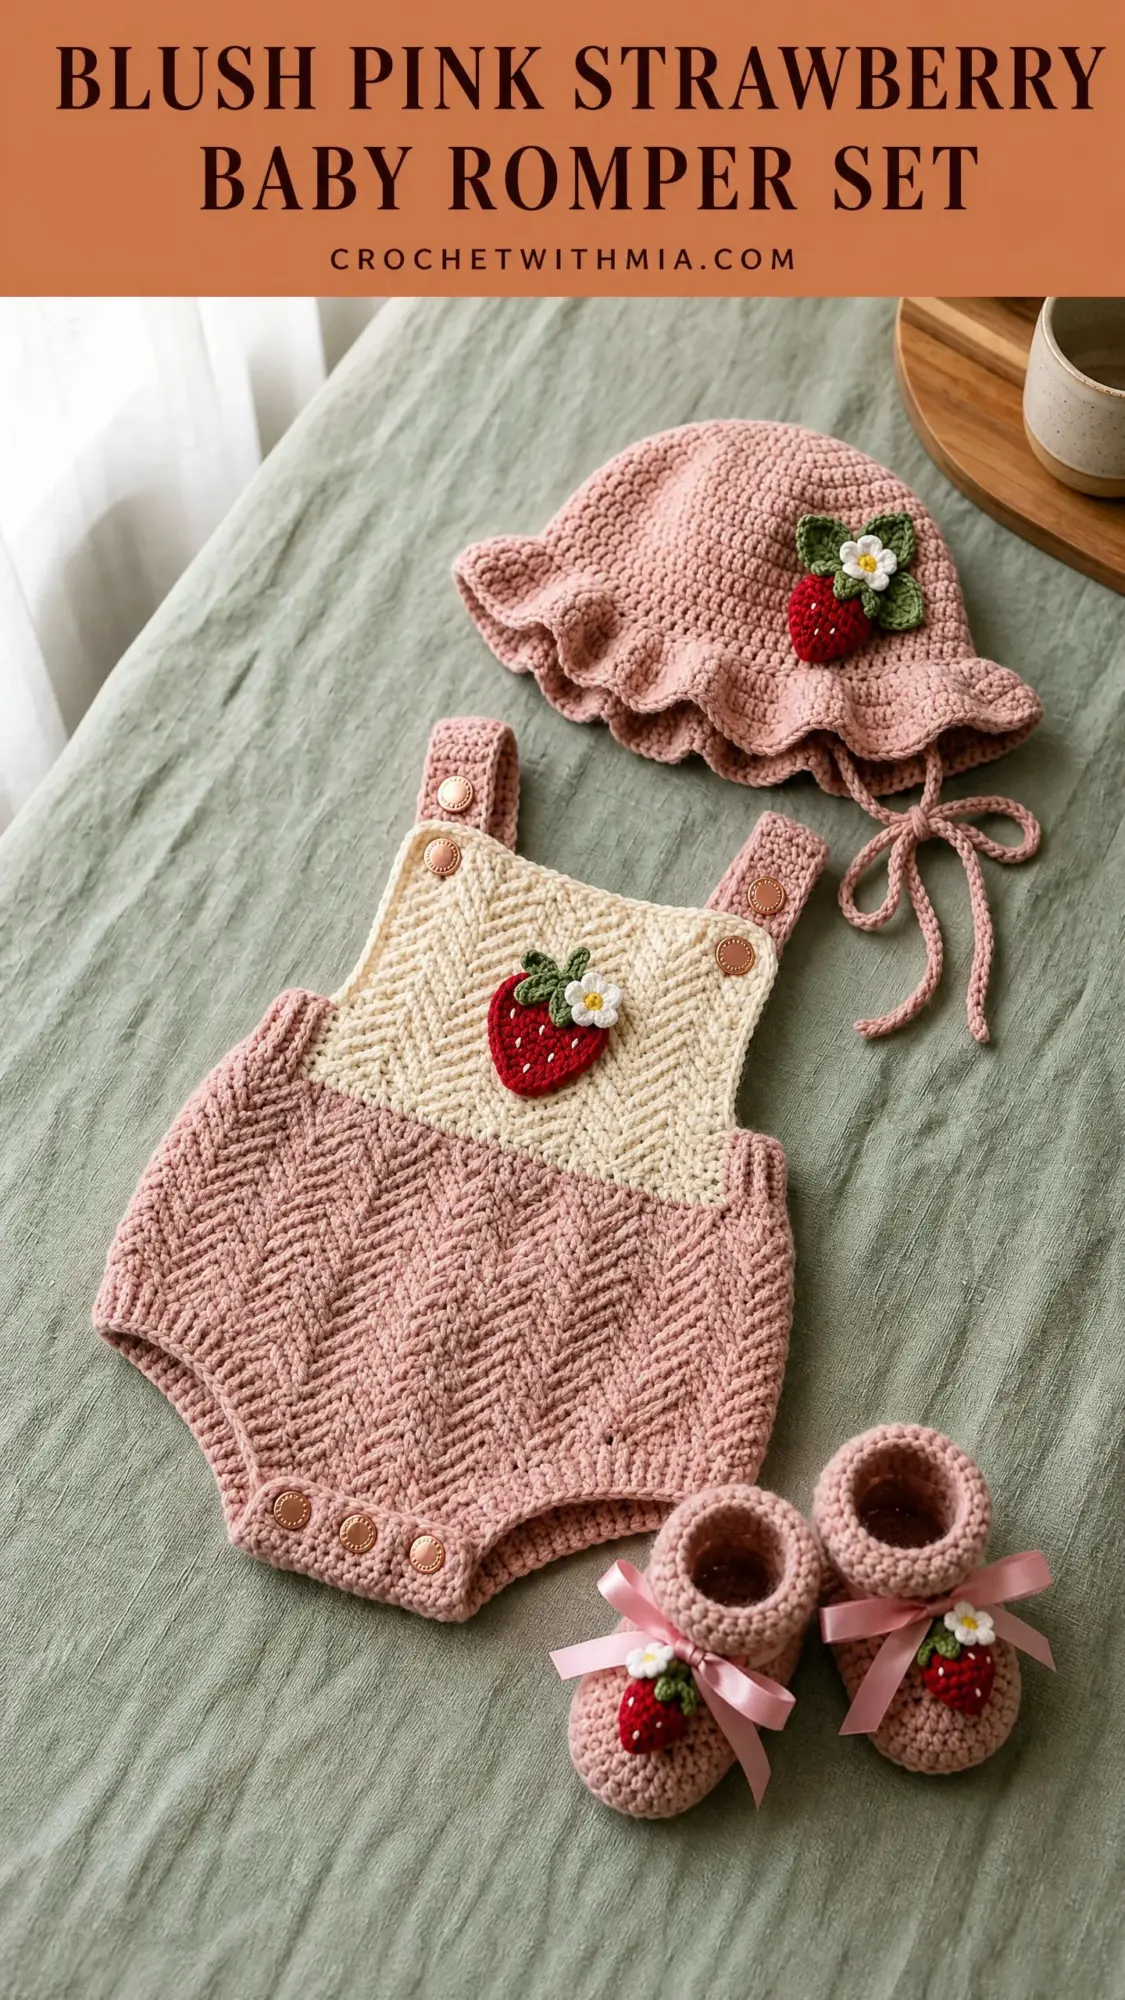
This strawberry-themed baby romper set hits all the right notes. You get a bubble romper with the sweetest cream bib panel, a ruffled sun bonnet, and the tiniest booties with satin ribbon bows. All three pieces feature adorable handmade strawberry appliques that tie everything together perfectly.
If you’ve been wanting to create an heirloom-quality baby gift that looks far more complicated than it actually is, this is your project. The herringbone texture gives it that professional finish, but once you learn the one special stitch, the whole set comes together smoothly.
Why This Baby Romper Set Works So Well
This crochet pattern creates a complete outfit that’s practical for real life, not just photo shoots. The copper snap buttons at the crotch and shoulders mean easy diaper changes. The bonnet ties stay put with crocheted cords. The booties actually stay on little feet thanks to the ribbon channel design.
The bubble silhouette on the romper is incredibly flattering on babies and gives plenty of room for cloth or disposable diapers underneath. The herringbone half double crochet stitch creates a dense, stretchy fabric that holds its shape beautifully through washing.
Skill level: Advanced beginner to intermediate. If you’ve completed two or three wearable projects before, you can absolutely handle this one.
Time estimate: Plan for 12 to 18 hours total across all three pieces. The romper takes the longest at 7 to 10 hours, while the bonnet and booties each take 2 to 3 hours.
Finished Measurements
Romper (fits 0 to 3 months):
Bonnet:
Booties:
Materials You’ll Need
Yarn (DK Weight)
| Color | Description | Amount Needed |
|---|---|---|
| Color A | Dusty Rose (main color) | 350 yards / 320 m |
| Color B | Cream / Off-White (bib panel) | 75 yards / 69 m |
| Color C | Red (strawberry body) | 25 yards / 23 m |
| Color D | Grass Green (leaves and stem) | 15 yards / 14 m |
| Color E | White (blossom petals) | 10 yards / 9 m |
| Color F | Yellow (blossom center) | Less than 5 yards / 4.5 m |
Hooks
Notions
Yarn Suggestions
Lion Brand Pound of Love works beautifully here. It’s a DK/worsted blend that’s machine washable and holds the herringbone texture well.
Paintbox Yarns Simply DK is another excellent choice with great stitch definition and a huge color range including perfect dusty rose and cream shades.
Drops Safran adds slight drape and breathability, making it ideal for warmer weather wear.
When substituting yarn, avoid anything with a halo like mohair blends. The fuzz will obscure your beautiful herringbone texture. Pure cotton works but adds weight and reduces stretch.
Gauge (Please Don’t Skip This)
Using G-6 / 4.0 mm hook and herringbone half double crochet:
17 stitches x 12 rows = 4 inches / 10 cm, blocked
Using E-4 / 3.5 mm hook and single crochet:
18 stitches x 20 rows = 4 inches / 10 cm
I know gauge swatches feel tedious, but this is a garment. The bubble silhouette depends on correct gauge, and you don’t want to spend 15 hours on a romper that doesn’t fit. Swatch and adjust your hook size before beginning.
Abbreviations
Special Stitches Explained
Herringbone Half Double Crochet (hbhdc)
This is the star stitch of this pattern. It creates that gorgeous diagonal, woven-looking texture you see in the photos. Here’s how to work it:
1. Yarn over
2. Insert hook into the indicated stitch
3. Yarn over and pull up a loop (you now have 3 loops on hook)
4. Instead of drawing through all 3 loops like a regular hdc, draw through only the first loop on hook (you now have 2 loops remaining)
5. Yarn over and draw through both remaining loops
The magic happens in step 4. You’re pulling the first loop through the second loop, which creates that signature diagonal lean. Practice a 20-stitch swatch for at least 6 rows before starting the pattern. Once it clicks, you’ll fly through it.
Herringbone Half Double Crochet 2 Together (hbhdc2tog)
This is your decrease stitch. It closes 2 stitches into 1 while maintaining the herringbone texture:
1. Yarn over, insert hook in first stitch, yarn over, pull up a loop, pull that loop through the second loop on hook (2 loops on hook)
2. Yarn over, insert hook in next stitch, yarn over, pull up a loop, pull that loop through the second loop on hook (3 loops on hook)
3. Yarn over, draw through all 3 remaining loops
Magic Ring (Adjustable Ring)
Used to start the bonnet crown and strawberry appliques:
1. Make a loop with yarn, crossing working yarn over the tail
2. Insert hook through center of loop from front to back
3. Draw working yarn through to make a loop on hook
4. Chain the number stated in pattern
5. Work stated stitches into the ring
6. Pull the tail to tighten the ring closed
Standing Single Crochet
Used to join new color without a slip stitch and chain start:
1. Make a slip knot with new yarn and place on hook
2. Insert hook into indicated stitch, yarn over, pull up a loop, yarn over, draw through both loops
Pattern Notes Before You Begin
Read these carefully. They’ll save you confusion later.
1. The romper is worked in two flat panels (front and back) then seamed at the sides and inseam. The bib section of the front panel is worked separately in Color B and then joined.
2. All herringbone hdc rows begin with ch 2. The ch 2 does NOT count as a stitch throughout this pattern. This is critical for accurate stitch counts.
3. Turn your work at the end of every flat row unless instructed otherwise.
4. RS is facing you on odd-numbered rows of flat sections unless otherwise noted.
5. Weave in all ends as you go on appliques before attaching them to the main pieces.
Romper Instructions
Section 1: Romper Front Panel
The front panel is worked in two parts: the lower body in Color A and the bib in Color B. They are then joined together.
Part 1A: Front Lower Body
Using Color A and G-6 / 4.0 mm hook, ch 61.
Row 1 (RS): Starting in 3rd ch from hook (skipped ch does not count), work hbhdc across. Turn. (59 hbhdc)
Row 2 (WS): Ch 2, hbhdc across. Turn. (59 hbhdc)
Rows 3 through 10: Rep Row 2. Turn after each row. (59 hbhdc at end of every row)
Checkpoint: After Row 10, the lower body panel should measure approximately 3.5 inches / 9 cm tall and 13.75 inches / 35 cm wide. This is the widest point of the bubble body.
Crotch Shaping (Decreases)
Row 11 (RS): Ch 2, hbhdc2tog, hbhdc to last 2 sts, hbhdc2tog. Turn. (57 hbhdc)
Row 12: Ch 2, hbhdc2tog, hbhdc to last 2 sts, hbhdc2tog. Turn. (55 hbhdc)
Row 13: Ch 2, hbhdc2tog, hbhdc to last 2 sts, hbhdc2tog. Turn. (53 hbhdc)
Row 14: Ch 2, hbhdc2tog, hbhdc to last 2 sts, hbhdc2tog. Turn. (51 hbhdc)
Checkpoint: After Row 14, the panel should measure approximately 5 inches / 12.7 cm tall. Mark the center bottom 9 stitches with a stitch marker for crotch snap placement.
Leg Openings (Worked Separately)
The lower panel is now divided for left and right leg openings.
Left Side:
Row 15 (RS): Ch 2, hbhdc across first 15 sts only. Turn, leaving rem 36 sts unworked. (15 hbhdc)
Row 16: Ch 2, hbhdc across. Turn. (15 hbhdc)
Row 17: Ch 2, hbhdc2tog, hbhdc to end. Turn. (14 hbhdc)
Row 18: Ch 2, hbhdc across. Turn. (14 hbhdc)
Row 19: Ch 2, hbhdc2tog, hbhdc to end. Turn. (13 hbhdc)
Fasten off Color A. Place a marker at the top left edge stitch.
Center Crotch Panel:
With RS facing, skip 3 sts after the left section (these form the inner leg curve), rejoin Color A.
Row 15C: Ch 2, hbhdc across next 15 sts. Turn. (15 hbhdc)
Rows 16C through 17C: Ch 2, hbhdc across. Turn. (15 hbhdc)
Fasten off. Mark the 4 snap positions evenly across this strip.
Right Side:
With RS facing, skip 3 sts after center crotch panel, rejoin Color A.
Row 15R (RS): Ch 2, hbhdc across rem 15 sts. Turn. (15 hbhdc)
Row 16R: Ch 2, hbhdc across. Turn. (15 hbhdc)
Row 17R: Ch 2, hbhdc to last 2 sts, hbhdc2tog. Turn. (14 hbhdc)
Row 18R: Ch 2, hbhdc across. Turn. (14 hbhdc)
Row 19R: Ch 2, hbhdc to last 2 sts, hbhdc2tog. Turn. (13 hbhdc)
Fasten off Color A. Place a marker at the top right edge stitch.
Part 1B: Front Bib Panel
The bib panel sits above the lower body and forms the chest. It’s worked in Color B with a narrower width to create the bib-over-bubble look.
Using Color B and G-6 / 4.0 mm hook, ch 43.
Row 1 (RS): Starting in 3rd ch from hook, hbhdc across. Turn. (41 hbhdc)
Rows 2 through 14: Ch 2, hbhdc across. Turn. (41 hbhdc at end of each row)
Armhole Shaping:
Row 15 (RS): Ch 2, hbhdc2tog, hbhdc across to last 2 sts, hbhdc2tog. Turn. (39 hbhdc)
Row 16: Ch 2, hbhdc2tog, hbhdc across to last 2 sts, hbhdc2tog. Turn. (37 hbhdc)
Row 17: Ch 2, hbhdc2tog, hbhdc across to last 2 sts, hbhdc2tog. Turn. (35 hbhdc)
Divide for Shoulder Straps:
Row 18 (RS): Ch 2, hbhdc across first 8 sts only. Fasten off. (8 hbhdc) This is left strap attachment point.
With RS facing, skip center 19 sts (neckline), rejoin Color B.
Row 18R: Ch 2, hbhdc across rem 8 sts. Fasten off. (8 hbhdc) This is right strap attachment point.
Checkpoint: The bib panel should measure approximately 4.75 inches / 12 cm tall and 9.5 inches / 24 cm wide at its widest.
Joining Bib to Lower Body
With WS of bib facing WS of lower body top edge (RS facing out on both sides), and working through both layers simultaneously, sl st the bottom edge of the bib to the top edge of the lower body panel. Center the bib horizontally over the lower body. The lower body is wider, so 9 stitches of lower body will extend beyond each side of the bib, forming the side underarm area. Seam by inserting hook through corresponding stitches of both layers, sl st across 41 stitches. Fasten off.
Section 2: Romper Back Panel
The back panel is worked entirely in Color A. It’s similar to the front lower body but continues with a back yoke instead of a bib.
Using Color A and G-6 / 4.0 mm hook, ch 61.
Row 1 (RS): Starting in 3rd ch from hook, hbhdc across. Turn. (59 hbhdc)
Rows 2 through 10: Ch 2, hbhdc across. Turn. (59 hbhdc)
Crotch Shaping (Decreases):
Row 11: Ch 2, hbhdc2tog, hbhdc to last 2 sts, hbhdc2tog. Turn. (57 hbhdc)
Row 12: Ch 2, hbhdc2tog, hbhdc to last 2 sts, hbhdc2tog. Turn. (55 hbhdc)
Row 13: Ch 2, hbhdc2tog, hbhdc to last 2 sts, hbhdc2tog. Turn. (53 hbhdc)
Row 14: Ch 2, hbhdc2tog, hbhdc to last 2 sts, hbhdc2tog. Turn. (51 hbhdc)
Leg Openings:
Work left side, center back crotch panel, and right side exactly as for front panel.
Back Yoke
Rejoin Color A at the top of the back panel at the right edge.
Row 1Y (RS): Ch 2, hbhdc across all 59 sts of Row 10 top edge. Turn. (59 hbhdc)
Note: You are picking up stitches across the top of Row 10 of the back lower body, above the crotch shaping section.
Rows 2Y through 8Y: Ch 2, hbhdc across. Turn. (59 hbhdc)
Armhole Shaping:
Row 9Y: Ch 2, hbhdc2tog, hbhdc across to last 2 sts, hbhdc2tog. Turn. (57 hbhdc)
Row 10Y: Ch 2, hbhdc2tog, hbhdc across to last 2 sts, hbhdc2tog. Turn. (55 hbhdc)
Row 11Y: Ch 2, hbhdc2tog, hbhdc across to last 2 sts, hbhdc2tog. Turn. (53 hbhdc)
Strap Placement Row:
Row 12Y (RS): Ch 2, hbhdc across first 8 sts. Fasten off. (8 hbhdc)
Skip center 37 sts (back neckline). Rejoin Color A.
Row 12YR: Ch 2, hbhdc across rem 8 sts. Fasten off. (8 hbhdc)
Checkpoint: The full back panel with yoke should measure approximately 8 inches / 20.3 cm tall at center back.
Section 3: Shoulder Straps (Make 2)
Using Color A and G-6 / 4.0 mm hook, ch 7.
Row 1: Starting in 3rd ch from hook, hbhdc across. Turn. (5 hbhdc)
Rows 2 through 20: Ch 2, hbhdc across. Turn. (5 hbhdc)
Fasten off, leaving a 12 inch / 30 cm tail for sewing.
Each strap should measure approximately 1.25 inches / 3.2 cm wide and 7 inches / 18 cm long. Attach one end of each strap to the back yoke strap points using whipstitch. The front strap ends fasten with snap buttons to the front bib strap points. Sew one half of each snap to the underside of the front strap end and the corresponding half to the top of the front bib strap point.
Section 4: Assembling the Romper
1. Block front and back panels lightly before seaming
2. Place front and back panels with RS together. Whipstitch or mattress stitch the side seams from underarm down to the top of leg openings on each side
3. Seam the inseam by joining center crotch panels of front and back
4. Sew 4 snap buttons evenly spaced across the crotch opening
5. Work one round of sc edging around each leg opening using Color A to neaten. Join with sl st. Fasten off
6. Work one round of sc edging around the neckline and armhole edges
7. Attach shoulder straps as described in Section 3
Ruffled Sun Bonnet Instructions
The bonnet is worked in the round from the crown downward using Color A.
Using Color A and G-6 / 4.0 mm hook, make a magic ring.
Rnd 1: Ch 2 (does not count as st here and throughout bonnet), work 6 hbhdc into ring. Pull ring closed. Join with sl st to first hbhdc. (6 hbhdc)
Rnd 2: Ch 2, 2 hbhdc in each st around. Join with sl st. (12 hbhdc)
Rnd 3: Ch 2, (hbhdc in first st, 2 hbhdc in next st) around. Join with sl st. (18 hbhdc)
Rnd 4: Ch 2, (hbhdc in next 2 sts, 2 hbhdc in next st) around. Join with sl st. (24 hbhdc)
Rnd 5: Ch 2, (hbhdc in next 3 sts, 2 hbhdc in next st) around. Join with sl st. (30 hbhdc)
Rnd 6: Ch 2, (hbhdc in next 4 sts, 2 hbhdc in next st) around. Join with sl st. (36 hbhdc)
Rnd 7: Ch 2, (hbhdc in next 5 sts, 2 hbhdc in next st) around. Join with sl st. (42 hbhdc)
Rnd 8: Ch 2, (hbhdc in next 6 sts, 2 hbhdc in next st) around. Join with sl st. (48 hbhdc)
Rnd 9: Ch 2, (hbhdc in next 7 sts, 2 hbhdc in next st) around. Join with sl st. (54 hbhdc)
Rnd 10: Ch 2, (hbhdc in next 8 sts, 2 hbhdc in next st) around. Join with sl st. (60 hbhdc)
Checkpoint: After Rnd 10, the crown should measure approximately 4.5 inches / 11.5 cm in diameter.
Body Rows (Worked Flat)
At this point, do not join. Turn and work flat rows across the back 40 stitches of the 60-stitch round, leaving the front 20 stitches unworked (these form the face opening).
Body Row 1 (WS): Ch 2, hbhdc across 40 sts. Turn. (40 hbhdc)
Body Rows 2 through 12: Ch 2, hbhdc across. Turn. (40 hbhdc)
Checkpoint: After Body Row 12, the bonnet back should measure approximately 3.5 inches / 9 cm from the base of the flat section.
Brim Ruffle
With RS facing and G-6 hook, join Color A with a sl st at the right bottom corner of the bonnet.
Ruffle Rnd 1: Ch 2, work 3 hbhdc in each row-end stitch along the right side edge (approximately 12 row ends = 36 sts), then work 3 hbhdc in each of the 20 face-opening sts (60 sts), then 3 hbhdc in each row-end stitch along the left side edge (approximately 12 row ends = 36 sts). Do not join, turn. (132 hbhdc total)
Ruffle Row 2: Ch 2, hbhdc across all 132 sts. Turn. (132 hbhdc)
Ruffle Row 3: Ch 2, hbhdc across all 132 sts. Fasten off. (132 hbhdc)
Tie Cord
Using Color A and G-6 hook, make two chains each 9 inches / 23 cm long. Fasten off. Attach one tie cord to each bottom corner of the ruffle where it meets the face opening edges.
Booties Instructions (Make 2)
Each bootie is worked from the sole upward using Color A and E-4 / 3.5 mm hook.
Ch 12.
Sole
Rnd 1: Starting in 2nd ch from hook, sc in next 10 chs, 3 sc in last ch (toe end), working back along other side of foundation ch: sc in next 10 chs, 2 sc in first ch (heel end). Join with sl st to first sc. (25 sc)
Rnd 2: Ch 1, 2 sc in first st, sc in next 9 sts, 2 sc in next 3 sts (toe), sc in next 9 sts, 2 sc in last 2 sts (heel). Join with sl st. (31 sc)
Rnd 3: Ch 1, sc in BLO around entire round. Join with sl st. (31 sc)
Note: Working in BLO on Rnd 3 creates a clean fold line between sole and upper.
Upper
Rnd 4: Ch 1, sc in both loops around. Join with sl st. (31 sc)
Rnd 5: Ch 1, sc in both loops around. Join with sl st. (31 sc)
Toe Shaping (Decrease Rounds)
Rnd 6: Ch 1, sc in first 10 sts, (sc2tog) 5 times across toe area, sc in rem 11 sts. Join with sl st. (26 sc)
Rnd 7: Ch 1, sc in first 10 sts, (sc2tog) 3 times, sc in rem 10 sts. Join with sl st. (23 sc)
Ankle Cuff
Rnd 8: Ch 1, sc around. Join with sl st. (23 sc)
Rnd 9: Ch 1, sc around. Join with sl st. (23 sc)
Ribbon Channel Row
Rnd 10: Ch 1, (sc in next 2 sts, ch 1, sk 1 st) around, adjusting as needed to complete round evenly (8 ch-1-sps). Join with sl st. (15 sc and 8 ch-1-sps)
Rnd 11: Ch 1, sc around including 1 sc into each ch-1-sp. Join with sl st. (23 sc)
Rnd 12: Ch 1, sc around. Fasten off. (23 sc)
Thread one 18 inch / 46 cm ribbon through the ch-1-sps of Rnd 10 and tie in a bow at the center front.
Checkpoint: Completed bootie before ribbon should measure 3.5 inches / 9 cm sole length and approximately 2.25 inches / 5.7 cm tall from sole to cuff top.
Strawberry Appliques (Make 3)
Each strawberry consists of a berry body, green calyx, and white blossoms. Make one for the romper bib, one for the bonnet, and one for each bootie (so 4 total for the complete set shown).
Strawberry Body
Using Color C and E-4 / 3.5 mm hook, make a magic ring.
Rnd 1: Ch 1, 6 sc into ring. Pull ring closed. Join with sl st. (6 sc)
Rnd 2: Ch 1, 2 sc in each st around. Join with sl st. (12 sc)
Rnd 3: Ch 1, (sc in next st, 2 sc in next st) around. Join with sl st. (18 sc)
Rnd 4: Ch 1, (sc in next 2 sts, 2 sc in next st) around. Join with sl st. (24 sc)
Rnd 5: Ch 1, sc around. Join with sl st. (24 sc)
Rnd 6: Ch 1, (sc in next 2 sts, sc2tog) around. Join with sl st. (18 sc)
Rnd 7: Ch 1, (sc in next st, sc2tog) around. Join with sl st. (12 sc)
Stuff lightly with a small amount of scrap yarn or fiberfill.
Rnd 8: Ch 1, sc2tog around. Join with sl st. (6 sc)
Fasten off, leaving a 12 inch / 30 cm tail. Thread tail through rem 6 sts, pull tight to close. Weave in tail.
Using Color F yarn and a needle, embroider small seed dots across the surface using straight stitches.
Calyx and Finishing
For the green calyx, use Color D to create small leaf shapes at the top of each strawberry. Add white blossoms using Color E with a yellow center in Color F. Attach completed appliques to the romper bib, bonnet, and booties using coordinating thread and a sewing needle.
Finishing Tips
Size Customization Tips
To adjust sizes, add or subtract stitches in multiples of 4 for the romper body. For each size up, add approximately 4 stitches to the starting chain and adjust decreases proportionally. The bonnet can be sized up by adding additional increase rounds before the body rows. Booties can be lengthened by adding chains to the starting chain for the sole.
This sweet strawberry baby romper set makes such a wonderful shower gift or special project for a little one in your life. The matching pieces really elevate the whole set, and those tiny strawberry appliques add the perfect finishing touch.
I hope you enjoy making this heirloom-quality crochet baby set as much as I enjoyed designing it. If you found this tutorial helpful, I’d love for you to save it to your Pinterest boards so you can find it easily when you’re ready to start. And please drop a comment below if you make this set. I always love seeing your finished projects and hearing which color combinations you chose!