
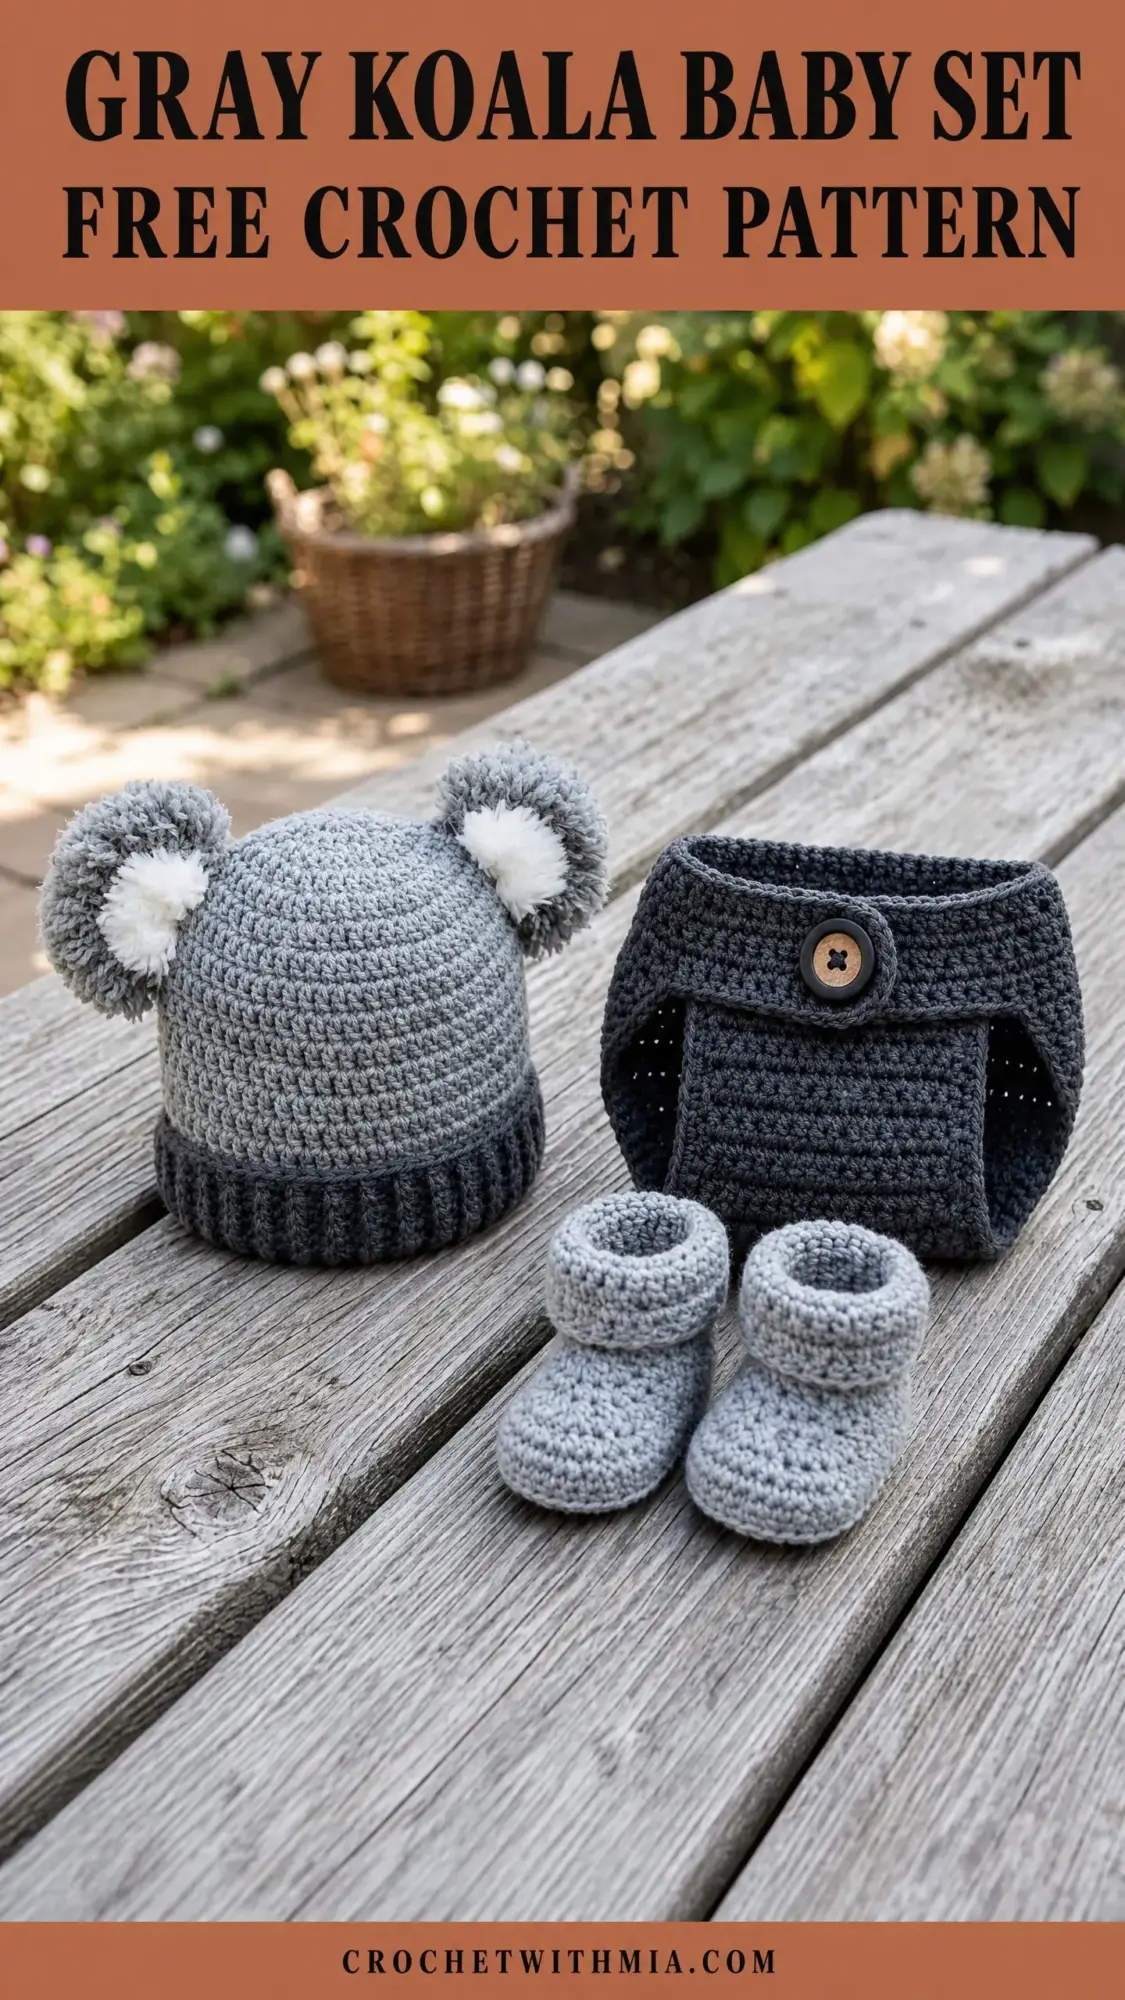
This is a three-piece newborn set featuring a double pom-pom beanie, a diaper cover with a button closure, and fold-over cuff booties. All pieces use single crochet and slip stitches. The entire set works up in about four to six hours.
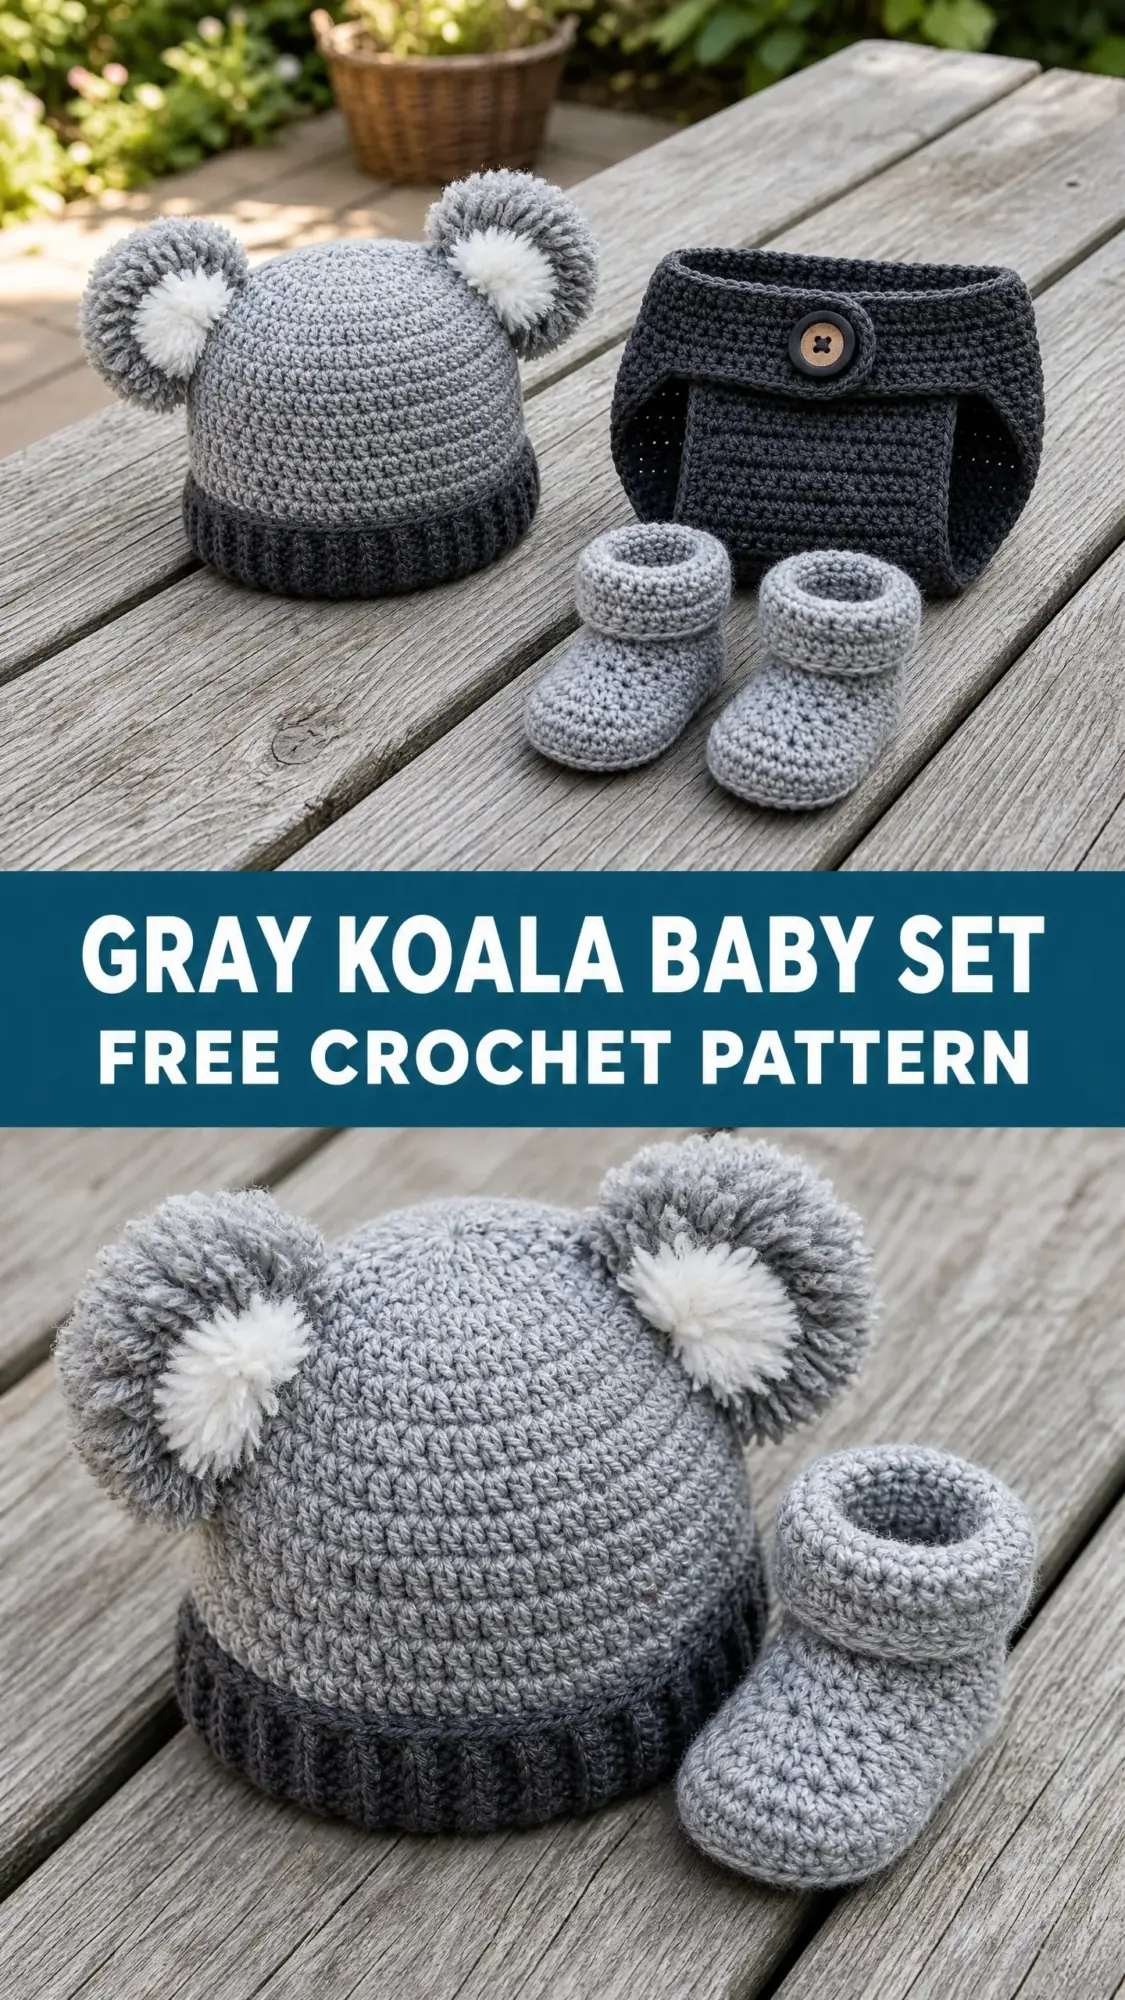
If you can chain, single crochet, and work in the round, you have everything you need. The charcoal and light gray color combination gives this set a modern feel while the oversized pom-poms add that irresistible koala ear look.
Perfect for newborn photography sessions or as a handmade baby shower gift. Let me walk you through every stitch.
Why This Baby Set Works So Well
I designed this set with busy crafters in mind. Each piece uses the same basic stitches, so once you get comfortable with one item, the others flow naturally. The beanie, diaper cover, and booties all complement each other without being too matchy-matchy.
The two-tone gray palette feels timeless and gender-neutral. Parents love receiving handmade baby items that photograph beautifully, and this set delivers on both counts. The textured ribbed brim on the beanie and the folded waistband on the diaper cover add visual interest without complicated techniques.
Skill level: Easy to Intermediate. The individual pieces are beginner-friendly, but managing three coordinated items and learning the ribbed brim technique bumps this up slightly.
Time estimate: Approximately four to six hours total. The beanie takes about one and a half to two hours including pom-pom assembly. The diaper cover needs roughly one and a half to two hours. The booties come together in about one to one and a half hours for the pair.
Finished Sizes
Beanie: Approximately 13 inches (33 cm) circumference, 6 inches (15 cm) tall before pom-poms. Fits newborn to 0-3 months.
Diaper cover: Approximately 14 inches (35.5 cm) waist circumference unstretched, 7 inches (18 cm) tall. Fits newborn to 0-3 months, approximately 8 to 12 pounds (3.6 to 5.4 kg).
Booties: Approximately 3.5 inches (9 cm) sole length. Fits newborn to 0-3 months.
Materials You Will Need
Gather these supplies before you start:
Yarn suggestions: Lion Brand Pound of Love in Taupe and Charcoal works beautifully. Caron Simply Soft in a light gray shade and Charcoal is another budget-friendly option. Any smooth worsted weight yarn that achieves gauge will work. Avoid fuzzy or textured yarns since stitch definition matters for this project.
Gauge
14 single crochet stitches and 16 rows = 4 inches (10 cm) worked in single crochet in the round with a US J / 6.0 mm hook.
Please check your gauge before starting. If your work is too tight, move up one hook size. If it is too loose, move down one hook size. Accurate gauge ensures all three pieces fit a newborn properly.
Abbreviations Used in This Pattern
Let me define every stitch and term before we begin:
Special Techniques
Ribbed Single Crochet
This technique creates the stretchy, textured brim and waistband:
1. At the start of each row, chain 1. This chain does not count as a stitch.
2. Single crochet in the back loop only of each stitch across the row.
3. At the end of the row, turn your work.
Working in the back loop only on every row creates horizontal ridges that mimic knit ribbing. It looks impressive but requires no advanced skills.
Adjustable Magic Ring
The magic ring creates a closed center for working in the round:
1. Wrap yarn around your fingers to form a loop, with the tail end overlapping the working yarn.
2. Insert hook through the loop, catch the working yarn, and pull through.
3. Chain 1 to secure, then work the required number of stitches into the ring.
4. Pull the tail end firmly to close the ring completely.
If the magic ring feels tricky, you can substitute by chaining 2 and working your first round stitches into the second chain from the hook.
Pattern Notes Before You Begin
1. All pieces are worked in continuous rounds unless otherwise stated. Use a stitch marker to mark the first stitch of each round and move it up as you work.
2. When switching colors on the beanie, work the last yarn over of the final slip stitch with the new color, then drop the old color and continue.
3. Stitch counts appear in parentheses at the end of every row or round.
4. The diaper cover is worked from the bottom up in joined rounds, then the waistband is worked as a flat ribbed panel attached to the top edge.
5. The wooden button is decorative. The diaper cover slips on like shorts and does not actually open and close.
6. Pom-poms are made separately and sewn to the beanie after blocking.
7. All pieces should be lightly misted with water and shaped to measurements before assembling.
Piece 1: Double Pom-Pom Beanie
The beanie is worked from the top down in continuous rounds. The body uses Color A (light gray). The brim uses Color B (charcoal) worked in joined rows for the ribbed effect.
Beanie Body
Foundation: Using Color A and a US J / 6.0 mm hook, make a magic ring.
Round 1: Work 6 sc into the ring. Pull ring closed. Do not join. Place marker in first stitch. (6 sc)
Round 2: Inc in each stitch around. (12 sc)
Round 3: (Inc in next st, sc in next st) rep 6 times. (18 sc)
Round 4: (Inc in next st, sc in next 2 sts) rep 6 times. (24 sc)
Round 5: (Inc in next st, sc in next 3 sts) rep 6 times. (30 sc)
Round 6: (Inc in next st, sc in next 4 sts) rep 6 times. (36 sc)
Round 7: (Inc in next st, sc in next 5 sts) rep 6 times. (42 sc)
Round 8: (Inc in next st, sc in next 6 sts) rep 6 times. (48 sc)
Checkpoint: After Round 8, the flat circle should measure approximately 5.5 inches (14 cm) in diameter. If larger, your gauge is too loose. If smaller, your gauge is too tight.
Rounds 9 through 22: Sc in each stitch around. Work these 14 rounds even with no increases or decreases. (48 sc each round)
Checkpoint: After Round 22, the beanie body from crown to current edge should measure approximately 5.5 inches (14 cm).
Do not fasten off. Drop Color A to the inside of the work.
Beanie Brim
The brim is worked as a flat ribbed strip attached to the lower edge of the beanie body.
Using Color B, join with a standing sc to any stitch at the bottom edge of the beanie body.
Row 1 (RS): Chain 8. Sc in second chain from hook and in each chain across. (7 sc). Sl st into next stitch on beanie edge to attach brim. Turn.
Row 2: Chain 1. Sc in blo of each stitch across, working back toward the beanie. (7 sc). Turn.
Row 3: Chain 1. Sc in blo of each stitch across. (7 sc). Sl st into next stitch on beanie edge. Turn.
Repeat Rows 2 and 3 alternately until you have worked one attachment slip stitch into every stitch around the lower edge of the beanie. You will work 48 sl st attachments total, meaning 96 total rows of ribbing. At the end of the final row, fold the brim piece to align the beginning and ending short edges, then slip stitch or whipstitch them together with Color B.
Fasten off Color B and weave in all ends.
Pom-Poms (Make 2)
Cut a piece of cardboard 2 inches (5 cm) wide, or use a pom-pom maker set to 2 inches (5 cm).
Wrap Color A yarn around the cardboard approximately 80 to 100 times. Slide a separate 12-inch (30 cm) length of yarn through the center of the wrapped bundle and tie it tightly with a double knot. Do not cut this tie strand as it will be used to attach the pom-pom. Cut through all loops on both sides of the cardboard. Trim the pom-pom into a round shape, approximately 2 inches (5 cm) diameter.
For the white tip on each pom-pom, use a small amount of white or off-white yarn and wrap a separate tiny pom-pom approximately 0.75 inch (2 cm) diameter. Tie off and trim, then anchor it to the center top of the larger gray pom-pom.
Attaching Pom-Poms to Beanie
Position each pom-pom at the top of the beanie, approximately 2 inches (5 cm) apart from each other, centered on either side of the crown. Thread the tie strand of each pom-pom onto a yarn needle and push it down through the crown of the beanie. Tie securely on the inside and weave in the ends.
Piece 2: Diaper Cover
The diaper cover is worked in Color B (charcoal gray) from the bottom up in joined rounds.
First Leg
Using Color B, chain 24. Being careful not to twist the chain, sl st to the first chain to form a ring.
Round 1: Chain 1, sc in each chain around. Sl st to first sc to join. (24 sc)
Rounds 2 through 4: Chain 1, sc in each stitch around. Sl st to first sc to join. (24 sc each round)
Fasten off, leaving a 6-inch (15 cm) tail for joining. Set aside.
Second Leg
Work same as First Leg but do not fasten off after Round 4.
Joining Legs
Joining Round: With working yarn still attached to Second Leg, ch 3. Insert hook into any stitch on First Leg and sc around the First Leg ring working 24 sc, then sc across the 3 chains (3 sc), then sc around the Second Leg ring working the remaining stitches, then sc across the opposite side of the 3 chain bridge (3 sc). Place marker in first stitch. Do not join at end of this round, switch to continuous rounds. (54 sc)
Rounds 1 through 12 of Body: Sc in each stitch around. (54 sc each round)
Waistband Setup
At the end of the final body round, sl st to close and do not fasten off.
Next Round: Working in flo only, sc in each stitch around to create a fold line for the waistband. Sl st to join. (54 sc)
Rounds 1 and 2 of Waistband Extension: Chain 1, sc in each stitch around. Sl st to join. (54 sc each round)
Fasten off Color B, leaving a tail for weaving.
Waistband Ribbing Strip
Using Color B, chain 8.
Row 1: Sc in second chain from hook and in each chain across. (7 sc). Turn.
Row 2: Chain 1. Sc in blo of each stitch across. (7 sc). Turn.
Row 3: Chain 1. Sc in blo of each stitch across. (7 sc). Turn.
Repeat Row 2 and Row 3 until the strip measures approximately 14 inches (35.5 cm) or until it fits snugly around the waistband extension. This will be approximately 50 to 52 rows total.
Do not fasten off. Fold the strip in half lengthwise so that the ribbed texture runs horizontally. Align one long edge of the strip with the top edge of the diaper cover. Using the working yarn, slip stitch the folded strip to the diaper cover top edge, working through both the strip and the top edge stitches simultaneously. Slip stitch the short ends of the strip together to close the waistband ring. Fasten off and weave in all ends.
Button Attachment
Center the wooden button on the front of the folded waistband flap. Using a sewing needle and thread matched to Color B, sew the button securely through all waistband layers. Make at least 8 passes through the button holes.
Piece 3: Booties (Make 2)
The booties are worked in Color A (light gray).
Sole
Using Color A, chain 8.
Round 1: Starting in the second chain from hook, sc 6, then work 3 sc in the last chain (toe end). Rotating the piece to work along the opposite side of the foundation chain, sc 5 in the next 5 chains, then work 2 sc in the first chain (heel end). Place marker in first stitch. Do not join. (16 sc)
Round 2: Inc, sc in next 5 sts, inc 3 times (once in each of the 3 toe center sts), sc in next 5 sts, inc twice (once in each of the 2 heel sts). (22 sc)
Round 3: Sc in next st, inc, sc in next 5 sts, (sc in next st, inc) 3 times, sc in next 5 sts, (sc in next st, inc) twice. (28 sc)
Checkpoint: The sole should measure approximately 3.5 inches (9 cm) long and 1.75 inches (4.5 cm) wide.
Sides
Round 4: Working in blo of each stitch, sc in each stitch around. This creates the fold line between the sole and sides. (28 sc)
Rounds 5 and 6: Sc in each stitch around through both loops. (28 sc each round)
Toe Shaping
Round 7: Sc in first 9 sts, inv-dec 5 times across the center 10 toe stitches, sc in remaining 9 sts. (23 sc)
Round 8: Sc in first 7 sts, inv-dec 4 times, sc in remaining 8 sts. (19 sc)
Round 9: Sc in first 5 sts, inv-dec 3 times, sc in remaining 8 sts. (16 sc)
Ankle and Cuff
Rounds 10 through 13: Sc in each stitch around. (16 sc each round)
Rounds 14 through 17: Sc in each stitch around. These rounds will form the cuff when folded down. (16 sc each round)
Sl st to next stitch to close round. Fasten off and weave in all ends.
Fold Rounds 14 through 17 downward toward the outside of the bootie to create the fold-over cuff.
Repeat all bootie instructions for the second bootie.
Finishing and Blocking
Weave in all yarn tails with a yarn needle. Make sure to weave through at least three different directions to prevent unraveling.
To block all three pieces, dampen each piece with cool water and gently squeeze out excess moisture in a towel. Shape each piece to the stated measurements on a flat padded surface. For the beanie, insert a round balloon or plastic bag stuffed lightly with tissue to hold the dome shape while drying. Allow all pieces to dry completely, approximately six to eight hours, before assembling pom-poms or removing shaping forms.
Care Instructions
Hand wash in cool water with a gentle baby wash. Do not wring or twist. Press gently between two towels to remove water. Reshape and dry flat away from direct heat or sunlight. If your yarn is labeled machine washable, a gentle cold cycle in a mesh laundry bag is acceptable. Do not tumble dry, iron, or dry clean.
Size Adjustments
To size up to 3 to 6 months: Work 2 additional increase rounds on the beanie crown, add 3 additional even rounds to the beanie body, add 2 rounds to each diaper cover leg section, add 6 rounds to the diaper cover body, and extend the bootie sole chain to 10 before beginning.
To size down for premature: Work 1 fewer increase round on the beanie crown, reduce the diaper cover leg to 3 rounds only, reduce the body to 9 rounds, and shorten the bootie sole chain to 6 stitches.
Thank you so much for choosing this pattern for your next baby crochet project. I truly hope you enjoy making this adorable koala-inspired set as much as I enjoyed designing it. These pieces make such a heartfelt gift, and I know whoever receives them will treasure the time and love you put into every stitch.
If you found this gray koala baby set crochet pattern helpful, I would love for you to pin it to your Pinterest boards so you can find it later and share it with fellow crafters. And please drop a comment below if you make this set. I always love seeing your finished projects and hearing how the pattern worked up for you!