
Alright, yarn lovers. This is your sign to dig into that stash and finally use those gorgeous skeins you have been saving for "the right project." The Berry Blush Sunburst Hobo Bag is that project. You know the ones I mean. That deep burgundy you bought two years ago because it was too beautiful to leave at the store. The dusty pink that felt like a splurge. The creamy off-white that goes with everything.
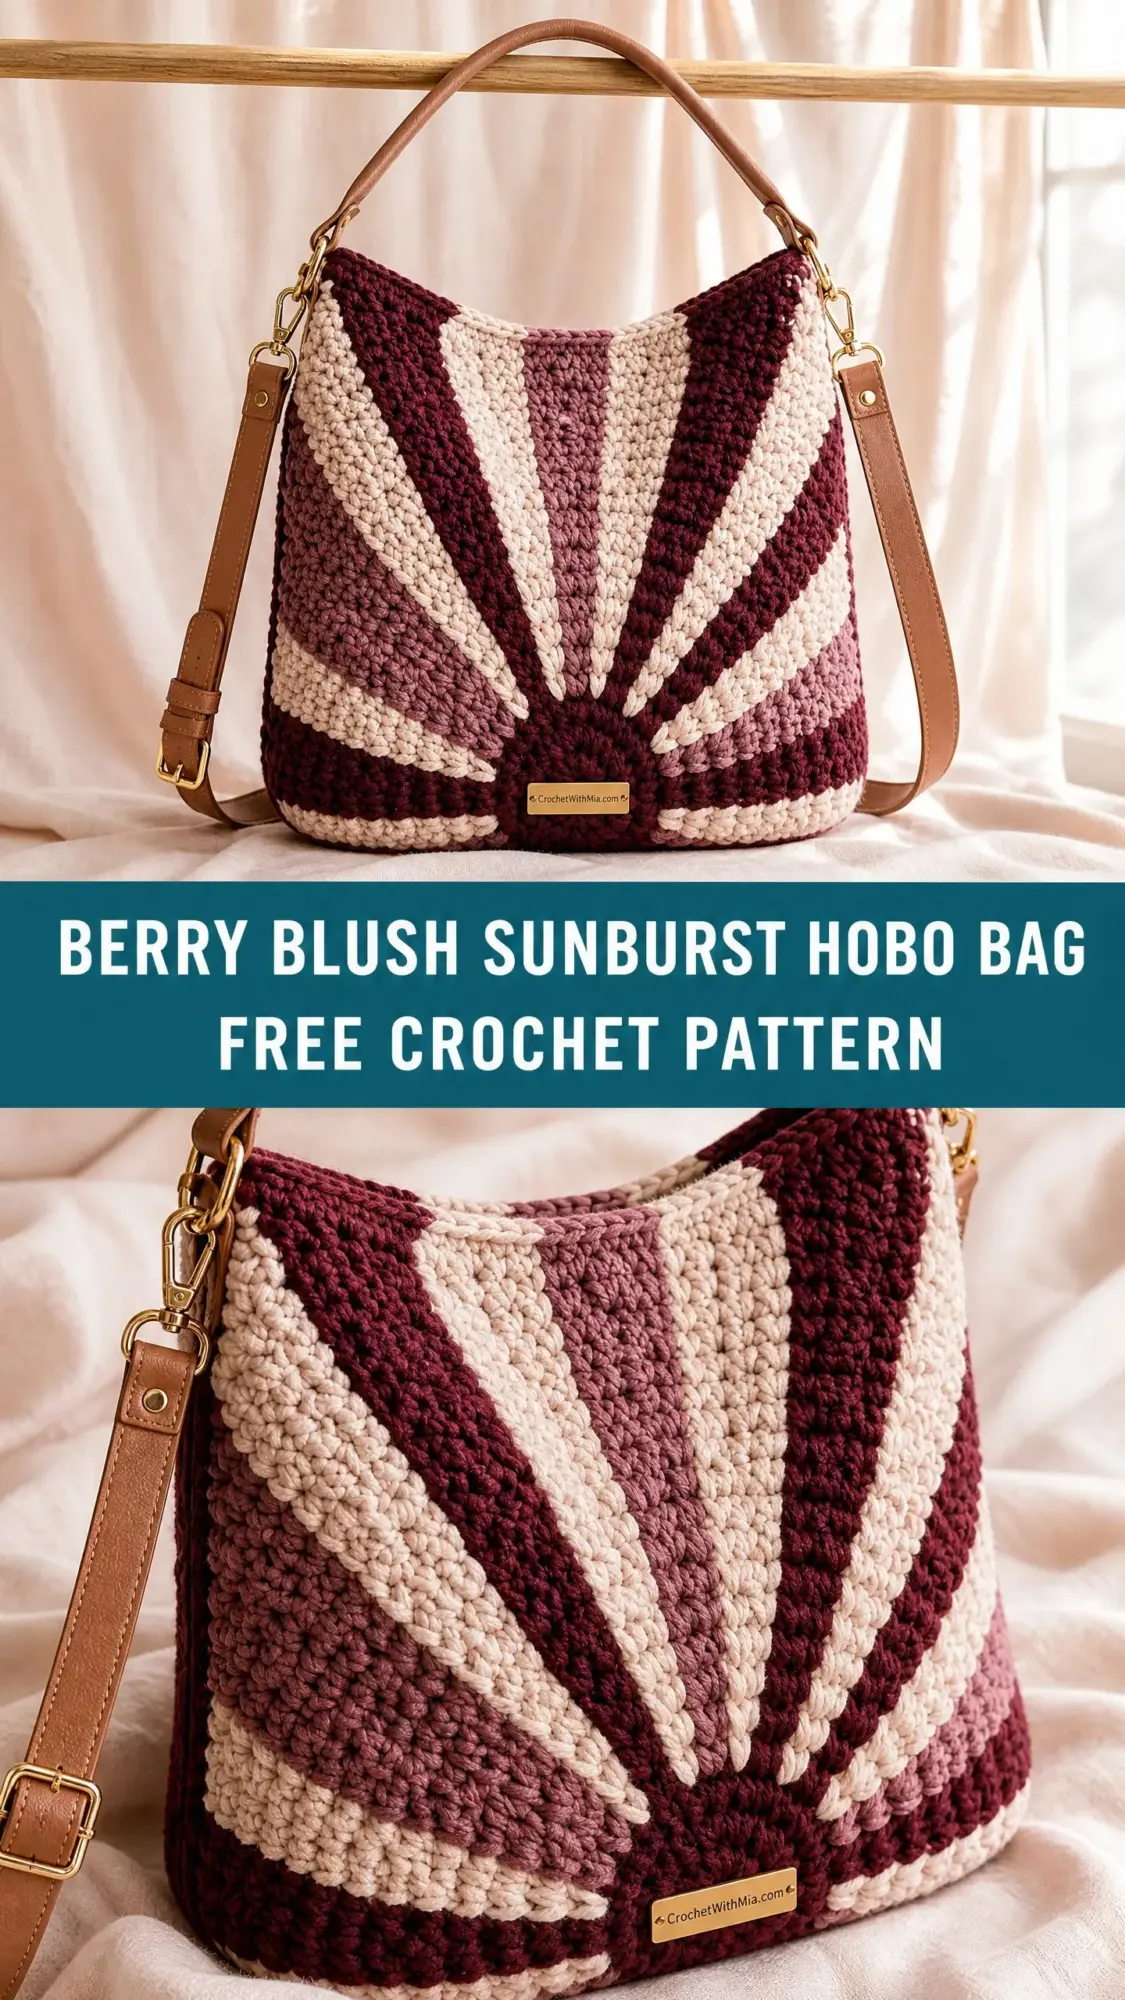
This bag features a dramatic sunburst motif worked in the round from a central magic ring, radiating outward like rays of light spreading across the fabric. The construction is genuinely interesting. You will create two identical circular panels, then seam them together to form a slouchy hobo silhouette with serious visual impact.
I will be honest about the difficulty level. This is an intermediate pattern. You will need comfort with the magic ring, color changes in the round, and back loop only single crochet (BLO sc). If you have never tackled colorwork before, this might feel like a stretch. But if you have a few projects under your belt and you are ready for something more challenging, this bag is absolutely worth the effort. The finished piece looks like it belongs in a boutique window.
Why This Hobo Bag Pattern Works So Well
The sunburst design creates an eye-catching focal point that makes this bag look far more complex than the stitches actually are. You are working entirely in single crochet (sc), which is one of the most basic crochet stitches. The magic happens through strategic color placement and the back loop only (BLO) technique, which creates a deeply ridged, almost corduroy-like texture.
When you work in the back loop only, you insert your hook into just the back loop of each stitch rather than both loops. This leaves the front loop exposed, creating horizontal ridges across your fabric. The result is a dense, tactile surface that photographs beautifully and feels substantial in your hands.
The hobo shape comes from seaming two flat circles together on three sides, then letting gravity do the rest. The bag naturally curves into that classic slouchy silhouette that works with everything from jeans to a casual dress.
Materials You Will Need
Yarn (Bulky Weight, Category 5):
Look for a tightly spun, smooth cotton or cotton-blend bulky yarn for the clearest stitch definition. Avoid fuzzy or bouclé yarns as they will obscure your beautiful sunburst pattern.
Yarn Suggestions:
Hook:
US size K / 6.5 mm crochet hook (or size needed to meet gauge)
Notions:
Finished Size
Approximately 14 inches wide by 12 inches tall at the center front, not including the top handle. The strap drop is approximately 9 inches for the top handle and adjustable from 18 to 24 inches for the crossbody strap.
In metric: approximately 35.5 cm wide by 30.5 cm tall at center front.
Gauge
14 single crochet stitches by 16 rows equal 4 inches / 10 cm, worked in back-loop-only single crochet with a US K / 6.5 mm hook, blocked and lying flat.
For the circular panel: After Round 6, the circle should measure approximately 4 inches / 10 cm in diameter.
Gauge matters here. A tighter gauge produces a stiffer, smaller bag. A looser gauge creates a drapier, larger bag. Check your gauge before diving in.
Abbreviations and Stitch Definitions
Special Techniques
Back Loop Only Single Crochet (BLO sc):
Insert your hook into the back loop only of the indicated stitch. That is the loop farthest from you as you work. Yarn over, pull up a loop. Yarn over, pull through both loops on hook. This creates the ridged texture you see in the finished bag.
Magic Ring (MC):
Make a loop with your yarn by crossing the tail end over the working yarn. Insert your hook through the center of the loop, yarn over with the working yarn, and pull up a loop. Chain 1 to secure. Work your stitches into the center of the ring, then pull the tail end firmly to close the hole before joining the round.
Color Change in Single Crochet:
To change colors at the end of a stitch, work your sc until you have two loops on your hook. Drop the current color to the wrong side. Pick up the new color, yarn over with the new color, and pull through both loops. The new color is now set. Carry unused colors loosely along the wrong side, twisting the carried yarn around the working yarn every 3 to 4 stitches to prevent long floats.
Pattern Notes Before You Begin
You will make two identical circular panels worked from the center outward. Both panels use the same chart of rounds, creating mirror-image sunbursts on the front and back of your bag. After blocking both panels, you will seam them together on three sides, leaving the top open.
The sunburst has 8 rays alternating between Color C (cream blush) and Color B (blush rose), separated by Color A (deep burgundy) background sections. When the bag is assembled, the magic ring origin sits at the lower center, and the rays fan upward toward the top opening.
Do not turn between rounds. The right side always faces you. Join each round with a slip stitch to the first stitch, then chain 1 before working the next round. The chain 1 does not count as a stitch.
Berry Blush Sunburst Hobo Bag Crochet Pattern Instructions
Panel (Make 2 Identical)
Round 1:
With Color A, make a magic ring. Chain 1 (does not count as st). Work 8 sc into the ring. Pull ring closed tightly. Sl st to first sc to join. (8 sc)
Round 2:
Chain 1. Working in BLO throughout: work 2 sc in each st around. Sl st to join. (16 sc)
Round 3:
Chain 1. [Work 2 sc in next st (inc), sc in next st] 8 times. Sl st to join. (24 sc)
Round 4:
Chain 1. [Inc in next st, sc in next 2 sts] 8 times. Sl st to join. (32 sc)
Color Introduction Note: The sunburst rays begin emerging from Round 5. With 32 stitches, each section occupies 4 stitches. The sequence around one full revolution is: Color A (1 st), Color C (2 sts), Color A (1 st), Color A (1 st), Color B (2 sts), Color A (1 st), repeating 4 times. This gives 8 rays total: 4 in Color C and 4 in Color B.
Round 5:
Chain 1. [Sc in 1 st in Color A, change to Color C, inc in next st (2 sc in Color C), change to Color A, sc in 1 st in Color A, sc in 1 st in Color A, change to Color B, inc in next st (2 sc in Color B), change to Color A, sc in 1 st in Color A] 4 times. Sl st to join. (40 sc total: 24 sc in Color A, 8 sc in Color C, 8 sc in Color B)
Round 6:
Chain 1. [Sc 1 in Color A, change to Color C, sc 2 in Color C, inc in next Color C st (3 sc in Color C), change to Color A, sc 1 in Color A, sc 1 in Color A, change to Color B, sc 2 in Color B, inc in next Color B st (3 sc in Color B), change to Color A, sc 1 in Color A] 4 times. Sl st to join. (48 sc total: 24 sc in Color A, 12 sc in Color C, 12 sc in Color B)
Round 7:
Chain 1. [Sc 1 in Color A, change to Color C, sc 3 in Color C, inc in next st in Color C (4 sc in Color C), change to Color A, sc 1 in Color A, sc 1 in Color A, change to Color B, sc 3 in Color B, inc in next st in Color B (4 sc in Color B), change to Color A, sc 1 in Color A] 4 times. Sl st to join. (56 sc total: 24 sc in Color A, 16 sc in Color C, 16 sc in Color B)
Round 8:
Chain 1. [Sc 2 in Color A, change to Color C, sc 4 in Color C, inc in next st in Color C (5 sc in Color C), change to Color A, sc 2 in Color A, change to Color B, sc 4 in Color B, inc in next st in Color B (5 sc in Color B), change to Color A] 4 times. Sl st to join. (64 sc total: 24 sc in Color A, 20 sc in Color C, 20 sc in Color B)
Round 9:
Chain 1. [Sc 2 in Color A, change to Color C, sc 5 in Color C, inc in next st in Color C (6 sc in Color C), change to Color A, sc 2 in Color A, change to Color B, sc 5 in Color B, inc in next st in Color B (6 sc in Color B), change to Color A] 4 times. Sl st to join. (72 sc total: 24 sc in Color A, 24 sc in Color C, 24 sc in Color B)
Round 10:
Chain 1. [Sc 2 in Color A, change to Color C, sc 6 in Color C, inc in next st in Color C (7 sc in Color C), change to Color A, sc 2 in Color A, change to Color B, sc 6 in Color B, inc in next st in Color B (7 sc in Color B), change to Color A] 4 times. Sl st to join. (80 sc total: 24 sc in Color A, 28 sc in Color C, 28 sc in Color B)
Checkpoint 1: Your circle should measure approximately 7 inches / 17.5 cm in diameter. Lay it flat and measure across the center.
Round 11:
Chain 1. [Sc 2 in Color A, change to Color C, sc 7 in Color C, inc in next st in Color C (8 sc in Color C), change to Color A, sc 2 in Color A, change to Color B, sc 7 in Color B, inc in next st in Color B (8 sc in Color B), change to Color A] 4 times. Sl st to join. (88 sc total: 24 sc in Color A, 32 sc in Color C, 32 sc in Color B)
Round 12:
Chain 1. [Sc 3 in Color A, change to Color C, sc 8 in Color C, inc in next st in Color C (9 sc in Color C), change to Color A, sc 3 in Color A, change to Color B, sc 8 in Color B, inc in next st in Color B (9 sc in Color B), change to Color A] 4 times. Sl st to join. (96 sc total: 28 sc in Color A, 36 sc in Color C, 36 sc in Color B)
Round 13:
Chain 1. [Sc 3 in Color A, change to Color C, sc 9 in Color C, inc in next st in Color C (10 sc in Color C), change to Color A, sc 3 in Color A, change to Color B, sc 9 in Color B, inc in next st in Color B (10 sc in Color B), change to Color A] 4 times. Sl st to join. (104 sc total: 28 sc in Color A, 40 sc in Color C, 40 sc in Color B)
Round 14:
Chain 1. [Sc 3 in Color A, change to Color C, sc 10 in Color C, inc in next st in Color C (11 sc in Color C), change to Color A, sc 3 in Color A, change to Color B, sc 10 in Color B, inc in next st in Color B (11 sc in Color B), change to Color A] 4 times. Sl st to join. (112 sc total: 28 sc in Color A, 44 sc in Color C, 44 sc in Color B)
Round 15:
Chain 1. [Sc 3 in Color A, change to Color C, sc 11 in Color C, inc in next st in Color C (12 sc in Color C), change to Color A, sc 3 in Color A, change to Color B, sc 11 in Color B, inc in next st in Color B (12 sc in Color B), change to Color A] 4 times. Sl st to join. (120 sc total: 28 sc in Color A, 48 sc in Color C, 48 sc in Color B)
Round 16:
Chain 1. [Sc 4 in Color A, change to Color C, sc 12 in Color C, inc in next st in Color C (13 sc in Color C), change to Color A, sc 4 in Color A, change to Color B, sc 12 in Color B, inc in next st in Color B (13 sc in Color B), change to Color A] 4 times. Sl st to join. (128 sc total: 32 sc in Color A, 52 sc in Color C, 52 sc in Color B)
Checkpoint 2: Your circle should measure approximately 11.5 inches / 29 cm in diameter. The sunburst rays should be clearly visible and distinct.
Round 17:
Chain 1. [Sc 4 in Color A, change to Color C, sc 13 in Color C, inc in next st in Color C (14 sc in Color C), change to Color A, sc 4 in Color A, change to Color B, sc 13 in Color B, inc in next st in Color B (14 sc in Color B), change to Color A] 4 times. Sl st to join. (136 sc total: 32 sc in Color A, 56 sc in Color C, 56 sc in Color B)
Round 18:
Chain 1. [Sc 4 in Color A, change to Color C, sc 14 in Color C, inc in next st in Color C (15 sc in Color C), change to Color A, sc 4 in Color A, change to Color B, sc 14 in Color B, inc in next st in Color B (15 sc in Color B), change to Color A] 4 times. Sl st to join. (144 sc total: 32 sc in Color A, 60 sc in Color C, 60 sc in Color B)
Round 19:
Chain 1. [Sc 4 in Color A, change to Color C, sc 15 in Color C, inc in next st in Color C (16 sc in Color C), change to Color A, sc 4 in Color A, change to Color B, sc 15 in Color B, inc in next st in Color B (16 sc in Color B), change to Color A] 4 times. Sl st to join. (152 sc total: 32 sc in Color A, 64 sc in Color C, 64 sc in Color B)
Round 20:
Chain 1. [Sc 5 in Color A, change to Color C, sc 16 in Color C, inc in next st in Color C (17 sc in Color C), change to Color A, sc 5 in Color A, change to Color B, sc 16 in Color B, inc in next st in Color B (17 sc in Color B), change to Color A] 4 times. Sl st to join. (160 sc total: 40 sc in Color A, 68 sc in Color C, 68 sc in Color B)
Checkpoint 3: Your circle should measure approximately 14.5 inches / 37 cm in diameter. Fasten off all colors, leaving a long tail in Color A (approximately 36 inches) for seaming. Weave in all other ends securely on the wrong side.
Make the second panel identically.
Blocking Your Panels
Wet blocking is essential for this project. Before seaming, submerge each panel in cool water. Gently squeeze out excess water without wringing. Lay the panel on a blocking mat or thick towels. Use rust-proof pins to pin the outer edge into a perfect circle measuring approximately 14.5 inches in diameter. Allow to dry completely, which may take 12 to 24 hours.
Both blocked panels should lie flat without cupping or ruffling.
Shaping and Seaming the Bag Body
Step 1: Hold one panel with the magic ring (center point) at the bottom. Mark this position with a stitch marker on each panel.
Step 2: Place the two panels with wrong sides facing each other. The sunburst designs should face outward on both sides. Place stitch markers at four points: top center, bottom center, and both side centers.
Step 3: Using the long Color A tail and a yarn needle, whipstitch or mattress-stitch the two panels together along three of the four arcs: the bottom and both sides. Leave the top arc open for the bag opening.
Step 4: Press the bottom seam flat and allow the bag to assume its natural hobo curve.
Top Edge Finishing
Round 1 of Edging:
With Color A and RS facing, join yarn with a sl st to any stitch along the top opening edge. Chain 1. Work 1 sc in BLO into each st around the entire opening, working into both the front panel edge and the back panel edge as separate stitches. Sl st to join. (80 sc total around opening)
Rounds 2 and 3 of Edging:
Chain 1. Sc in BLO in each st around. Sl st to join. (80 sc)
Fasten off and weave in end.
Hardware and Strap Attachment
Position the leather top handle centered over the top opening, landing approximately 3 to 4 inches from the center on each side. Using strong waxed linen thread, sew the D-rings firmly to the inside upper edge, stitching at least 12 to 16 passes through each attachment point.
Attach the crossbody strap swivel snap hooks to D-rings sewn at the side marker points.
For the optional label plate, center it on the front lower panel approximately 1 to 2 inches above the bottom seam and sew through the holes with waxed thread.
Adding a Lining (Optional but Recommended)
Cut two pieces of lining fabric approximately 14 by 13 inches. Sew them together along the bottom and sides with a 0.5 inch seam allowance. Fold the top edge down 0.75 inch and press. Insert the lining into the bag and slip-stitch in place. The lining conceals all yarn floats and significantly extends your bag’s life.
Size Customization Tips
For a smaller bag: Work only through Round 15 or 16. At Round 15, the circle is approximately 10.5 inches in diameter, producing a finished bag of approximately 11 inches wide by 10 inches tall.
For a larger tote: Continue adding rounds beyond Round 20, increasing each ray by 1 stitch per round and increasing the Color A background sections by 1 stitch every 4 rounds.
To adjust firmness: Use a smaller hook for a stiffer, more structured bag. Use a larger hook for a drapier, softer bag.
Care Instructions
For acrylic yarns: Machine wash on gentle cycle in cold water inside a mesh laundry bag. Lay flat to dry.
For wool or wool-blend yarns: Hand wash only in cool water with gentle wool wash. Reshape while damp and lay flat to dry.
For leather hardware: Wipe with a slightly damp cloth if soiled. Apply leather conditioner periodically.
Store your bag stuffed lightly with tissue paper to help it retain its shape.
You Made It!
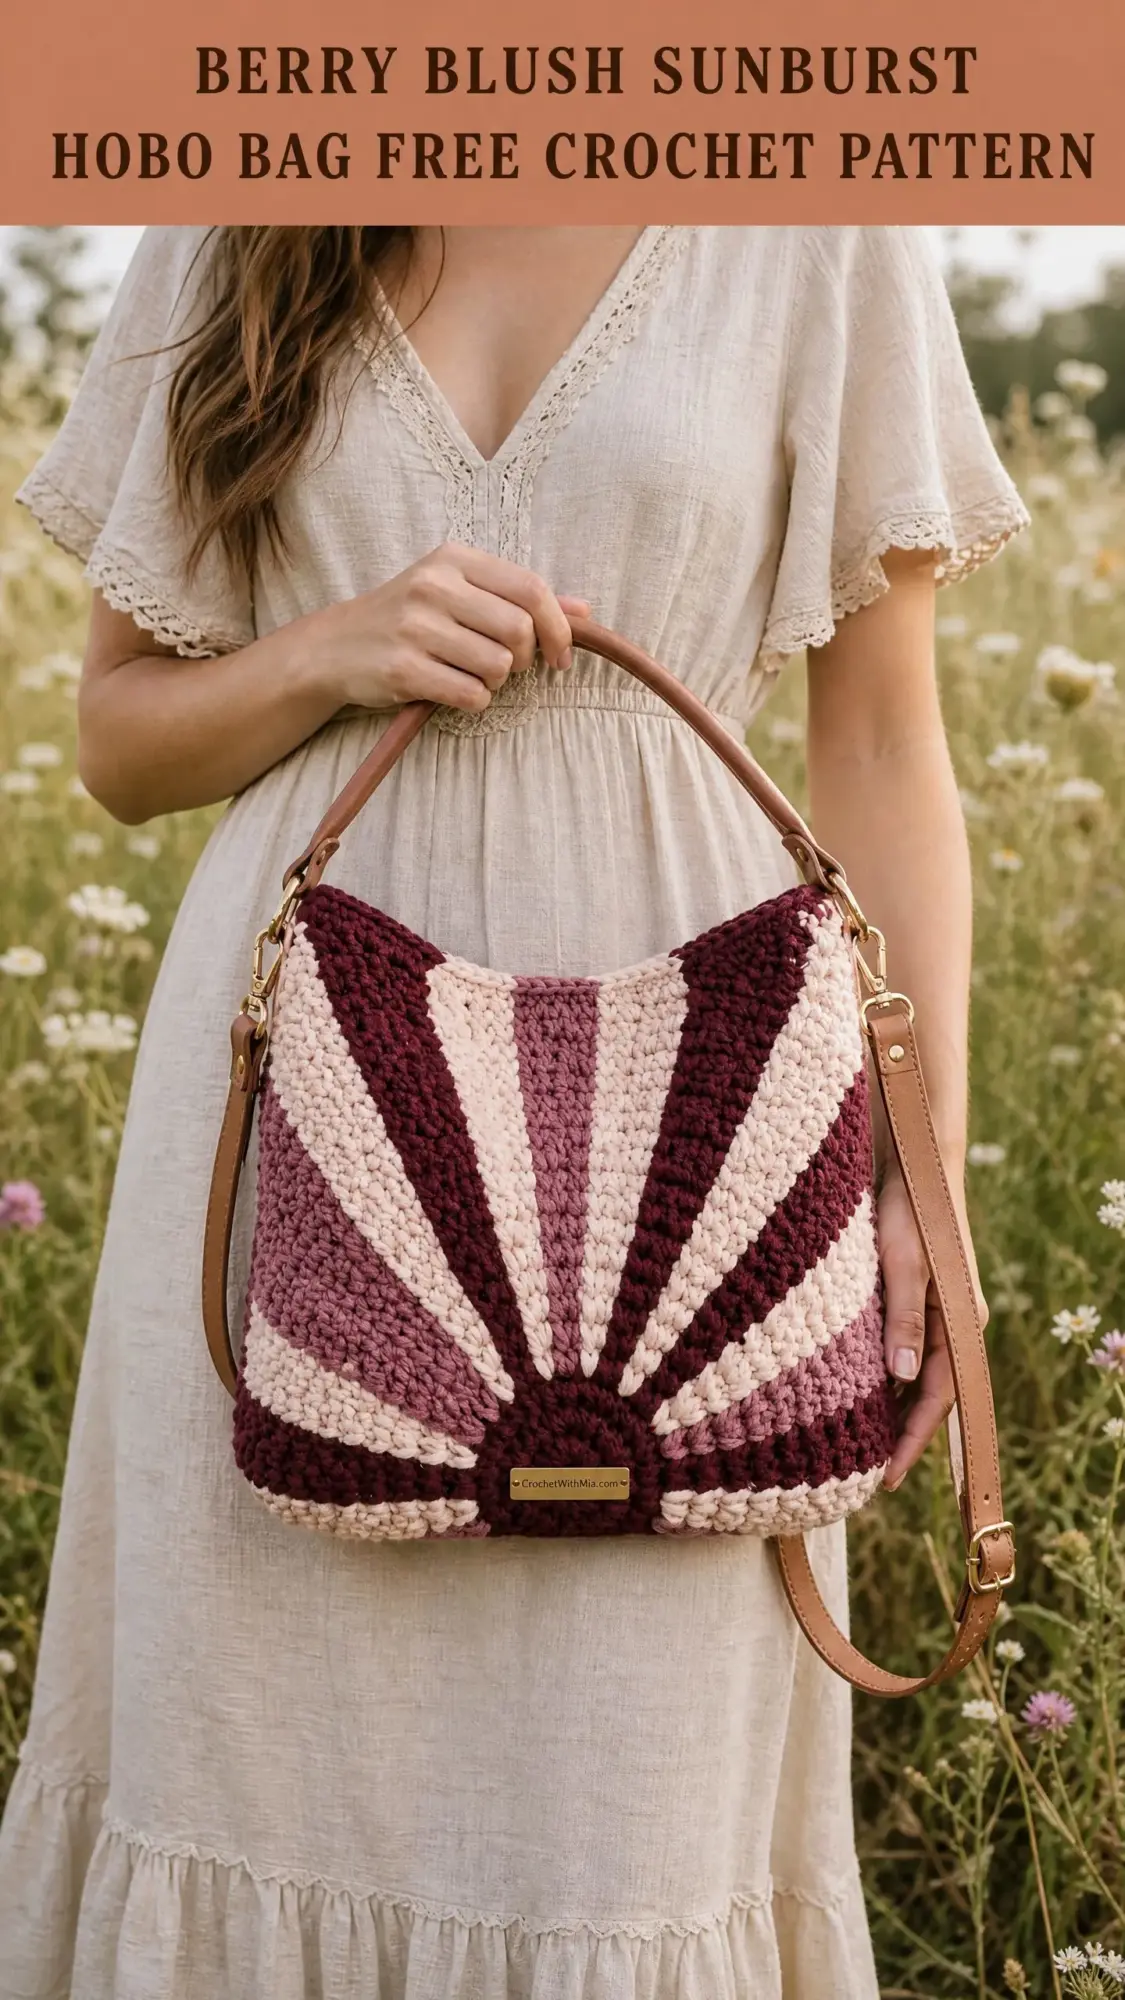
Thank you so much for choosing this pattern for your next project. I really hope you love making this bag as much as I loved designing it. The sunburst motif is such a statement piece, and every time you carry it, you will know you made something truly special with your own hands.
If you make this Berry Blush Sunburst Hobo Bag, I would absolutely love to see it! Tag me on Instagram or share a photo in our Facebook group. Seeing your finished projects genuinely makes my day.
Go ahead and save this pattern to your Pinterest boards so you can find it easily when you are ready to start. And if you have any questions or want to share your progress, drop a comment below. I always love hearing from you!