
This is hands down one of the MOST stunning baby dress patterns I have ever worked up. And here is the best part: it looks incredibly intricate, but the construction is totally manageable once you break it down.
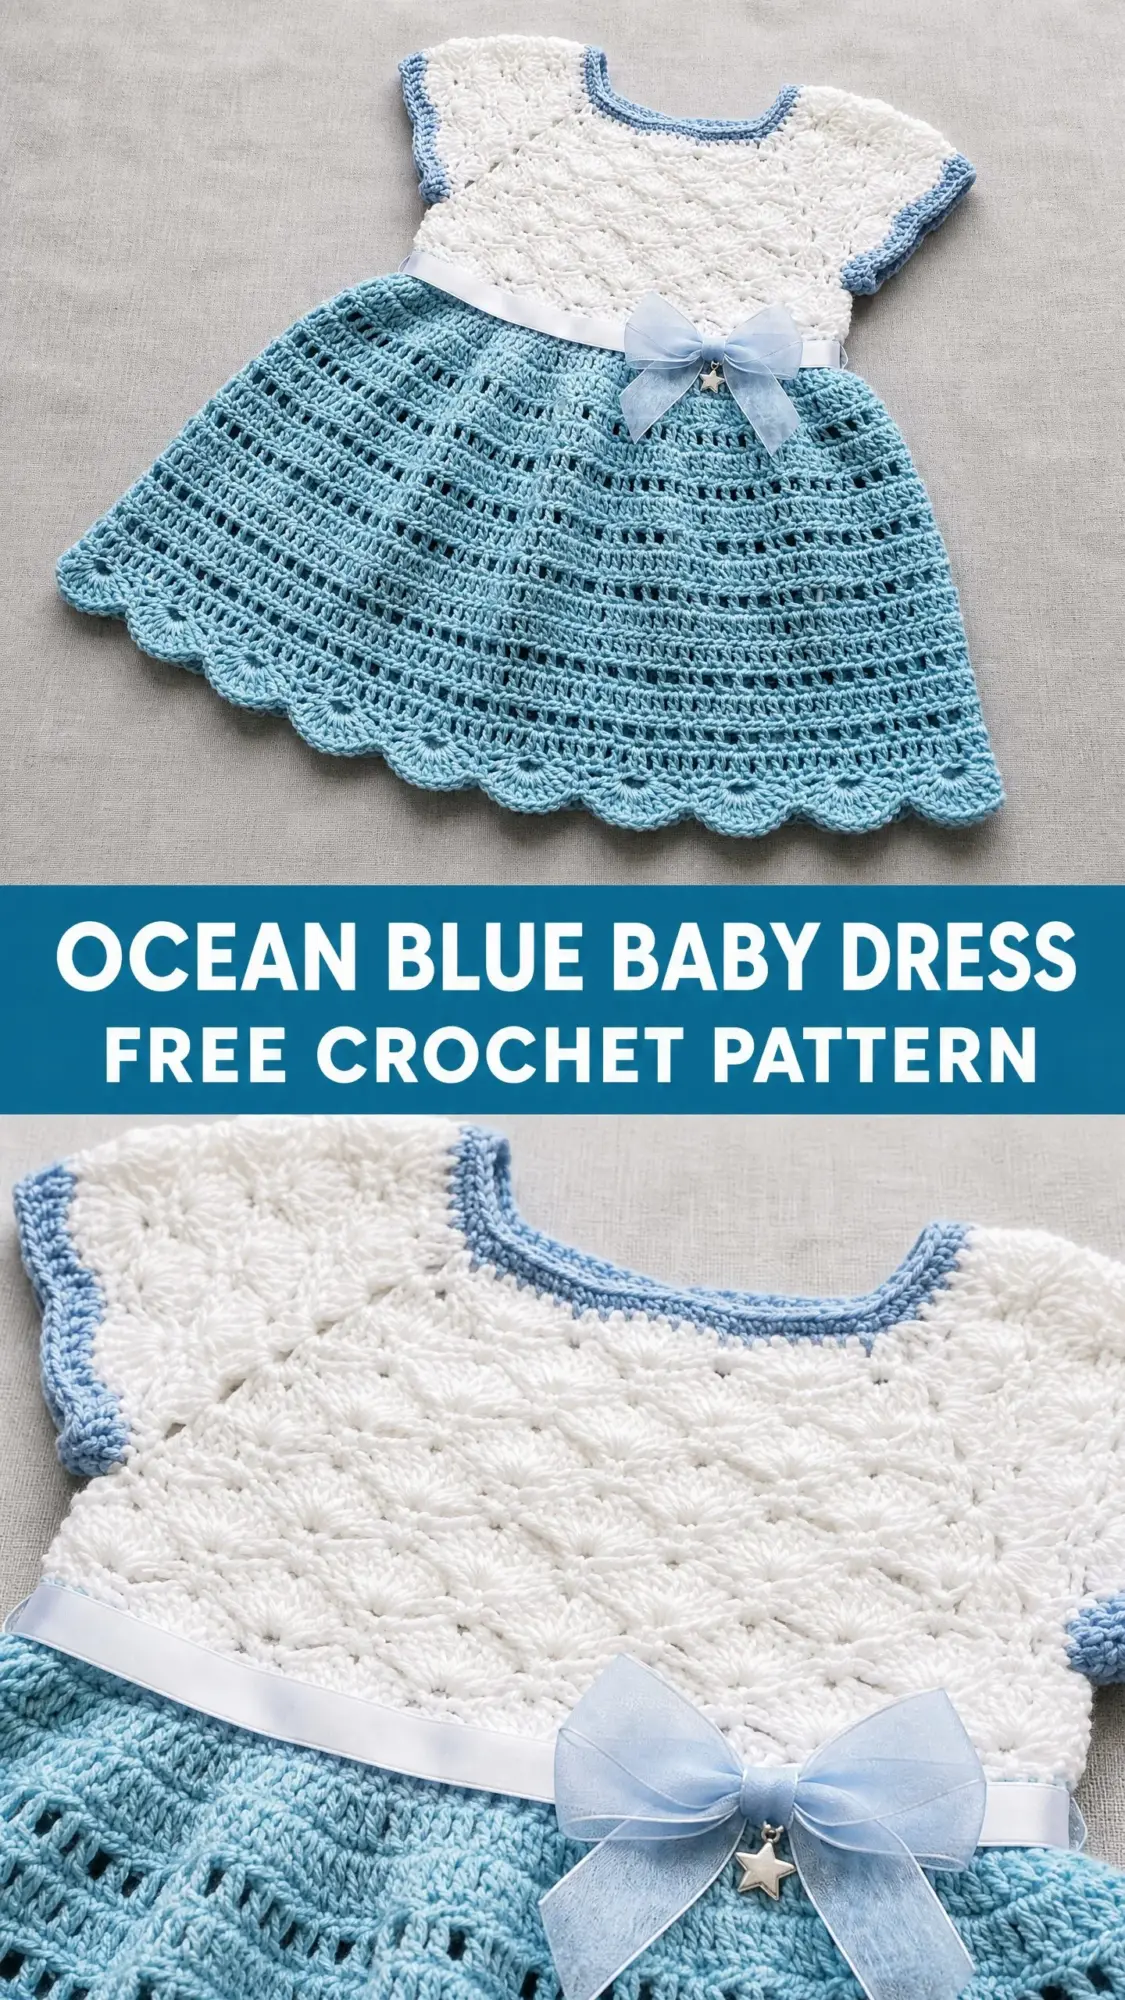
We are talking gorgeous shell stitches on the bodice, a flowy A-line skirt with those pretty mesh stripes, and that dreamy scalloped hem that makes everyone gasp. The whole thing works up top-down in one piece, so you will not be sewing a million seams at the end.
If you have been wanting to make a showstopper baby gift that looks like it came from a boutique, this is your pattern. Expect around 12 to 18 hours of work for the 6-month size, and I promise every single hour is worth it.
Why This Crochet Baby Dress Pattern Is So Special
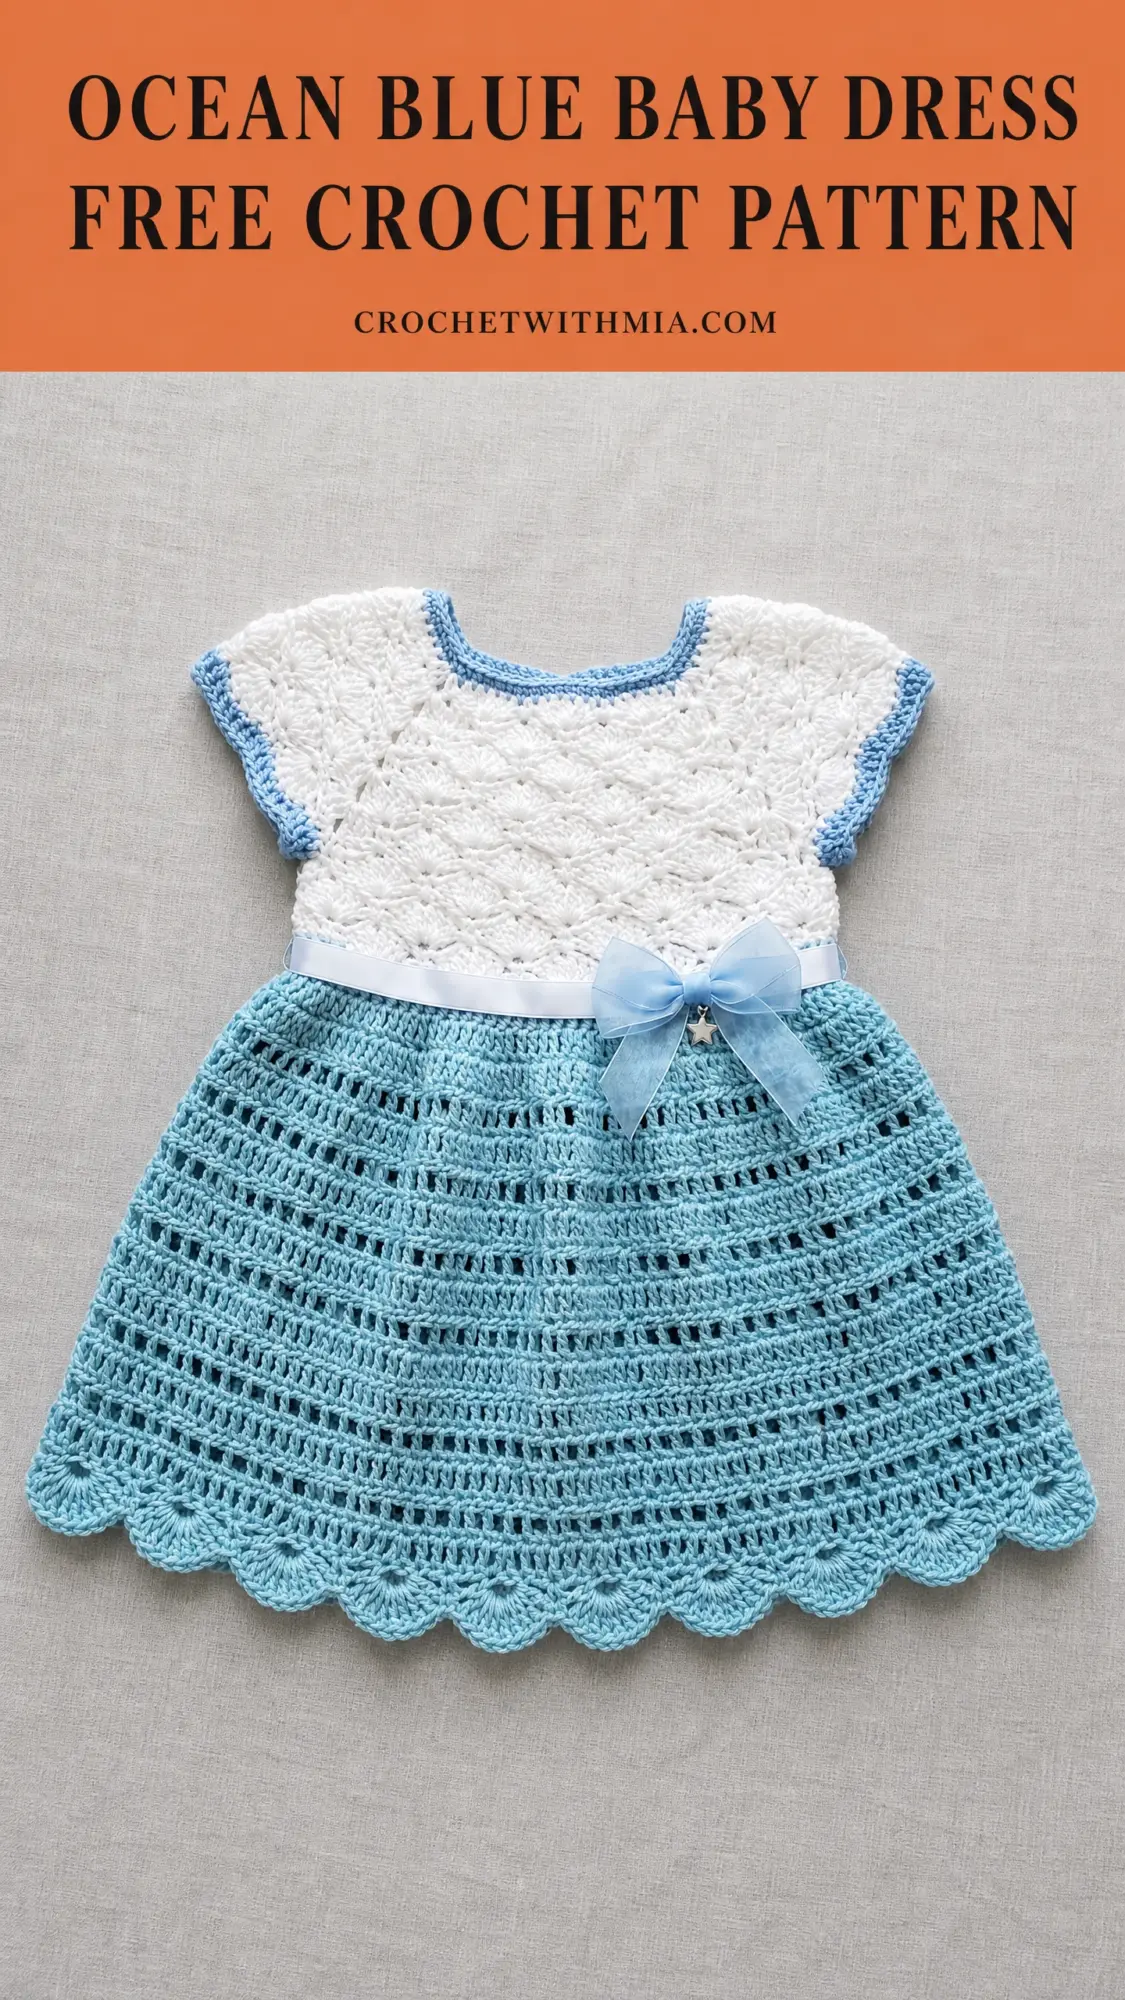
Let me tell you what makes this baby dress crochet pattern stand out from the crowd. The design combines a fitted white bodice worked in a delicate fan stitch with a light blue flared skirt. The contrast between the textured top and the smooth, flowing bottom creates visual interest that catches everyone’s eye.
The dress features short cap sleeves with blue trim that matches the neckline edging. At the waist, a satin ribbon threads through a specially created casing and ties in a sweet bow at the front. You can even add a little star charm for extra sparkle.
The scalloped hem at the bottom is the perfect finishing touch. It adds movement and that classic handmade charm that machine-made clothes simply cannot replicate.
Skill Level and What You Need to Know
I am rating this pattern as intermediate level. You should be comfortable with working in joined rounds, reading stitch repeats, and managing stitch counts. If you have made a few garments before, you will be absolutely fine.
The techniques you will use include:
Do not let that list intimidate you. I will walk you through every single step. If this is your first garment, just take it slow and trust the process.
Finished Measurements
This pattern includes three sizes:
Size 0 to 3 months: Chest 14 inches (35.5 cm), Length 10 inches (25.5 cm)
Size 6 months: Chest 16 inches (40.5 cm), Length 11.5 inches (29 cm)
Size 12 months: Chest 18 inches (45.5 cm), Length 13 inches (33 cm)
The instructions are written for the 6-month size throughout. I have included size customization tips at the end so you can easily adjust up or down.
Materials Needed
Yarn A (White): DK weight yarn, approximately 120 yards (110 m)
Yarn B (Light Blue): DK weight yarn, approximately 200 yards (183 m)
Hook: US size E-4 / 3.5 mm crochet hook
Notions: Yarn needle, 4 stitch markers, 24 inches (61 cm) of 3/8 inch (1 cm) satin ribbon in white, 1 small star charm, scissors
Yarn Suggestions
Option 1: Paintbox Yarns Simply DK (100% acrylic, 137 yd per 50 g). Colors: Pure White and Sailor Blue. This gives excellent stitch definition and is easy to care for.
Option 2: Scheepjes Cahlista (100% mercerized cotton, 85 yd per 50 g). Colors: White (106) and Cyan (397). Cotton provides beautiful drape and breathability for warmer months.
Option 3: Lion Brand Pound of Love (100% acrylic, 1020 yd per 454 g). Colors: White and Pastel Blue. Soft, machine washable, and economical for gift projects.
Substitution Note: Use any smooth DK weight yarn that achieves gauge. Avoid fuzzy or textured yarns because the fan and shell stitches will lose their definition. If using cotton, check your gauge carefully since cotton has less stretch than acrylic.
Gauge
Getting gauge right is critical for a fitted garment like this baby dress. Please make a swatch before starting.
In fan stitch pattern (bodice), after blocking:
16 stitches and 8 rows = 4 inches (10 cm)
In double crochet (skirt), after blocking:
18 stitches and 8 rounds = 4 inches (10 cm)
Abbreviations
Let me define every abbreviation you will encounter. Even if you know these by heart, a quick refresher never hurts.
ch = chain: wrap yarn over hook, pull through loop on hook
sl st = slip stitch: insert hook, yarn over, pull through stitch and loop on hook in one motion
sc = single crochet: insert hook, yarn over, pull up a loop (2 loops on hook), yarn over, pull through both loops
hdc = half double crochet: yarn over, insert hook, yarn over, pull up a loop (3 loops on hook), yarn over, pull through all 3 loops
dc = double crochet: yarn over, insert hook, yarn over, pull up a loop (3 loops on hook), yarn over, pull through 2 loops, yarn over, pull through remaining 2 loops
tr = treble crochet: yarn over twice, insert hook, yarn over, pull up a loop, (yarn over, pull through 2 loops) three times
sk = skip: pass over the indicated stitch without working into it
st(s) = stitch(es)
sp(s) = space(s)
rep = repeat
beg = beginning
rem = remaining
pm = place marker
sm = slip marker: move your marker from the old stitch to the new one
RS = right side: the front of your work
WS = wrong side: the back of your work
rnd = round
yo = yarn over
inc = increase: work 2 dc in same stitch
ch-sp = chain space
BLO = back loop only: insert hook under only the back loop of the stitch
FLO = front loop only: insert hook under only the front loop of the stitch
Special Stitches
These special stitches create all the beautiful texture in this crochet baby dress pattern. Read through them before you begin.
Fan Stitch (fan st)
Work (dc, ch 1, dc, ch 1, dc, ch 1, dc, ch 1, dc) all in the same stitch or space. This creates a 5-dc fan with ch-1 spaces between each dc. You will have 5 dc and 4 ch-1 spaces total. To close the fan at the top of a row, work a sc in the center ch-1 sp of the fan below.
Shell Stitch (shell)
Work 5 dc all in the same stitch or space. Simple and beautiful.
V-Stitch (V-st)
Work (dc, ch 2, dc) in the same stitch or space.
Picot
Ch 3, sl st in the 3rd ch from hook. This creates a small decorative bump.
Mesh Row (open mesh)
Ch 3 (counts as dc), sk 1 st, dc in next st, (ch 1, sk 1 st, dc in next st) across.
Pattern Notes Before You Begin
Read these carefully. They will save you confusion later.
1. The dress is worked top-down in joined rounds from the neckline. The yoke is worked in rows then joined, and the skirt is worked in continuous joined rounds.
2. Turning chains: Ch 3 counts as first dc throughout unless otherwise noted. Ch 1 at the start of a sc row does NOT count as a stitch.
3. Place stitch markers at the 4 raglan points throughout the yoke shaping. Move them up each round.
4. The ribbon casing is created by working a round of BLO sc at the waist join, then threading the satin ribbon through the ch-1 sps of that round.
5. Color change: Join Yarn B with a sl st at the beginning of the waist ribbon casing round. Fasten off Yarn A cleanly.
6. All rounds are joined with a sl st to the top of the beginning ch-3 (or to the first sc) unless otherwise noted.
7. The dress fits snugly through the chest and flares generously through the skirt for a true A-line silhouette.
8. Block the finished dress by soaking in cool water, gently squeezing out excess water in a towel, and pinning flat to measurements to dry. Do not wring.
Step-by-Step Crochet Pattern Instructions
Neckline Foundation
Using Yarn B and hook E-4, ch 61.
Row 1 (RS): Sc in 2nd ch from hook and in each ch across. Turn. (60 sc)
Row 2: Ch 1, sc in each sc across. Turn. (60 sc)
Do not fasten off. Turn your work so the foundation chain edge is at the top and you are working into the bottom of Row 1.
Join Yarn A with a sl st at the right end of the foundation chain edge.
Yoke
The yoke is worked in rows, turning, in the fan stitch pattern with raglan shaping. Four markers divide the work into 5 sections: left front, left sleeve, back, right sleeve, right front.
Yoke Section Counts at Start:
Yoke Increase Method: Each increase row adds 8 sts total, 2 sts at each of the 4 raglan marker points (1 st before marker, 1 st after marker). Work 2 dc in the st before marker, sm, work 2 dc in the st after marker.
Yoke Row 1 (Increase, RS): Ch 3, dc in each st to 1 st before first marker, 2 dc in next st, sm, 2 dc in next st, dc to 1 st before second marker, 2 dc in next st, sm, 2 dc in next st, dc to 1 st before third marker, 2 dc in next st, sm, 2 dc in next st, dc to 1 st before fourth marker, 2 dc in next st, sm, 2 dc in next st, dc to end. Turn. (68 sts)
Yoke Row 2 (Plain): Ch 3, dc in each st across. Turn. (68 sts)
Yoke Row 3 (Increase): Repeat increase row method. (76 sts)
Yoke Row 4 (Plain): Ch 3, dc in each st across. Turn. (76 sts)
Yoke Row 5 (Increase): Add 8. (84 sts)
Yoke Row 6 (Plain): Ch 3, dc in each st across. Turn. (84 sts)
Yoke Row 7 (Increase): Add 8. (92 sts)
Yoke Row 8 (Plain): Ch 3, dc in each st across. Turn. (92 sts)
Yoke Row 9 (Increase): Add 8. (100 sts)
Yoke Row 10 (Plain): Ch 3, dc in each st across. Turn. (100 sts)
Now you will work the fan stitch rows across the bodice front and back only. Time for sleeve separation.
Sleeve Separation
On the next row, you will skip over the sleeve stitches and join the fronts and back, adding underarm chain stitches.
Sleeve Separation Row: Ch 3, dc in each of first 17 sts (right front), ch 4, skip 18 sleeve sts (right sleeve), dc in each of next 30 sts (back), ch 4, skip 18 sleeve sts (left sleeve), dc in each of last 17 sts (left front). Turn. (72 working sts: 17 + 4 + 30 + 4 + 17)
Sleeve Cap and Sleeve Edging
Set aside the 18 sleeve sts per sleeve. You will return to these.
Join Yarn B at underarm with sl st.
Sleeve Edging Rnd: Ch 1, sc evenly around sleeve opening: sc in each of 18 sleeve sts, sc in each of 4 ch sts at underarm. Join with sl st to first sc. (22 sc)
Sleeve Edging Rnd 2: Ch 1, sc in each sc around. Join. (22 sc)
Fasten off Yarn B. Weave in ends. Repeat for second sleeve.
Bodice
After sleeve separation, work the bodice in flat rows across the 72 working sts, then join to work in the round.
Bodice Row 1 (RS): Ch 3, dc in each st and ch across. Turn. (72 dc)
Bodice Row 2: Ch 1, sc in first st, (sk 2 sts, fan st in next st, sk 2 sts, sc in next st) across. Turn. (12 fan repeats)
Bodice Row 3 (RS): Ch 3, turn, 2 dc in first sc, (sc in center ch-1 sp of fan, 5 dc in next sc) across, ending sc in center ch-1 sp of last fan, 3 dc in last sc. Turn. (72 pattern sts)
Bodice Row 4: Ch 1, sc in first dc, (fan st in next sc, sc in center dc of 5-dc group) across, ending fan st in last sc, sc in top of ch-3. Turn. (72 pattern sts)
Bodice Row 5: Repeat Row 3. (72 pattern sts)
Bodice Row 6: Repeat Row 4. (72 pattern sts)
Bodice Row 7: Repeat Row 3. (72 pattern sts)
Fold bodice in half matching side edges. Sl st side edges together on each side (3 sl sts at each side seam). Join Yarn B at right side seam to begin working in the round.
Checkpoint 1: After the bodice is joined, your piece should measure approximately 4.5 inches (11.5 cm) from neckline to waist edge. The chest circumference should measure approximately 16 inches (40.5 cm).
Waist Casing Round
Join Yarn B at right side seam with sl st. Drop Yarn A.
Waist Casing Rnd 1: Ch 1, sc in BLO of each st around the bottom edge of bodice. Join with sl st to first sc. (72 sc)
Waist Casing Rnd 2: Ch 1, (sc in next st, ch 1, sk 1 st) around. Join with sl st to first sc. (36 sc, 36 ch-1 sps)
This ch-1 sp row creates the ribbon casing.
Waist Casing Rnd 3: Ch 1, sc in each sc and each ch-1 sp around. Join. (72 sc)
Do not fasten off Yarn B. Continue with skirt.
Skirt
The skirt is worked in joined rounds in Yarn B, expanding with evenly spaced increases to create an A-line silhouette.
Skirt Rnd 1: Ch 3 (counts as dc), dc in same st, 2 dc in each st around. Join to top of beg ch-3. (144 dc)
Skirt Rnd 2: Ch 3, dc in each dc around. Join. (144 dc)
Skirt Rnd 3: Ch 3, dc in each dc around. Join. (144 dc)
Skirt Rnd 4 (Mesh Round): Ch 4 (counts as dc + ch 1), sk 1 dc, (dc in next dc, ch 1, sk 1 dc) around. Join with sl st to 3rd ch of beg ch-4. (72 dc, 72 ch-1 sps)
Skirt Rnd 5: Ch 3, (dc in next ch-1 sp, dc in next dc) around. Join to top of beg ch-3. (144 dc)
Skirt Rnd 6: Ch 3, dc in each dc around. Join. (144 dc)
Skirt Rnd 7: Ch 3, dc in each dc around. Join. (144 dc)
Skirt Rnd 8 (Increase): Ch 3, dc in next 7 dc, 2 dc in next dc, (dc in next 8 dc, 2 dc in next dc) around. Join. (160 dc)
Skirt Rnd 9: Ch 3, dc in each dc around. Join. (160 dc)
Skirt Rnd 10: Ch 3, dc in each dc around. Join. (160 dc)
Skirt Rnd 11 (Mesh Round): Ch 4 (counts as dc + ch 1), sk 1 dc, (dc in next dc, ch 1, sk 1 dc) around. Join to 3rd ch of beg ch-4. (80 dc, 80 ch-1 sps)
Skirt Rnd 12: Ch 3, (dc in next ch-1 sp, dc in next dc) around. Join. (160 dc)
Skirt Rnd 13: Ch 3, dc in each dc around. Join. (160 dc)
Skirt Rnd 14: Ch 3, dc in each dc around. Join. (160 dc)
Skirt Rnd 15 (Increase): Ch 3, dc in next 9 dc, 2 dc in next dc, (dc in next 9 dc, 2 dc in next dc) around. Join. (176 dc)
Skirt Rnd 16: Ch 3, dc in each dc around. Join. (176 dc)
Skirt Rnd 17: Ch 3, dc in each dc around. Join. (176 dc)
Skirt Rnd 18 (Mesh Round): Ch 4, sk 1 dc, (dc in next dc, ch 1, sk 1 dc) around. Join. (88 dc, 88 ch-1 sps)
Skirt Rnd 19: Ch 3, (dc in next ch-1 sp, dc in next dc) around. Join. (176 dc)
Skirt Rnd 20: Ch 3, dc in each dc around. Join. (176 dc)
Checkpoint 2: After Rnd 20 of the skirt, your piece should measure approximately 11.5 inches (29 cm) from neckline to current edge. The skirt hem circumference should measure approximately 39 inches (99 cm).
Scallop Border
The scallop border is worked directly onto the last round of the skirt. Do not turn.
Border Rnd 1: Ch 1, sc in same st, sk 3 sts, shell (5 dc) in next st, sk 3 sts, sc in next st, rep (sk 3, shell in next, sk 3, sc in next) around. Join with sl st to first sc. (22 shells, 22 sc)
Border Rnd 2: Sl st to center dc of first shell, ch 1, sc in same st, ch 3, (sc in center dc of next shell, ch 3) around. Join to first sc. (22 sc, 22 ch-3 sps)
Border Rnd 3: Sl st into first ch-3 sp, ch 3, 4 dc in same sp, sc in next sc, (5 dc in next ch-3 sp, sc in next sc) around. Join. (22 shells, 22 sc)
Border Rnd 4: Sl st to center dc of first shell, ch 1, sc in same st, ch 5, (sc in center dc of next shell, ch 5) around. Join. (22 sc, 22 ch-5 arches)
Border Rnd 5 (Final Scallop): Into each ch-5 arch work (sc, hdc, dc, tr, dc, hdc, sc). Join with sl st to first sc. Fasten off. (22 full scallops)
Checkpoint 3: The completed scallop border should add approximately 1 inch (2.5 cm) of depth to the hem. The finished length from neckline to hem tip should be approximately 11.5 inches (29 cm).
Neckline Finishing
Join Yarn B at right back shoulder of neckline with sl st, RS facing.
Neckline Rnd 1: Ch 1, sc evenly around neckline edge. Work approximately 60 sc total to keep the neckline flat and snug. Join. (60 sc)
Neckline Rnd 2: Ch 1, sc in each sc around. Join. Fasten off. (60 sc)
Weave in all ends.
Ribbon and Embellishment
Cut one length of satin ribbon 24 inches (61 cm). Thread ribbon through the ch-1 sps of the Waist Casing Rnd 2, starting and ending at center front. Pull to adjust gathers evenly. Tie in a bow at center front.
Attach star charm to the knot of the bow using a small jump ring or by threading through the charm hole before tying the bow.
Size Customization Tips
To size down to 0-3 months: Begin with a foundation chain of 55. Reduce each yoke section by 1 st (fronts 10, sleeves 7, back 17 = 51 at start). Work only 8 yoke increase rows instead of 10. Reduce bodice stitch count to 64. Begin skirt with Rnd 1 yielding 128 dc. Work 2 fewer skirt rounds between mesh rows.
To size up to 12 months: Begin with a foundation chain of 67. Increase starting yoke sections (fronts 14, sleeves 9, back 22 = 68 at start). Work 12 yoke increase rows. Increase bodice stitch count to 80. Begin skirt with Rnd 1 yielding 160 dc, work 2 additional skirt rounds between mesh rows. End with 192 dc before border.
General tip: Every 4 additional sts in the starting chain adds approximately 1 inch (2.5 cm) to the chest circumference. Every 2 additional skirt rounds adds approximately 0.5 inch (1.25 cm) to the skirt length.
Finishing and Blocking
Weave in all ends securely, leaving at least 6 inches (15 cm) of tail for weaving.
Wet blocking is strongly recommended. Soak the dress in cool water with a small amount of wool wash or gentle soap for 15 minutes. Do not wring. Gently press water out by rolling in a clean dry towel. Lay flat on a blocking mat and pin to the finished measurements. Allow to dry completely before unpinning, at least 24 hours.
Blocking opens the fan stitches and mesh rows beautifully and evens out the scallop hem. Remove ribbon before blocking and rethread after the dress is dry.
Care Instructions
If worked in acrylic yarn: Machine wash on gentle cycle in a mesh laundry bag with cold water. Lay flat to dry. Do not tumble dry on high heat.
If worked in cotton yarn: Hand wash in cool water with mild detergent. Lay flat to dry. May be gently ironed on low heat with a pressing cloth.
If worked in wool or wool blend: Hand wash only in cool water with wool wash. Do not agitate. Lay flat to dry.
Store folded flat, not on a hanger, to preserve the shape of the skirt.
Final Thoughts on This Baby Dress Crochet Pattern
You did it! This ocean blue baby dress is truly a labor of love, and the result is absolutely stunning. Whether you are making this for your own little one, a baby shower gift, or a special occasion, the recipient is going to treasure it.
I would love to see your finished dresses! Tag me on Instagram or share your photos in our Facebook group. Seeing your creations always makes my day.
If you loved this baby dress crochet tutorial, go ahead and pin it to your Pinterest boards so you can find it whenever inspiration strikes. And please drop a comment below if you make one. I would love to hear how it turned out and see what color combinations you choose!