
My daughter was barely walking when I spotted a faded photograph at an antique shop. A little girl from the 1920s stood in what looked like a cloud of cream-colored lace, her dress cascading in delicate fans and shells. I couldn’t stop thinking about it.
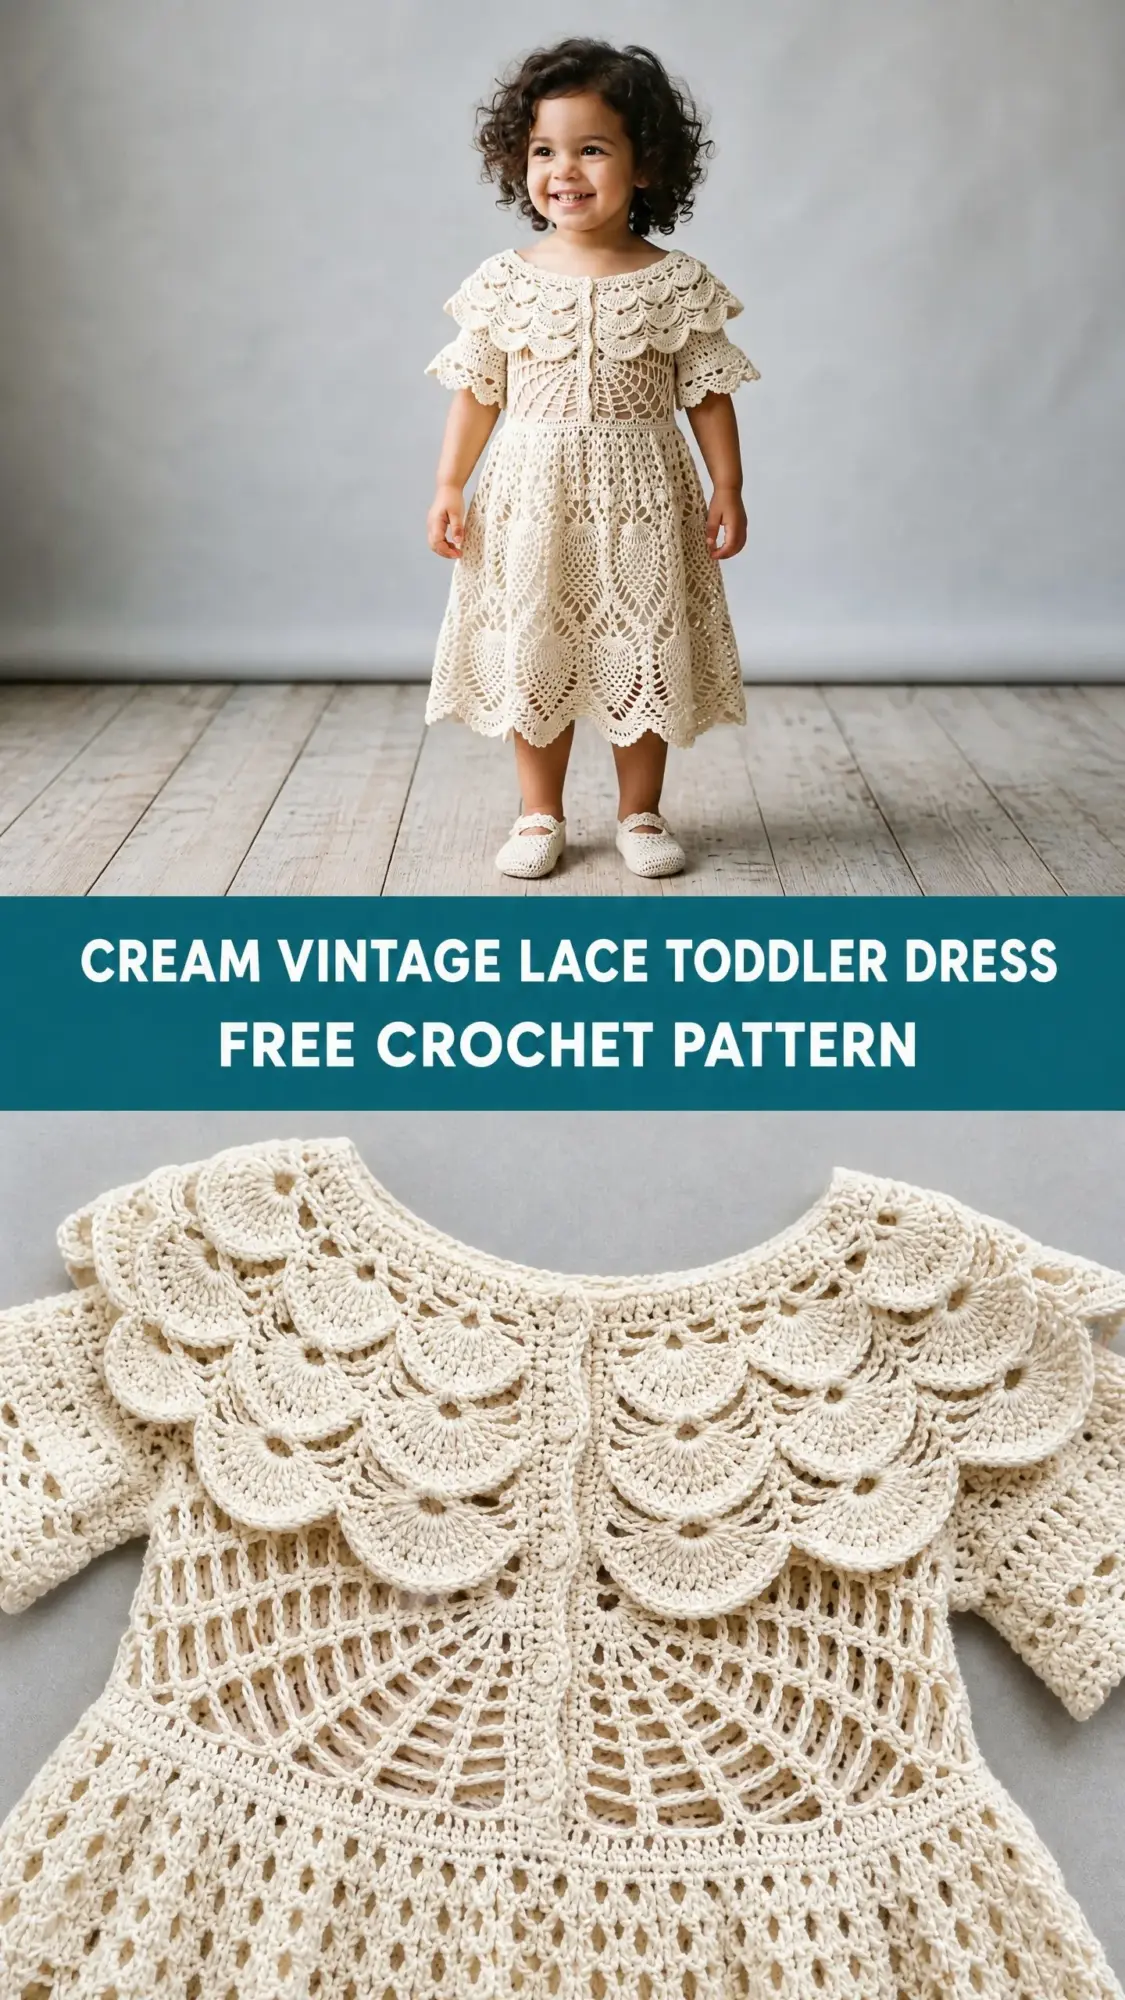
That image stayed with me for months. I sketched it on napkins, studied vintage patterns in library archives, and eventually started swatching. What emerged after countless attempts is this heirloom toddler dress, a piece that looks like it belongs in a museum but fits perfectly on a modern little one twirling at a family gathering.
This is not a quick weekend project. I want to be honest about that upfront. But if you’ve been craving a challenge that results in something truly breathtaking, something that could be passed down for generations, this cream vintage lace toddler dress crochet pattern is exactly what you’re looking for.
About This Vintage Lace Dress Pattern
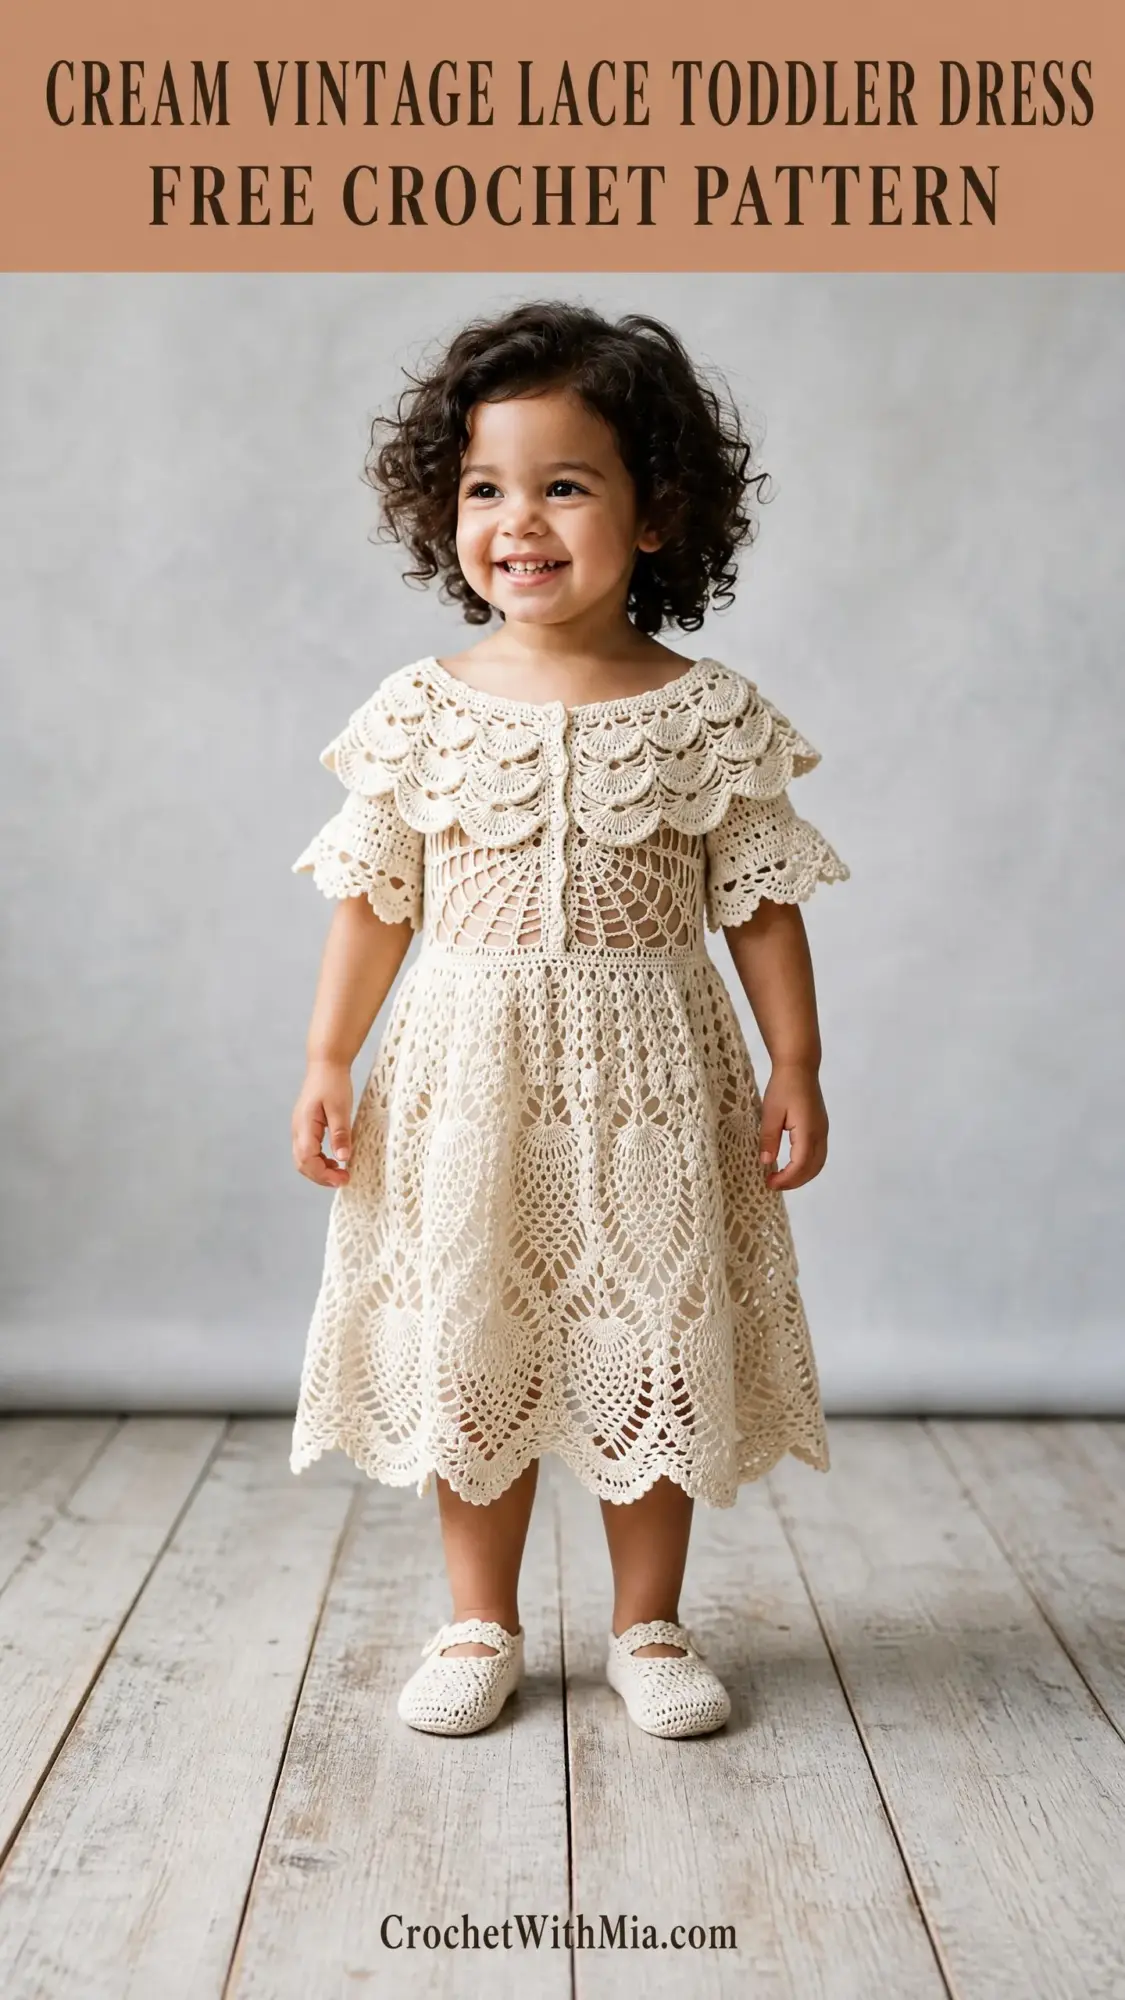
This crochet pattern creates a stunning fitted bodice dress with a full lace skirt featuring pineapple fan motifs, the hallmark of vintage crochet lace work. The construction includes a double-layered scalloped capelet collar that drapes beautifully over the shoulders, adding that unmistakable heirloom quality.
The dress is worked in three main sections. First, you’ll create a fitted bodice worked in the round from the top down. Then comes a structured waist band that cinches the silhouette. Finally, the full skirt is worked from waist to hem with those gorgeous repeating pineapple motifs.
The skill level is advanced. You’ll need comfort with pineapple stitch patterns, working increases within complex lace repeats, and maintaining stitch counts through intricate rows. If you’ve completed at least two lace projects before, you’re ready. If not, consider practicing with a simpler lace pattern first, then come back to this beauty.
Expect to spend approximately 30 to 45 hours on this project if you’re experienced. Blocking adds another 12 to 24 hours of drying time. Yes, it’s a commitment. But every single hour is worth it when you see that finished dress.
Finished Sizes
The pattern is written for size 3T with adjustments for 2T and 4T in brackets.
Size 2T: Chest 21 inches (53 cm), Length from shoulder to hem 20 inches (51 cm)
Size 3T: Chest 22 inches (56 cm), Length from shoulder to hem 21 inches (53 cm)
Size 4T: Chest 23 inches (58 cm), Length from shoulder to hem 22 inches (56 cm)
Throughout the pattern, size adjustments appear in brackets formatted as [2T / 3T / 4T].
Materials Needed
Yarn
You’ll need 400 yards [350 / 400 / 450] of fingering weight cotton yarn in cream or natural ecru. Cotton or a cotton blend is strongly recommended because it creates the structured drape visible in the finished dress. Acrylic fingering weight will work but produces less drape and stiffness after blocking.
Recommended yarn options:
Avoid hairy or fuzzy fibers like mohair or wool blends. They’ll obscure the delicate lace stitches. Mercerized cotton is preferred for its subtle sheen, which mimics the look of true vintage pieces.
Hooks
Notions
Gauge
Getting gauge right is critical for fit. Please swatch before starting.
With B-1 / 2.25 mm hook:
With C-2 / 2.75 mm hook:
Make a swatch at least 5 inches by 5 inches. Block it exactly as you’ll block the finished dress. Measure after blocking.
Abbreviations and Stitch Definitions
Here are all the terms you’ll encounter in this pattern:
Brackets [ ] contain stitch counts at the end of rows or rounds. Parentheses ( ) indicate groups of stitches worked into the same stitch or space.
Special Stitches
Pineapple Fan Motif
This is a 16-stitch, 14-row repeating unit that creates the signature vintage lace look. The pineapple begins with a chain-3 base worked across the top of a fan shell. It gradually narrows through decreasing double crochet clusters across a series of rows and closes with a single sc. The fan beneath forms by working 7 dc in a single ch-2 space.
dc2tog (Double Crochet 2 Together)
This is how you decrease in double crochet:
1. Yarn over, insert hook in next stitch, yarn over, pull up a loop, yarn over, pull through 2 loops. You now have 2 loops on your hook.
2. Yarn over, insert hook in the following stitch, yarn over, pull up a loop, yarn over, pull through 2 loops. You now have 3 loops on your hook.
3. Yarn over, pull through all 3 loops. One decrease completed.
Shell Stitch
Work (2 dc, ch 1, 2 dc) all into the same stitch or space. This creates a decorative shell shape and is used throughout the bodice and collar.
Fan Shell
Work (3 dc, ch 1, 3 dc) all into the same stitch or space. Slightly larger than the regular shell and used in the collar scallops.
Scallop Edge
Work (sc, hdc, 3 dc, hdc, sc) all into the same stitch or space. Skip the next 2 stitches after completing each scallop.
Picot
Chain 3, then slip stitch in the 3rd chain from hook. Creates a decorative point.
Mesh Row
(Sc in next stitch, ch 3, skip 3 stitches) repeated across. Creates an open mesh structure used at the waist transition.
Pattern Notes Before You Begin
1. The bodice is worked in the round from the neckline down with a center-back opening. You’ll work flat (back and forth) until the armhole is complete, then join to work in the round for the lower bodice.
2. Turning chains: For rows worked flat, ch 3 at the beginning of a dc row counts as the first dc. For sc rows, ch 1 does not count as a stitch.
3. Place stitch markers at center front, center back left, and center back right of the neckline. Move them up every 4 rounds.
4. The skirt is worked as a separate piece from waist down. It gets seamed to the bodice using whip stitch.
5. The capelet collar is worked as two separate flat pieces (outer and inner) then joined along the outer scalloped edge before sewing to the neckline.
6. Block ALL pieces before assembly. This step is non-negotiable. Blocking opens up the lace and allows the pineapple motifs to lay flat and fan correctly.
7. The center-back bodice opening is approximately 4.5 inches (11.5 cm) long with 3 buttons or snaps evenly spaced.
Section 1: Bodice Instructions
The bodice begins with a foundation chain at the neckline. You’ll work flat through the armhole depth, then join to work in the round.
Neckline Setup
With B-1 / 2.25 mm hook, ch [148 / 156 / 164].
Row 1 (WS, setup row): Sc in 2nd ch from hook and in each ch across. Ch 1, turn. [147 / 155 / 163 sc]
Place a locking stitch marker in the first and last stitch to mark center-back edges.
Row 2 (RS, shell row): Ch 3 (counts as dc here and throughout), sk 1 st, work shell (2 dc, ch 1, 2 dc) in next st, sk 2 sts; rep from beginning working shells across, end dc in last st. Ch 3, turn. [30 shells + 2 edge dc for size 3T; 28 shells for 2T; 32 shells for 4T]
Row 3: Ch 3, dc in first shell sp (ch-1 sp of shell below), ch 1; rep (shell in next ch-1 sp, ch 1) across all shell sps, end dc in t-ch sp. Ch 3, turn. [30 shells for 3T]
Row 4: Rep Row 3. [30 shells]
Armhole Shaping
At the end of Row 4, divide the work: 7 shells for right back, 16 shells for front, 7 shells for left back.
Row 5 (Right Back): Work across first 7 shells in established pattern. Ch 3, turn. [7 shells]
Rows 6 to 12: Continue in shell pattern on these 7 shells. [7 shells per row]
After Row 12, fasten off. Rejoin yarn at the 8th shell for the front section.
Row 5 (Front): Work across 16 shells in established pattern. Ch 3, turn. [16 shells]
Rows 6 to 12: Continue in shell pattern on front 16 shells. [16 shells per row]
After Row 12, do not fasten off. Continue to Left Back.
Row 5 (Left Back): Work across remaining 7 shells. Ch 3, turn. [7 shells]
Rows 6 to 12: Continue in shell pattern on 7 shells. [7 shells per row]
Joining Row (Row 13)
With RS facing, seam the right back shoulder to the right front shoulder and the left back shoulder to the left front shoulder using a sl st seam through corresponding shell tops. Keep 3 shells at each front corner unjoined for the armhole opening.
Lower Bodice (Worked in the Round)
Round 14: Join yarn at center back right edge, ch 3, work shells in each ch-1 sp around, sl st to top of beg ch-3. [30 shells]
Round 15: Ch 3, (shell in each ch-1 sp) around, sl st to top of beg ch-3. [30 shells]
Round 16 (increase round): Ch 3, (shell in ch-1 sp, ch 2, shell in same sp) in every 5th shell sp, work regular shell in remaining sp, sl st to top of beg ch-3. [36 shells]
Rounds 17-18: Ch 3, (shell in each ch-1 sp) around, sl st to top of beg ch-3. [36 shells]
Round 19 (waist transition, mesh row): Ch 1, sc in first ch-1 sp, ch 3, (sc in next ch-1 sp, ch 3) around, sl st to first sc. [36 sc, 36 ch-3 sps]
Round 20: Ch 1, sc in same sp, ch 3, (sc in next ch-3 sp, ch 3) around, sl st to first sc. [36 sc, 36 ch-3 sps]
Round 21: Ch 1, sc in same sp, (ch 1, sc in next sp) around, sl st to first sc. [72 sts total]
Round 22 (waist band join round): Ch 1, sc evenly around working 2 sc in each ch-3 sp and 1 sc in each sc, sl st to first sc. [144 sc]
Checkpoint: The bodice should measure approximately 5.5 to 6 inches (14 to 15 cm) from neckline to waist band. Circumference at waist band should be 20.5 to 22 inches (52 to 56 cm) when laid flat and slightly stretched.
Fasten off. Weave in ends. Set aside.
Section 2: Skirt Instructions
The skirt is worked from waist down using the larger C-2 / 2.75 mm hook.
Foundation
With C-2 / 2.75 mm hook, ch 144, sl st to first ch to form a ring. Be careful not to twist. [144 ch]
Round 1: Ch 3, dc in each ch around, sl st to top of beg ch-3. [144 dc]
Round 2: Ch 1, sc in first st, ch 2, sk 2, (sc in next st, ch 2, sk 2) around, sl st to first sc. [48 sc, 48 ch-2 sps]
Round 3 (fan base round): Ch 3, (7 dc fan in ch-2 sp, ch 2, sc in next ch-2 sp, ch 2) across. [24 fan groups]
Round 4: Work pineapple tops: sc in 1st dc of fan, (ch 2, sc in next dc) 6 times, ch 2 across each fan. [24 pineapple tops with 7 sc and 6 ch-2 sps each]
Pineapple Body Rows
Round 5: Ch 3, (dc2tog over 1st and 2nd ch-2 sps, ch 2) 6 times per pineapple, end with sc between pineapples. [144 dc2tog + 24 sc between]
Round 6: Ch 3, sc in each dc2tog, ch 2 between each sc within pineapple, work fan shell in the sc between pineapples. [pineapple = 6 sc; between = fan shell]
Round 7: Work dc2tog across each pineapple, 5 dc2tog per pineapple. [120 dc2tog]
Round 8: Sc in each dc2tog, ch 2 between within pineapple, fan shell between pineapples. [pineapple = 5 sc]
Round 9: dc2tog x 4 per pineapple. [96 dc2tog]
Round 10: Sc in each dc2tog within pineapple, fan shell between. [pineapple = 4 sc]
Round 11: dc2tog x 3 per pineapple. [72 dc2tog]
Round 12: Sc in each dc2tog, fan shell between. [pineapple = 3 sc]
Round 13: dc2tog x 2 per pineapple. [48 dc2tog]
Round 14: Sc in each dc2tog, fan shell between. [pineapple = 2 sc]
Round 15: dc2tog across remaining 2 sc of each pineapple, closing the tip. [24 dc2tog]
Round 16: Ch 1, sc in each dc2tog tip, ch 5 (bridge chain), sc in center of fan shell between pineapples, ch 5. [24 sc at tips, 24 sc at fan centers, 48 ch-5 arches]
Second Pineapple Tier (Expansion)
Round 17 (new fan base): Ch 3, work 9 dc in each ch-5 arch, sc in each sc between arches. [432 dc in fans + 48 sc]
Round 18: Work pineapple tops: (sc in 1st dc of fan, ch 2, sc in next dc) 6 times, ch 2 per fan, sc between fans. [48 pineapple tops x 7 sc each]
Rounds 19 to 30: Work pineapple narrowing rounds mirroring Rounds 5 to 15 but over 48 pineapples. By Round 30, all 48 pineapples are closed at their tips.
Round 31: Sc in each tip, ch 5, sc in each fan shell center, ch 5 around. [48 tip sc + 48 fan sc + 96 ch-5 arches]
Hem Scallop
Round 32: Ch 1, (sc, hdc, 5 dc, hdc, sc) in each ch-5 arch around, sl st to first sc. [96 scallops]
Round 33: Sl st across to center dc of first scallop, ch 1, sc in same st, ch 5, (sc in center dc of next scallop, ch 5) around, sl st to first sc. [96 sc, 96 ch-5 sps]
Round 34 (final hem scallop): Ch 1, (sc, hdc, 3 dc, picot, 3 dc, hdc, sc) in each ch-5 sp around, sl st to first sc. [96 scallops with picot]
Fasten off. Weave in ends.
Checkpoint: The skirt should measure approximately 14 to 15 inches (35.5 to 38 cm) from waist chain to hem. Hem circumference when blocked should be approximately 44 to 48 inches (112 to 122 cm).
Section 3: Capelet Collar Instructions
The collar is a double-layered piece worked flat.
Outer Collar
With B-1 / 2.25 mm hook, ch 156.
Row 1: Sc in 2nd ch from hook and each ch across. Ch 3, turn. [155 sc]
Row 2: Sk 2 sts, fan shell (3 dc, ch 1, 3 dc) in next st, sk 2 sts, (sc in next st, sk 2 sts, fan shell in next st, sk 2 sts) across, end sc in last st. Ch 3, turn. [25 fan shells]
Row 3: (Fan shell in ch-1 sp of each shell, sc in each sc between shells) across. Ch 3, turn. [25 fan shells]
Row 4: Rep Row 3. Ch 3, turn. [25 fan shells]
Row 5: Ch 1, (sc in sc between shells, ch 3, sc in ch-1 sp of shell, ch 3) across. Ch 1, turn. [50 sc, 50 ch-3 arches]
Row 6 (outer scallop edge, RS): (Sc, hdc, 5 dc, hdc, sc) in each ch-3 arch across. [50 scallops]
Fasten off.
Inner Collar (Lining)
With B-1 / 2.25 mm hook, ch 156.
Work Rows 1 through 5 identical to Outer Collar.
Row 6 (inner lining scallop): (Sc, hdc, 3 dc, hdc, sc) in each ch-3 arch. [50 smaller scallops]
Fasten off.
Joining the Collar Layers
Place inner collar on top of outer collar, wrong sides together, aligning all edges. Using a yarn needle, whip stitch the two layers together along the straight neckline edge (foundation chain row). Leave scalloped edges free so outer collar scallops drape over and slightly cover inner collar scallops.
Checkpoint: Joined collar should measure approximately 22 inches (56 cm) across neckline edge and 4 inches (10 cm) deep from neckline to outer scallop point.
Section 4: Button Band Instructions
Right Center-Back Edge (Buttonhole Side)
With B-1 / 2.25 mm hook and RS facing:
Row 1: Join yarn at top right corner of center-back opening. Ch 1, work 36 sc evenly along opening edge. Ch 1, turn. [36 sc]
Row 2: Sc in each sc across. Ch 1, turn. [36 sc]
Row 3 (buttonhole row): Sc 4, (ch 2, sk 2, sc 10) twice, ch 2, sk 2, sc 4. Ch 1, turn. [3 buttonholes]
Row 4: Sc in each sc and 2 sc in each ch-2 sp across. Ch 1, turn. [36 sc]
Row 5: Sc in each sc across. Fasten off. [36 sc]
Left Center-Back Edge (Button Side)
Row 1: Join yarn at bottom left edge, ch 1, work 36 sc evenly up left back opening edge. Ch 1, turn. [36 sc]
Rows 2 to 5: Sc in each sc across. Fasten off after Row 5. [36 sc]
Sew buttons to left button band, aligning with buttonholes.
Assembly
Step 1: Block all pieces separately before assembly. See finishing section below.
Step 2: With RS facing, align waist edge of bodice (Round 22) with foundation chain edge of skirt. Using yarn needle and whip stitch or mattress stitch, seam bodice to skirt around full circumference, matching stitch counts evenly. [144 stitches joined]
Step 3: Center the collar along bodice neckline (foundation chain edge of collar aligns with neckline). Pin in place with center-back ends meeting at button band edges but not overlapping. Sew collar to neckline using whip stitch.
Step 4: Weave in all remaining ends securely, working each end through at least 3 directions for security.
Blocking and Finishing
This dress requires thorough wet blocking. Without it, the dress will appear bunched and stitch definition will be lost.
Wet Blocking Method
1. Fill a clean basin with cool water. Submerge each piece and gently press to saturate fully. Do not wring.
2. Lift each piece and press between clean towels to remove excess moisture.
3. Lay each piece on blocking mats. For the skirt, pin each scallop individually, pulling each point firmly to full width. Use rust-proof T-pins.
4. Pin bodice to correct finished dimensions. Pin collar flat with all scallops spread.
5. Allow to dry completely (12 to 24 hours). Do not use heat.
After blocking, lace motifs should be fully open, pineapple fans spread and clear, hem scallops crisp and defined.
Care Instructions
Hand wash in cool water with gentle soap. Do not bleach. Roll in towel to remove water. Lay flat to dry away from direct sunlight. Do not tumble dry. Reblock after washing if needed. Store in acid-free tissue paper or clean cotton bag.
Size Customization Tips
To size up or down beyond provided sizes, add or remove multiples of 16 stitches from the bodice neckline foundation chain (16 stitches equals approximately 2 to 2.5 inches of circumference). Add or remove corresponding multiples of 3 stitches from skirt foundation chain to maintain repeat structure.
To lengthen the skirt, add extra rounds at Rounds 5 to 8 in each tier (2 extra rounds per 0.5 inch of additional length).
To shorten the dress, work only one pineapple tier instead of two. This shortens the skirt by approximately 7 inches.
You’ve Got This
I know this pattern looks intimidating. The pineapple motifs, the multiple sections, the blocking. It’s a lot. But here’s the thing: every single stitch is something you already know how to do. Single crochet, double crochet, chains, decreases. That’s it. The magic happens when those simple stitches combine into lace.
Take your time. Work section by section. And when you hold that finished dress in your hands, you’ll have created something that could genuinely become a family heirloom.
Thank you so much for trusting me with your time and yarn on this project. I’d absolutely love to see your finished dresses. Tag me on Instagram or share in the Facebook group. Seeing your makes is honestly the best part of designing patterns.
If this cream vintage lace toddler dress crochet pattern spoke to you, go ahead and pin it to your Pinterest boards so you can find it when you’re ready to start. And please drop a comment below if you make one. I read every single comment and would love to cheer you on!