
Got some beautiful cotton yarn hiding in your stash? Maybe a skein of blush pink you have been saving for something special? This is the project that deserves it.
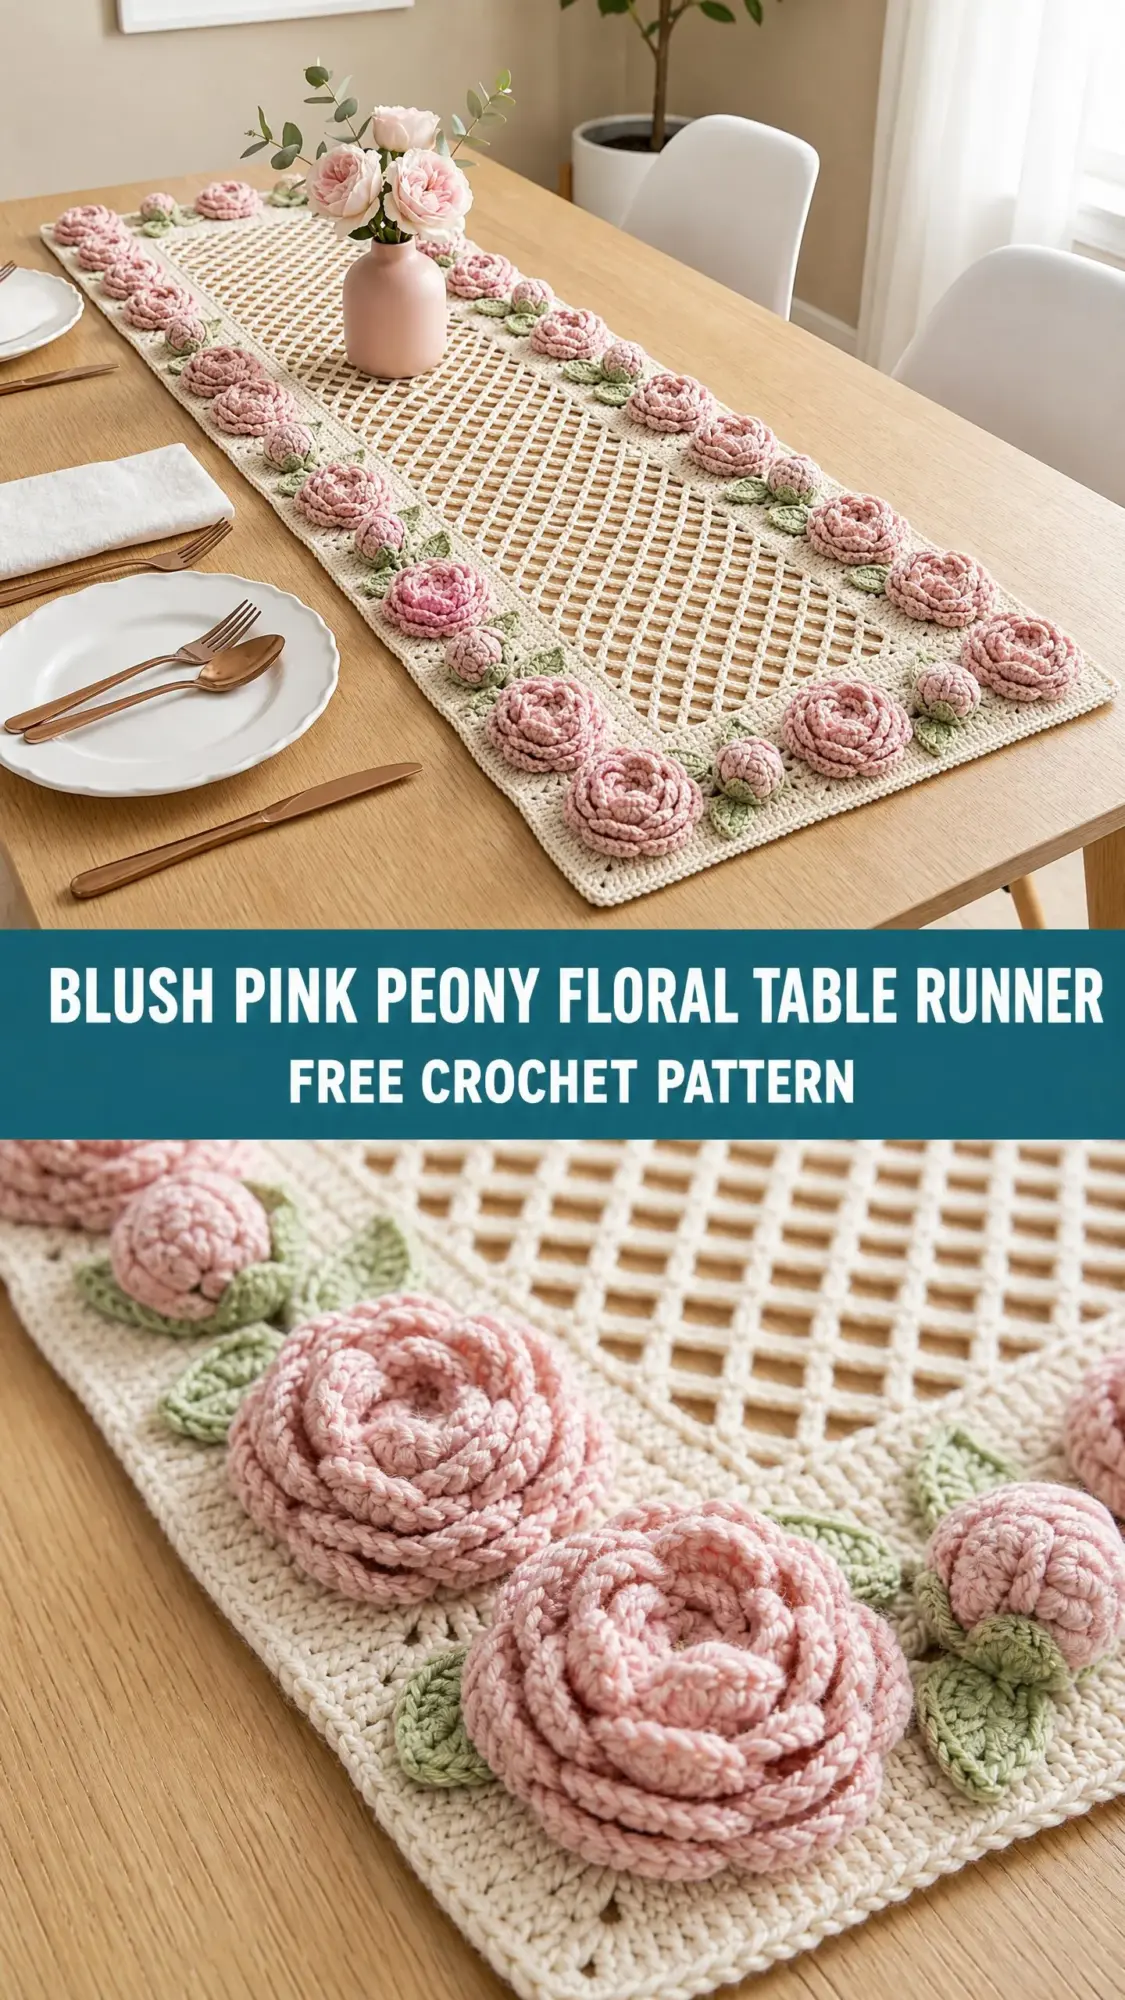
This table runner combines a delicate filet mesh center with three-dimensional peony roses that practically bloom right off the fabric. The construction is genuinely interesting. You will work the lattice panel first, build a sturdy border around it, then create each rose and leaf separately before assembling everything into one stunning piece. Fair warning: this is an intermediate to advanced project that takes patience and careful stitch counting.
But if you are ready for a challenge that results in an heirloom-quality piece, keep reading. Your dining table is about to get a serious upgrade.
Why This Crochet Pattern Creates Such a Stunning Piece
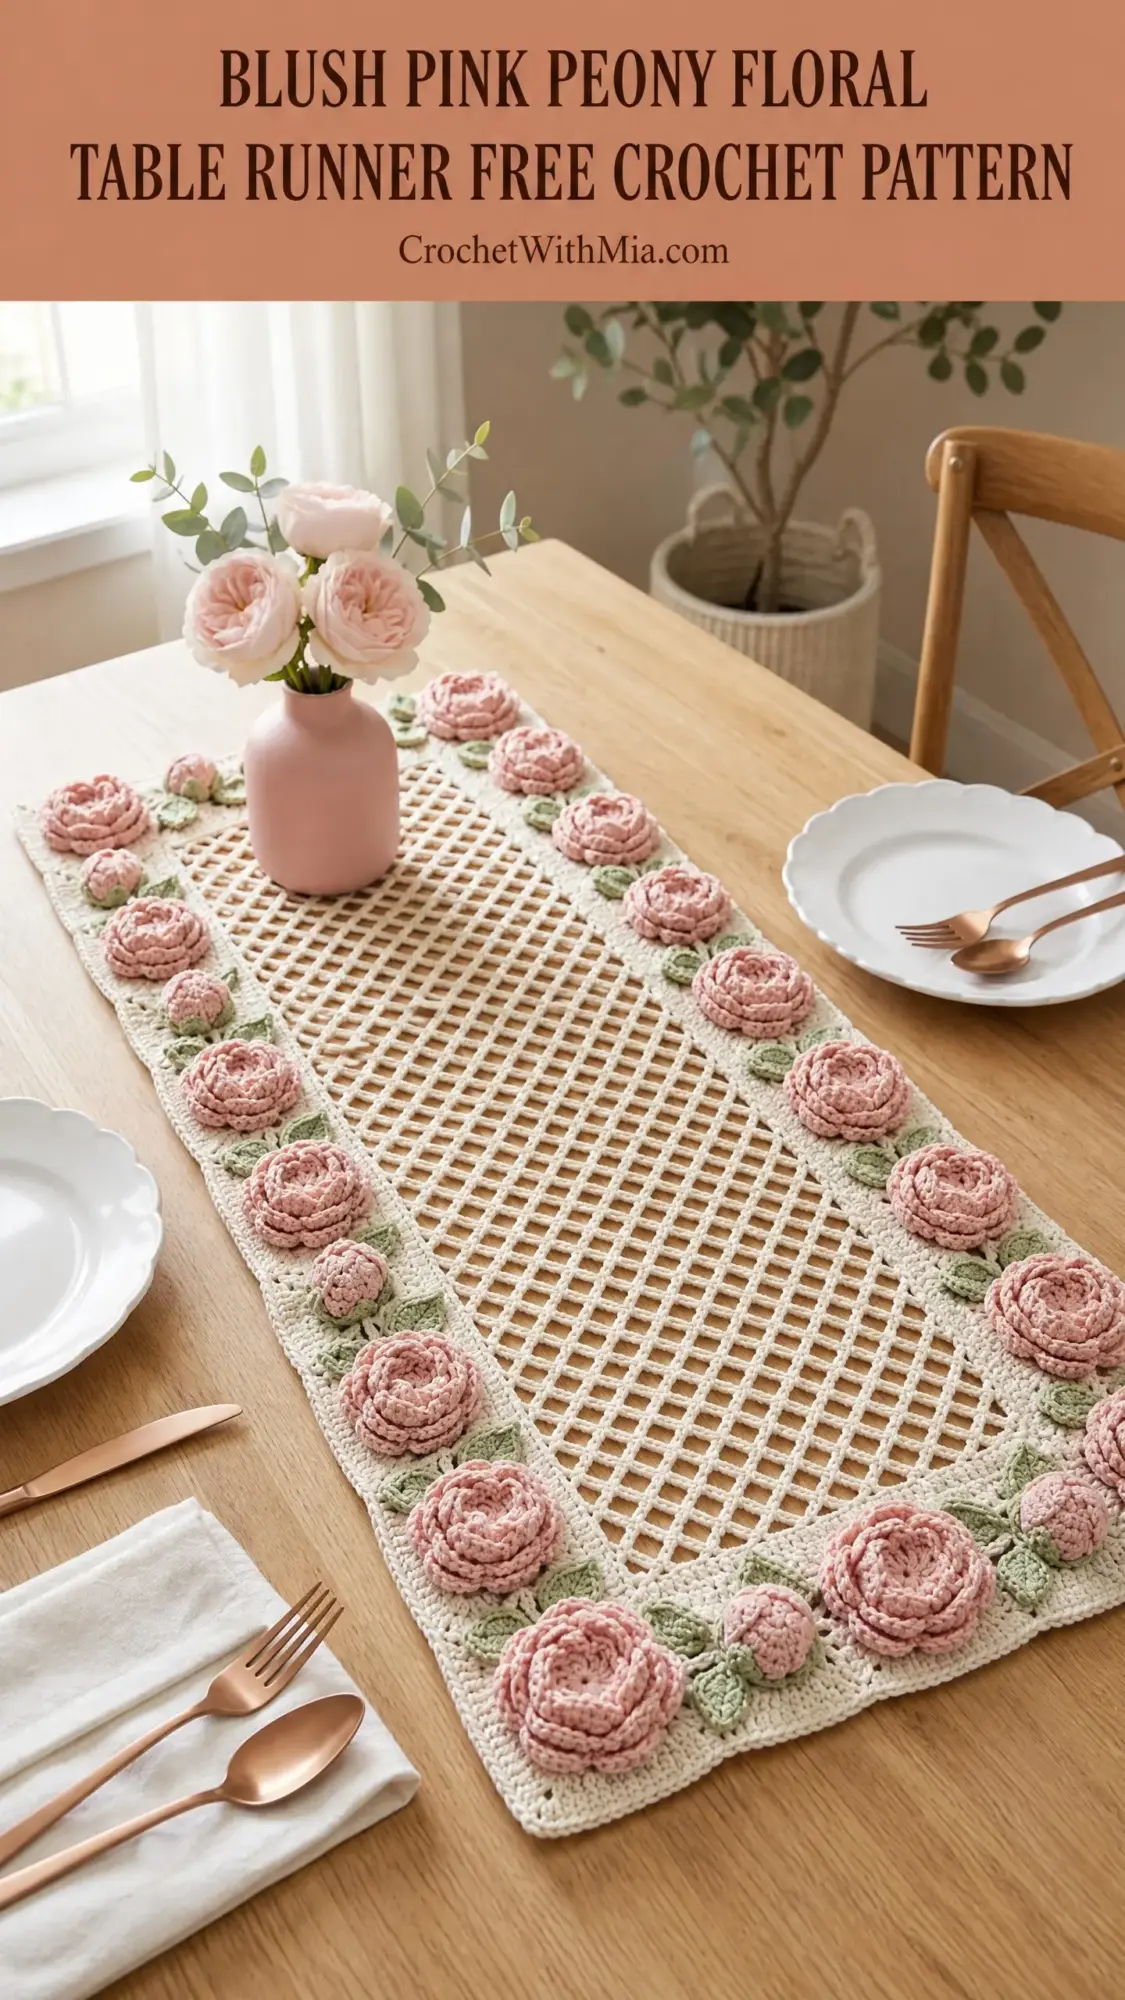
The magic of this blush pink peony table runner lies in its layered construction. The cream mesh center creates an airy, elegant lattice that lets your table surface peek through. Around that delicate center sits a solid border dense enough to support those gorgeous dimensional roses.
And those roses. Each one features five rounds of petals worked behind one another, creating that full, lush peony look you see in the reference images. They are not flat appliqués. They genuinely pop off the surface with realistic depth.
The sage green leaves add the perfect finishing touch, tucked beside each bloom to frame the flowers naturally. When everything comes together, you have a piece that looks far more complicated than the individual techniques actually are.
Skill Level and Time Investment
This crochet pattern sits firmly in the intermediate to advanced range. You should feel comfortable with filet mesh construction, working in the round, shaping three-dimensional petals, and seaming pieces together. If you have made basic amigurumi or floral motifs before, you can absolutely handle this with some patience.
Time estimate: Plan for 20 to 30 hours total. The mesh panel takes roughly 4 to 6 hours. The border adds another 3 to 4 hours. Each rose runs about 25 to 35 minutes, and each leaf takes 10 to 15 minutes. Assembly and finishing need 2 to 3 more hours.
This is not a weekend project. But the finished result? Worth every minute.
Finished Dimensions
Your completed table runner will measure approximately 14 inches wide by 40 inches long (35.5 cm by 101.5 cm) after blocking. The mesh panel itself spans about 9 inches wide by 35 inches long, with the border adding roughly 2.5 inches on all sides.
These measurements assume proper gauge and wet blocking. Unblocked, expect the piece to run about 1 to 1.5 inches smaller in each direction.
Materials You Will Need
Yarn
Main Color (MC): Cream or off-white, approximately 500 yards (457 m) of worsted weight cotton yarn, 100% cotton or cotton-acrylic blend
Contrast Color A (CCA): Blush pink or dusty rose, approximately 300 yards (274 m) of worsted weight cotton yarn
Contrast Color B (CCB): Sage green, approximately 100 yards (91 m) of worsted weight cotton yarn
Recommended Yarn Options
Option 1: Lion Brand 24/7 Cotton in Ecru (MC), Rose (CCA), and Sage (CCB). This mercerized cotton gives a smooth, polished finish with excellent stitch definition. Machine washable and holds its shape beautifully.
Option 2: Paintbox Yarns Simply Cotton Worsted in Paper White (MC), Blush Pink (CCA), and Grass Green (CCB). Budget-friendly with great stitch definition. The matte finish creates a slightly more rustic, vintage feel.
Option 3: Scheepjes Catona held double if using a lighter weight. This 100% mercerized cotton has a lovely sheen that elevates the flowers.
Substitution note: Any smooth worsted weight cotton at approximately 200 yards per 100 grams will work. Avoid fuzzy or textured yarns since they obscure the mesh openings and blur the rose petals. Test for colorfastness before starting, especially with pink yarn.
Hook
US Size G-6 (4.0 mm) crochet hook, or size needed to obtain gauge
Notions
Gauge
In filet mesh pattern: 4 mesh repeats by 5 mesh rows = 4 inches by 4 inches (10 cm by 10 cm), blocked
In single crochet for border: 18 sc by 20 rows = 4 inches by 4 inches (10 cm by 10 cm)
Gauge matters here for achieving the stated dimensions. Adjust your hook size up or down as needed and swatch before diving in.
Abbreviations (US Terms)
Special Stitches and Techniques
Mesh Square
Each mesh square consists of 1 double crochet (dc), chain 2, skip 2 stitches or the chain-2 space. When working into a previous row, place the dc into the top of the dc below and chain 2 to span the open space. This creates the diagonal lattice pattern visible in the runner’s center.
Three-Dimensional Peony Rose
The rose builds in five rounds, each creating a petal layer that sits slightly in front of the previous layer. Detailed instructions follow in the Rose Section.
Leaf
Leaves work back and forth along a foundation chain, increasing to a midpoint then decreasing back to a point.
Petal
Into the same stitch, work (hdc, dc, tr, dc, hdc). This forms a single curved petal lobe.
Pattern Notes Before You Begin
1. The mesh center panel is worked flat in rows. The border is then worked in joined rounds around the entire perimeter.
2. Corner stitches increase by 3 dc in each corner to keep the piece flat.
3. Roses and leaves are made entirely separately and pinned into position before sewing.
4. Do not pull the turning chain too tightly. The chain-3 turning chain counts as the first dc throughout the mesh section.
5. All yarn ends should be woven in securely on the wrong side before blocking. Leave the tails on roses and leaves for sewing.
6. Stated finished dimensions are after wet blocking.
Crochet Pattern Instructions: Mesh Center Panel
Foundation Chain
Using MC and your G-6 hook, chain 111.
Row 1 (RS)
Dc into the 6th chain from the hook (this counts as dc, ch-2, dc for the first mesh). Ch 2, skip 2 ch, dc into next ch. Repeat from to across to the end. Turn. (36 mesh squares)
Your foundation chain of 111 produces: 4 skipped chains for beginning plus 1 dc in 6th chain equals first mesh, then (ch 2, skip 2, dc) 35 times equals 35 more meshes. Total equals 36 mesh squares. Check that you end with a dc into the last chain.
Row 2
Ch 5 (counts as dc plus ch 2), turn to WS. Dc into next dc. Ch 2, dc into next dc. Repeat from to across, ending with dc into top of turning chain. Turn. (36 mesh squares)
Rows 3 through 43
Repeat Row 2. Turn after each row. (36 mesh squares per row)
Work a total of 43 rows of mesh including Row 1. After Row 43, do not fasten off. Proceed to border.
Checkpoint: After completing Row 43, the mesh panel should measure approximately 9 inches wide by 35 inches long when blocked flat with light pinning. If your piece is shorter or longer, adjust the number of rows before proceeding.
Border Instructions
The border is worked in rounds around the perimeter of the completed mesh panel. Do not turn at the end of rounds. Join each round with a slip stitch to the first stitch.
Round 1 (SC Foundation Round)
Do not fasten off after the mesh panel. Position the panel so the RS faces you and the hook is at the top-right corner.
Ch 1. Work sc evenly around the entire perimeter as follows:
Along the top edge: Work 3 sc into the corner, then work 2 sc across each mesh square along the top (into each ch-2 sp and over each dc). This yields approximately 109 sc along the top. Work 3 sc into the corner.
Along the right side: Work 2 sc for every row of mesh. With 43 rows, this yields approximately 86 sc. Work 3 sc into the corner.
Along the bottom edge: Mirror the top edge, working approximately 109 sc. Work 3 sc into the corner.
Along the left side: Mirror the right side, working approximately 86 sc. Work 3 sc into the corner.
Join with sl st to first sc. Mark the center stitch of each corner group with a stitch marker. (402 sc)
Round 2 (DC Border Round)
Ch 3 (counts as first dc). Dc into each sc around, working 3 dc into the center sc of each corner group. Join with sl st to top of ch-3. (410 dc)
Round 3 (SC Round)
Ch 1. Sc into each dc around, working 3 sc into the center dc of each corner group. Join with sl st to first sc. (418 sc)
Round 4 (DC Round)
Ch 3. Dc into each sc around, working 3 dc into the center sc of each corner. Join with sl st to top of ch-3. (426 dc)
Round 5 (SC Round)
Ch 1. Sc into each dc around, working 3 sc into corner centers. Join with sl st to first sc. (434 sc)
Round 6 (DC Round)
Ch 3. Dc into each sc around, working 3 dc into corner centers. Join with sl st to top of ch-3. (442 dc)
Round 7 (Final SC Round)
Ch 1. Sc into each dc around, working 3 sc into corner centers. Join with sl st to first sc. (450 sc)
Fasten off and weave in ends.
Checkpoint: After completing all 7 rounds, the runner should measure approximately 14 inches wide by 40 inches long. The border itself is approximately 2.5 inches wide on all sides.
Rose Instructions (Make 26)
Each rose is worked in CCA (blush pink). Begin with a magic ring or chain 4 and join with sl st to form a ring.
Round 1 (Base Ring)
Ch 1. Work 10 sc into the ring. Join with sl st to first sc. Do not turn. (10 sc)
Round 2 (Inner Petal Layer)
Ch 1. (Sc, ch 2, sc) into each sc around. Join with sl st to first sc. (10 petals)
Each petal unit sits loosely on the ring. You will have 10 petal arches.
Round 3 (First Full Petal Layer)
Slip stitch to position yourself behind Round 2 petals. Insert hook from back to front between the 1st and 2nd sc of Round 1. Work: (sl st into space between sc sts of Round 1, ch 4, dc, tr, dc, ch 4, sl st) into each gap between sc sts of Round 1. (10 larger petals)
Because Round 1 has 10 sc, there are 10 gaps between stitches. Work one large petal into each gap.
Round 4 (Second Outer Petal Layer)
Slip stitch from behind to a position in the Round 1 base, going further back behind all previous petals. Working into the base ring from behind: (sl st, ch 5, dc, tr, tr, dc, ch 5, sl st) into each of 10 gaps, evenly spaced. (10 large outer petals)
Round 5 (Optional Outermost Ruffle)
For a fuller peony effect, slip stitch again behind all layers to the base ring. (Sl st, ch 6, dc, tr, tr, tr, dc, ch 6, sl st) into each of 10 positions evenly around the outside. (10 outermost petals)
Fasten off, leaving a 12-inch (30 cm) tail for sewing. Gently shape the petals with your fingers so they fan outward from the center. The finished rose should measure approximately 2.5 to 3 inches in diameter.
Rose tip: Each round of petals is worked slightly behind the previous round, creating the layered three-dimensional look. If your petals are lying flat rather than layering, make sure you are consistently inserting the hook from the back of the work to reach the base round. Do not pull the chain loops too tightly. Let them arch gracefully.
Leaf Instructions (Make 30 Total)
Make 26 leaves (one per rose) plus 4 additional accent leaves for corners.
Each leaf is worked in CCB (sage green).
Foundation
Ch 12.
Row 1 (RS)
Sc into 2nd ch from hook, hdc into next ch, dc into next 3 ch, hdc into next ch, sc into next ch, hdc into next ch, dc into next ch, (dc, ch 2, dc) into the last ch (this is the leaf tip).
Now working back along the opposite side of the foundation chain: dc into next ch, hdc into next ch, sc into next ch, hdc into next ch, dc into next 3 ch, hdc into next ch, sc into last ch. Join with sl st to first sc. Do not turn.
Fasten off, leaving a 10-inch (25.5 cm) tail for sewing. The finished leaf should measure approximately 2.25 inches long and 0.75 inch wide.
Leaf tip: If you want a slightly wider leaf, begin with ch 14 and add one additional dc on each side of the central section. Swatch one leaf to check size against your roses before making all 30.
Assembly and Finishing
Blocking the Base
Before attaching any roses or leaves, wet block the completed runner base. Soak in cool water for 15 minutes, gently squeeze out excess water without wringing, lay flat on a blocking mat, pin to 14 by 40 inches, and allow to dry completely. This ensures the mesh opens correctly and the border lies flat.
Rose Placement Layout
The roses are arranged in a continuous border around the perimeter, sitting on top of the crocheted border.
Along each long side (40-inch sides): Place 8 roses per side, evenly spaced approximately 4.5 inches apart from center to center.
Along each short end (14-inch ends): Place 4 roses per end, evenly spaced approximately 3.25 inches apart from center to center.
Corner treatment: At each of the 4 corners, place 1 rose so it sits squarely at the corner, bridging the long-side and short-end rows.
Total roses: 8 plus 8 plus 4 plus 4 equals 24 along the edges, plus 2 additional roses can be placed at the center of each short end for a fuller look. Adjust quantity as your design preference dictates.
Leaf Placement
Place one leaf beside each rose, positioned so the leaf tip points slightly outward from the center of the runner. At corner roses, angle the leaf diagonally outward. The 4 accent corner leaves are placed at 45-degree angles for extra fullness.
Sewing On Roses and Leaves
Pin all roses and leaves in place before sewing any of them down. Step back and look at the overall layout. When satisfied, thread the 12-inch tail of each rose onto a yarn needle and sew the base of the rose securely to the border fabric using several small stitches in a circular pattern around the base.
Do the same for each leaf, sewing down the bottom 0.5 inch of the leaf stem to the border while leaving the rest of the leaf free for a natural dimensional quality.
Final Blocking
After all roses and leaves are attached, lightly mist the finished piece with water and pat the roses and leaves into their final positions. Do not fully submerge the piece after assembly since this may distort the roses. Allow to air dry flat.
Size Customization Tips
To make a shorter runner: Reduce the number of rows in the mesh panel in increments of 3 rows. Each group of 3 rows removed shortens the piece by approximately 2.5 inches. Adjust the number of roses along the long sides accordingly.
To make a longer runner: Add rows in increments of 3. Add 2 roses per additional 9 inches of length.
To make a wider runner: Increase the foundation chain by multiples of 3 chains. Each group of 3 chains adds approximately 0.75 inch of width. Add extra roses along the short ends as needed.
To make a matching placemat: Work a mesh panel of 12 mesh squares wide by 16 mesh squares tall, add 3 rounds of border, and decorate with 6 roses and 6 leaves.
Care Instructions
Hand wash in cool water with a gentle detergent formulated for delicates or cotton. Lay flat to dry, reshaping the border roses gently while damp. Do not place in a clothes dryer since heat and agitation will distort the three-dimensional roses and may cause cotton to shrink. Do not dry clean. Store flat or loosely rolled to prevent permanent creasing of the dimensional flowers. Iron on the reverse side only on a low cotton setting if the base fabric needs pressing, taking care to avoid flattening the roses.
You Did It!
This blush pink peony floral table runner crochet pattern is definitely a labor of love. But when you drape it across your dining table and see those dimensional roses catching the light, you will understand why every stitch was worth it. This is the kind of piece that becomes a family heirloom, something guests notice and ask about, something that makes ordinary dinners feel special.
Thank you so much for choosing this pattern for your next project. I would absolutely love to see your finished runner! Tag me on Instagram or share a photo in my Facebook group. Seeing your beautiful work is honestly the best part of sharing these patterns.
If this pattern caught your eye, go ahead and save it to your Pinterest boards so you can find it when you are ready to start. And if you make this runner, please drop a comment below. I would love to hear how it turned out and see which colors you chose for your roses!