
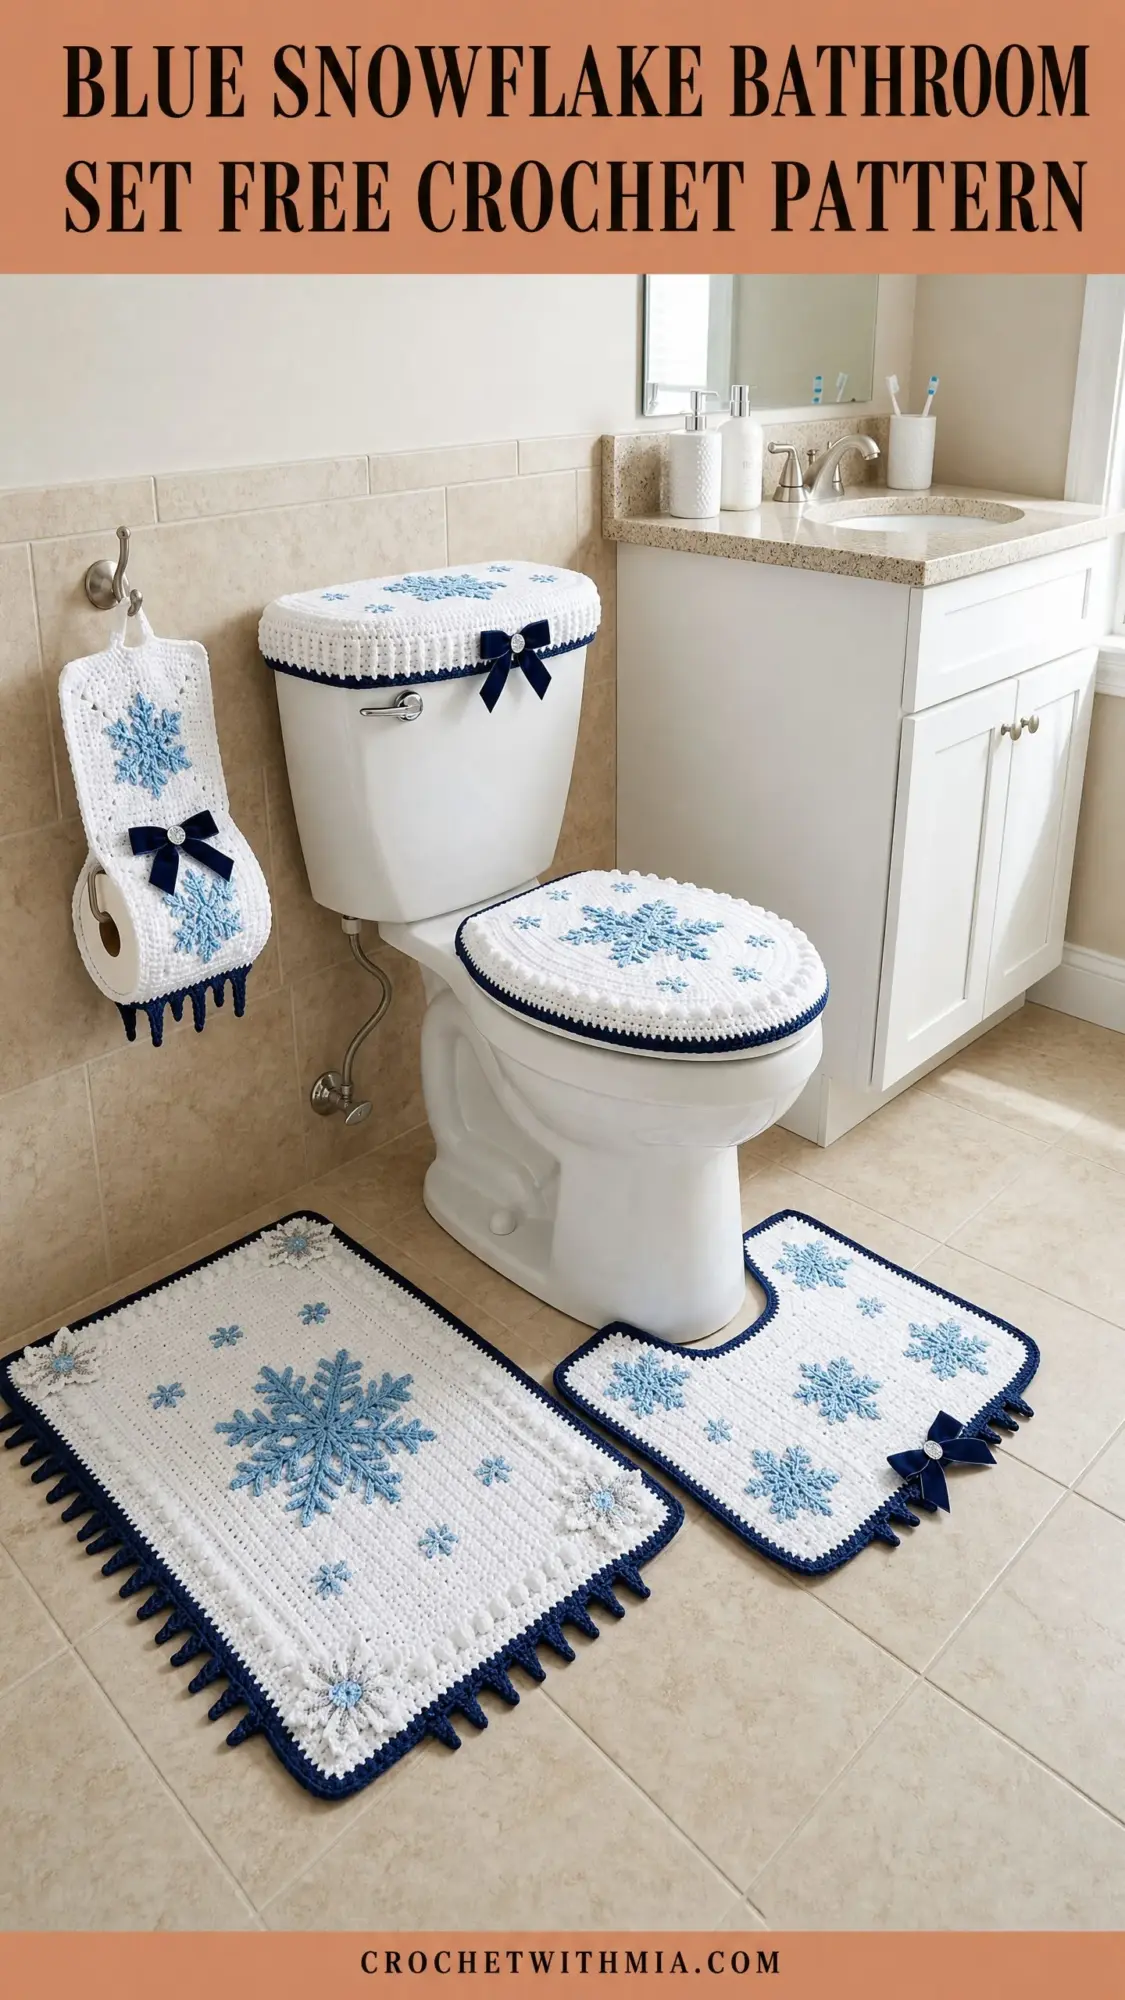
If you have been searching for a practical way to add seasonal charm to your bathroom, this coordinating set checks every box. The Blue Snowflake Bathroom Set includes five pieces that work up in single crochet for a dense, durable fabric perfect for everyday use. You get a toilet lid cover, a tank lid cover, a contour rug, a rectangular bath mat, and a toilet paper holder cover.
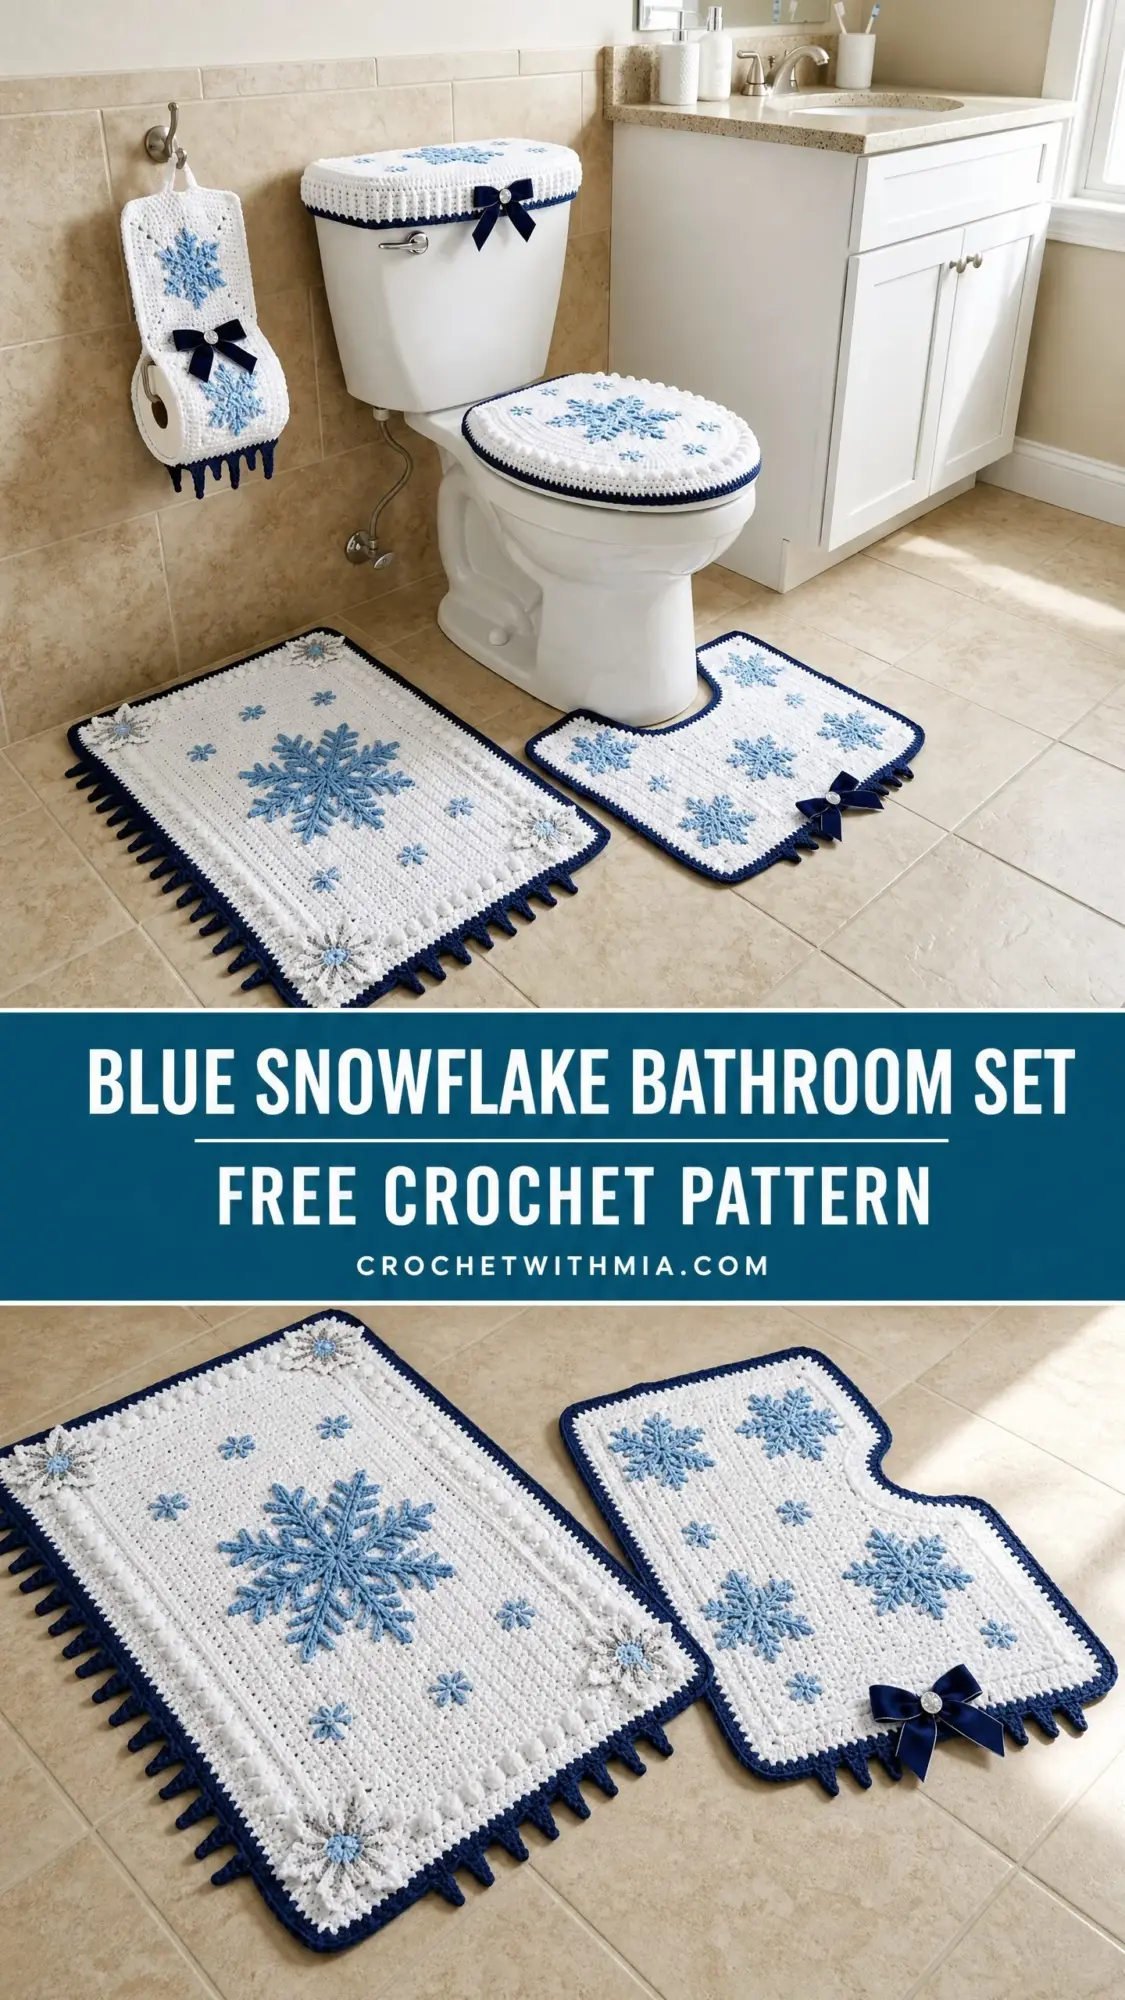
The entire set uses worsted weight yarn in white, navy, and sky blue. The snowflakes are added after construction using a surface slip stitch technique that looks impressive but is easier than you might think. This makes an excellent gift for anyone who loves winter decor, or you can treat yourself to a bathroom refresh that will last for years.
Whether you are an intermediate crocheter looking for your next project or a confident beginner ready to level up, this set offers clear instructions and satisfying results. Each piece builds on the same basic techniques, so by the time you finish the first item, the rest will feel familiar. Let me walk you through everything you need to know.
Project Overview and Skill Level
This bathroom set is rated intermediate. You should feel comfortable working in the round, constructing ovals from a chain foundation, and joining new colors. The surface slip stitch technique for the snowflakes is straightforward once you try it, and I will explain it in detail below.
The construction is logical and methodical. The rugs are worked flat in rows. The toilet lid cover and tank lid cover are worked in continuous rounds to form oval shapes. The toilet paper holder is a simple rectangle that gets folded and seamed into a pocket.
Nothing here is fussy or complicated. If you have made a basic hat or a dishcloth, you have the skills to tackle this set.
Time Estimate
Here is roughly how long each piece takes:
The complete set runs approximately 20 to 28 hours depending on your pace. I recommend working one piece at a time and adding the snowflakes as you go.
Finished Sizes
Important: Toilet lid and tank lid dimensions vary by brand. Measure your specific toilet before beginning and adjust as noted in the size customization section at the end.
Materials
Yarn
Yarn Suggestions
Option 1: Lion Brand Pound of Love (100% acrylic, 1,020 yards per 16 oz skein) in White (MC) and Navy (CA). Purchase 2 skeins white, 1 skein navy. For sky blue, use Lion Brand Vanna’s Choice in Colonial Blue or Baby Blue.
Option 2: Red Heart Super Saver (100% acrylic, 364 yards per 7 oz skein) in White (MC) and Soft Navy (CA). Purchase 4 skeins white, 1 skein navy. For sky blue, use Red Heart Super Saver in Soft Teal or Pale Blue.
Option 3: Caron Simply Soft (100% acrylic, 315 yards per 6 oz skein) in White (MC) and Navy (CA). Purchase 4 skeins white, 1 skein navy. For sky blue, use Caron Simply Soft in Soft Blue.
Choose a smooth, washable worsted weight yarn with good stitch definition. Avoid fluffy or textured yarns as they will obscure the snowflake surface detail.
Hook
Notions
Gauge
18 sc by 20 rows = 4 in by 4 in (10 cm by 10 cm) using MC and US J-10 (6 mm) hook, working in continuous rounds of single crochet, blocked.
Gauge is important for the lid covers to ensure fit. Swatch and adjust hook size if needed.
Abbreviations
Special Stitches
Bobble Edging (Used on Border of Rugs)
This creates a pointed spike edge seen along the bottom and sides of the rugs in navy.
With CA, join in any corner stitch.
Step 1: Ch 1.
Step 2: In the same stitch, yo and insert hook, pull up a loop, yo, draw through 2 loops. Rep this step 4 more times in the same stitch (6 loops on hook).
Step 3: Yo, draw through all 6 loops. Ch 1 to close.
Step 4: Sl st in next stitch to anchor.
Step 5: Rep Steps 2 through 4 across edge as directed.
Surface Slip Stitch (SS) for Snowflake Embroidery
This technique creates the beautiful sky blue snowflakes on top of your finished white fabric.
Step 1: With the RS of the finished piece facing you, hold CB yarn behind the fabric.
Step 2: Insert hook from front to back through a stitch at the starting point of the snowflake line.
Step 3: Pull the CB yarn through to the front.
Step 4: Insert hook from front to back through the next stitch along the snowflake line.
Step 5: Pull CB through the stitch AND through the loop already on your hook. One surface slip stitch made.
Step 6: Continue along each branch and arm of the snowflake, rearranging direction by bringing hook up through the anchor point and working outward along each arm.
Step 7: At end of each arm, fasten off and weave in on the wrong side. Begin again at the center for each new arm.
Tip: Work loosely so the surface stitches do not pucker the base fabric.
Pattern Notes
1. All rounds are worked in continuous rounds (no slip stitch join, no turning chain) unless specifically stated otherwise. Use a stitch marker in the first stitch of each round and move it up as you work.
2. For the rugs (contour and rectangular), rows are worked back and forth. Turn at the end of each row. Use ch 1 as turning chain (does not count as a stitch).
3. The toilet lid cover and tank lid cover are worked as a flat oval top, then sides are added to form a shell that slips over the lid. Optional: cut a piece of foam to fit inside the top oval for a padded look.
4. Snowflakes are applied after all pieces are complete and assembled, before bows are attached.
5. Snowflake placement: center one large snowflake motif on each piece. Surround it with 4 to 6 small snowflake motifs scattered around the field.
6. When joining CA for borders, cut MC and join CA with a standing sc (insert hook, pull up CA loop, yo, draw through both loops).
7. Weave in all ends securely. Pieces will be laundered.
Piece 1: Toilet Lid Cover Pattern
The cover is worked in two ovals (top and bottom facing), seamed around the perimeter with the lid enclosed, and finished with a navy border.
Top Oval
Foundation: With MC and J-10 hook, ch 22.
Round 1: Starting in the 2nd ch from hook, sc 20 across to last ch. Work 3 sc in last ch (corner). Rotate work. Sc 19 back along the opposite side of the foundation chain. Work 2 sc in the first ch (same ch where you began). Do not join. Place marker. (44 sc)
Round 2: Sc 20. Inc in next 2 sts. Sc 19. Inc in next 2 sts. Pm. (48 sc)
Round 3: Sc 20. Inc in next st. Sc 1. Inc in next st. Sc 19. Inc in next st. Sc 1. Inc in next st. (52 sc)
Round 4: Sc 20. Inc in next st. Sc 3. Inc in next st. Sc 19. Inc in next st. Sc 3. Inc in next st. (56 sc)
Round 5: Sc 20. Inc in next st. Sc 5. Inc in next st. Sc 19. Inc in next st. Sc 5. Inc in next st. (60 sc)
Round 6: Sc 20. Inc in next st. Sc 7. Inc in next st. Sc 19. Inc in next st. Sc 7. Inc in next st. (64 sc)
Round 7: Sc 20. Inc in next st. Sc 9. Inc in next st. Sc 19. Inc in next st. Sc 9. Inc in next st. (68 sc)
Round 8: Sc 20. Inc in next st. Sc 11. Inc in next st. Sc 19. Inc in next st. Sc 11. Inc in next st. (72 sc)
Round 9: Sc 20. Inc in next st. Sc 13. Inc in next st. Sc 19. Inc in next st. Sc 13. Inc in next st. (76 sc)
Round 10: Sc around, no increases. (76 sc)
Fasten off. This is the TOP oval panel. Set aside. Make a second identical oval for the BOTTOM panel.
Checkpoint: Each oval should measure approximately 14 in wide by 17 in long (35.5 cm by 43 cm).
Side Gusset
With MC and J-10 hook, ch 8.
Row 1: Sc in 2nd ch from hook, sc across. (7 sc)
Row 2: Ch 1, turn. Sc across. (7 sc)
Rep Row 2 until gusset strip measures the full perimeter of the oval (approximately 52 in / 132 cm). Fasten off.
Assembly of Lid Cover
Step 1: Pin the gusset strip around the perimeter of the top oval panel with RS facing out, aligning edges. Seam with sc through both layers using MC, working around the full oval. (Approximately 76 sc around)
Step 2: If using foam insert, cut foam to match the top oval shape. Place foam against the WS of the top oval inside the gusset.
Step 3: Align the bottom oval panel RS facing out on the open side of the gusset. Sc seam around approximately 70% of the perimeter (leave approximately the front 30% open so cover can slide over lid).
Step 4: At the open edge (front and sides), work a row of sc across the opening in CA to finish the raw edge neatly.
Lid Cover Border
Join CA at the back seam with a standing sc.
Round 1: Sc around entire outer edge of the assembled cover. (Approximately 76 sc)
Round 2: Sl st in each sc around. Fasten off.
Snowflake Embroidery on Lid Cover
Center large snowflake: Work on top oval panel. The large snowflake spans approximately 4 in (10 cm) in diameter. Using the surface slip stitch method with CB:
Arm 1: Locate center of oval. Work SS from center outward 8 sts to the top (12 o’clock direction). Fasten off.
Arm 2: Re-enter center, work SS 8 sts toward bottom (6 o’clock). Fasten off.
Arm 3: Re-enter center, work SS 8 sts toward left (9 o’clock). Fasten off.
Arm 4: Re-enter center, work SS 8 sts toward right (3 o’clock). Fasten off.
Arm 5: Re-enter center, work SS 4 sts diagonally toward 10 o’clock. Fasten off.
Arm 6: Re-enter center, work SS 4 sts diagonally toward 4 o’clock. Fasten off.
Arm 7: Re-enter center, work SS 4 sts diagonally toward 8 o’clock. Fasten off.
Arm 8: Re-enter center, work SS 4 sts diagonally toward 2 o’clock. Fasten off.
Branch accents (on each of the 4 main arms): At 4 sts out from center on each main arm, work SS 2 sts to each side perpendicularly. This gives a classic 6-pointed snowflake look. Fasten off after each branch pair.
Small snowflakes (4 of them): Scattered 3 in (7.5 cm) from center in 4 diagonal directions. Each small snowflake has 4 main arms of 3 SS each and no branches.
Bow and Brad Attachment
Sew one navy ribbon bow to the front bottom edge of the lid cover (front center). Sew a rhinestone brad through the bow knot center into the fabric. Secure brad prongs on WS.
Piece 2: Tank Lid Cover Pattern
The tank lid cover is worked as a single flat rectangle with rounded corners, sized to drape over the top of the tank lid.
Foundation: With MC and J-10 hook, ch 38.
Round 1: Starting in 2nd ch from hook, sc 36 across. Work 3 sc in last ch. Rotate. Sc 35 back. Work 2 sc in first ch. Pm. (76 sc)
Round 2: Sc 36. Inc in next st. Sc 1. Inc in next st. Sc 35. Inc in next st. Sc 1. Inc in next st. (80 sc)
Round 3: Sc 36. Inc in next st. Sc 3. Inc in next st. Sc 35. Inc in next st. Sc 3. Inc in next st. (84 sc)
Round 4: Sc 36. Inc in next st. Sc 5. Inc in next st. Sc 35. Inc in next st. Sc 5. Inc in next st. (88 sc)
Round 5: Sc 36. Inc in next st. Sc 7. Inc in next st. Sc 35. Inc in next st. Sc 7. Inc in next st. (92 sc)
Round 6: Sc around, no increases. (92 sc)
Round 7: Sc around. (92 sc)
Round 8: Sc around. (92 sc)
Border
Join CA with standing sc.
Round 9: Sc around. (92 sc)
Round 10: Sl st in each st around. Fasten off.
Checkpoint: Tank lid cover should measure approximately 7 in wide by 19 in long (18 cm by 48 cm).
Snowflake Embroidery
Center one large snowflake (same construction as lid cover snowflake) in the center of the tank cover rectangle. Add 2 small snowflakes flanking the center snowflake, each placed approximately 4 in (10 cm) to either side of center.
Bow Attachment
Sew one bow to the front center edge of the tank cover. Sew rhinestone brad through bow knot.
Piece 3: Contour Rug Pattern (U-Shaped)
The contour rug fits around the base of the toilet. It is worked flat in rows to build a rectangle, then a U-shaped cutout is made at the back center.
Foundation: With MC and J-10 hook, ch 91.
Row 1 (RS): Sc in 2nd ch from hook, sc across. (90 sc)
Row 2: Ch 1, turn. Sc across. (90 sc)
Rep Row 2 until piece measures 24 in (61 cm) from foundation. Do not fasten off.
Creating the U-Shaped Cutout
The cutout is centered on one short edge (this will be the back of the rug, placed closest to toilet base).
Step 1: With RS facing, identify the center 30 stitches of the last row worked (stitches 31 through 60 of the 90-st row).
Step 2: You will now work around the outside of the U-shape only. The left arm has 30 sts, the right arm has 30 sts, and the front width has 90 sts.
Left Arm
Row 1 of Left Arm: With MC, attach yarn at the left outer corner of the last row. Ch 1. Sc 30 across the left 30 sts. (30 sc)
Rows 2 through 12 of Left Arm: Ch 1, turn. Sc 30 across. (30 sc each row) Work 11 more rows (12 rows total on arm), measuring approximately 2.5 in (6 cm).
Right Arm
With MC, attach yarn at stitch 61 (the first stitch of the right arm, right of center cutout).
Row 1 of Right Arm: Sc 30 across to outer right edge. (30 sc)
Rows 2 through 12 of Right Arm: Ch 1, turn. Sc 30 across. (30 sc) Work 11 more rows (12 rows total).
Checkpoint: After completing both arms, the rug should resemble a wide U-shape. The full piece width should be 20 in (51 cm), arm length from the cutout junction should be approximately 2.5 in (6 cm).
Border for Contour Rug
Join CA with standing sc at any corner.
Border Round 1: Sc around the entire perimeter of the rug including around the inside U-shaped cutout edge. Work 3 sc in each outer corner. Work sc2tog at each inner corner of the U-shape (where arm meets the cutout). (Approximately 220 to 240 sc around entire perimeter.)
Border Round 2: Sl st in each st around. Fasten off.
Bobble Edging on Contour Rug
Join CA at the back inner curve of the U-shape. Work Bobble Edging across the bottom straight edge of the rug and along the two outer side edges of the arms. Skip the front (toilet-facing) straight edge and inner U-curve edge which remain plain. Work one bobble in every other stitch along designated edges.
Snowflake Embroidery
Center large snowflake in the field of the rug, approximately 8 in (20 cm) from front edge and centered side to side. Add 2 small snowflakes flanking the center, placed 5 in (12.5 cm) to either side of center snowflake. Add 2 more small snowflakes near the top of each arm.
Bow Attachment
Sew one bow with rhinestone brad to the front outer edge of the rug, centered between the two arms.
Piece 4: Rectangular Bath Mat Pattern
The bath mat is worked flat in rows with a plain body and decorative navy border with spike fringe.
Foundation: With MC and J-10 hook, ch 91.
Row 1 (RS): Sc in 2nd ch from hook, sc across. (90 sc)
Row 2: Ch 1, turn. Sc across. (90 sc)
Rep Row 2 until piece measures 30 in (76 cm) from foundation edge. This is approximately 150 rows at gauge.
Border for Bath Mat
Join CA with standing sc at any corner.
Border Round 1: Work sc evenly around entire perimeter. Work 3 sc in each corner. When working sc along the row-end edges (sides), work 1 sc per row end. Along the top and bottom edges, work 1 sc per st. (Approximately 488 sc total.)
Border Round 2: Sl st in each st around. Fasten off.
Bobble Edging on Bath Mat
Join CA at any corner. Work Bobble Edging around the entire outer perimeter, one bobble in every other stitch.
Snowflake Embroidery
Center one large snowflake in the center of the mat. For the large central snowflake, extend each main arm to 12 SS (instead of 8) to scale up proportionally for the larger field.
Surround with 4 medium snowflakes (6 arms each, 5 SS per arm, no branches) placed diagonally 6 in (15 cm) from center.
Add 4 small snowflakes near each corner of the mat, approximately 4 in (10 cm) from corner.
Bow Attachment
Sew one bow with rhinestone brad to the lower left corner of the mat, approximately 2 in (5 cm) from edges.
Piece 5: Toilet Paper Holder Cover Pattern
This is a flat rectangle folded into a pocket that hangs on the wall or door hook over the toilet paper roll holder.
Foundation: With MC and J-10 hook, ch 32.
Row 1 (RS): Sc in 2nd ch from hook, sc across. (31 sc)
Row 2: Ch 1, turn. Sc across. (31 sc)
Rep Row 2 until piece measures 20 in (51 cm) from foundation. This will fold in half to create a 10-in-tall (25 cm) pocket approximately 7 in wide (17.5 cm).
Seaming
Fold piece in half (RS out) so the two short edges meet at the top. The fold becomes the bottom of the pocket. Seam the two side edges using sl st seam with MC. Leave the top open for inserting paper roll.
Top Opening Finish
Front top edge: Join CA, ch 1, sc 31 across. Sl st. Fasten off.
Back top edge: Join CA, ch 1, sc 31 across. Sl st. Fasten off.
Icicle Fringe at Bottom
At the bottom fold of the pocket, join CA at the right corner of the bottom edge.
Icicle 1: Ch 12, sl st in 2nd ch from hook, sl st in each ch back to fabric edge. Sl st in next st along edge.
Icicle 2: Ch 10, sl st in 2nd ch from hook, sl st in each ch back. Sl st in next st.
Icicle 3: Ch 8, sl st in 2nd ch from hook, sl st in each ch back. Sl st in next st.
Icicle 4: Ch 6, sl st in 2nd ch from hook, sl st in each ch back. Sl st in next st.
Icicle 5: Ch 8, sl st in 2nd ch from hook, sl st in each ch back. Sl st in next st.
Icicle 6: Ch 10, sl st in 2nd ch from hook, sl st in each ch back. Sl st in next st.
Icicle 7: Ch 12, sl st in 2nd ch from hook, sl st in each ch back. Sl st in next st.
This creates 7 graduated icicle points across the bottom. Rep this 7-icicle sequence across the full bottom edge, or space icicles every 4 to 5 stitches.
Hang Loop
Join CA at top back center. Ch 20. Sl st back to same stitch. Fasten off.
Snowflake Embroidery
Work one large snowflake centered on the front face of the cover. Add 2 small snowflakes flanking it, one upper left and one lower right.
Bow Attachment
Sew one bow with rhinestone brad to the front face, at the center just above the top row of CA border.
Snowflake Chart Reference
Large Snowflake Summary
Small Snowflake Summary
Size Customization Tips
Toilet Lid Cover: Measure your lid at its widest and longest point. Adjust the foundation chain length to match the longest dimension minus the rounded ends. Add or remove increase rounds until your oval matches the lid shape.
Tank Lid Cover: Measure tank lid length and width. Adjust foundation chain for the long dimension. If your tank is longer than 19 in, add 4 sts to the foundation chain per additional inch needed.
Rugs: To make a larger bath mat, simply add stitches to the foundation chain (every 4.5 sts = 1 inch in width) and work more rows (every 5 rows = 1 inch in length).
Contour Rug Cutout Width: Measure the circumference of your toilet base plus 1 in ease. For a wider base, skip up to 40 center stitches for the cutout and reduce each arm to 25 stitches.
Finishing and Blocking
Step 1: Weave in all yarn ends using a yarn needle, securing tails at least 2 in (5 cm) into the fabric. Trim close.
Step 2: Wet blocking: Fill a basin with cool water. Submerge each piece and gently squeeze (do not wring). Remove and roll in a towel to absorb excess water. Lay flat on a blocking mat. Pin to finished dimensions using rust-proof blocking pins. Allow to dry completely (12 to 24 hours).
Step 3: For the toilet lid and tank lid covers, allow to dry flat before attempting to fit over the actual lid.
Step 4: Once dry, attach all bows and rhinestone brads using a sewing needle and matching navy thread.
Step 5: Do a final surface inspection of all snowflake embroidery. Gently tug any loose SS arms and re-secure yarn tails on WS.
Care Instructions
Machine wash on gentle cycle in cold water. Lay flat to dry or tumble dry on low. The acrylic yarn holds up beautifully to regular washing, which is essential for bathroom items.
Final Thoughts on This Crochet Bathroom Set
Thank you so much for choosing this pattern for your next project. I hope you enjoy every stitch of this Blue Snowflake Bathroom Set crochet pattern. The finished pieces look absolutely stunning together, and the surface slip stitch snowflakes add such a lovely handmade touch. If you make this set, I would love to see your finished work. Tag me on Instagram or share a photo in our Facebook group.
Go ahead and save this pattern to your Pinterest boards so you can find it easily when you are ready to start. And if you have any questions along the way, drop a comment below. Happy crocheting!