
Go raid your stash right now. I mean it. That pretty mint yarn you have been saving for something special? This is the project. And that soft pink skein sitting next to it? Grab that too.
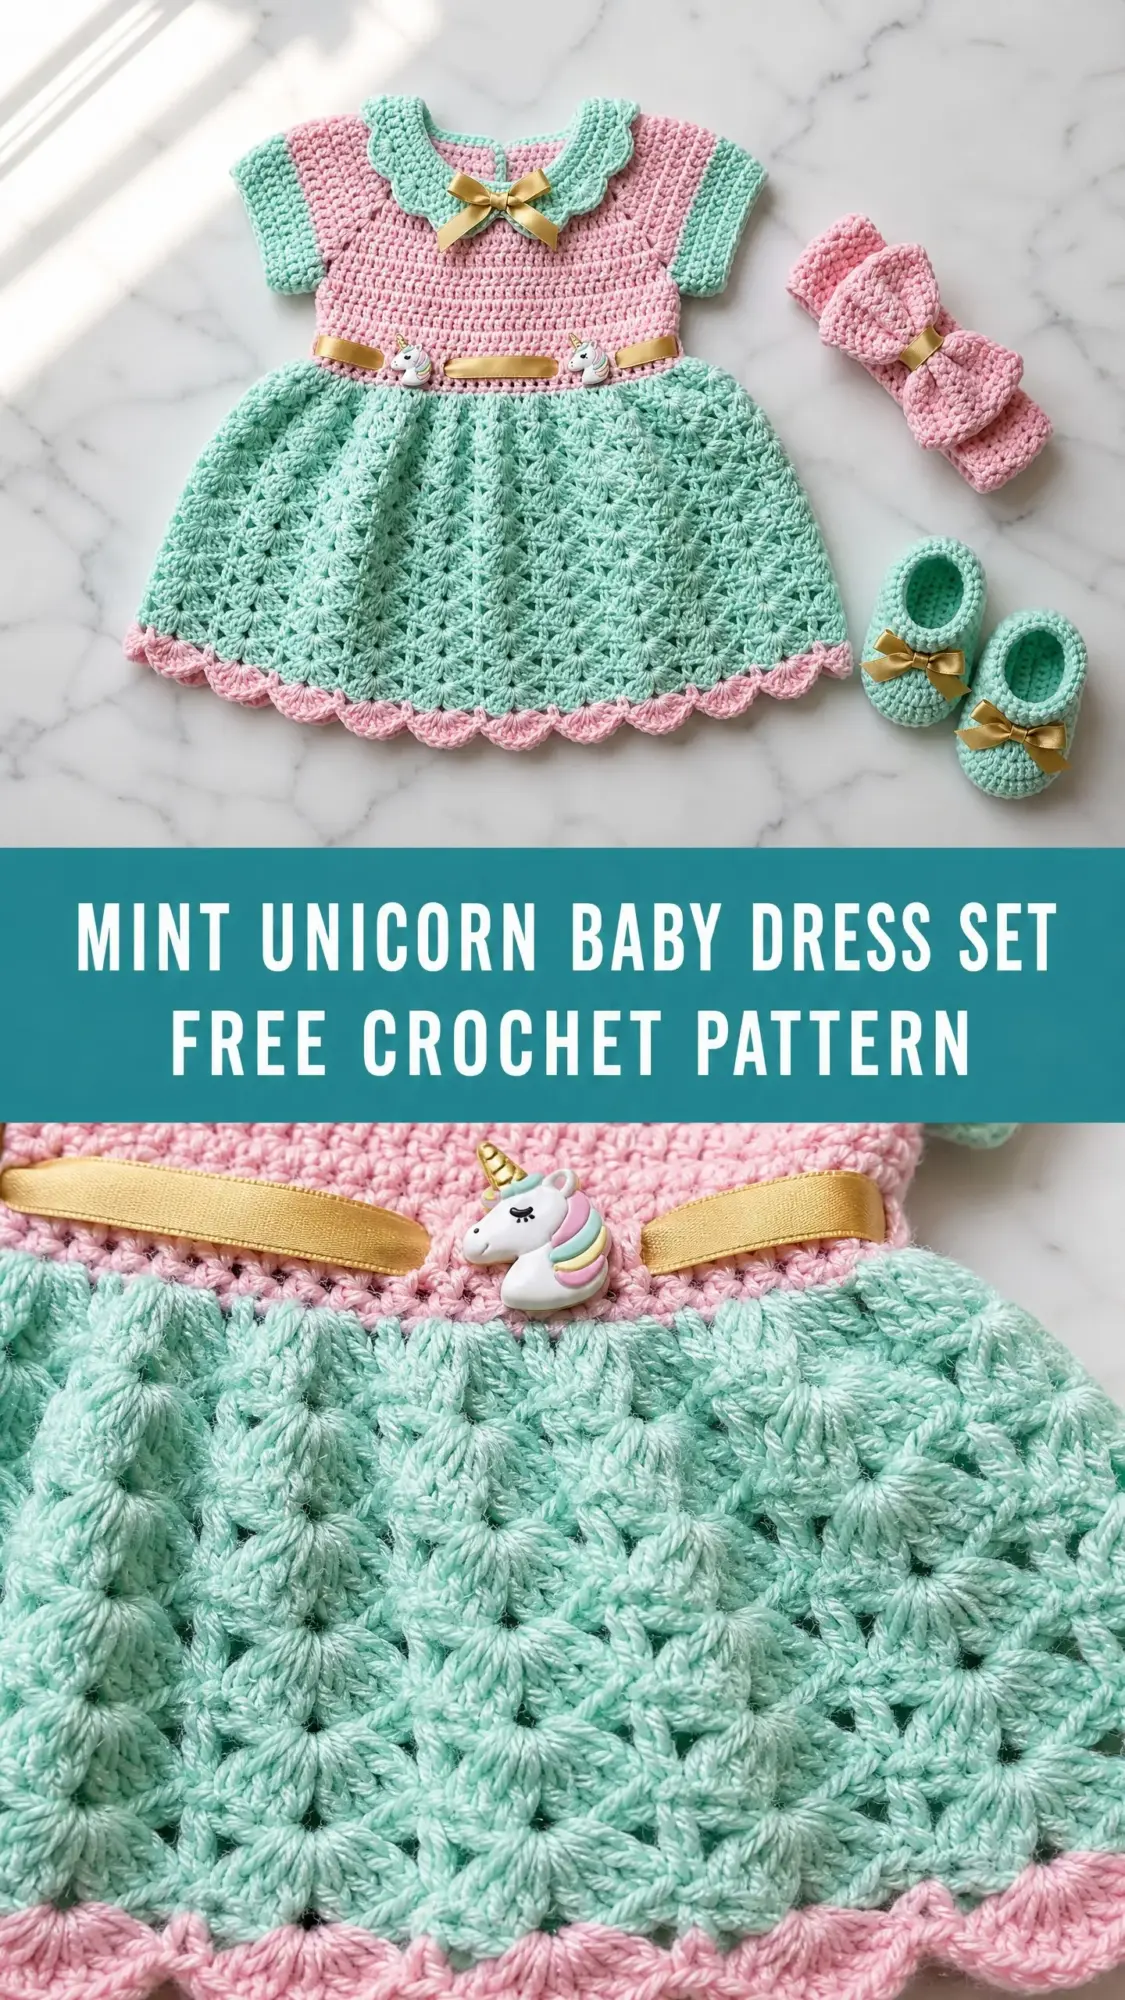
This baby dress set combines some seriously satisfying techniques. You will work a fitted bodice in single crochet, then transition into a gorgeous fan shell stitch for the skirt that creates that dreamy, lacy texture. The peter pan collar adds vintage charm. The matching booties and headband bow complete the set beautifully. Fair warning: this is an intermediate level project. But if you are comfortable with basic stitches and ready to stretch your skills, you can absolutely do this.
The construction is clever. You work the dress top down in one piece, which means minimal seaming. The collar gets made separately and attached, giving you that crisp layered look. And those little unicorn buttons at the waistband? Pure sweetness.
Why This Baby Dress Set Works So Well
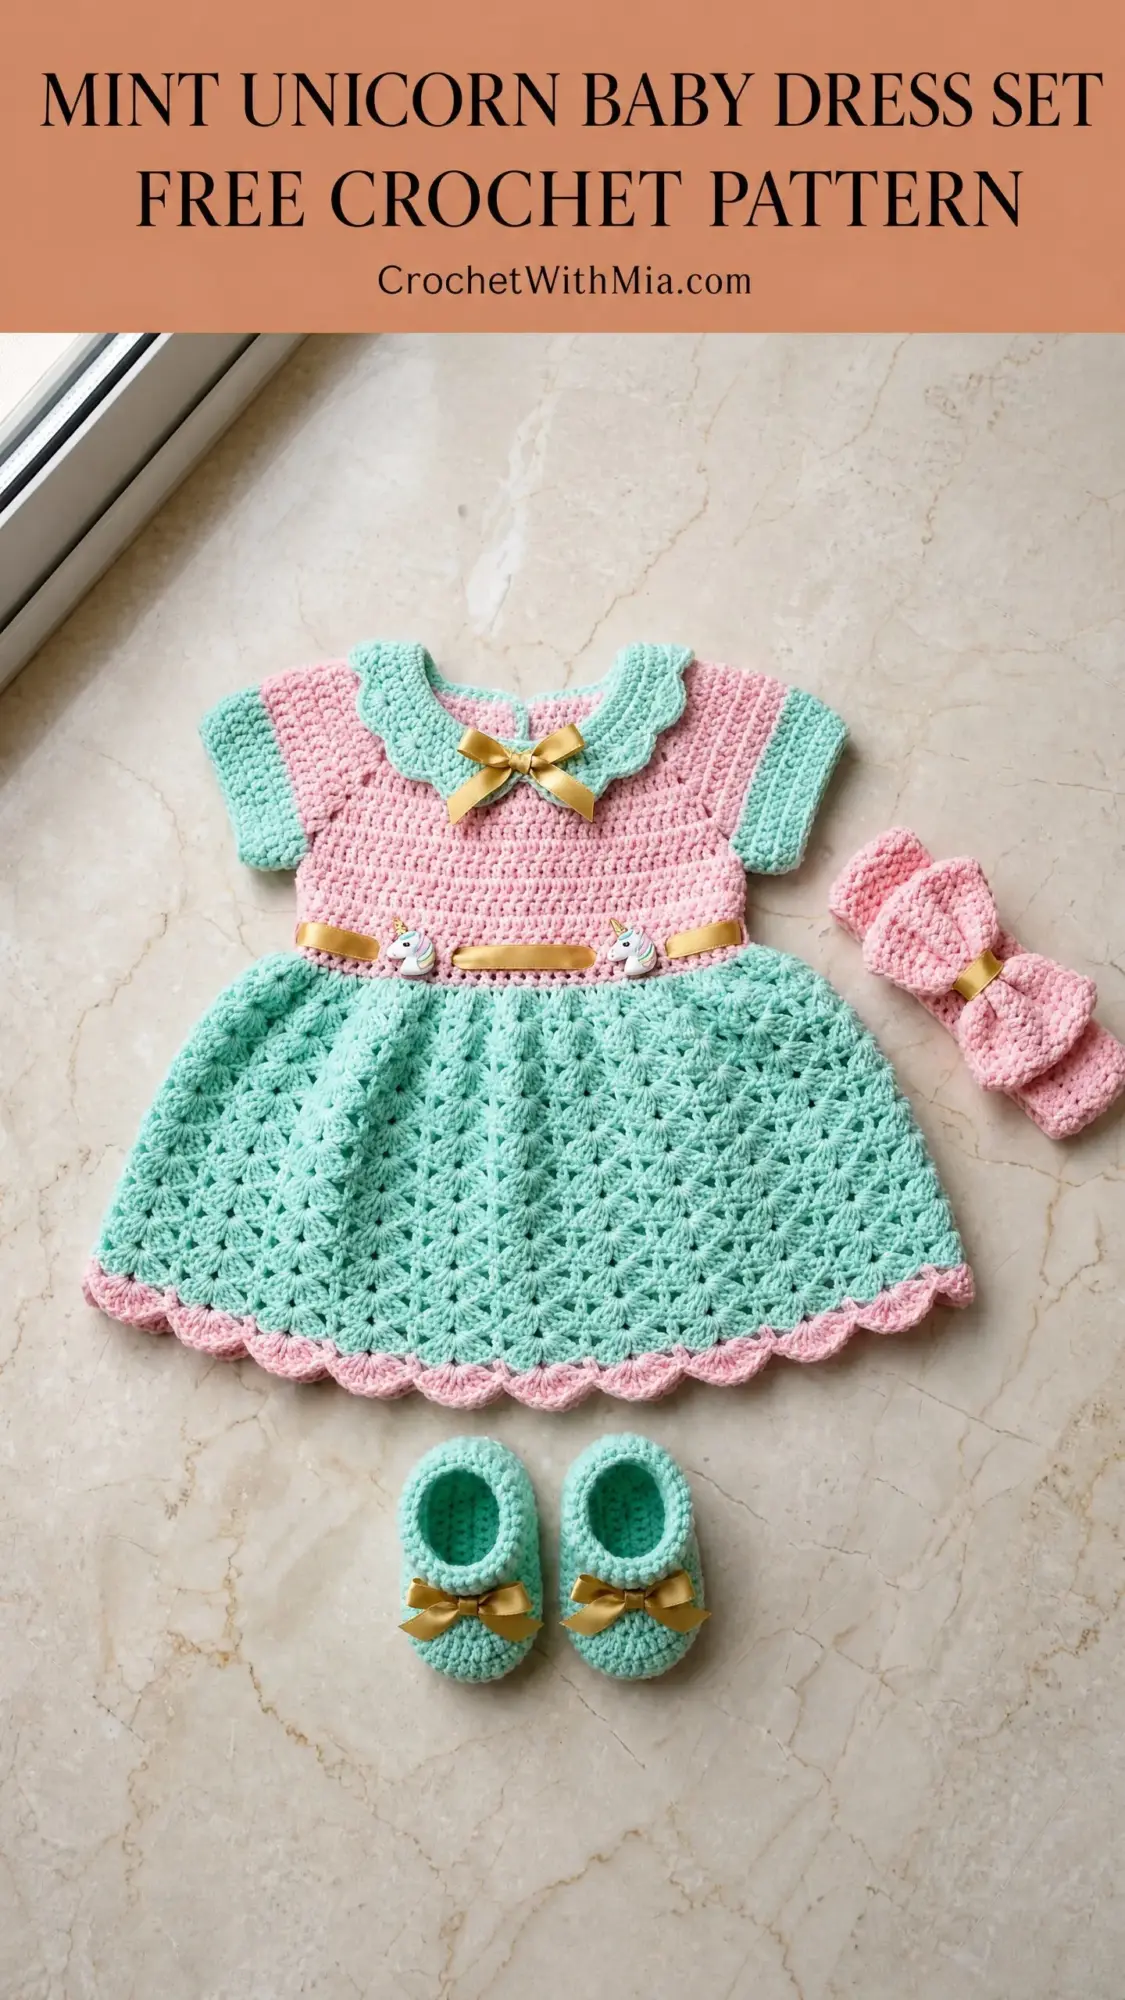
This pattern creates a complete layette set that looks far more complicated than it actually is. The fitted pink bodice features a scalloped mint peter pan collar and sweet cap sleeves. The full flared skirt uses a shell fan stitch pattern that shows off beautifully in the mint yarn. A gold satin ribbon threads through eyelets at the waist, accented with unicorn novelty buttons for that whimsical touch.
The matching pieces tie everything together. Mint booties with gold satin bows coordinate perfectly with the dress. A pink crocheted headband features a large bow embellishment that frames any baby face adorably.
This set fits newborn to 3 month sizes, with the pattern including detailed notes for sizing up through 12 months.
Materials You Will Need
Before you begin, gather everything so you can work uninterrupted.
Yarn:
Hook: US size E-4 / 3.5 mm crochet hook
Notions:
Yarn suggestions that work beautifully:
Paintbox Yarns Simply DK gives excellent stitch definition that shows off the fan shell texture. It is machine washable and comes in perfect shades of bubblegum pink and mint green. You will need 2 skeins of pink and 2 skeins of mint.
Lion Brand Pound of Love works as a budget option, though you should swatch carefully since it runs slightly thicker.
Scheepjes Catona in mercerized cotton creates a dressier, stiffer drape that holds the collar and skirt shape without blocking.
Gauge (Please Do Not Skip This)
18 stitches and 20 rows = 4 inches in single crochet worked flat using Color A and your E-4 hook.
For the fan shell skirt: 1 fan shell repeat (6 stitches) = approximately 1.33 inches wide. 2 rows of fan pattern = approximately 1 inch tall.
I know gauge swatches feel tedious. But this is a garment. A difference of even one stitch per inch will significantly alter how this dress fits. Work a swatch at least 5 inches square, wash and dry it the way you would wash the finished dress, then measure. Your future self will thank you.
Finished Measurements
Dress:
Booties:
Headband:
Abbreviations and Stitch Definitions
Let me walk you through every abbreviation you will encounter. If you are newer to pattern reading, bookmark this section.
Special Stitches You Will Learn
Fan Shell Stitch
This creates the gorgeous lacy texture throughout the skirt. Each fan consists of 5 double crochets worked into a single stitch, flanked by single crochets that anchor the fans. Here is how it works:
Row 1 (setup, RS): Sc in first st. Sk 2 sts, 5 dc in next st, sk 2 sts, sc in next st. Rep from * to end.
Row 2 (WS): Ch 3, turn. 2 dc in first sc. Sc in center dc of fan, 5 dc in next sc. Rep to last fan. Sc in center dc of last fan. 3 dc in last sc.
Row 3 (RS): Ch 1, turn. Sc in first dc. Sk 2 sts, 5 dc in next sc, sk 2 sts, sc in center dc of fan. Rep to end, placing final sc in top of tch.
Rows 2 and 3 form the pattern. Once you get the rhythm, it flows naturally.
Scallop Edging
This decorative border appears at the collar, sleeve cuffs, and skirt hem:
Sl st in next st, sk 1 st, 5 dc in next st, sk 1 st. Rep around or across.
Pattern Instructions
Part 1: Bodice (Top Down, Color A)
The bodice works back and forth in rows, starting at the neckline. A back opening runs along the center back.
Foundation Row: With Color A and E-4 hook, ch 62. Sc in 2nd ch from hook and in each ch across. Turn. (61 sc)
Row 1 (WS): Ch 1, turn. Sc in each st across. (61 sc)
Row 2 (RS, neckline shaping): Ch 1, turn. Sc in first 12 sts (left back panel), ch 3, sk 9 sts (left sleeve), sc in next 19 sts (front panel), ch 3, sk 9 sts (right sleeve), sc in last 12 sts (right back panel). (43 sc plus 6 ch = 49 working sts)
Row 3: Ch 1, turn. Sc in each st and ch across. (49 sc)
Row 4: Ch 1, turn. Sc in first 2 sts. Inc in next st. Sc in next 4 sts, inc in next st. Rep to last 2 sts. Sc in last 2 sts. (57 sc)
Row 5: Ch 1, turn. Sc in each st across. (57 sc)
Row 6: Ch 1, turn. Sc in first 2 sts. Inc in next st. Sc in next 5 sts, inc in next st. Rep to last 3 sts. Sc in last 3 sts. (65 sc)
Rows 7 through 10: Ch 1, turn. Sc in each st across. (65 sc)
Row 11 (eyelet row for ribbon): Ch 3 (counts as dc), turn. Sk 1 st. Dc in next st, ch 1, sk 1 st. Rep to last 2 sts. Dc in each of last 2 sts. (34 dc plus 31 ch-1 sps)
Row 12: Ch 1, turn. Sc in first dc. Sc in ch-1 sp, sc in next dc. Rep to end. Sc in top of tch. (65 sc)
Checkpoint: After Row 12, your bodice should measure approximately 2.75 inches from neckline to waist.
Bodice Lower Section (Rows 13 to 22)
Rows 13 through 17: Ch 1, turn. Sc in each st across. (65 sc) Repeat for all 5 rows.
Row 18: Ch 1, turn. Sc in first 3 sts. Inc in next st. Sc in next 6 sts, inc in next st. Rep 8 times. Sc in last 4 sts. (74 sc)
Rows 19 and 20: Ch 1, turn. Sc in each st across. (74 sc)
Row 21: Ch 1, turn. Sc in first 3 sts. Inc in next st. Sc in next 7 sts, inc in next st. Rep 8 times. Sc in last 3 sts. (83 sc)
Row 22: Ch 1, turn. Sc in each st across. Do not fasten off. (83 sc)
Checkpoint: Full bodice should measure approximately 5.5 inches from neckline to bottom.
Part 2: Joining for Skirt
Seam the center back of the bodice together with slip stitches up the center back. This closes the dress back.
Skirt Foundation Round: With RS facing and Color B, attach yarn at center back seam. Work sc evenly around the bottom edge of the bodice, placing inc sts at 5 evenly spaced points to reach 90 sc total. Join with sl st to first sc. (90 sc)
Change to Color B at the start of this round. 90 stitches = 15 fan repeats of 6 stitches each.
Part 3: Skirt (Color B, Fan Shell Stitch in Rounds)
When working fan shell in the round, all rounds are right side rounds.
Fan Round 1: Ch 1. Sc in first st. Sk 2 sts, 5 dc in next st, sk 2 sts, sc in next st. Rep 15 times. Join with sl st to first sc. (90 sts)
Fan Round 2: Ch 3, 2 dc in same st as join. Sc in center dc of next fan. 5 dc in next sc, sc in center dc of next fan. Rep 14 times. 2 dc in same st as first sl st join. Join with sl st to top of ch-3. (90 sts)
Fan Round 3: Ch 1. Sc in first st. Sk 2 sts, 5 dc in next sc, sk 2 sts, sc in center dc of fan. Rep 15 times. Join with sl st to first sc. (90 sts)
Fan Rounds 4 through 7: Alternate Rounds 2 and 3.
Fan Round 8 (increase round): Ch 1. Sc in first sc. Sk 2 sts, 7 dc in next sc (instead of 5), sk 2 sts, sc in center dc of fan. Rep 15 times. Join with sl st to first sc. (120 sts)
This increase from 5-dc fans to 7-dc fans adds 30 stitches total, creating the flared A-line silhouette.
Fan Rounds 9 through 14: Continue working the 7-dc fan pattern, alternating between bridge rounds and fan rounds as established. (120 sts)
Hem Edging Round (Color A): Change to Color A. Ch 1. Sl st in next st, sk 1 st, 5 dc in next st, sk 1 st. Rep around. Join with sl st to first sl st. Fasten off. (30 scallop shells)
Part 4: Cap Sleeves (Color B)
Right Sleeve: With Color B and RS facing, attach yarn to the underarm chain bridge at the right armhole. Work sc evenly around the entire armhole opening, picking up 9 sts from the skipped row sts and 3 sts from the ch-3 bridge. Join with sl st to first sc. (12 sc)
Round 1: Ch 2. Hdc in each st around. Join with sl st to first hdc. (12 hdc)
Round 2: Ch 1. Sl st in next st, sk 1 st, 5 dc in next st, sk 1 st. Rep 3 times. Join with sl st. Fasten off. (3 scallop shells)
Left Sleeve: Work same as Right Sleeve.
Part 5: Peter Pan Collar (Color B, Made Separately)
Foundation: With Color B, ch 64. Hdc in 3rd ch from hook and in each ch across. (62 hdc)
Rows 1 and 2: Ch 2, turn. Hdc in each st across. (62 hdc)
Outer Scallop Edge: Ch 1, do not turn. Working along the outer edge, sl st in first st, sk 1 st, 5 dc in next st, sk 1 st. Rep across to end. Fasten off. (approximately 15 scallop shells)
Inner Edge: Attach yarn to foundation chain edge. Work 1 row of sl st across to stabilize. Fasten off.
Attaching: Align center of collar with center front neckline. Whipstitch inner edge to bodice neckline, working outward toward each side. Collar terminates approximately 1 inch from each back edge.
Part 6: Embellishments
Collar Bow: Cut 6 inches of gold satin ribbon and tie into a small bow. Attach to center front of collar at neckline.
Waistband Ribbon: Thread 24 inches of gold satin ribbon through the eyelet row using a safety pin, beginning and ending at center front. Tie into a bow. Attach unicorn buttons on each side of the bow.
Part 7: Booties (Make 2, Color B)
Sole Foundation: Ch 10.
Round 1: Sc in 2nd ch from hook, sc in next 7 chs, 4 sc in last ch. Working back along other side: sc in next 7 chs, 3 sc in first ch. Join with sl st. (22 sc)
Round 2: Ch 1. Inc in first 2 sts. Sc in next 7 sts. Inc in next 4 sts. Sc in next 7 sts. Inc in next 2 sts. Join. (30 sc)
Round 3: Ch 1. Inc in next st, sc in next st. Twice. Sc in next 7 sts. Inc in next st, sc in next st. 4 times. Sc in next 7 sts. Inc in next st, sc in next st. Twice. Join. (38 sc)
Round 4 (BLO): Ch 1. Working in back loop only, sc in each st around. Join. (38 sc)
Round 5: Ch 1. Sc in each st around. Join. (38 sc)
Round 6: Ch 1. Sc in first 12 sts. Sc2tog 7 times. Sc in last 12 sts. Join. (31 sc)
Round 7: Ch 1. Sc in first 10 sts. Sc2tog 5 times. Sc in last 11 sts. Join. (26 sc)
Round 8: Ch 1. Sc in first 9 sts. Sc2tog 4 times. Sc in last 9 sts. Join. (22 sc)
Rounds 9 and 10: Ch 1. Sc in each st around. Join. (22 sc)
Round 11: Ch 1. Sc in next st, ch 1, sk 1 st. Rep 11 times. Join. (22 sts equivalent)
Round 12: Ch 1. Sc in next sc, sc in ch-1 sp. Rep 9 times. Sc2tog twice. Join. (20 sc)
Scallop Edging (Color A): Change to Color A. Sl st in next st, sk 1 st, 5 dc in next st, sk 1 st. Rep 5 times. Join. Fasten off. (5 scallop shells)
Bootie Bow: Cut 6 inches of gold ribbon per bootie. Tie into bow and attach at center front of cuff.
Part 8: Headband (Color A)
Foundation: With Color A, ch 61. Sc in 2nd ch from hook and in each ch across. (60 sc)
Rows 1 through 3: Ch 1, turn. Sc in each st across. (60 sc)
Fasten off with long tail. Fold into loop and sl st short ends together to form headband ring.
Crocheted Bow:
Rectangle: Ch 16. Sc in 2nd ch from hook and in each ch across. (15 sc)
Rows 1 through 5: Ch 1, turn. Sc in each st across. (15 sc)
Make 2 rectangles. Stack together, pinch center to form bow shape. Wrap center tightly with 12 inches of Color A yarn 8 to 10 times. Tie off securely.
Attach: Sew bow to center front of headband.
Size Customization
For 3 to 6 months: Add 6 stitches to foundation chain, work 2 additional bodice rows before armholes, add 1 fan shell repeat to skirt, add 2 fan pattern rows to skirt length.
For 6 to 9 months: Add 12 stitches to foundation, 4 additional bodice rows, 2 additional fan repeats, 4 additional fan rows.
For 9 to 12 months: Add 18 stitches to foundation, 6 additional bodice rows, 3 additional fan repeats, 6 additional fan rows.
Always ensure your foundation chain remains a multiple of 6 plus 3 for the fan shell pattern.
Estimated Time to Complete
This is not a quick project, but every hour is worth it when you see this complete set come together.
Final Thoughts on This Crochet Baby Dress Set
Thank you so much for choosing this pattern for your next project. I hope you love making this set as much as I loved designing it. The combination of that shell stitch skirt, the sweet peter pan collar, and those tiny matching booties creates something truly special for a little one.
If you make this mint unicorn baby dress set, I would absolutely love to see it. Tag me on Instagram or share a photo in my Facebook group. There is nothing better than seeing these patterns come to life in your hands.
Save this baby dress crochet pattern to your Pinterest boards so you can find it whenever you are ready to start. And please drop a comment below if you make it or have any questions along the way. I read every single one and love hearing from you.