
Cables look intimidating. I get it. Those twisted, braided textures seem like something only expert crocheters can pull off. But here’s the truth: if you can wrap your yarn around a hook and work a double crochet, you can absolutely make cables.
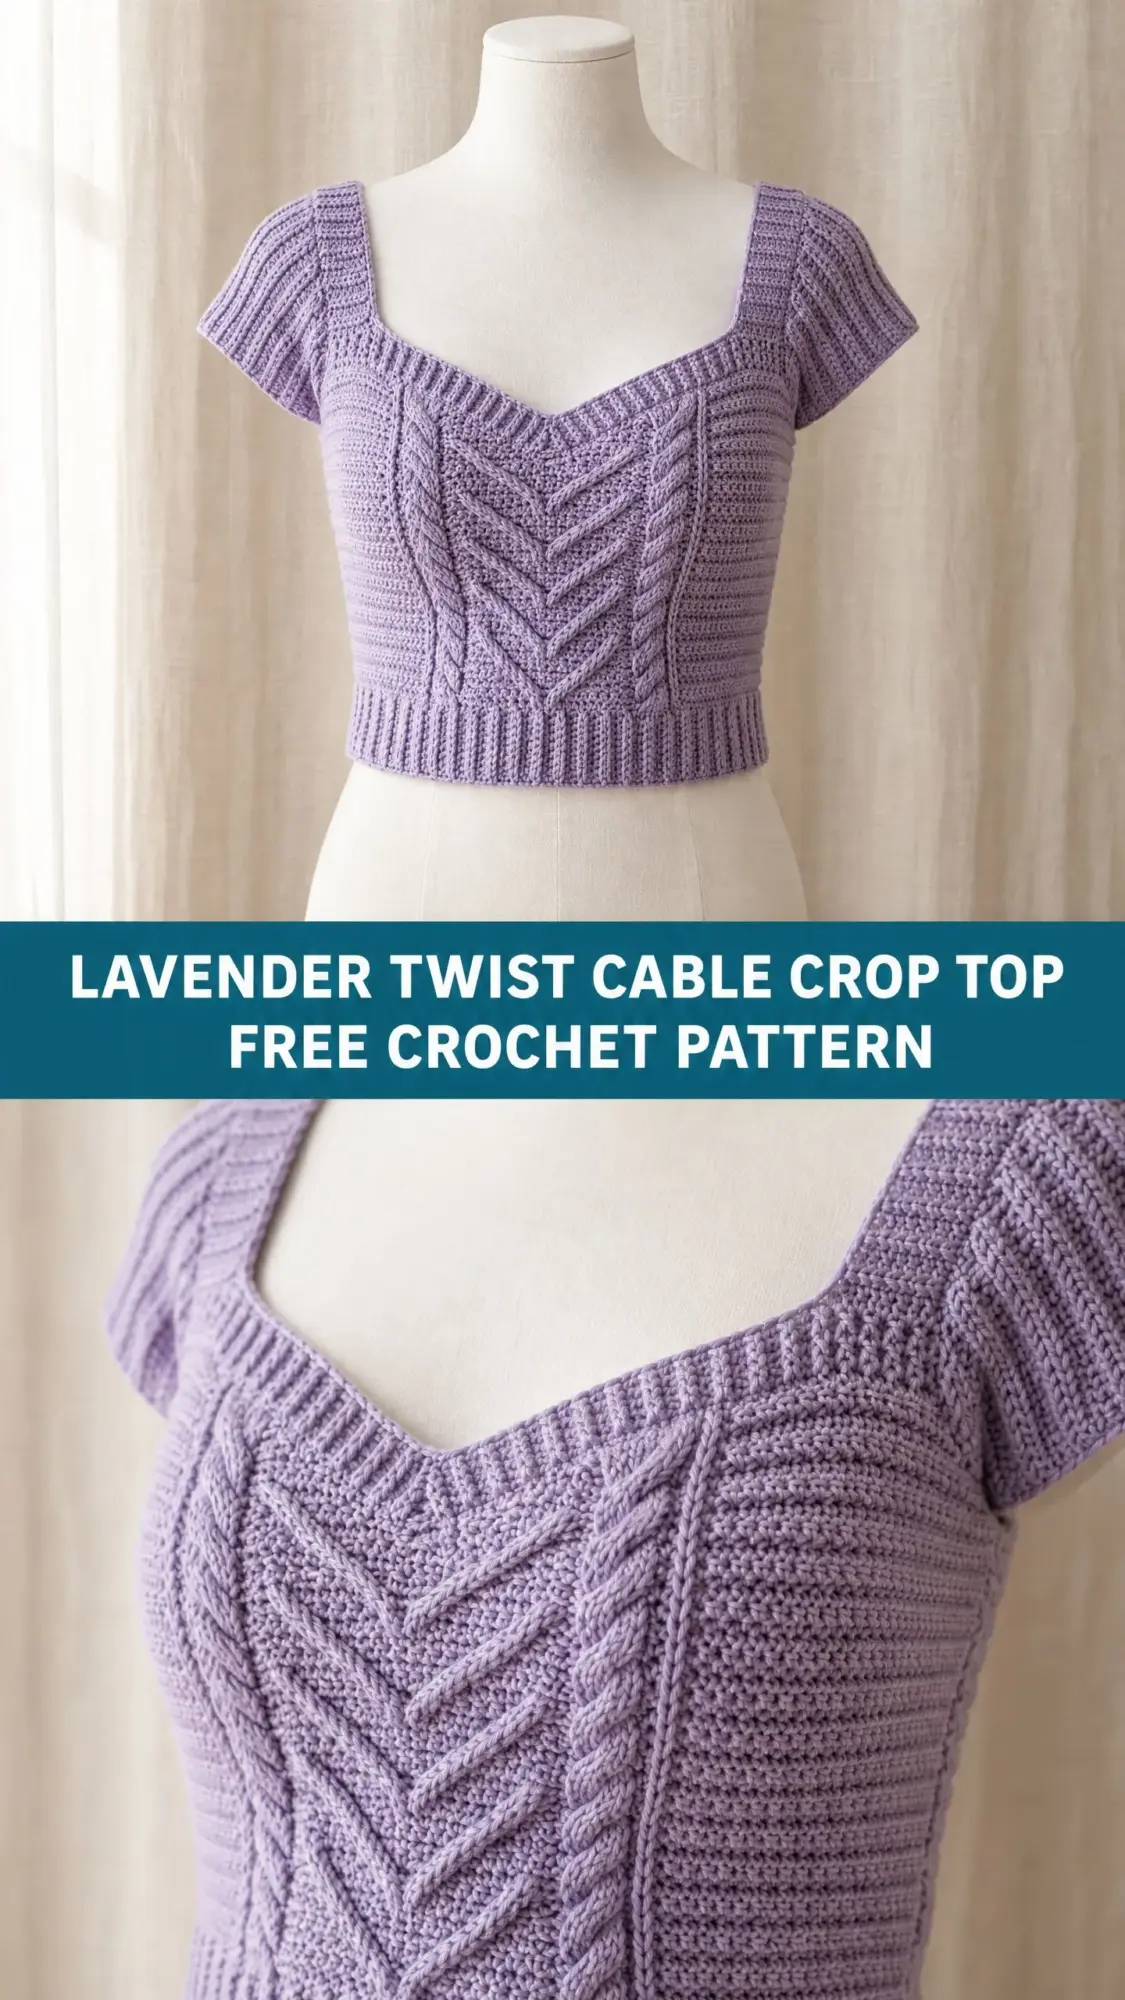
This Lavender Twist Cable Crop Top breaks down every single step so you can create that gorgeous chevron cable detail without losing your mind. The pattern walks you through each cable cross with clear instructions, and once you do it two or three times, it becomes muscle memory. I promise.
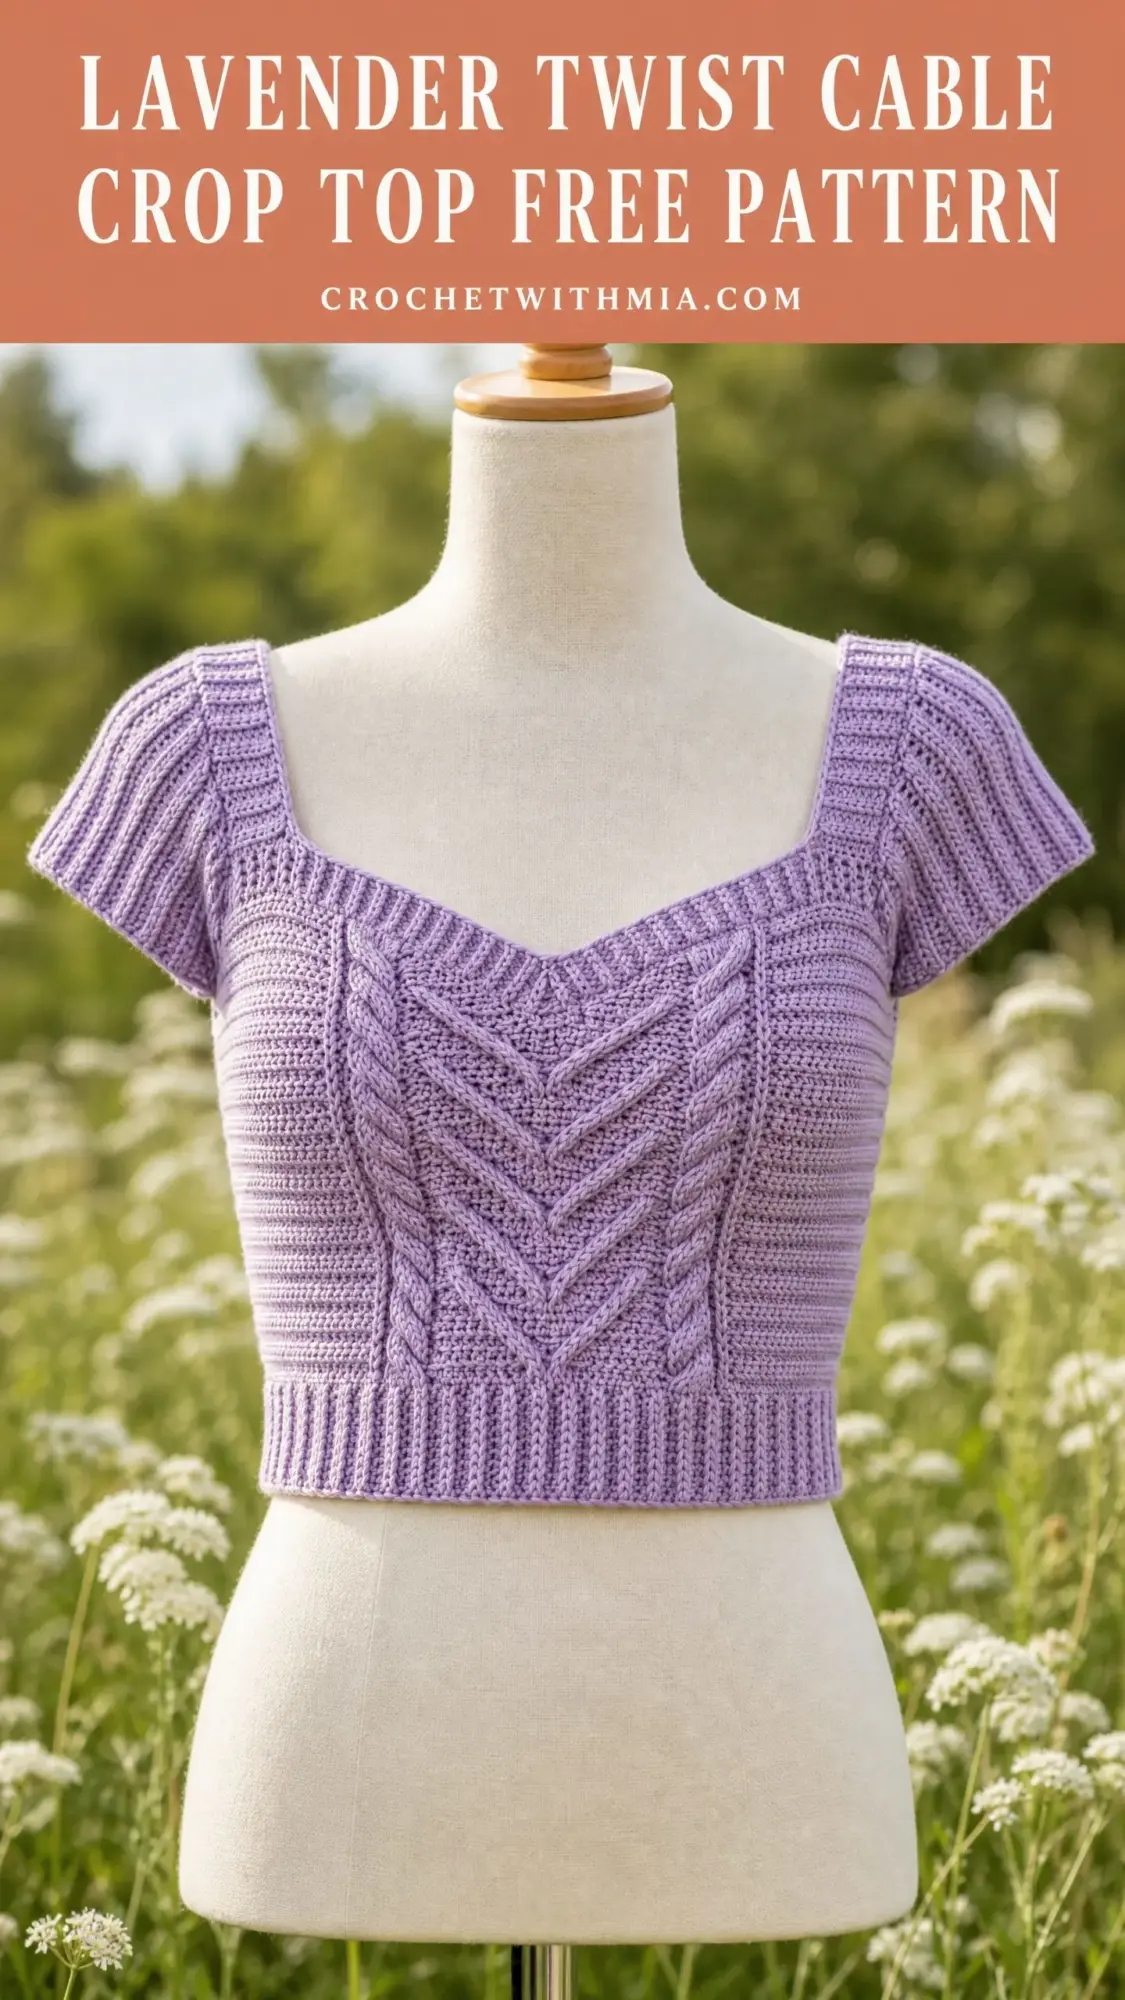
Whether you’re an intermediate crocheter ready to level up or an advanced maker looking for a satisfying summer project, this top delivers. The fitted silhouette, sweetheart neckline, and that stunning V-shaped cable motif down the center front make it look far more complicated than it actually is. Let’s build your confidence stitch by stitch.
About This Crochet Pattern
This crop top is worked from the bottom up, starting with a ribbed hem band that gives the garment structure and a polished finish. The body is worked in the round until you reach the underarms, then you’ll split the front and back to work them flat. The front features that eye-catching cable chevron panel flanked by vertical ribbing, while the back stays simple in half double crochet for comfort and ease.
The sweetheart neckline gets shaped with gradual decreases that create a soft, flattering curve rather than harsh steps. Short cap sleeves are picked up around the armholes and finished with a few rounds of ribbing. The whole construction is seamless except for the shoulder seams, which get joined with a simple whip stitch or slip stitch.
Skill Level: Intermediate to Advanced
Time Estimate: 15 to 25 hours depending on your experience with cable stitches
Finished Measurements
The pattern includes four sizes. Instructions are written for Small with changes for Medium, Large, and Extra Large in parentheses.
Size Small: Bust 32 to 34 inches, finished bust circumference 33 inches
Size Medium: Bust 35 to 37 inches, finished bust circumference 36 inches
Size Large: Bust 38 to 40 inches, finished bust circumference 39 inches
Size Extra Large: Bust 41 to 43 inches, finished bust circumference 42 inches
Finished cropped length from hem to highest center back point: approximately 12 inches
Sleeve cap depth: approximately 2.5 inches
Materials You’ll Need
Yarn: DK weight, category 3. You’ll need approximately 550 (620, 700, 780) yards of smooth, tightly spun cotton or cotton-blend yarn. A smooth yarn with minimal halo is essential for cable definition.
Yarn Suggestions:
Avoid fuzzy, bouclé, or loosely plied yarns as they will obscure the cable motif.
Hooks:
Notions: At least 6 stitch markers, yarn needle, scissors, measuring tape
Gauge
Getting gauge right is critical for a fitted garment like this. Please swatch and block before starting.
With US G-6 / 4.0 mm hook in half double crochet worked in rounds:
With US G-6 / 4.0 mm hook in the cable panel motif:
Abbreviations and Stitch Definitions
BPdc (Back Post Double Crochet): Yarn over, insert hook from back to front to back around the post of the indicated stitch below, yarn over and pull up a loop, (yarn over and draw through 2 loops) twice. This creates a recessed groove on the right side.
BPsc (Back Post Single Crochet): Same technique as BPdc but worked as a single crochet height.
ch (Chain): The foundation loop made by yarning over and pulling through.
dc (Double Crochet): Yarn over, insert hook, pull up loop, (yarn over, pull through 2 loops) twice.
FPdc (Front Post Double Crochet): Yarn over, insert hook from front to back to front around the post of the indicated stitch below (not through the top loops), yarn over and pull up a loop, (yarn over and draw through 2 loops) twice. This creates a raised ridge on the right side.
FPsc (Front Post Single Crochet): Same technique as FPdc but worked as a single crochet height.
hdc (Half Double Crochet): Yarn over, insert hook, pull up loop, yarn over and pull through all 3 loops.
hdc2tog (Half Double Crochet 2 Together): A decrease that turns 2 stitches into 1.
pm: Place marker
sc (Single Crochet): Insert hook, pull up loop, yarn over and pull through both loops.
sl st (Slip Stitch): Insert hook, yarn over, pull through stitch and loop on hook in one motion.
st(s): Stitch(es)
Special Stitches for the Cable Panel
2-Stitch Front Cable Cross (2/2 FPC): Skip the next 2 stitches. Work FPdc around the post of the 3rd stitch. Work FPdc around the post of the 4th stitch. Now working behind those two completed FPdc stitches, go back and work FPdc around the post of the first skipped stitch, then FPdc around the post of the second skipped stitch. This crosses 4 stitches total with the front pair crossing over the back pair, producing a left-leaning cable.
Don’t let this intimidate you. You’re simply skipping two stitches, working the next two, then going back to work the ones you skipped. The magic happens because you’re working behind your previous stitches, which makes them twist over each other.
Ribbing Stitch: Alternating FPdc and BPdc across, maintaining established rib alignment every row or round.
Pattern Notes Before You Begin
1. The body is worked in the round from the hem upward to the underarm. At the underarm, the round divides into front and back halves, then each half is worked flat.
2. Chain 2 at the beginning of a hdc row or round does NOT count as a stitch unless specifically stated. Chain 1 at the beginning of a sc row does NOT count as a stitch.
3. The cable panel is worked on the front half only. The back is worked entirely in hdc.
4. For the cable chevron to align correctly, work the cable cross on every 4th row of the front panel.
5. All ribbing is worked as (FPdc, BPdc) across, with FPdc over FPdc and BPdc over BPdc as seen from the right side.
Section 1: Hem Ribbing Band
The hem band is worked flat as a narrow rectangle, then seamed to form a ring.
With smaller hook (US E-4 / 3.5 mm), chain 13.
Row 1: Sc in 2nd ch from hook and in each ch across. Turn. (12 sc)
Row 2: Ch 1, FPsc in first st, (BPsc in next st, FPsc in next st) across to last st, BPsc in last st. Turn. (12 sts)
Rows 3 through 148 (162, 176, 190): Repeat Row 2. (12 sts each row)
After all rows are complete, seam the short ends together with a sl st seam, right sides facing, to form a ring. This seam will sit at center back.
Checkpoint: The hem band should measure approximately 32.5 inches (35.5, 38.5, 41.5 inches) around.
Section 2: Body
Switch to larger hook (US G-6 / 4.0 mm). Join yarn to top edge of hem band at center back seam.
Setup Round: Ch 2 (does not count as st), work 148 (162, 176, 190) hdc evenly across the top edge of the hem band by inserting hook into each row end stitch of the band. Join with sl st to first hdc. (148, 162, 176, 190 hdc)
The body is divided as follows:
Within the front half, the center 20 stitches form the cable panel. The remaining stitches on each side are worked in (FPdc, BPdc) ribbing. The back half is worked entirely in hdc.
Round 1: Ch 2, pm at beginning of round (center back). Work 74 (81, 88, 95) hdc across back half, pm for side seam, work 27 (30, 34, 37) sts in (FPdc, BPdc) ribbing for right front side panel, pm for cable panel start, work 20 sts as hdc across center front, pm for cable panel end, work 27 (30, 34, 37) sts in (FPdc, BPdc) ribbing for left front side panel, join with sl st to first hdc. (148, 162, 176, 190 sts)
Round 2: Ch 2, hdc in each of next 74 (81, 88, 95) sts across back, work 27 (30, 34, 37) sts in established ribbing, work Cable Setup Row across center 20 sts as follows: (BPdc in next 2 sts, FPdc in next 2 sts) 5 times, work 27 (30, 34, 37) sts in established ribbing, join. (148, 162, 176, 190 sts)
Round 3: Ch 2, hdc in each of next 74 (81, 88, 95) sts across back, work 27 (30, 34, 37) sts in established ribbing, work center 20 sts as: (BPdc in next 2 sts, FPdc in next 2 sts) 5 times, work 27 (30, 34, 37) sts in established ribbing, join. (148, 162, 176, 190 sts)
Round 4 (Cable Cross Round): Ch 2, hdc in each of next 74 (81, 88, 95) sts across back, work 27 (30, 34, 37) sts in established ribbing, work Chevron Cable across center 20 sts as follows:
BPdc in next 2 sts, work 2/2 FPC over next 4 sts (cable crossing, creating outward-leaning right cable), BPdc in next 2 sts, FPdc in next 2 sts, BPdc in next 2 sts, work 2/2 FPC over next 4 sts (mirror cable, creating outward-leaning left cable), BPdc in next 2 sts.
Work 27 (30, 34, 37) sts in established ribbing, join. (148, 162, 176, 190 sts)
Rounds 5 through 7: Repeat Round 3 pattern (no cable cross). (148, 162, 176, 190 sts each round)
Round 8 (Cable Cross Round): Repeat Round 4. (148, 162, 176, 190 sts)
Rounds 9 through 11: Repeat Round 3. (148, 162, 176, 190 sts each round)
Round 12 (Cable Cross Round): Repeat Round 4. (148, 162, 176, 190 sts)
Rounds 13 through 15: Repeat Round 3. (148, 162, 176, 190 sts each round)
Round 16 (Cable Cross Round): Repeat Round 4. (148, 162, 176, 190 sts)
Rounds 17 through 19: Repeat Round 3. (148, 162, 176, 190 sts each round)
Round 20 (Cable Cross Round): Repeat Round 4. (148, 162, 176, 190 sts)
Checkpoint: After Round 20, the body (not including the hem band) should measure approximately 6 inches tall. The center front should show 5 completed chevron cable crosses stacked to form the V motif.
Continue in pattern (3 plain rounds, then 1 cable cross round) until body measures approximately 8.5 inches from top of hem band, ending after a non-cable round. For most sizes this will be approximately Round 27 to 29.
Section 3: Dividing for Front and Back
Divide Round: Work across 74 (81, 88, 95) back sts in hdc. Do not continue in the round. Chain 4 for underarm bridge. The work now turns.
Mark the 74 (81, 88, 95) front stitches. Leave the back stitches unworked on hold.
Section 4: Front Yoke (Worked Flat)
Turn work so RS faces you. Work back and forth across the 74 (81, 88, 95) front sts.
Row 1 (RS): Ch 2, work across all 74 (81, 88, 95) front sts in established pattern. Turn. (74, 81, 88, 95 sts)
Row 2 (WS): Ch 2, work across in established pattern. Turn. (74, 81, 88, 95 sts)
Rows 3 through 8: Repeat Rows 1 and 2 three more times. Include a cable cross on Row 5 if the cable sequence calls for it. (74, 81, 88, 95 sts each row)
Checkpoint: After Row 8, the front panel above the underarm should measure approximately 2.5 inches.
Section 5: Sweetheart Neckline Shaping
Right Front Cup
Row 9 (RS): Work across first 37 (40, 44, 47) sts in established pattern. Leave remaining sts unworked. Turn. (37, 40, 44, 47 sts)
Row 10 (WS): Sl st across first 3 sts (neckline edge), ch 2, work in established pattern to end. Turn. (34, 37, 41, 44 sts)
Row 11 (RS): Work across in established pattern to last 2 sts, work hdc2tog over last 2 sts. Turn. (33, 36, 40, 43 sts)
Row 12 (WS): Sl st across first 2 sts, ch 2, work in established pattern to end. Turn. (31, 34, 38, 41 sts)
Row 13 (RS): Work in established pattern to last 2 sts, hdc2tog. Turn. (30, 33, 37, 40 sts)
Row 14 (WS): Ch 1, work 1 sc in next st as a decrease edge, then ch 2 and work in established pattern to end. Turn. (30, 33, 37, 40 sts)
Rows 15 through 18: Work even in established pattern with no further decreases. Turn at end of each row. (30, 33, 37, 40 sts)
Fasten off.
Left Front Cup
With RS facing, skip 0 sts for Small (1 st for Medium, Large, XL). Join yarn at center of front at the stitch immediately after the midpoint.
Row 9 (RS): Work across remaining 37 (40, 44, 47) sts in established pattern. Turn. (37, 40, 44, 47 sts)
Row 10 (WS): Work in established pattern to last 3 sts, turn leaving last 3 sts unworked. (34, 37, 41, 44 sts)
Row 11 (RS): Hdc2tog over first 2 sts, work in established pattern to end. Turn. (33, 36, 40, 43 sts)
Row 12 (WS): Work in established pattern to last 2 sts, leave 2 sts unworked. Turn. (31, 34, 38, 41 sts)
Row 13 (RS): Hdc2tog over first 2 sts, work in established pattern to end. Turn. (30, 33, 37, 40 sts)
Row 14 (WS): Work in established pattern to last st, 1 sc in last st as edge decrease. Turn. (30, 33, 37, 40 sts)
Rows 15 through 18: Work even. (30, 33, 37, 40 sts each row)
Fasten off.
Section 6: Back Yoke (Worked Flat)
Rejoin yarn at right underarm edge of back.
Row 1 (RS): Ch 2, hdc in each of 74 (81, 88, 95) sts. Turn. (74, 81, 88, 95 sts)
Rows 2 through 6: Ch 2, hdc across. Turn. (74, 81, 88, 95 sts)
Row 7 (RS): Ch 2, hdc across first 30 (33, 37, 40) sts. Leave rem sts unworked. Turn. (30, 33, 37, 40 sts)
Rows 8 through 12: Ch 2, hdc across. Turn. (30, 33, 37, 40 sts each row)
Fasten off.
For right back shoulder: Skip center 14 (15, 14, 15) sts for back neck. Rejoin yarn to next st.
Rows 7 through 12 (right back shoulder): Ch 2, hdc across 30 (33, 37, 40) sts. Turn. (30, 33, 37, 40 sts each row)
Fasten off.
Section 7: Shoulder Seams
Align front and back right shoulders with wrong sides together. Using a yarn needle, work a whip stitch or sl st seam across the 30 (33, 37, 40) shoulder sts. Repeat for the left shoulder. Fasten off and weave in ends.
Section 8: Sleeve Finishing
With smaller hook (US E-4 / 3.5 mm), RS facing, join yarn at center of underarm.
Pickup Round: Work sc evenly around armhole opening. Target total: 44 (46, 48, 50) sts. Join with sl st. (44, 46, 48, 50 sts)
Round 1: Ch 2, work (FPdc, BPdc) ribbing around. Join with sl st. (44, 46, 48, 50 sts)
Rounds 2 through 4: Repeat Round 1. (44, 46, 48, 50 sts)
Fasten off. Repeat for second armhole.
Section 9: Neckline Finishing
With smaller hook (US E-4 / 3.5 mm), RS facing, join yarn at center back neck.
Pickup Round: Sc evenly around the entire neckline opening. At the sweetheart dip, work 3 sc together over the 3 sts at the deepest point. Total pickup should result in a multiple of 2 stitches. Approximate: 80 (84, 88, 92) sts. Join with sl st. (80, 84, 88, 92 sts)
Ribbing Round: Ch 1, work (FPsc, BPsc) around entire neckline. At the sweetheart dip, work sc3tog over the 3 center front sts. Join with sl st.
Fasten off. Weave in all ends.
Finishing and Blocking Your Cable Crop Top
Weave in all ends securely, taking care to bury cable-area ends through the post stitches so they don’t pop through to the right side.
Wet blocking is strongly recommended for this crochet pattern. Soak the finished top in cool water with a small amount of wool wash for 15 to 20 minutes. Gently squeeze out excess water without wringing. Lay flat on a blocking mat, pin to finished measurements, and shape the sweetheart neckline curve with pins. Allow to dry fully before moving.
Blocking will even out the cable tension, soften any stiffness in the cotton, and set the final dimensions accurately.
Care Instructions
Machine wash on gentle cycle in cold water, or hand wash in cool water. Lay flat to dry. Do not tumble dry, iron directly, or dry clean. Store folded, not hung, to prevent the cotton from stretching over time.
Tips for Customizing Your Fit
To adjust circumference: Add or remove stitches in multiples of 14. Always keep the cable panel at 20 stitches.
To adjust length: Add or remove body rounds between Rounds 21 and the division round. Each round adds approximately 0.29 inches of length.
To lower or raise the sweetheart dip: Add 2 to 4 extra rows in the front yoke before beginning neckline shaping for a deeper dip. Reduce by 2 rows for a higher, more modest curve.
I really hope you enjoy making this Lavender Twist Cable Crop Top crochet pattern as much as I enjoyed designing it. Those cables are going to look absolutely stunning on you, and I can’t wait to see your finished tops. Thank you so much for being here and trusting me with your next project.
If you want to come back to this step by step crochet tutorial later, go ahead and save it to your Pinterest boards so it’s easy to find. And please leave a comment below if you make this top. I love seeing what you create and hearing how the pattern worked up for you!