
Go ahead and dig into that stash of yours. You know the one. That beautiful cotton yarn you’ve been saving for "the right project" is about to get its moment. These charcoal gray crochet sandals combine granny square construction with a modern silhouette, and they’re more achievable than you might think. The lacy motifs create visual interest while the structured straps keep everything secure. I’ll be honest with you. This is an intermediate project that requires some patience, especially during assembly. But if you can make a basic granny square and you’re comfortable sewing pieces together, you absolutely can do this.
Why You’ll Love This Crochet Sandals Pattern
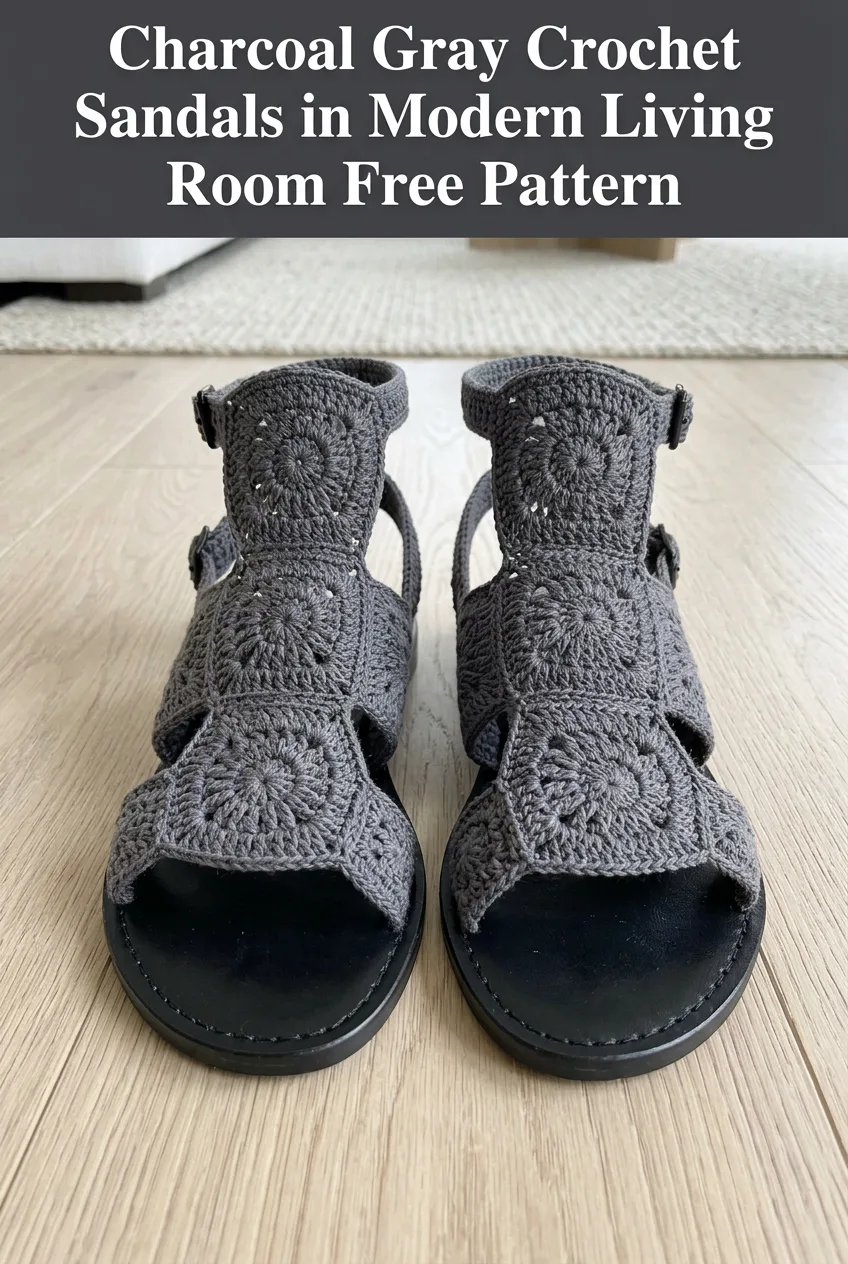
These aren’t your grandmother’s house slippers. This crochet sandals pattern creates actual wearable footwear with a professional finish. The secret is attaching your crocheted upper to a pre-made sandal sole, which gives you real outdoor durability.
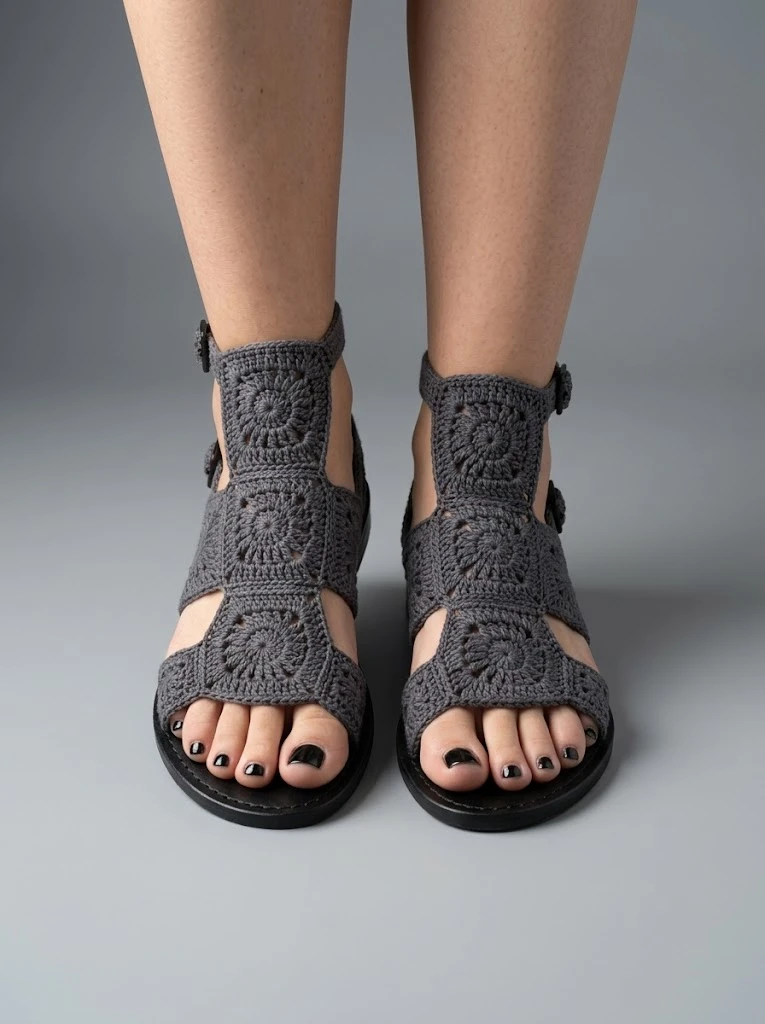
The granny square motifs on the foot create that classic handmade charm, while the solid crochet straps provide structure and support. The ankle strap with a buckle closure means you get an adjustable, secure fit every time.
What makes this design special is the balance between openwork and solid sections. Your feet stay cool thanks to the lacy motifs, but the reinforced edges and straps keep everything sturdy enough for actual wear.
Materials You’ll Need
Yarn:
Hook:
Notions:
Gauge:
One complete granny square motif measures approximately 2.5 inches square after blocking.
Abbreviations and Stitch Definitions
Let me walk you through every stitch you’ll encounter in this pattern.
Ch = Chain: Wrap yarn over hook, pull through loop on hook. This creates foundation stitches.
Sl st = Slip stitch: Insert hook, yarn over, pull through both loops at once. Used for joining and moving across stitches invisibly.
Sc = Single crochet: Insert hook, yarn over, pull up a loop (2 loops on hook), yarn over, pull through both loops. Creates a short, tight stitch.
Dc = Double crochet: Yarn over, insert hook, yarn over, pull up a loop (3 loops on hook), yarn over, pull through 2 loops, yarn over, pull through remaining 2 loops. Creates a taller stitch with nice drape.
3-dc cluster = Three double crochets worked into the same stitch or space, creating a shell effect.
Pattern Notes Before You Begin
Read this section completely before starting. Trust me, it saves headaches later.
Don’t stress if your first motif looks a little wonky. Block it and watch the magic happen.
Granny Square Motif (Make 4 Total, 2 Per Sandal)
These form the main decorative element across the top of each foot.
Round 1: Make a magic ring. Ch 3 (counts as first dc throughout), work 2 dc into ring, ch 2, *3 dc into ring, ch 2* three more times. Sl st to top of beginning ch-3 to join. (4 groups of 3-dc clusters, 4 ch-2 corner spaces)
Round 2: Sl st across to first corner ch-2 space. Ch 3, 2 dc in same corner space, ch 1, 3 dc in same corner space, ch 1, *in next corner space work (3 dc, ch 2, 3 dc), ch 1* around. Sl st to top of ch-3 to join. (8 groups of 3-dc clusters, 4 ch-2 corner spaces)
Round 3: Sl st to corner space. Ch 3, 2 dc in corner space, ch 2, 3 dc in same corner space, ch 1, 3 dc in next ch-1 space, ch 1, *in corner space work (3 dc, ch 2, 3 dc), ch 1, 3 dc in ch-1 space, ch 1* around. Sl st to join. (12 groups of 3-dc clusters)
Round 4: Sl st to corner space. Ch 3, 2 dc in corner space, ch 2, 3 dc in same corner space, *ch 1, 3 dc in next ch-1 space* across to next corner, ch 1, (3 dc, ch 2, 3 dc) in corner space. Repeat around. Sl st to join. (16 groups of 3-dc clusters)
Round 5 (Border Round): Ch 1, sc in same st, sc in each dc and ch-1 space around, working 3 sc in each corner ch-2 space. Sl st to first sc to join. Fasten off. (Approximately 60 sc)
Weave in ends and block each square to 2.5 inches.
Toe Strap (Make 2)
This creates the band that goes across your toes.
Row 1: Ch 26. Sc in second ch from hook and in each ch across. Turn. (25 sc)
Rows 2-4: Ch 1, sc in each sc across. Turn. (25 sc)
Row 5: Ch 1, sc in each sc across. Do not turn. Continue around entire piece with sc evenly spaced, working 3 sc in each corner. Sl st to first sc. Fasten off. (Approximately 62 sc around entire edge)
This edging creates a clean, finished border and adds stability.
Center Vertical Strap (Make 2)
This connects the toe strap to the ankle section.
Row 1: Ch 6. Sc in second ch from hook and each ch across. Turn. (5 sc)
Rows 2-22: Ch 1, sc in each sc across. Turn. (5 sc)
Fasten off, leaving a long tail for sewing.
The length may need adjustment depending on your foot size. Standard is approximately 4.5 inches, but measure against your own foot if possible.
Ankle Strap (Make 2)
Row 1: Ch 46. Sc in second ch from hook and each ch across. Turn. (45 sc)
Rows 2-3: Ch 1, sc in each sc across. Turn. (45 sc)
Row 4: Ch 1, sc in each sc across. Do not turn. Continue around entire piece with sc border as before. Sl st to join. Fasten off.
Buckle Loop (Make 2)
This small piece holds your buckle in place.
Row 1: Ch 10. Sc in second ch from hook and each ch across. Turn. (9 sc)
Rows 2-3: Ch 1, sc in each sc across. Turn. (9 sc)
Fasten off, leaving a long tail.
Side Straps (Make 4 Total, 2 Per Sandal)
These connect the ankle strap to the foot section on each side.
Row 1: Ch 6. Sc in second ch from hook and each ch across. Turn. (5 sc)
Rows 2-12: Ch 1, sc in each sc across. Turn. (5 sc)
Fasten off with long tail.
Assembly Instructions
Here’s where everything comes together. Take your time with this section.
Step 1: Join the Granny Squares
Place two granny squares side by side. Using a whip stitch or mattress stitch, sew them together along one edge. This creates your foot upper panel.
Step 2: Attach to Sole
Position the joined squares on top of your sandal sole, centered over the ball of the foot area. Using your tapestry needle and matching yarn, sew through the pre-punched holes in the sole. Work slowly and keep your stitches even. If your sole has leather, you may need a leather needle.
Step 3: Attach Toe Strap
Position the toe strap across the front edge of your granny square panel, overlapping slightly. Sew securely in place, then attach the other edge to the sole through the pre-punched holes.
Step 4: Add Center Vertical Strap
Sew one end of the center strap to the back edge of the granny square panel. The other end will connect to the ankle strap.
Step 5: Attach Side Straps
Sew the side straps to each outer edge of the granny square panel. These will also connect to the ankle area.
Step 6: Complete Ankle Assembly
Attach the ankle strap, weaving through or sewing to the side straps and center strap. On one end, fold the buckle loop around your buckle and sew it closed. Attach this to one end of the ankle strap. The other end should be able to thread through the buckle for closure.
Step 7: Final Securing
Go back and reinforce any attachment points that feel loose. Add extra stitches where the straps meet the sole.
Sizing Adjustments
The beauty of this crochet tutorial is its adaptability.
For smaller sizes, reduce your granny square to 3 rounds before the border round. Shorten all straps by a few rows.
For larger sizes, add an additional round to each granny square. Lengthen straps as needed, checking against your own measurements.
Always measure against your foot as you work. Crochet is forgiving, and adjusting as you go is much easier than frogging finished pieces.
Care Instructions
Hand wash your sandals in cool water with mild soap. Reshape while damp and allow to air dry completely before wearing. The soles can be wiped clean with a damp cloth.
Avoid machine washing, which can damage the attachment points between the crochet and sole.
Tips for Success
Block everything. I cannot stress this enough. Blocking transforms lumpy, uneven pieces into professional-looking components.
Use stitch markers liberally. Mark your corners, mark your joining points, mark anything that helps you stay oriented.
Test your tension. If your squares come out much larger or smaller than the gauge, adjust your hook size accordingly.
Don’t rush assembly. The sewing portion determines how professional your finished sandals look. Take breaks if you feel frustrated.
I really hope you enjoy making these crochet sandals as much as I enjoyed designing them. They’re such a satisfying project, and wearing handmade footwear feels incredibly special. If you give this pattern a try, I’d love to see your finished sandals! Tag me on Instagram or share in my Facebook group.
If this pattern caught your eye, go ahead and save it to your Pinterest boards so you can find it when you’re ready to start. And please drop a comment below if you make these. I genuinely love seeing what you create, and your photos always make my day!