
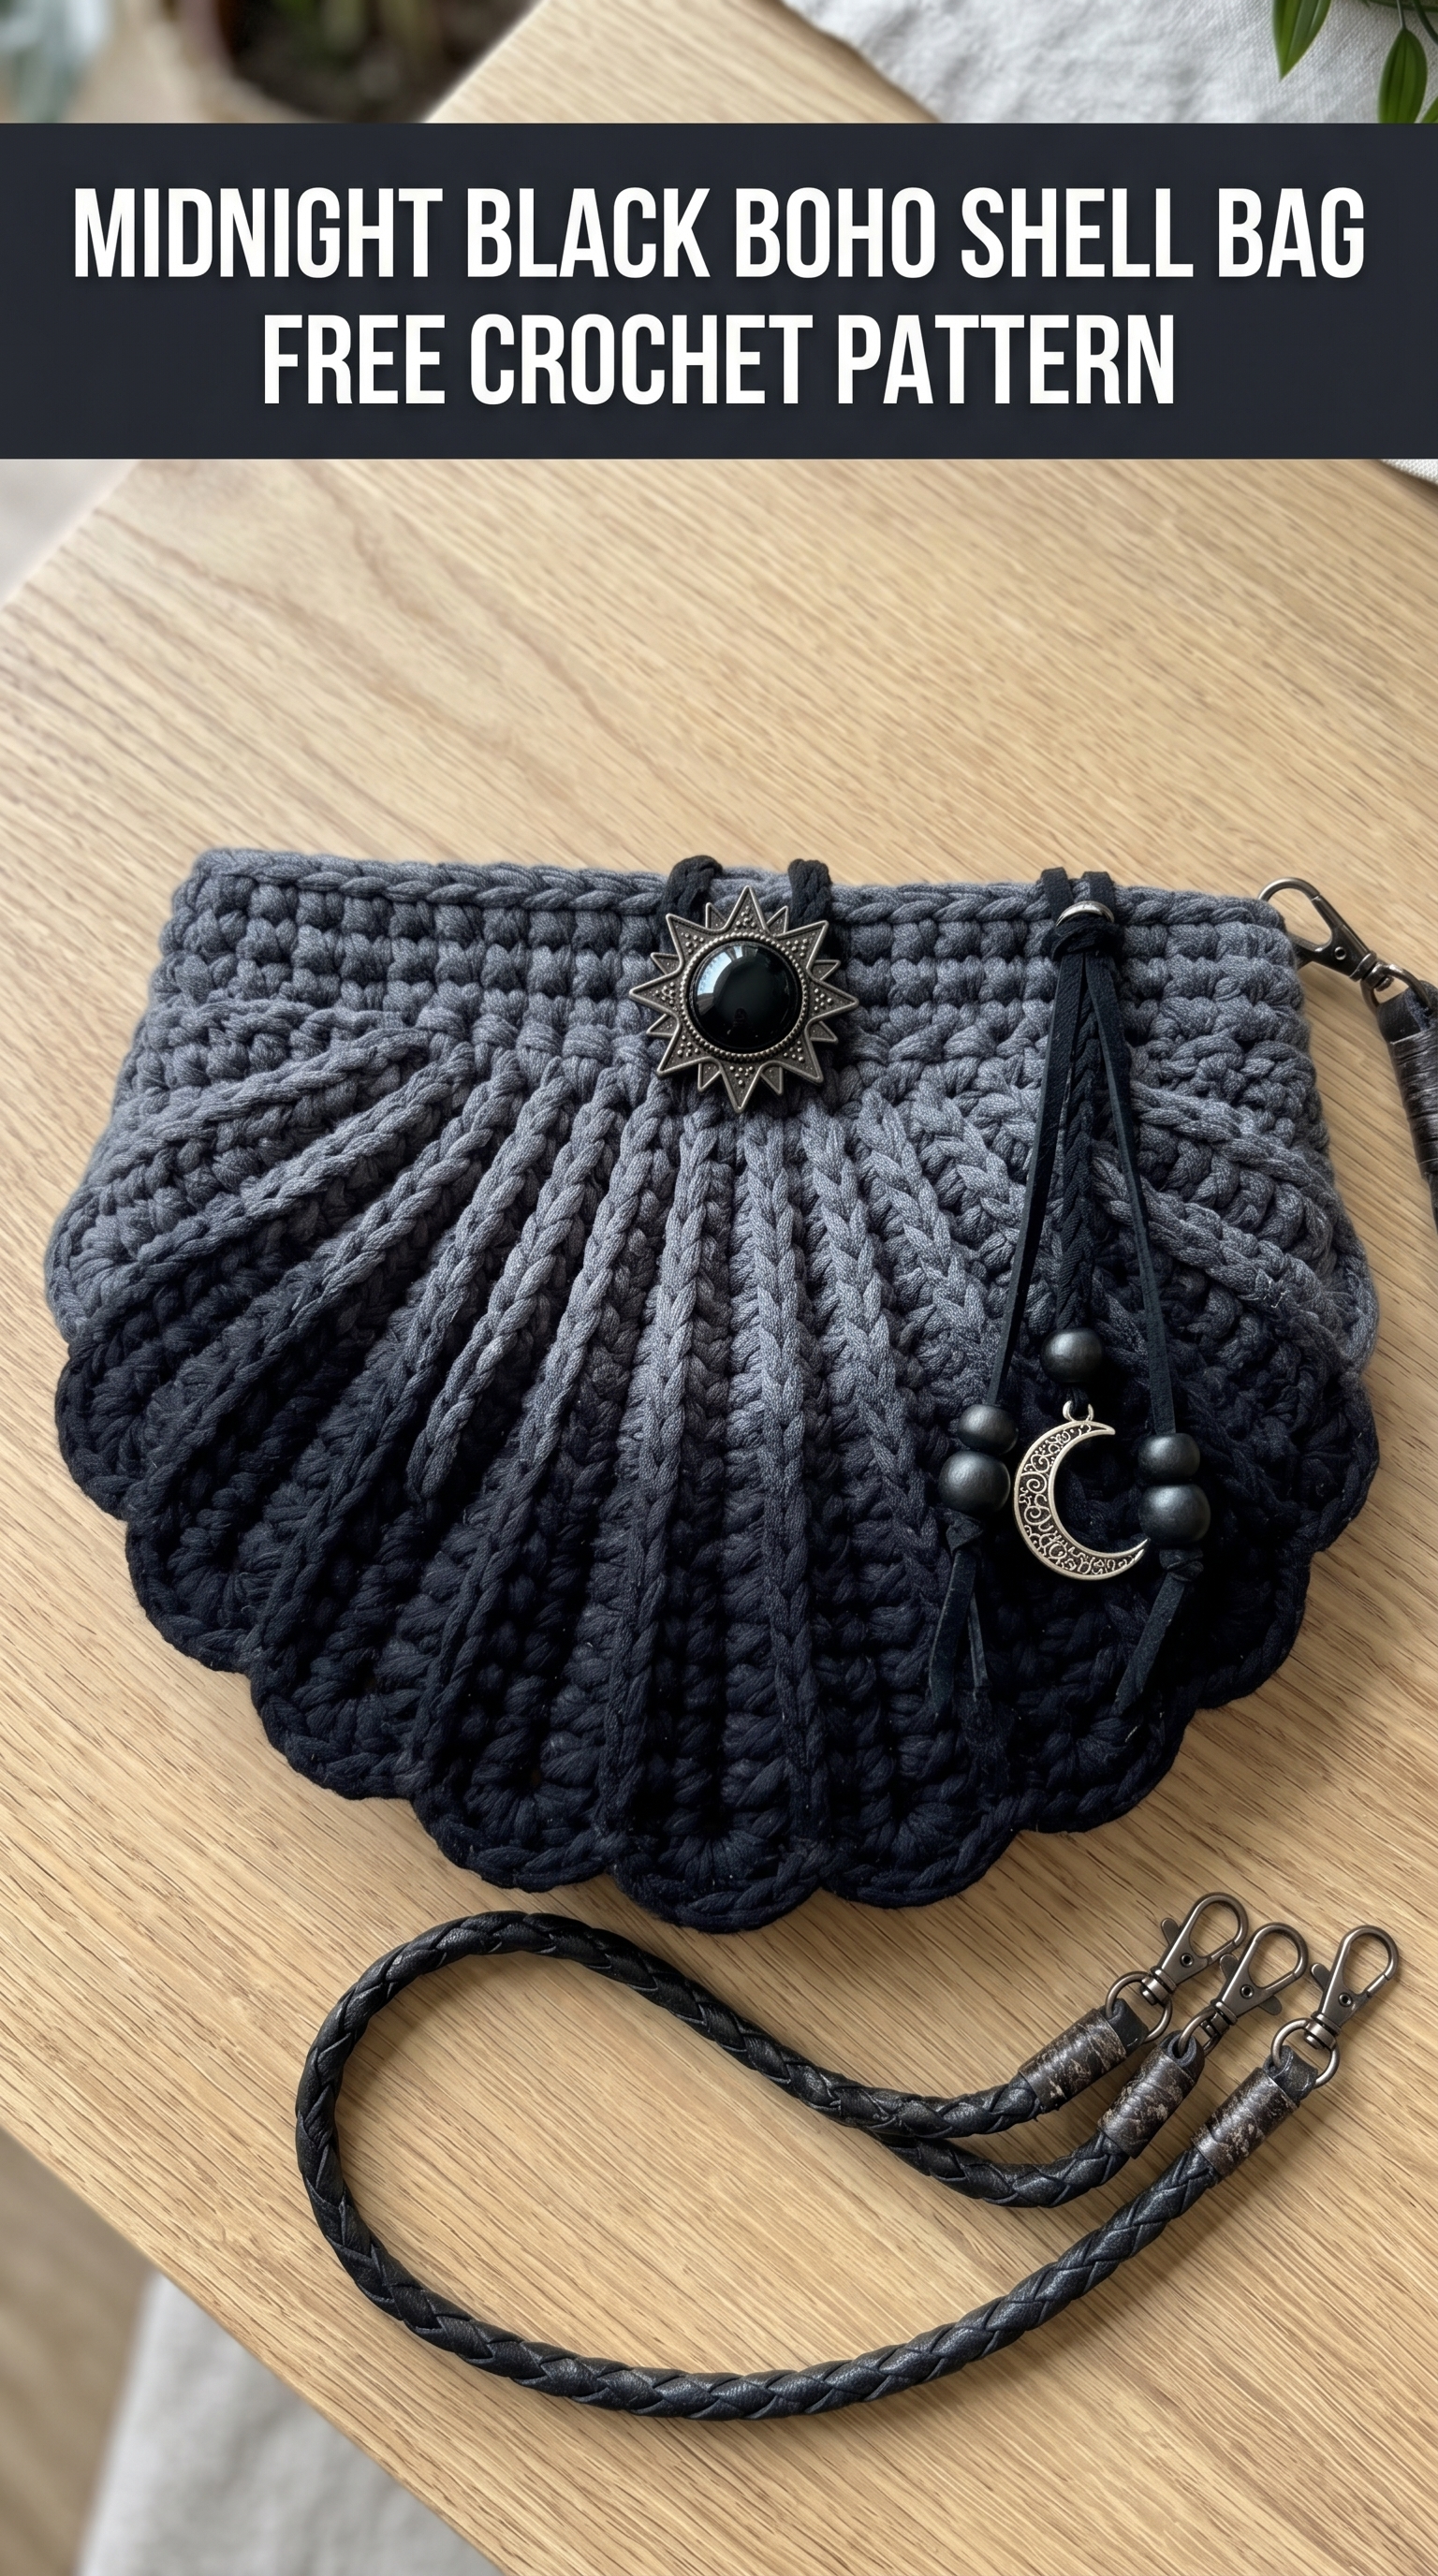
This gorgeous shell-shaped crossbody bag is about to become your new favorite accessory. I fell in love with the dramatic scalloped silhouette the moment I finished it. The radiating texture creates those beautiful fan-like ridges that catch the light perfectly. And that moody black colorway? Absolutely stunning for a boho or witchy aesthetic.
If you can work basic stitches and increases, you can absolutely make this bag. I would call this an intermediate level project, but a confident beginner who takes their time will do just fine. The construction is more straightforward than it looks. Promise.
Let me walk you through everything you need to create your own Midnight Black Boho Shell Bag crochet pattern from start to finish.
Why You Will Love This Crochet Bag Pattern
This is not your average crochet purse. The shell shape gives it a romantic, mermaid-inspired vibe while the black yarn keeps it edgy and modern. The textured ridges radiate outward from the center bottom, creating that signature scallop look without any complicated colorwork.
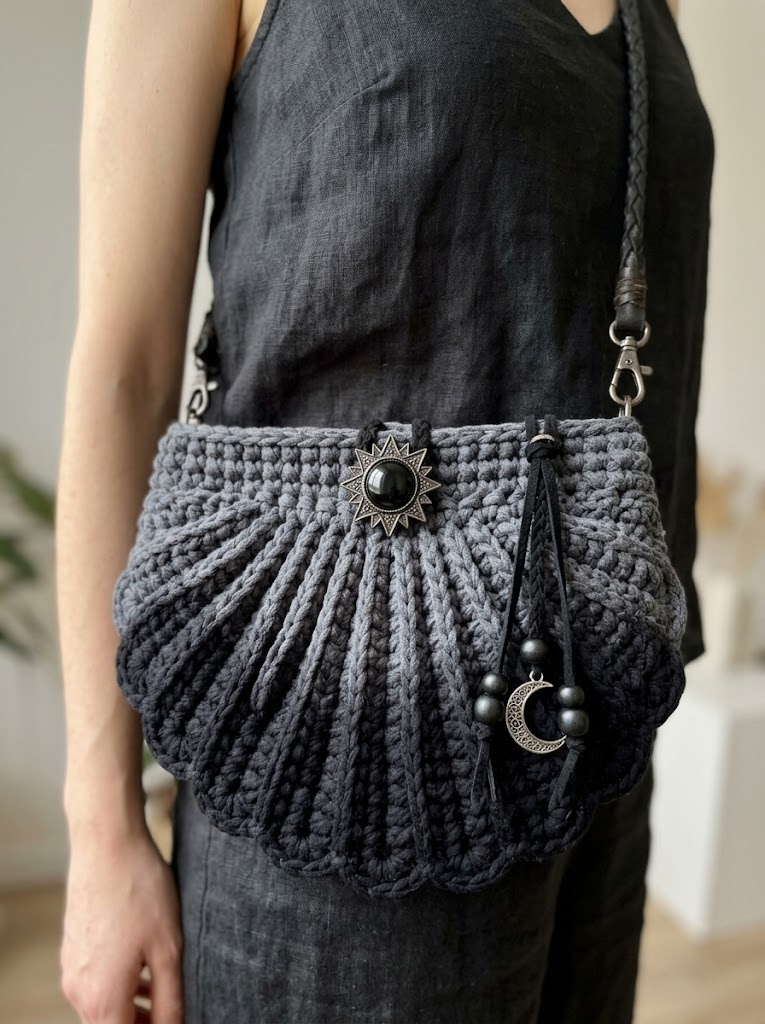
The finished bag sits beautifully against your hip as a crossbody. It is the perfect size for your phone, wallet, keys, and a few extras. Not too bulky, not too small.
What makes this crochet tutorial special is the construction method. You work from the center bottom outward in joined rounds, increasing strategically to form the shell shape. The top edge gets a simple border and hardware attachment points for your strap.
Materials and Tools You Will Need
Gather these supplies before you start. Having everything ready makes the process so much smoother.
Yarn
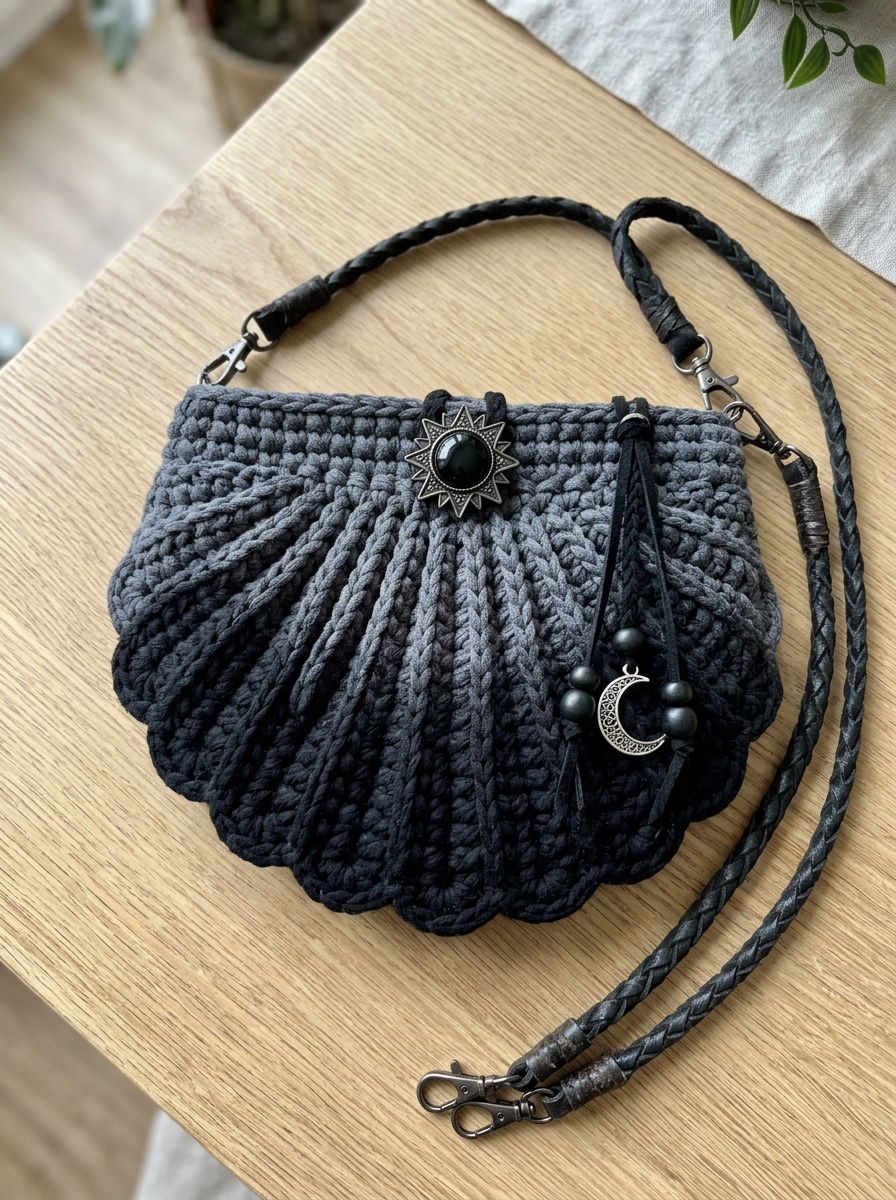
T-shirt yarn or fabric tape yarn in black or dark charcoal gray. You will need approximately 200 to 250 grams depending on your tension. This chunky ribbon-style yarn creates that substantial, structured look you see in the photo.
The yarn appears to be a super bulky weight (category 6) cotton or cotton blend tape yarn. Brands like Hoooked Zpagetti, Yarn Art Maccheroni, or similar recycled cotton tape yarns work beautifully.
If you cannot find t-shirt yarn, you could substitute bulky cotton rope yarn or even macrame cord in a 3 to 4mm thickness. Just test your gauge first.
Hook
10mm or 12mm crochet hook works best with t-shirt yarn. I used a 10mm for a tighter, more structured fabric. If your stitches feel too tight or hard to work, size up.
Hardware and Notions
Abbreviations and Stitch Definitions
Let me break down every stitch you will use. Read through these before starting so nothing catches you off guard.
Ch = Chain. Wrap yarn over hook, pull through loop on hook. This is your foundation stitch.
Sl st = Slip stitch. Insert hook, yarn over, pull through stitch AND loop on hook in one motion. Used for joining rounds.
Sc = Single crochet. Insert hook into stitch, yarn over, pull up a loop (2 loops on hook), yarn over, pull through both loops.
Hdc = Half double crochet. Yarn over, insert hook, yarn over, pull up a loop (3 loops on hook), yarn over, pull through all 3 loops.
Dc = Double crochet. Yarn over, insert hook, yarn over, pull up a loop (3 loops on hook), yarn over, pull through 2 loops, yarn over, pull through remaining 2 loops.
Inc = Increase. Work 2 stitches into the same stitch. This adds one stitch to your count.
Sk = Skip. Pass over the indicated stitch without working into it.
St(s) = Stitch(es).
BLO = Back loop only. Work into just the back horizontal loop of the stitch instead of both loops.
Gauge
With t-shirt yarn and a 10mm hook in single crochet:
6 stitches and 6 rows = 4 inches (10cm)
Gauge is less critical for a bag than for a garment. But if your fabric feels floppy or too stiff, adjust your hook size. You want a dense fabric that holds its shape but is not painfully hard to work.
Finished Dimensions
Width at widest point: approximately 10 to 11 inches (25 to 28cm)
Height from bottom center to top edge: approximately 7 to 8 inches (18 to 20cm)
Step by Step Crochet Pattern Instructions
This bag is worked in joined rounds from the center bottom outward. You will create two identical shell panels, then join them together. The ridged texture comes from working in the back loop only throughout most of the pattern.
Shell Panel (Make 2)
Magic Ring Setup
Start with a magic ring. If you have never made one, here is the quick version: wrap yarn around your fingers twice, insert hook, pull up a loop, chain 1 to secure. You will work your first round into this ring, then pull the tail tight to close the center.
Alternatively, chain 4 and slip stitch to join into a ring.
Round 1: Work 6 sc into magic ring. Sl st to first sc to join. Pull tail to close ring tightly. (6 sts)
Round 2: Ch 1 (does not count as a stitch throughout). Work 2 sc in each st around. Sl st to join. (12 sts)
Round 3: Ch 1. *Sc in next st, 2 sc in next st.* Repeat from * to * around. Sl st to join. (18 sts)
Round 4: Ch 1. Working in BLO, *sc in next 2 sts, 2 sc in next st.* Repeat from * to * around. Sl st to join. (24 sts)
This is where the magic happens. Working in the back loop only creates those raised ridges on the right side of your fabric. Each unworked front loop forms a horizontal line that radiates outward.
Round 5: Ch 1. Working in BLO, *sc in next 3 sts, 2 sc in next st.* Repeat from * to * around. Sl st to join. (30 sts)
Round 6: Ch 1. Working in BLO, *sc in next 4 sts, 2 sc in next st.* Repeat from * to * around. Sl st to join. (36 sts)
Round 7: Ch 1. Working in BLO, *sc in next 5 sts, 2 sc in next st.* Repeat from * to * around. Sl st to join. (42 sts)
Round 8: Ch 1. Working in BLO, *sc in next 6 sts, 2 sc in next st.* Repeat from * to * around. Sl st to join. (48 sts)
Round 9: Ch 1. Working in BLO, *sc in next 7 sts, 2 sc in next st.* Repeat from * to * around. Sl st to join. (54 sts)
Round 10: Ch 1. Working in BLO, *sc in next 8 sts, 2 sc in next st.* Repeat from * to * around. Sl st to join. (60 sts)
At this point, your panel should be roughly 8 to 9 inches across. If you want a larger bag, continue the increase pattern (adding one more sc between increases each round) for 1 or 2 additional rounds.
Creating the Scalloped Edge
Now we shape that beautiful wavy shell edge. This is worked in one final round.
Round 11 (Scallop Round): Ch 1. Working in BLO:
*Sc in next 2 sts, hdc in next st, dc in next st, 2 dc in next st, dc in next st, hdc in next st, sc in next 2 sts, sl st in next st.*
Repeat from * to * around. This creates 6 scallop sections. Sl st to join. Fasten off.
Do not worry if your scallops look a little uneven at first. They relax and settle beautifully once the bag is assembled.
Joining the Panels
Hold both shell panels together with wrong sides facing inward (ridges facing out on both sides). The textured lines should radiate outward on the visible exterior.
Joining Round: Starting at one side edge, approximately 1 inch below the top corner, work sc through both layers to join. Continue around the curved bottom edge to the opposite side, stopping approximately 1 inch below the other top corner.
Leave the top edge open for the bag opening.
Fasten off and weave in ends securely.
Top Border and Hardware Attachment
Turn your bag so the opening faces up. Join yarn at one side seam.
Border Round 1: Ch 1. Sc evenly around the entire top opening edge, working through both layers at the sides. Aim for approximately 50 to 54 sts total around the opening. Sl st to join.
Border Round 2: Ch 1. Sc in each st around. When you reach each upper corner (where you want to attach the strap hardware), work 3 sc into that corner stitch to create an attachment point. Sl st to join.
Border Round 3 (Optional): Repeat Round 2 for a thicker, more structured top edge.
Fasten off.
Attaching Hardware
D-rings or Swivel Clasps: Using a small piece of matching yarn or thin leather cord, loop through your hardware and secure it to each upper corner of the bag. You can sew directly into the crocheted fabric or create a small yarn tab that folds over the hardware.
Decorative Closure: Position your sun brooch or decorative button at the top center front. Sew or pin in place. The closure is decorative in the photo, but you could add a functional button loop on the back panel if desired.
Strap: Clip your braided leather strap to the D-rings. Adjust length for crossbody wear.
Adding Charms and Embellishments
The moon charm and beaded tassel in the photo add such a gorgeous finishing touch. Thread beads onto thin leather cord or waxed cotton cord. Add your charm. Knot securely and attach to one side of the bag opening.
This is completely optional but really elevates the finished piece.
Helpful Tips for Success
Working with t-shirt yarn: This yarn can be tricky at first. Keep your tension relaxed. The yarn tends to twist, so untwist it every few stitches if needed. Your hands might get tired since it is heavier than regular yarn. Take breaks.
Keeping ridges defined: Make sure you are consistently working in the back loop only. If the ridges seem to disappear, check that you are catching just one loop.
Making panels match: Count your stitches at the end of each round. Both panels need the same stitch count to join neatly.
Stiff fabric is good: Your fabric should feel firm and structured. If it flops around, your hook is too large or your tension too loose.
Pattern Variations to Try
Once you master this beginner friendly shell bag shape, try these ideas:
Color options: This silhouette looks stunning in cream, blush pink, sage green, or navy blue. Ombre t-shirt yarn creates a gorgeous gradient effect.
Size adjustments: Add or subtract increase rounds to make a clutch (fewer rounds) or a larger tote (more rounds).
Lining: Cut two pieces of fabric slightly smaller than your panels, hem the edges, and hand stitch inside for a polished interior.
Different closure: Add a zipper across the top, magnetic snaps, or a drawstring.
How to Care for Your Finished Bag
Spot clean with a damp cloth when needed. If your bag needs a deeper clean, hand wash in cool water with mild detergent. Reshape while wet and lay flat to dry. Do not machine wash or dry, as t-shirt yarn can stretch and warp.
Store stuffed with tissue paper to maintain the shell shape.
You Did It
I hope this Midnight Black Boho Shell Bag crochet pattern inspires you to create something truly special. This bag turns heads. I have gotten so many compliments wearing mine, and people genuinely cannot believe it is handmade.
Take your time with the construction, trust the process, and do not hesitate to frog (rip it, rip it) if something looks off. Every maker frogging is just a maker getting closer to perfection.
Thank you so much for choosing to make this pattern. It means the world that you trust me with your crafting time.
I would absolutely love to see your finished shell bags. Tag me on Instagram or share in my Facebook group so I can cheer you on. Seeing your creations is genuinely the best part of my day.
Happy hooking, friend. You have got this.