
Micro crochet jewelry looks intimidating. I get it. Those tiny mushrooms, delicate fern fronds, and itty bitty acorns seem like they require years of experience and superhuman patience. But here’s the truth: if you can single crochet in the round, you can absolutely make this bracelet. Each charm is worked separately using basic stitches you already know. The magic comes from working small, not from complicated techniques. Whether you’ve been crocheting for decades or just mastered your first amigurumi last month, this woodland charm bracelet is completely within your reach. Let me walk you through every single step.
About This Crochet Charm Bracelet Pattern
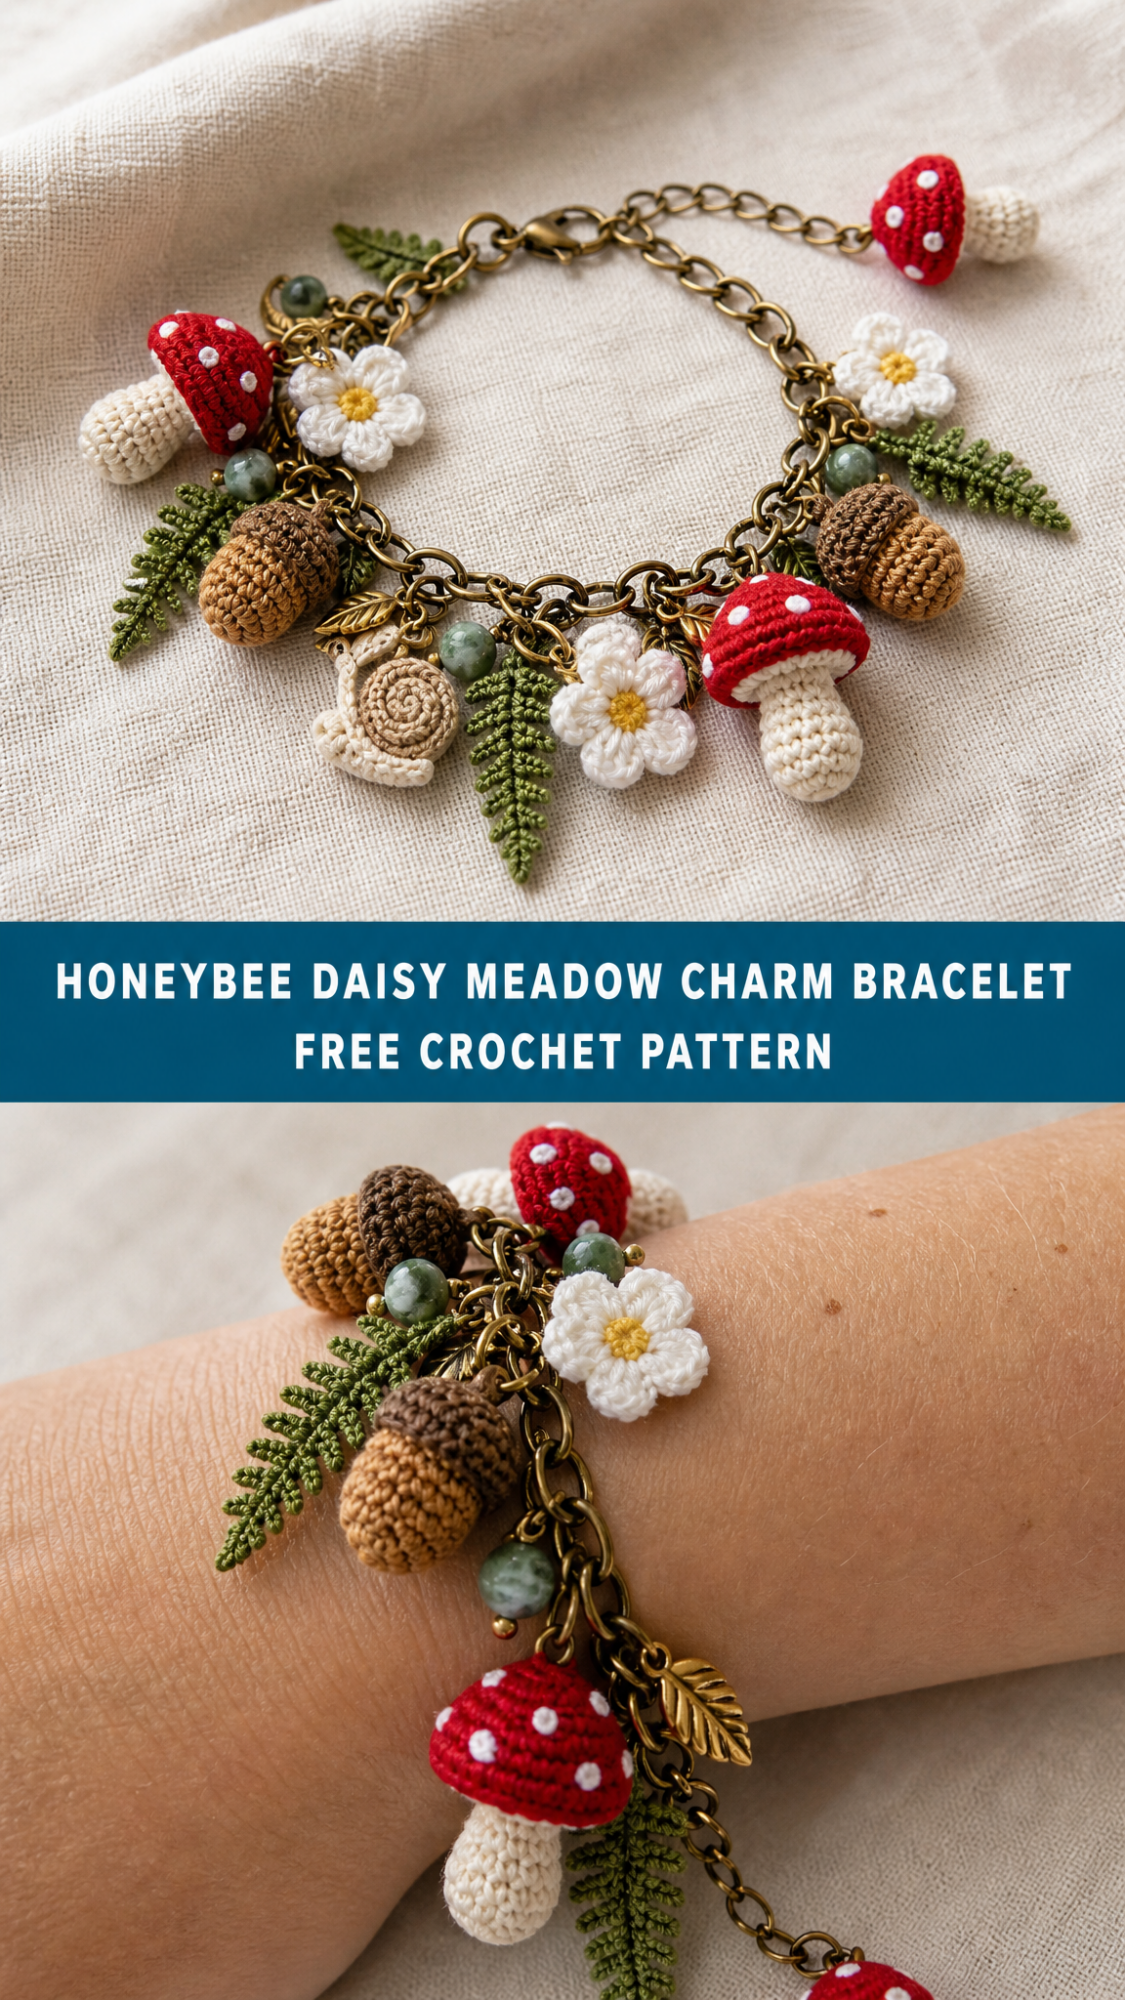
This enchanting woodland charm bracelet features miniature crocheted elements that capture the essence of a forest floor. You’ll create tiny toadstool mushrooms with classic red caps and white spots, acorns in varying shades of brown, delicate fern leaves, dainty daisy flowers, and a sweet snail. These charms attach to an antique brass chain alongside sage green beads and metal leaf accents.
The finished bracelet measures approximately 7 to 8 inches long, depending on your chain length. Each mushroom charm stands about 1 inch tall. The acorns measure roughly half an inch. These proportions create a beautifully balanced, wearable piece of art.
Skill level: Advanced beginner to intermediate. You need comfort with working in continuous rounds and decreasing, but no specialized jewelry techniques are required.
Time to complete: 4 to 6 hours total for all charms, plus 30 minutes for assembly.
Materials Needed for Your Charm Bracelet
Yarn
You’ll need crochet thread or fingering weight cotton yarn in the following colors:
I recommend size 10 crochet thread for the cleanest results. DMC Petra or Aunt Lydia’s Classic work beautifully. You can also use fingering weight cotton like Scheepjes Catona.
Hook and Tools
Jewelry Supplies
Abbreviations and Stitch Definitions
Let me explain each stitch before we begin. Understanding these terms will make the pattern much easier to follow.
Ch = Chain. Wrap yarn over hook, pull through loop on hook. This creates foundation stitches.
Sl st = Slip stitch. Insert hook, yarn over, pull through stitch AND loop on hook in one motion. Used for joining and invisible stitches.
Sc = Single crochet. Insert hook, yarn over, pull up a loop (2 loops on hook), yarn over, pull through both loops. Your most basic stitch.
Inc = Increase. Work 2 single crochet stitches into the same stitch. This adds one stitch to your count.
Dec = Decrease (invisible decrease preferred). Insert hook through front loops only of next 2 stitches, yarn over, pull through both, yarn over, pull through remaining 2 loops. This removes one stitch from your count.
Magic ring = Adjustable starting loop. Wrap yarn around finger, insert hook, pull up loop, chain 1, work stitches into ring, pull tail to close. Also called magic circle or adjustable ring.
FLO = Front loop only. Work into the loop closest to you instead of both loops.
BLO = Back loop only. Work into the loop farthest from you.
Crochet Pattern Instructions
Toadstool Mushroom Charm (Make 2 to 3)
The mushroom is the star of this bracelet. You’ll work the cap and stem separately, then join them.
Mushroom Cap (Red)
Round 1: Make a magic ring, work 6 sc into ring, pull tight to close. (6 sts)
Round 2: Inc in each st around. (12 sts)
Round 3: *Sc 1, inc* repeat around. (18 sts)
Round 4: Sc in each st around. (18 sts)
Round 5: Working in BLO only, *sc 1, dec* repeat around. (12 sts)
Fasten off, leaving a long tail for sewing. Stuff cap lightly with fiberfill.
White Spots
Using cream thread, embroider 4 to 6 French knots randomly across the red cap. Alternatively, you can use tiny dots of white fabric paint if embroidery frustrates you.
To make a French knot: Thread your needle, bring it up through the cap where you want a spot. Wrap thread around needle 2 to 3 times. Insert needle back down very close to where you came up, holding wraps in place. Pull through slowly.
Mushroom Stem (Cream)
Round 1: Make a magic ring, work 6 sc into ring. (6 sts)
Round 2: Inc in each st around. (12 sts)
Rounds 3 to 6: Sc in each st around. (12 sts)
Round 7: *Sc 1, dec* repeat around. (8 sts)
Stuff stem lightly. Do not fasten off.
Joining Cap to Stem
Place cap on top of stem, wrong sides facing inward. Using your working yarn, slip stitch through both layers to join. Weave in ends securely.
Attach a small jump ring through one stitch at the top edge of the cap for hanging.
Acorn Charm (Make 4 to 6)
These tiny acorns work up in about 10 minutes each. Make them in different brown combinations for visual interest.
Acorn Body (Tan)
Round 1: Make a magic ring, work 6 sc into ring. (6 sts)
Round 2: Inc in each st around. (12 sts)
Rounds 3 to 5: Sc in each st around. (12 sts)
Round 6: *Sc 1, dec* repeat around. (8 sts)
Stuff very lightly. The acorn should feel firm but not bulging.
Round 7: Dec around. (4 sts)
Fasten off. Close hole by weaving yarn through remaining stitches and pulling tight.
Acorn Cap (Dark Brown or Medium Brown)
Round 1: Make a magic ring, work 6 sc into ring. (6 sts)
Round 2: Inc in each st around. (12 sts)
Round 3: Working in BLO only, sc in each st around. (12 sts)
This creates the textured ridge you see on real acorn caps.
Round 4: Sl st in each st around. (12 sts)
Fasten off, leaving a long tail.
Assembly
Place cap on top of acorn body. Sew in place using the tail. Create a small stem at the top by chaining 3, then slip stitching back down the chain. Attach a jump ring through the stem.
Fern Leaf Charm (Make 1 to 2)
The fern adds wonderful texture and movement to your bracelet. This is worked flat.
Foundation: Ch 15.
Row 1: Skip first ch, sl st in next 2 ch, *sc 1, hdc 1, dc 1, ch 3, sl st in 2nd ch from hook, sl st in next ch, dc 1, hdc 1, sc 1, sl st 2* repeat pattern along chain, adjusting as needed to reach the end.
Don’t panic if your first fern looks wobbly. The leaflets naturally curl and twist, which actually looks more realistic.
For a simpler fern, try this alternative:
Simple Fern: Ch 12. Working back along chain: sl st 1, *ch 3, sl st back into same base ch, sl st 1 in next ch* repeat to end.
Fasten off. Attach jump ring at the stem end.
Daisy Flower Charm (Make 1 to 2)
These cheerful flowers add brightness to the woodland palette.
Flower Center (Yellow)
Round 1: Make a magic ring, work 6 sc into ring, sl st to join. (6 sts)
Fasten off.
Petals (Cream)
Join cream thread to any stitch on the yellow center.
*Ch 4, sl st in 2nd ch from hook, sl st in next ch, sl st in next ch, sl st into next st on center* repeat around. You should have 6 petals.
Fasten off. Weave in ends. Attach jump ring between two petals.
Snail Charm (Make 1)
The snail shell is a simple spiral. This charm adds whimsy to your bracelet.
Shell (Tan or Yellow)
Round 1: Make a magic ring, work 6 sc into ring. (6 sts)
Round 2: Inc in each st around. (12 sts)
Rounds 3 to 4: Sc in each st around. (12 sts)
Stuff lightly. Continue decreasing:
Round 5: *Sc 1, dec* repeat around. (8 sts)
Round 6: Dec around. (4 sts)
Fasten off. The piece will naturally curl into a spiral shape. Gently coil it and tack with a few stitches if needed.
Snail Body (Cream)
Ch 8. Sl st in 2nd ch from hook and in each ch across. (7 sl sts)
Sew body to the flat side of the shell. Attach jump ring at the top of the shell.
Small Mushroom Variation (Make 1 to 2)
For variety, make one or two smaller mushrooms.
Mini Cap (Red)
Round 1: Magic ring, 6 sc. (6 sts)
Round 2: Inc around. (12 sts)
Round 3: Sc around. (12 sts)
Fasten off and stuff.
Mini Stem (Cream)
Round 1: Magic ring, 6 sc. (6 sts)
Rounds 2 to 3: Sc around. (6 sts)
Join to cap. Add spots and jump ring.
Bracelet Assembly Instructions
Now comes the fun part: putting everything together.
Step 1: Lay out your chain flat. Arrange all your charms, beads, and metal leaf accents in a pleasing pattern. I like to place the larger mushrooms near the center and work outward with smaller elements.
Step 2: Using chain nose pliers, open a jump ring by twisting sideways (never pull apart). Thread through the attachment point on your first charm.
Step 3: Slide the open jump ring through a link in your chain. Close the jump ring by twisting back together.
Step 4: Continue attaching charms, spacing them approximately 1 inch apart. Alternate between crochet charms, beads, and metal leaves for balance.
Step 5: Thread beads onto headpins if needed, create a wrapped loop, and attach to chain links between crochet charms.
Step 6: Check that your clasp is securely attached. Test the bracelet around your wrist before wearing.
Tips for Perfect Micro Crochet
Tension matters more than ever at this scale. Work tightly to prevent stuffing from showing through. If you normally crochet loosely, go down one hook size.
Good lighting is essential. Position yourself near a window or use a bright craft lamp. Your eyes will thank you.
Take breaks. Micro crochet can strain your hands and eyes. Set a timer for 30 minutes and stretch.
Count your stitches every round. With so few stitches per round, one mistake throws off the entire shape.
Use stitch markers liberally. Mark the first stitch of each round so you never lose your place.
Customization Ideas
This pattern is wonderfully flexible. Consider these variations:
Swap the red mushroom caps for orange, yellow, or purple for a fantasy forest feel.
Add tiny strawberries using the same technique as the mushroom cap, but without the stem attachment.
Include miniature pinecones by working tightly packed bobble stitches in brown.
Create leaves using the simple leaf pattern: Ch 6, sl st in 2nd ch, sc 1, hdc 1, dc 1, hdc 1 in last ch, then work back down the opposite side of the chain.
Use silver chain instead of brass for a more modern look.
Caring for Your Crochet Jewelry
Handle your charm bracelet gently. The thread is durable but can snag on rough surfaces.
To clean, spot wash individual charms with mild soap and water. Let dry completely before wearing.
Store flat in a jewelry box to prevent tangling.
Avoid wearing while doing dishes, gardening, or other activities that might damage the delicate pieces.
Final Thoughts on This Woodland Charm Bracelet Crochet Pattern
You did it. You now have everything you need to create this stunning Honeybee Daisy Meadow Charm Bracelet from start to finish. Each tiny charm showcases your skill while remaining genuinely achievable. The combination of crocheted elements, glass beads, and metal accents creates a bracelet that looks like it came from an artisan boutique.
This makes an incredible gift for the nature lover in your life. Package it in a small box with tissue paper and watch their face light up when they realize you made it by hand.
I would absolutely love to see your finished bracelets. Seriously, nothing makes my day more than seeing your creations come to life. Tag me on Instagram or share a photo in my Facebook group so I can cheer you on.
Thank you so much for trusting me with your crafting time. Happy hooking, friend.
If you loved this pattern, do me a quick favor and save it to your Pinterest boards so you can find it easily when you’re ready to start. And please drop a comment below if you make one. I read every single comment and genuinely want to hear how your bracelet turns out.