
Last month I was scrolling through my photos looking for something completely unrelated when I stumbled across a picture from my cousin’s wedding three years ago. There I was, holding this tiny clutch that matched absolutely nothing I was wearing. I remember thinking at the time how much I wished I had a bag with a little more personality. Something that made a statement without screaming for attention. That memory sat with me for weeks until I finally picked up my hook and started playing around with shapes. What came out of that experimenting session is this gorgeous bow bag, and honestly, I think past-me would have been thrilled to carry it.
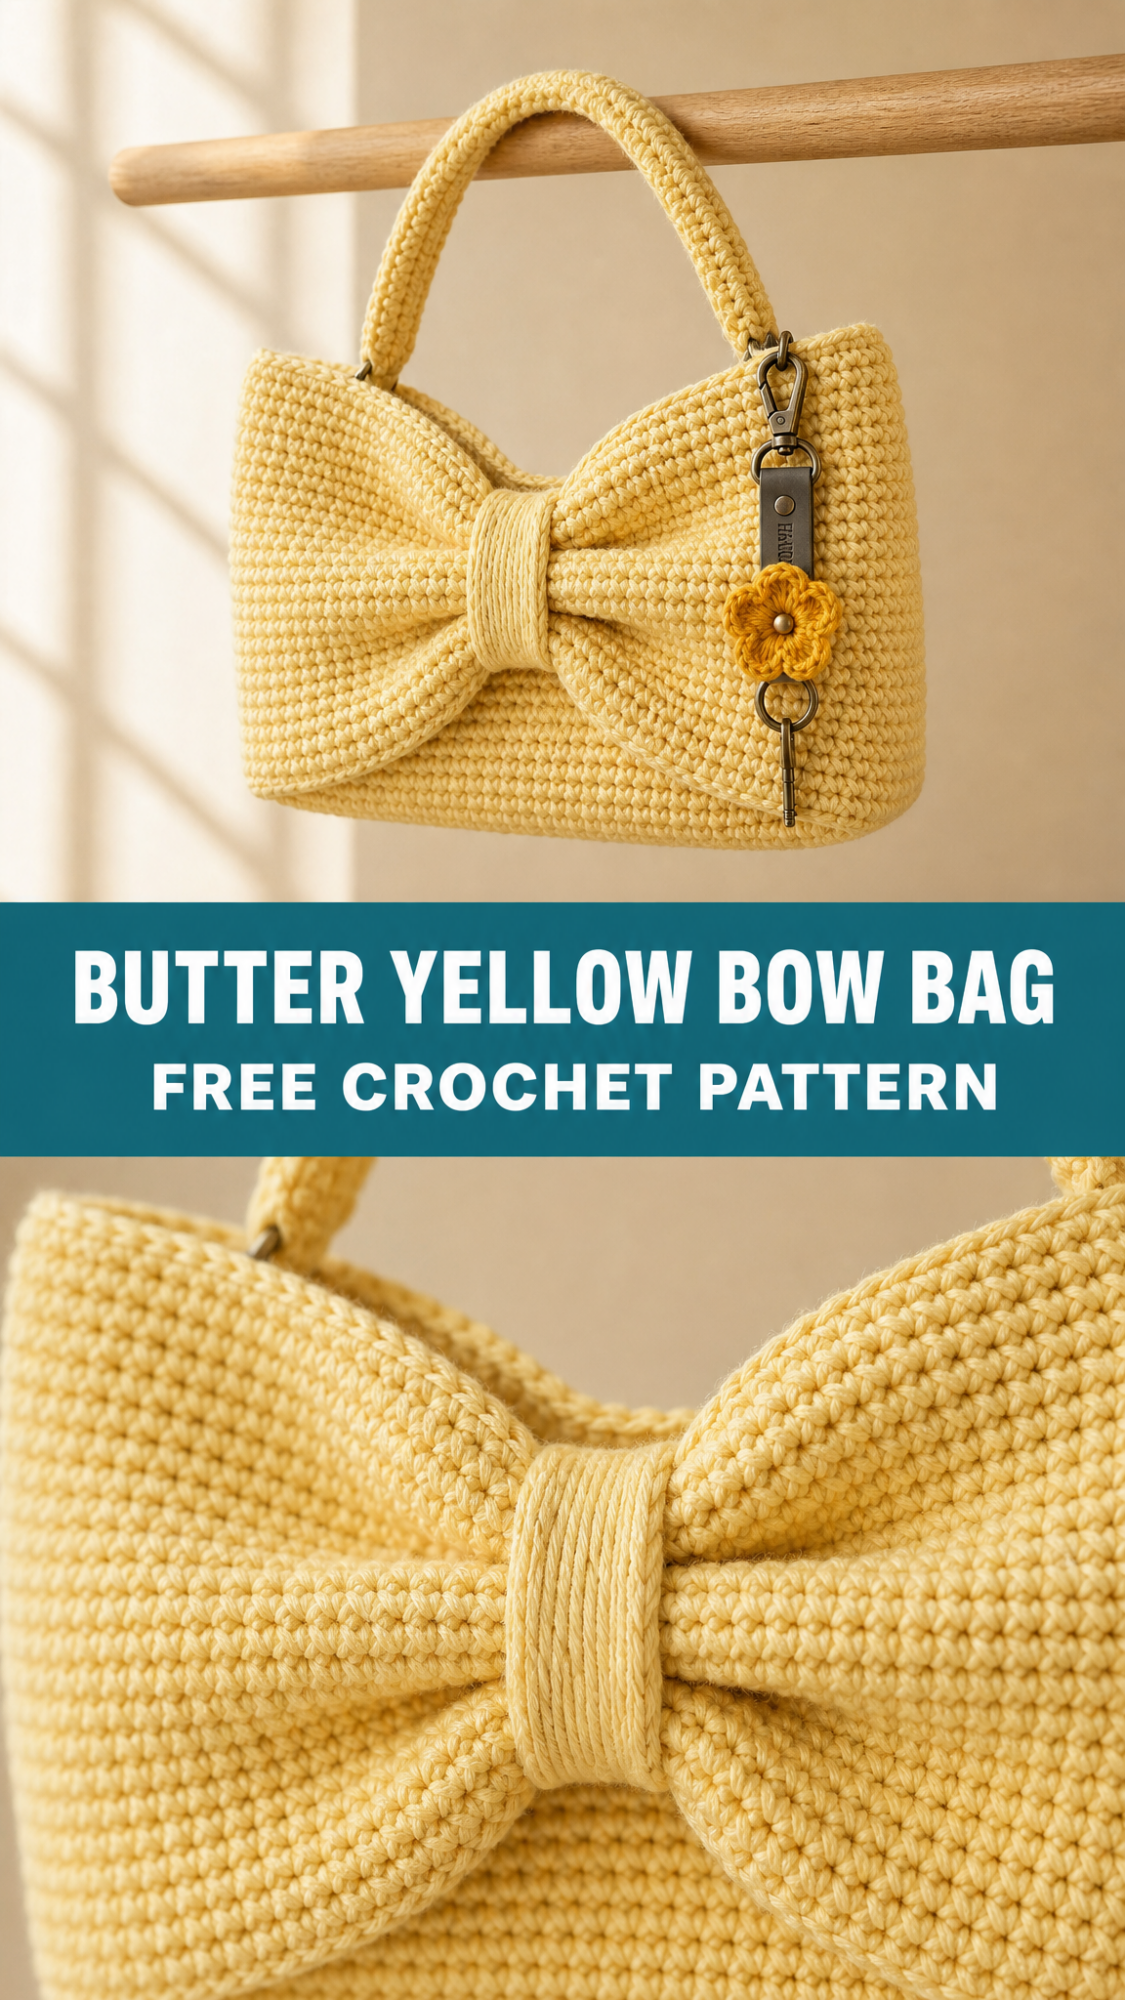
This crochet bow bag pattern creates a structured handbag with a dramatic oversized bow detail on the front. The construction is simpler than it looks, I promise. You are basically making a rectangular body, adding a separate bow piece, and bringing it all together with a wrapped center band. The single crochet fabric gives you that dense, sturdy texture that holds its shape beautifully without any lining needed.
Why You Will Love This Crochet Bow Bag Pattern
This bag hits that sweet spot between everyday practical and special occasion worthy. The structured silhouette looks polished enough for dinner out, but the soft crochet texture keeps it from feeling too formal. I have been reaching for mine constantly since I finished it.
What makes this pattern special:
The charcoal grey version you see here is incredibly versatile, but imagine this in butter yellow for spring, dusty rose for date night, or classic black for everything. The possibilities really are endless.
Skill Level
Intermediate beginner to confident beginner. If you can work single crochet in rows and rounds, you have all the skills you need. The construction involves some shaping and assembly, which might feel new if you have only made flat projects before. I will walk you through every step.
Materials Needed
Yarn:
Cotton yarn or a cotton acrylic blend works best here. You want something with body that will not stretch out over time. I used a sturdy mercerized cotton that gave me that lovely defined stitch texture you can see in the close-up photo.
Hook:
Notions:
Gauge
18 single crochet stitches and 20 rows = 4 inches (10cm) in single crochet worked flat.
Gauge matters for this project because it determines your finished bag size. Take a few minutes to make a swatch. If your swatch is too big, go down a hook size. Too small? Go up a hook size.
Finished Dimensions
Abbreviations and Stitch Definitions
Ch = Chain. Wrap yarn over hook and pull through the loop on your hook. This creates a foundation or adds height.
Sc = Single crochet. Insert hook into stitch, yarn over and pull up a loop (2 loops on hook), yarn over and pull through both loops.
Sl st = Slip stitch. Insert hook into stitch, yarn over and pull through both the stitch and the loop on your hook in one motion.
Inc = Increase. Work 2 single crochet stitches into the same stitch. This adds one stitch to your count.
Dec = Decrease. Insert hook into first stitch and pull up a loop, insert hook into next stitch and pull up a loop (3 loops on hook), yarn over and pull through all 3 loops. This removes one stitch from your count.
St(s) = Stitch(es)
RS = Right side (the side that faces out on your finished project)
WS = Wrong side
Pattern Notes
Crochet Bow Bag Pattern Instructions
Part 1: Bag Base and Body
The bag starts with an oval base, then you work up the sides in continuous rounds.
Foundation:
Ch 37.
Round 1: Sc in 2nd ch from hook, sc in next 34 ch, 3 sc in last ch (this is the end of your chain, you will work around the corner). Working along the opposite side of the foundation chain, sc in next 34 sts, 2 sc in last st. Do not join. Place marker. (74 sts)
Round 2: 2 sc in first st, sc in next 34 sts, 2 sc in each of next 3 sts, sc in next 34 sts, 2 sc in last 2 sts. (82 sts)
Round 3: Sc in first st, 2 sc in next st, sc in next 34 sts, (sc in next st, 2 sc in next st) 3 times, sc in next 34 sts, (sc in next st, 2 sc in next st) twice. (90 sts)
Round 4: Sc in first 2 sts, 2 sc in next st, sc in next 34 sts, (sc in next 2 sts, 2 sc in next st) 3 times, sc in next 34 sts, (sc in next 2 sts, 2 sc in next st) twice. (98 sts)
Round 5: Working in back loops only this round, sc in each st around. (98 sts)
This creates a defined edge where the base meets the sides. You will notice your work wants to fold up now. That is exactly what we want.
Rounds 6 through 35: Sc in each st around. (98 sts)
Work these 30 rounds evenly. Your bag body should measure approximately 6 inches tall from the base fold line.
Part 2: Upper Opening
Now we transition to working in rows to create the bag opening.
Row 1 (RS): Sc in next 49 sts, ch 1, turn. Leave remaining 49 sts unworked. (49 sts)
Rows 2 through 8: Ch 1, sc in each st across, turn. (49 sts)
Fasten off and weave in end.
Second Side:
Join yarn to the first unworked stitch from Row 1 on the opposite side.
Row 1 (RS): Ch 1, sc in same st and in each st across, turn. (49 sts)
Rows 2 through 8: Ch 1, sc in each st across, turn. (49 sts)
Fasten off. You now have a bag with an opening at the top.
Part 3: The Bow Piece
This is where the magic happens. The bow is essentially a large rectangle that gets gathered in the center.
Foundation:
Ch 61.
Row 1: Sc in 2nd ch from hook and in each ch across, turn. (60 sts)
Rows 2 through 40: Ch 1, sc in each st across, turn. (60 sts)
Fasten off, leaving a long tail for seaming.
Fold the rectangle in half lengthwise with wrong sides together. Whip stitch or slip stitch the long edges together to create a tube. Do not close the short ends.
Part 4: Center Band
This small piece wraps around the middle of the bow to create that gathered look.
Foundation:
Ch 9.
Row 1: Sc in 2nd ch from hook and in each ch across, turn. (8 sts)
Rows 2 through 20: Ch 1, sc in each st across, turn. (8 sts)
Fasten off, leaving a long tail.
Part 5: Handle
The handle is worked as a tube around a core for stability.
Foundation:
Ch 4, sl st to first ch to form a ring.
Round 1: Ch 1, 6 sc in ring. Do not join, work in continuous rounds. (6 sts)
Rounds 2 through 110: Sc in each st around. (6 sts)
Sl st to next st. Fasten off.
Your handle tube should measure approximately 22 inches long. If you want a taller handle drop, add more rounds. For a shorter drop, work fewer rounds.
Pro tip: I like to stuff my handle tube with a piece of sturdy cord or even a fabric strip as I work. This gives it more structure and helps it hold its curved shape.
Part 6: D-Ring Tabs (Make 2)
These small tabs attach to your D-rings or swivel clasps.
Foundation:
Ch 7.
Row 1: Sc in 2nd ch from hook and in each ch across, turn. (6 sts)
Rows 2 through 12: Ch 1, sc in each st across, turn. (6 sts)
Fasten off, leaving a long tail.
Assembly Instructions
Take your time with assembly. This is where your bag transforms from pieces into something spectacular.
Step 1: Attach the Handle
Thread one end of the handle through a D-ring tab. Fold the tab in half and stitch securely to the inside of the bag body, positioning it about 1 inch down from the top edge on one side. Repeat with the second D-ring tab on the opposite side.
Thread each end of your handle onto the D-rings.
Step 2: Create the Bow Shape
Take your bow tube piece. Pinch the center together, gathering the fabric to create that classic bow silhouette. The bow should look like two puffy sections on either side with a pinched waist in the middle.
Wrap the center band piece around this pinched section. Pull it snug so the bow keeps its shape. Stitch the ends of the center band together at the back.
Step 3: Attach the Bow to the Bag
Position the bow horizontally across the front of your bag, centered and sitting just below the top edge. The bow should cover most of the front panel.
Using your yarn needle and matching yarn, stitch the back of the bow to the front of the bag body. Work carefully along the top and bottom edges of the bow where it meets the bag. You want secure attachment without stitches showing on the right side.
Step 4: Final Details
Weave in all remaining ends. Check all your seams and reinforce any spots that feel loose.
If you want to add the flower keychain accent like the one shown, you can make a simple five-petal flower using your contrasting color. Work 5 ch, join, then work (ch 3, 2 dc, ch 3, sl st) five times into the ring. Attach to a lobster clasp and clip it to your D-ring.
Care Instructions
Hand wash your finished bag in cool water with mild soap. Gently squeeze out excess water without wringing. Reshape while damp and lay flat to dry. The dense single crochet fabric should hold its shape well, but avoid hanging the bag while wet.
Customization Ideas
Color combinations: Try a blush pink body with a cream bow, or go bold with emerald green and gold hardware.
Size adjustments: For a smaller clutch version, reduce your foundation chain by 10 stitches and work fewer rounds on the body. For a larger tote, increase accordingly.
Add a lining: If you want extra structure and protection for your belongings, cut fabric to fit the interior and hand stitch it in place along the upper edge.
Closure options: You could add a magnetic snap to the inside of the bag opening, or stitch a button and loop closure.
Troubleshooting Tips
My bow looks floppy: Make sure your gauge is correct. A looser gauge will create softer fabric. Try going down a hook size, or stuff the bow piece lightly with polyester fiberfill before gathering.
The bag does not stand up: Cotton yarn should provide enough structure. If yours is collapsing, you can insert a piece of plastic canvas cut to fit the base.
My handle twists: This is common with tube handles. Make sure you are working in true continuous rounds without any turning. Blocking the handle while it is damp can help straighten it.
Thank you so much for choosing this pattern for your next project. I genuinely hope you love making this bag as much as I loved designing it. If you finish one, please tag me on Instagram or share it in our Facebook group. Seeing your versions brings me so much joy.
If this pattern is going on your must-make list, go ahead and save it to your Pinterest boards so you can find it easily when you are ready to start. And I would absolutely love to hear from you in the comments below when you make yours. Tell me what color you are thinking, or share a picture of your finished bag. Happy hooking, friend.