
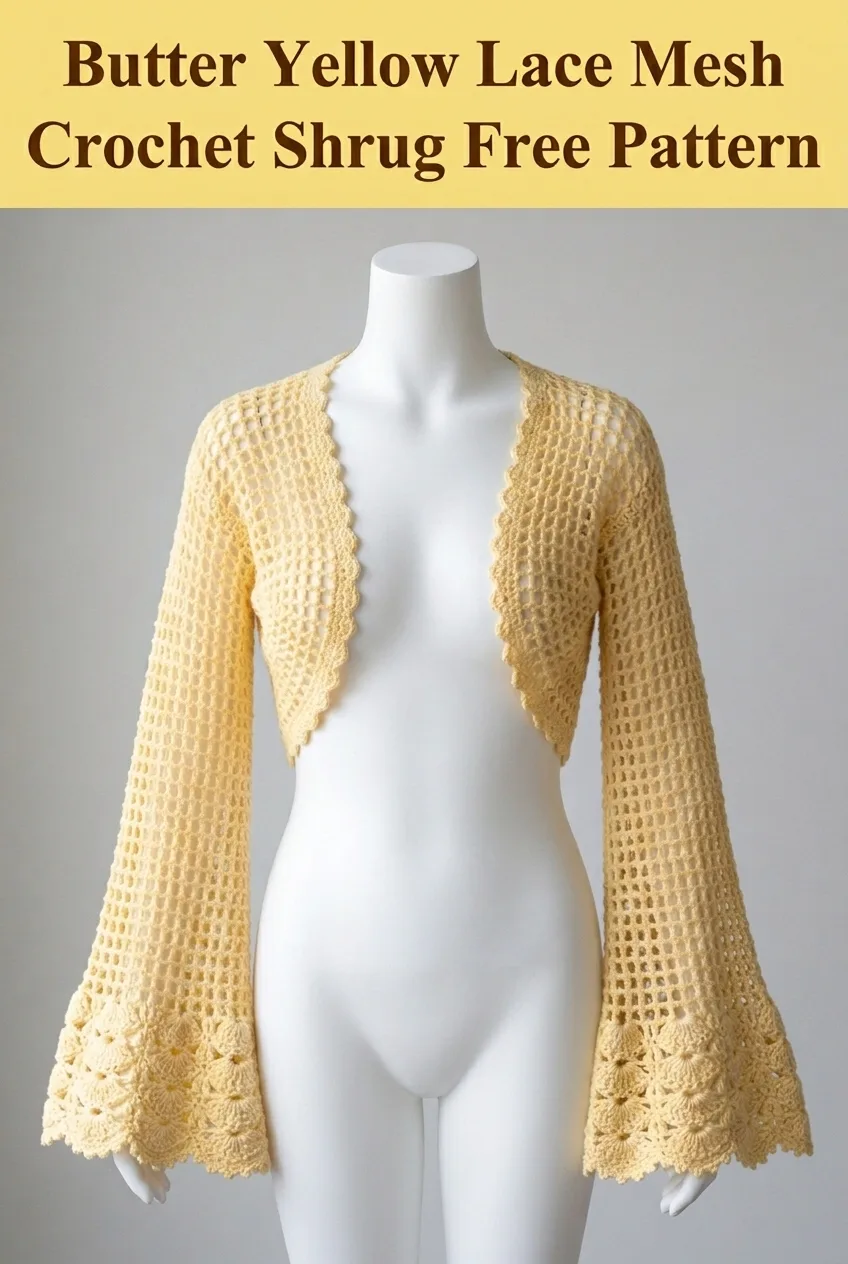
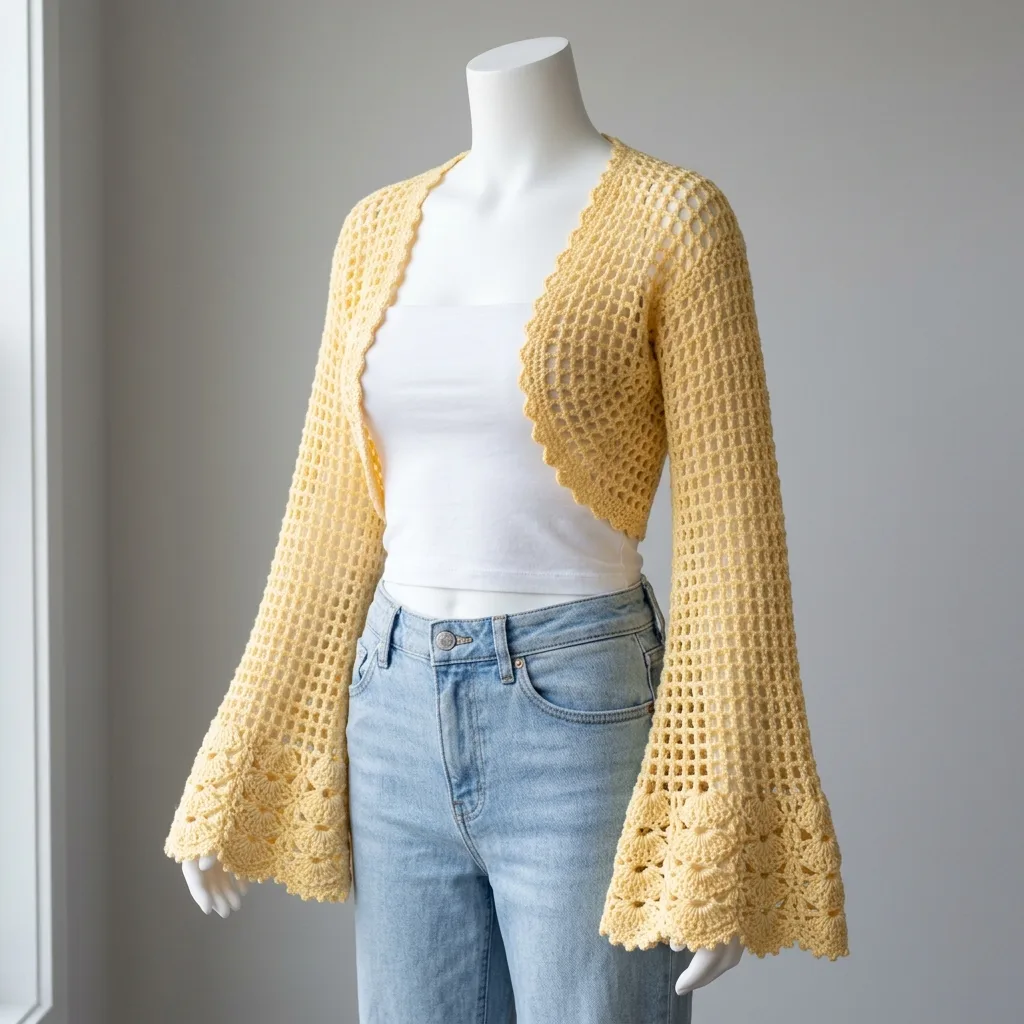
This is a cropped lace mesh shrug with dramatic bell sleeves. It uses basic chain spaces and double crochet stitches throughout the body, with a shell stitch border along the edges and sleeve cuffs. If you can chain, double crochet, and count, you can absolutely make this.
About This Butter Yellow Lace Mesh Crochet Shrug Pattern
I designed this shrug for those in-between weather days when you want a little something over your shoulders but nothing too heavy. The open mesh construction makes it breathable and lightweight. The cropped length sits right at the natural waist, making it perfect for layering over tank tops, sundresses, or fitted tees.
The butter yellow color gives it a soft, sunny vibe that works beautifully for spring and summer. But honestly, this pattern would look stunning in any color. Think soft sage, dusty rose, or crisp white for a completely different feel.
What I love most about this shrug is the contrast between the simple grid-like mesh body and the decorative shell stitch edging. Those bell sleeves add drama without adding difficulty. The shells at the cuffs and along the front opening give the whole piece a polished, finished look that says "I know what I’m doing" even if this is your first garment.
Skill Level
This crochet shrug pattern is beginner-friendly with some intermediate elements. If you have made a basic scarf or blanket and feel comfortable with double crochet, you are ready for this project.
The mesh section is extremely repetitive and meditative once you get the rhythm. The shell border requires a bit more attention but uses the same stitches you already know, just grouped differently.
Materials Needed
Yarn:
Hook:
Notions:
Gauge
Gauge matters for garments. Please take the time to check yours.
In mesh pattern: 4 chain-1 spaces and 8 rows = 4 inches square
To test your gauge, chain 22 and work the mesh pattern for about 12 rows. Measure the center section, avoiding the edges. If your swatch is too small, go up a hook size. If it is too large, go down a hook size.
Finished Measurements
This pattern is written for size Small/Medium with notes for adjusting.
Abbreviations and Stitch Definitions
Let me walk you through every stitch abbreviation before we begin. No surprises.
Ch = Chain. Wrap yarn over hook, pull through loop on hook. This creates the foundation and spaces in our mesh.
Sl st = Slip stitch. Insert hook, yarn over, pull through both the stitch and loop on hook in one motion. Used for joining and moving across stitches without adding height.
Sc = Single crochet. Insert hook, yarn over, pull up a loop (two loops on hook), yarn over, pull through both loops. The shortest basic stitch.
Dc = Double crochet. Yarn over, insert hook, yarn over, pull up a loop (three loops on hook), yarn over, pull through two loops, yarn over, pull through remaining two loops. This is the main stitch in our mesh grid.
Ch-1 sp = Chain-1 space. The small gap created when you chain 1 between stitches. You will work into these spaces, not into the chain itself.
Shell = A group of stitches worked into the same stitch or space. For this pattern, a shell is 5 dc worked into one stitch or space.
Sk = Skip. Pass over the indicated stitch or space without working into it.
Special Techniques
Working into chain spaces: Throughout the mesh section, you will insert your hook into the gap below the chain, not into the chain stitch itself. This is easier and creates cleaner holes.
Joining in the round: When we work the sleeves and edging, you will join with a slip stitch to the top of the turning chain, then chain up to begin the next round.
Increasing for bell sleeves: We add width gradually by working extra stitches at regular intervals. I will tell you exactly where.
Pattern Notes
Crochet Pattern Instructions
Body Panel (Worked Flat)
The body is one long rectangle. We will fold it and seam the sides later, leaving gaps for armholes.
Foundation Row: Ch 122.
Row 1: Dc in 4th ch from hook (the skipped chains count as your first dc), *ch 1, sk 1 ch, dc in next ch*. Repeat from * across. Turn. (60 dc, 59 ch-1 spaces)
Row 2: Ch 4 (counts as dc plus ch 1), sk first dc, dc in next dc, *ch 1, sk ch-1 sp, dc in next dc*. Repeat from * across, placing last dc in top of turning chain. Turn. (60 dc, 59 ch-1 spaces)
Rows 3 through 52: Repeat Row 2.
Your piece should measure approximately 26 inches wide and 14 inches tall at this point. This creates enough fabric for the back panel and both front panels when folded.
Fasten off and weave in ends.
Assembling the Body
Fold the rectangle in half widthwise, wrong sides together. The fold becomes your shoulder line.
Mark your armholes: From the fold (shoulder), measure down 8 inches on each side. Place a stitch marker. From the bottom edge, measure up 6 inches on each side. Place another marker. The space between these markers (approximately 8 inches) is your armhole opening.
Side seams: Using your tapestry needle and matching yarn, whip stitch or mattress stitch the front and back together from the bottom edge up to your lower armhole marker. Leave the armhole section open. Repeat on the other side.
Do not seam the shoulder/top area. This remains open, creating the front opening of your shrug.
Sleeves (Worked in the Round)
The sleeves are worked directly into the armhole openings, then increased gradually to create the bell shape.
Joining Round: With right side facing, join yarn at the underarm seam with a sl st. Ch 3 (counts as first dc).
Round 1: Work 48 dc evenly around the armhole opening, spacing them to create a smooth circle. Join with sl st to top of ch-3. (48 dc)
*Tip: Aim for about 2 dc per row edge along the sides, and 1 dc per stitch along the top and bottom of the opening.*
Round 2: Ch 4 (counts as dc plus ch 1), sk next dc, dc in next dc, *ch 1, sk 1 dc, dc in next dc*. Repeat from * around. Join with sl st to 3rd ch of ch-4. (24 dc, 24 ch-1 spaces)
Rounds 3 through 12: Ch 4, dc in next dc, *ch 1, dc in next dc*. Repeat from * around. Join with sl st. (24 dc, 24 ch-1 spaces)
Your sleeve should measure approximately 6 inches from the armhole at this point.
Bell Increase Section
Now we add width for the dramatic bell.
Round 13 (Increase Round): Ch 3 (counts as dc), dc in same st, dc in ch-1 sp, *2 dc in next dc, dc in ch-1 sp*. Repeat from * around. Join. (72 dc)
Round 14: Ch 4, sk 1 dc, dc in next dc, *ch 1, sk 1 dc, dc in next dc*. Repeat from * around. Join. (36 dc, 36 ch-1 spaces)
Rounds 15 through 18: Ch 4, dc in next dc, *ch 1, dc in next dc*. Repeat from * around. Join. (36 dc, 36 ch-1 spaces)
Round 19 (Second Increase Round): Ch 3, dc in same st, dc in ch-1 sp, dc in next dc, *2 dc in next dc, dc in ch-1 sp, dc in next dc*. Repeat from * around. Join. (96 dc)
Rounds 20 through 22: Work even in mesh pattern: Ch 4, sk 1 dc, dc in next dc, *ch 1, sk 1 dc, dc in next dc*. Repeat around. Join. (48 dc, 48 ch-1 spaces)
Shell Cuff Border
This is where the magic happens. The shell border transforms the sleeve edge.
Round 23: Ch 1, sc in same st, sk 2 dc, 5 dc in next dc (shell made), sk 2 dc, *sc in next dc, sk 2 dc, 5 dc in next dc, sk 2 dc*. Repeat from * around. Join with sl st to first sc. (8 shells, 8 sc)
Round 24: Ch 3, 2 dc in same sc, sc in center dc of next shell, *5 dc in next sc, sc in center dc of next shell*. Repeat from * around, ending with 2 dc in first sc. Join to top of ch-3. (8 shells, 8 sc)
Round 25: Repeat Round 23, working sc in center dc of shells and shells in sc stitches.
Fasten off and weave in ends.
Repeat entire sleeve section for the second armhole.
Front and Neckline Edging
The scalloped edge along the front opening and neckline ties the whole piece together.
With right side facing, join yarn at the bottom right front corner with a sl st.
Round 1: Ch 1, work sc evenly along the entire front opening, around the back neck, and down the other front side. Work 3 sc in each corner to help them lie flat. Join.
*Aim for approximately 2 sc per row along the fronts and 1 sc per stitch across the back neck. Your exact count will vary based on your gauge.*
Round 2: Ch 1, sc in same st, sk 2 sc, 5 dc in next sc, sk 2 sc, *sc in next sc, sk 2 sc, 5 dc in next sc, sk 2 sc*. Repeat from * around, adjusting at corners as needed to keep shells flat. Join.
Round 3: Ch 3, 2 dc in same sc, sc in center dc of next shell, *5 dc in next sc, sc in center dc of next shell*. Repeat from * around. Join.
Fasten off and weave in ends.
Bottom Hem Edging
Join yarn at one side seam along the bottom edge.
Round 1: Ch 1, sc evenly around the entire bottom hem. Join.
Round 2: Work shell pattern as established: sc in first st, sk 2, 5 dc in next st, sk 2. Repeat around. Join.
Fasten off and weave in all remaining ends.
Finishing Your Butter Yellow Lace Mesh Crochet Shrug
Block your finished shrug for the best results. For cotton yarn, wet blocking works beautifully.
1. Soak the shrug in lukewarm water with a drop of wool wash for 15 minutes
2. Gently squeeze out excess water without wringing
3. Roll in a clean towel to remove more moisture
4. Lay flat on a blocking mat or clean towels
5. Pin the shells along the edges so they fan out properly
6. Allow to dry completely (usually 24 to 48 hours)
Blocking opens up the mesh, evens out your stitches, and helps the shells lay flat and pretty.
Customization Ideas
Make it longer: Add more rows to the body panel before assembling. Every 4 rows adds approximately 1 inch of length.
Shorter sleeves: Stop the sleeve after Round 12, skip the bell increases, and add the shell cuff directly.
Different sizes: For larger sizes, add more chains to your foundation row in multiples of 4. Add 8 chains for each size up. You will also need to adjust your armhole placement when assembling.
Solid sleeves: Skip the mesh rounds on the sleeves and work solid double crochet throughout for a warmer, less lacy look.
Troubleshooting Common Issues
My mesh looks wonky: Make sure you are working into the chain spaces, not into the chains themselves. Also check that you are not accidentally adding or skipping stitches.
The shells are cupping: Your tension might be too tight. Try going up a half hook size for the shell rounds only.
The front edges are wavy: This usually corrects itself with blocking. If it persists, you may need fewer stitches in your edging round.
Armholes are too tight: You can add a round of single crochet before starting the mesh sleeve pattern to give yourself more room.
Why This Crochet Shrug Pattern Works
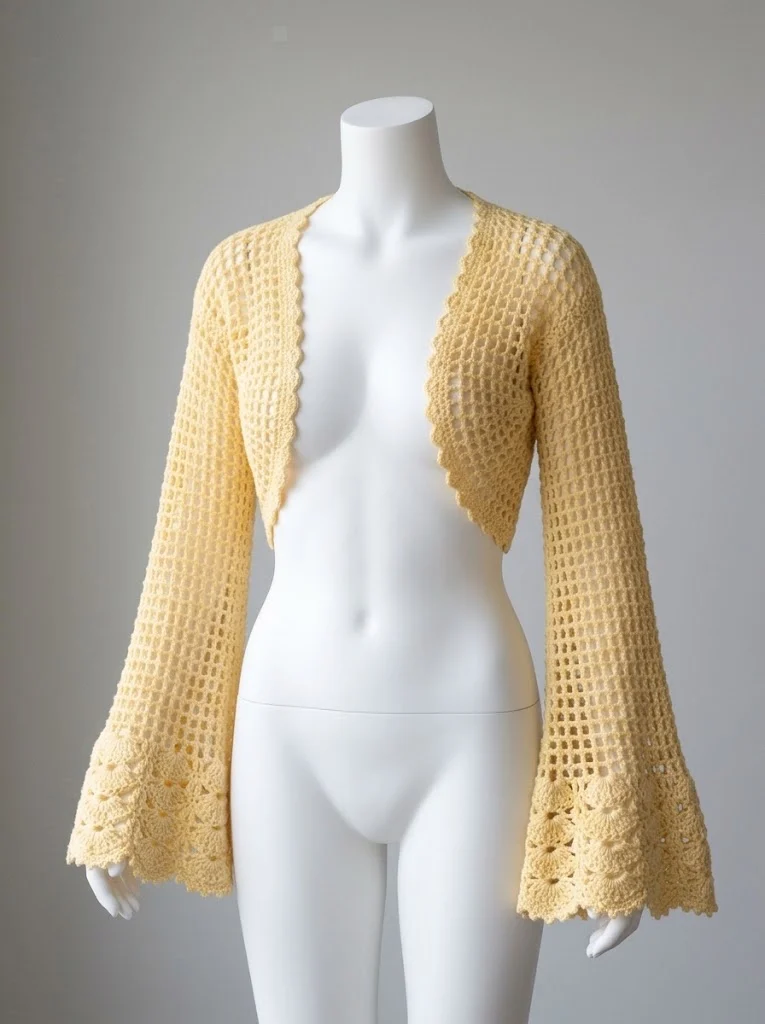
The beauty of this design is in its simplicity. The mesh stitch pattern is essentially just double crochet and chains repeated over and over. Once you establish the rhythm, you can work almost on autopilot.
The construction method, working flat and then seaming, means you never have to worry about complicated shaping or following a confusing schematic. It is just a rectangle that becomes a shrug.
And those bell sleeves? They look impressive but they are just gradual increases followed by a simple shell border. You already know every stitch required.
I hope you love making this butter yellow lace mesh crochet shrug as much as I enjoyed designing it. If you make one, I would absolutely love to see it! Tag me on Instagram or share a photo in my Facebook group. Nothing makes my day like seeing your finished projects pop up in my feed.
If you want to come back to this pattern later, go ahead and pin it to your favorite Pinterest board. And please drop a comment below if you have any questions or just want to say hi. I read every single one and I am always here to help.