
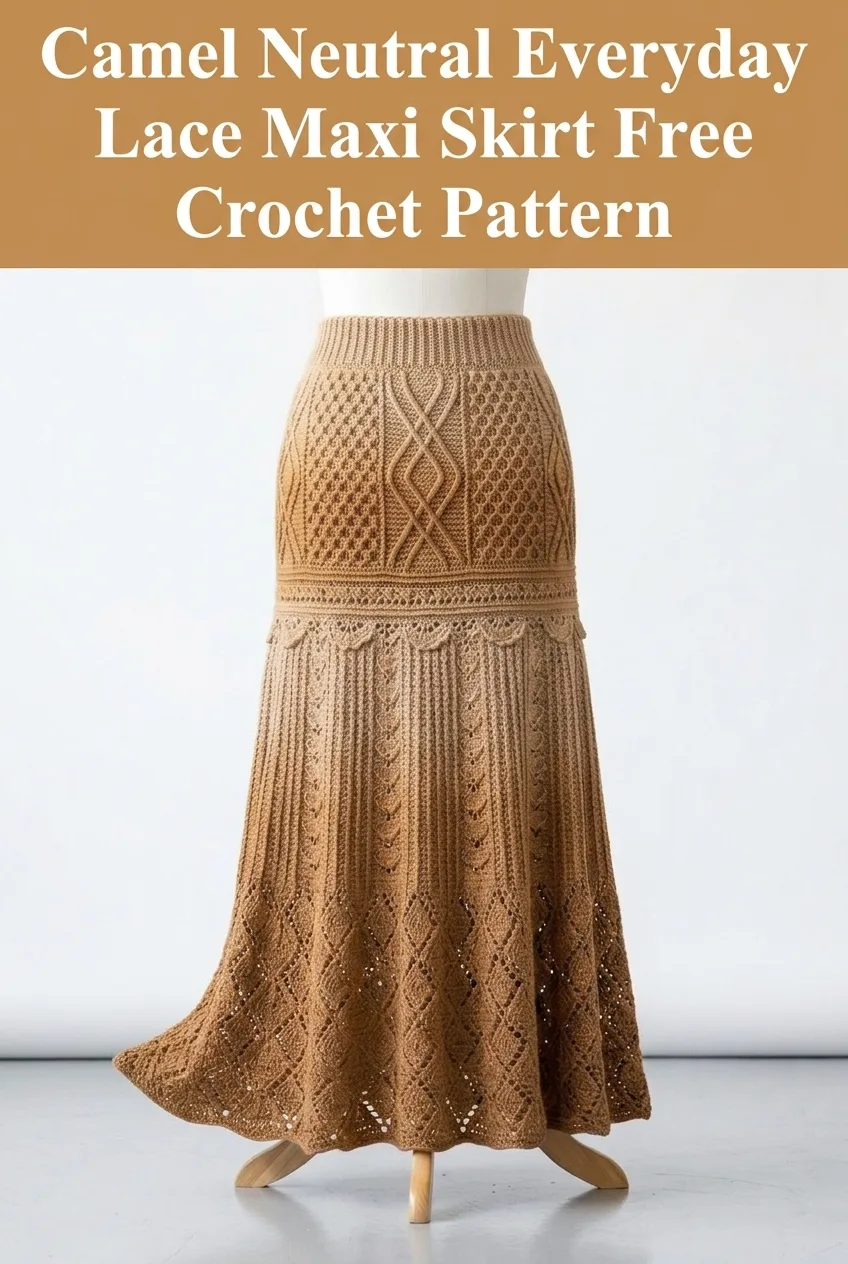
This is a stunning floor-length crochet maxi skirt featuring intricate lace panels and cable-inspired texture. The pattern uses intermediate stitches worked in the round. You will need a fingering weight yarn and patience, but the result is absolutely worth every stitch.
Why You Will Love This Crochet Skirt Pattern
This camel neutral lace maxi skirt is the kind of project that makes people stop and ask, "Wait, you *made* that?" The construction combines fitted waistband texture with dramatic flared lace panels that flow beautifully when you walk. It looks complicated, but I promise you can break it down into manageable sections.
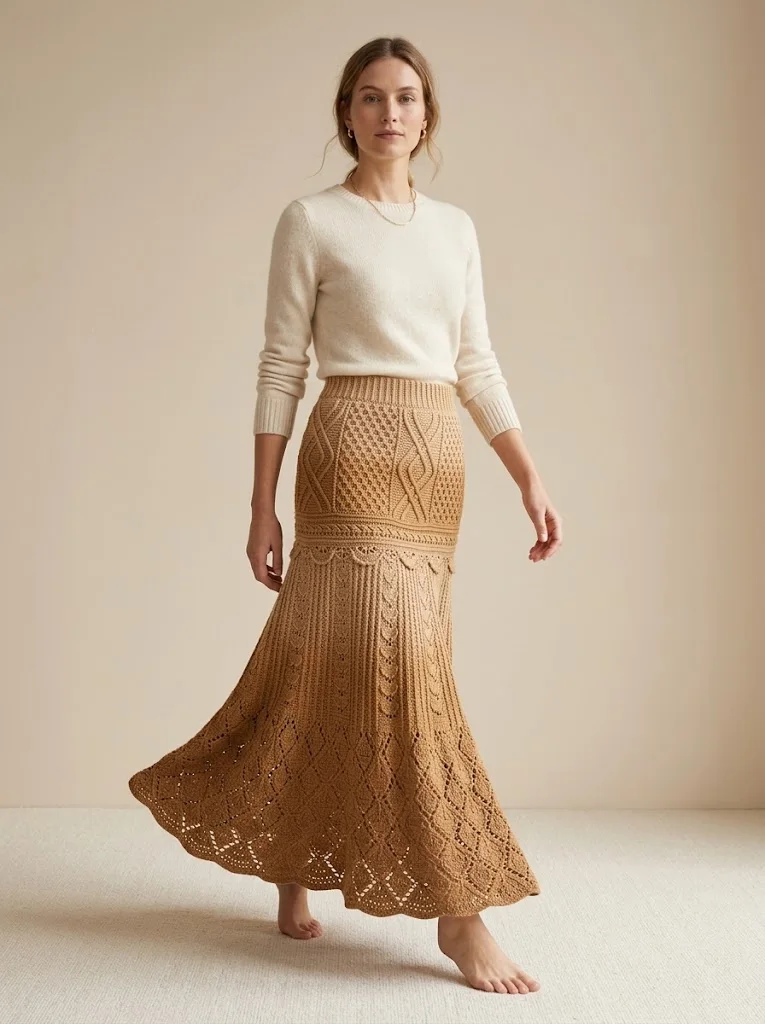
The earthy camel tone works with practically everything in your closet. Pair it with a simple tank in summer or layer it over leggings with boots when the weather cools. This is truly an everyday piece despite its elegant appearance.
Skill Level
Intermediate to Advanced
This crochet maxi skirt pattern requires comfort with working in the round, reading stitch patterns, and maintaining consistent tension across many rows. You should be familiar with basic increases, decreases, and lacework before starting.
If you are newer to garment making, I recommend practicing the cable cross technique and the lace repeat on a small swatch first. Once you see how the stitches interact, the full skirt becomes much less intimidating.
Materials Needed
Yarn:
Hook:
Notions:
Gauge
22 stitches and 26 rows = 4 inches in single crochet
Important: Gauge matters enormously for garment fit. Please swatch before starting. Wash and block your swatch exactly as you plan to care for the finished skirt.
Finished Measurements
This pattern is written for sizes Small, Medium, and Large.
The lace panels create natural stretch, so the skirt will accommodate 2 to 3 inches of ease beyond these measurements.
Abbreviations and Stitch Definitions
Let me walk you through every stitch you will need. I define each one so you can reference this section anytime you feel uncertain.
ch = chain: Yarn over, pull through loop on hook. This creates the foundation and spacing throughout the pattern.
sl st = slip stitch: Insert hook, yarn over, pull through both the stitch and the loop on your hook in one motion. Used for joining rounds.
sc = single crochet: Insert hook into stitch, yarn over and pull up a loop (2 loops on hook), yarn over and pull through both loops.
dc = double crochet: Yarn over, insert hook into stitch, yarn over and pull up a loop (3 loops on hook), yarn over and pull through 2 loops, yarn over and pull through remaining 2 loops.
tr = treble crochet: Yarn over twice, insert hook into stitch, yarn over and pull up a loop (4 loops on hook), yarn over and pull through 2 loops three times.
hdc = half double crochet: Yarn over, insert hook into stitch, yarn over and pull up a loop (3 loops on hook), yarn over and pull through all 3 loops at once.
FPdc = front post double crochet: Yarn over, insert hook from front to back to front around the post (vertical bar) of the stitch below, complete as a regular double crochet. This creates raised texture.
BPdc = back post double crochet: Yarn over, insert hook from back to front to back around the post of the stitch below, complete as a regular double crochet.
sk = skip: Pass over the indicated number of stitches without working into them.
inc = increase: Work 2 stitches into the same stitch.
ch-sp = chain space: The gap created by a chain in the previous row. Work into this space, not into the chain itself.
Special Techniques
Cable Cross (worked over 6 stitches)
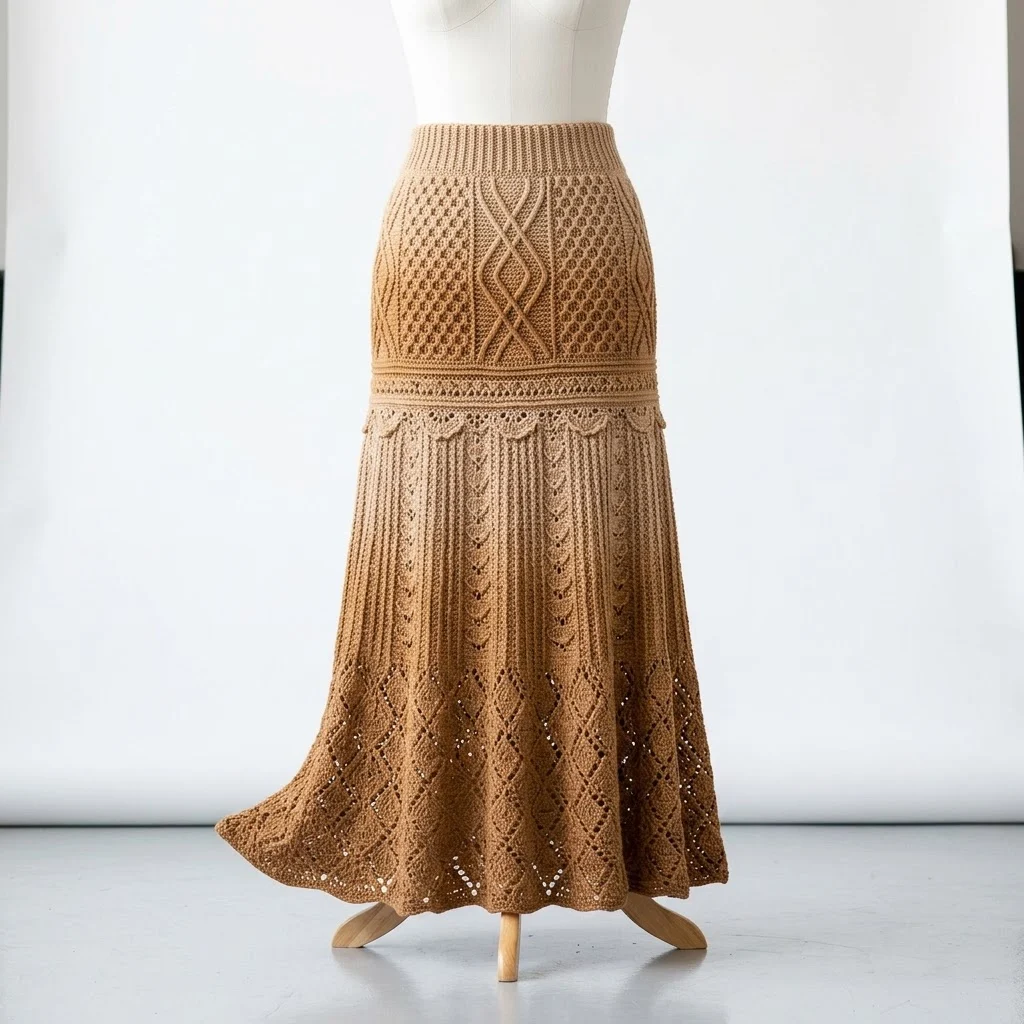
This creates the beautiful diamond cable texture in the hip section.
Right Cross: Skip 3 stitches, work FPdc into the next 3 stitches, then go back and work FPdc into the 3 skipped stitches, working in front of the stitches you just made.
Left Cross: Skip 3 stitches, work FPdc into the next 3 stitches, then go back and work FPdc into the 3 skipped stitches, working behind the stitches you just made.
Do not stress if this feels awkward at first. The cables become intuitive after 2 or 3 repeats.
Lace Shell Pattern
(2 dc, ch 2, 2 dc) in same stitch or space = This creates the decorative shell motifs in the lower skirt.
Pattern Instructions
Section 1: Ribbed Waistband
The waistband is worked flat in rows, then joined to form a tube.
Foundation: Ch 13.
Row 1: Sc in 2nd ch from hook and in each ch across. (12 sc)
Row 2: Ch 1, turn. Working in back loops only (BLO), sc in each st across. (12 sc)
Rows 3 through 144 (168, 192): Repeat Row 2.
The number of rows depends on your size. Measure against your waist elastic as you go. The ribbing should match your elastic length when slightly stretched.
Joining: Fold the ribbed strip so the first and last rows meet. Sl st through both layers to join into a tube. Do not fasten off.
Section 2: Hip Yoke with Cable Texture
You will now work in continuous rounds, picking up stitches along one long edge of the waistband.
Setup Round: Ch 1, work 144 (168, 192) sc evenly around the bottom edge of the waistband, placing one sc in the end of each waistband row. Join with sl st to first sc. Place marker at join. (144, 168, 192 sts)
Round 1: Ch 3 (counts as dc here and throughout), dc in each st around. Join with sl st to top of ch-3. (144, 168, 192 dc)
Round 2: Ch 3, *FPdc around next st, BPdc around next st* repeat around. Join. (144, 168, 192 sts)
Rounds 3 through 6: Repeat Round 2, maintaining the rib pattern (FPdc over FPdc, BPdc over BPdc).
Round 7 (Cable Setup): Ch 3, *work 6 sts in established rib pattern, place marker, work Right Cross over next 6 sts, place marker, work 6 sts in rib, work 6 sts in seed texture (alternating FPdc and BPdc opposite of the row below)* repeat around, adjusting stitch counts as needed for your size. Join.
Rounds 8 through 12: Continue in established patterns. Work cable crosses every 6th round, alternating between Right Cross and Left Cross to create the diamond motif.
Rounds 13 through 36: Continue working the cable and texture pattern. The hip section should measure approximately 8 to 10 inches from the waistband.
If you need more or less length through the hips, add or subtract rounds here before beginning the lace transition.
Section 3: Lace Transition Band
This decorative band creates visual separation between the fitted hip and the flowing skirt.
Round 37: Ch 4 (counts as dc plus ch-1), *sk 1 st, dc in next st, ch 1* repeat around. Join to 3rd ch of beginning ch-4. (72, 84, 96 dc and ch-1 spaces)
Round 38: Ch 1, sc in same st, *3 sc in ch-1 sp, sc in dc* repeat around. Join. (216, 252, 288 sc)
Round 39: Ch 3, dc in each st around. Join.
Round 40: Ch 3, *dc in next 5 sts, 2 dc in next st (increase)* repeat around. Join. (252, 294, 336 dc)
Section 4: Flared Lace Skirt Panels
This is where the magic happens. The lace panels create gorgeous drape and movement.
Round 41 (Shell Setup): Ch 3, dc in same st, *ch 2, sk 3 sts, (2 dc, ch 2, 2 dc) in next st (shell made), ch 2, sk 3 sts, dc in next 2 sts* repeat around, adjusting final repeat as needed. Join.
Round 42: Ch 3, dc in next dc, *ch 2, shell in ch-2 sp of shell below, ch 2, dc in next 2 dc* repeat around. Join.
Rounds 43 through 50: Repeat Round 42. The shells will begin to separate and create the lace pattern.
Round 51 (Increase Round): Ch 3, dc in next dc, *ch 3 (instead of ch 2), shell in shell below, ch 3, dc in next 2 dc* repeat around. Join.
Rounds 52 through 60: Continue pattern with ch-3 spaces.
Round 61 (Increase Round): Work pattern with ch-4 spaces.
Rounds 62 through 75: Continue with ch-4 spaces. The skirt will flare dramatically.
Round 76 (Final Increase): Work pattern with ch-5 spaces.
Rounds 77 through 90: Continue pattern. Add or remove rounds to achieve your desired length.
Section 5: Scalloped Hem Edging
Final Round: Ch 1, sc in first st, *sk 2 sts, 5 dc in next st (scallop made), sk 2 sts, sc in next st* repeat around entire hem edge. Join with sl st. Fasten off.
Finishing Your Crochet Maxi Skirt
Weave in all ends using your tapestry needle. Work ends along the same color pathway for at least 2 inches, then reverse direction for security.
Install the waistband elastic. Fold the top edge of the ribbed waistband over the elastic and whip stitch the inner edge to the inside of the waistband, creating a casing. Leave a small opening, thread the elastic through, overlap the ends by 1 inch, and sew securely. Stitch the opening closed.
Block your skirt. Fill a basin with cool water and a splash of wool wash or gentle soap. Submerge the skirt for 15 to 20 minutes. Gently press out water without wringing. Lay flat on blocking mats or towels, pinning the scalloped hem to open the lace pattern beautifully. Allow to dry completely.
Blocking transforms this skirt. The lace will open up, the cable texture will pop, and the entire piece will look polished and professional.
Customization Tips
Longer length: Add 10 to 15 more rounds in Section 4 before beginning the hem edging.
Shorter midi length: Stop the lace section around Round 70 instead of Round 90.
More dramatic flare: Add an extra increase round with ch-6 spaces in the final section.
Different colorways: This pattern looks stunning in cream, navy, burgundy, or sage green. Consider a subtle gradient by holding a thin thread of a second color in the lower section.
Care Instructions
Hand wash in cool water with mild detergent. Lay flat to dry and reshape while damp. Store folded, never on a hanger, as the lace will stretch over time.
I really hope you enjoy making this beautiful lace maxi skirt as much as I enjoyed designing it. It is a labor of love, but the finished piece is truly a showstopper that you will reach for again and again.
If you make this crochet skirt pattern, I would absolutely love to see your finished piece. Tag me on Instagram or share a photo in our Facebook group. Your color choices and styling always inspire me and help other makers feel confident starting their own version.
Save this pattern to your Pinterest boards so you can find it when you are ready to cast on. And please drop a comment below if you have questions or just want to say hello. I read every single one and love hearing from you.