
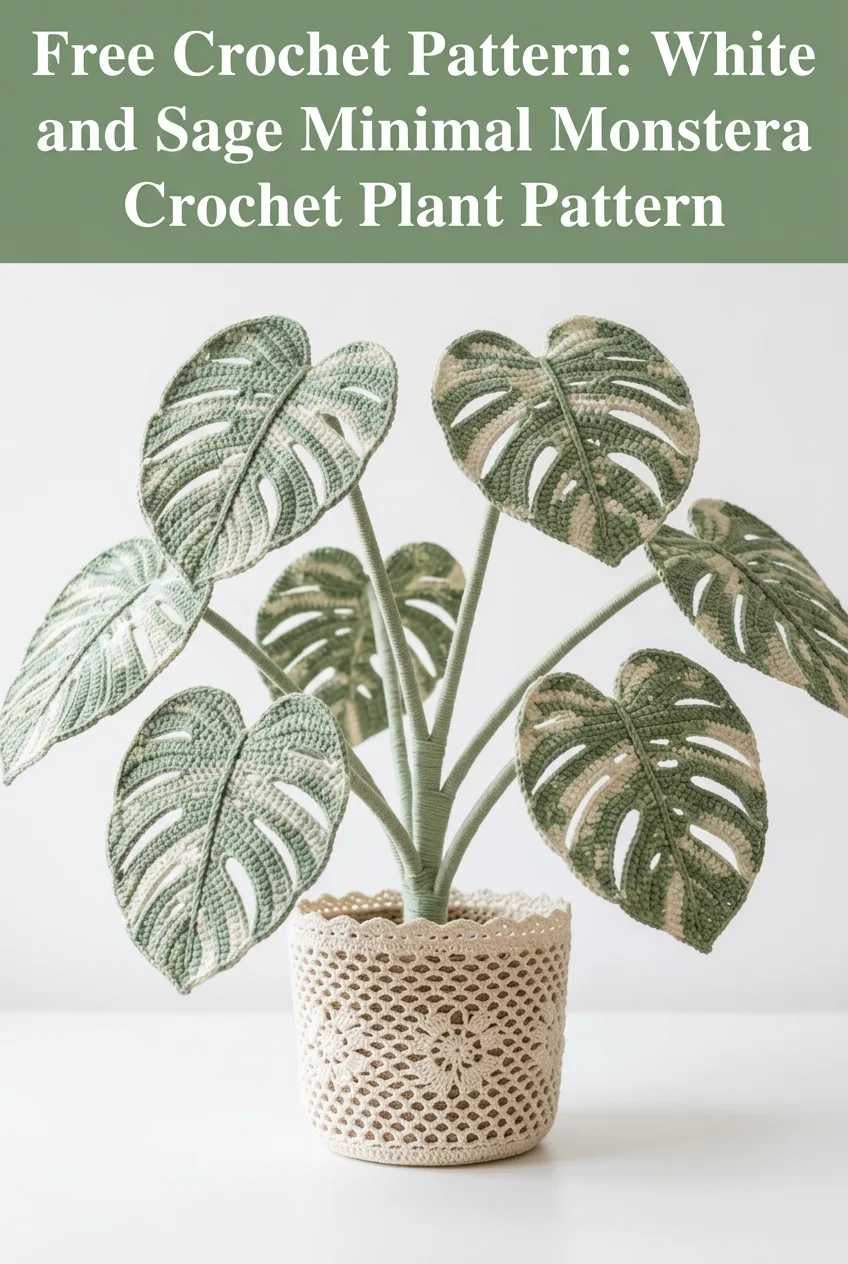
You know that gorgeous skein you’ve been saving for "the right project"? This is it. Grab your sage greens, your soft whites, and let’s put that stash to work on something truly stunning. This crochet monstera plant combines simple stitches with clever construction to create those iconic split leaves and fenestrations that make real monstera plants so beloved. I won’t sugarcoat it, this project takes patience and attention to detail, but if you can single crochet and double crochet, you absolutely have the skills to make this beauty.
Why You’ll Love This Crochet Monstera Plant Pattern
This crochet monstera plant brings all the tropical vibes without any of the watering, repotting, or sad brown leaves when you forget about it for a week. The finished plant sits beautifully in a decorative pot cover and makes a jaw-dropping statement piece for shelves, desks, or windowsills.
What makes this pattern special is the two-tone color work on each leaf. By combining sage green with creamy white accents, you get that variegated monstera look that plant collectors obsess over. The leaves have realistic proportions with natural curves and those signature splits and holes that give monstera plants their "Swiss cheese" nickname.
This project works up as separate components. You’ll crochet individual leaves, wrap stems with yarn, and assemble everything into a lush arrangement. It’s like building a bouquet, but with yarn.
Skill Level
Intermediate. You should be comfortable with basic stitches, increasing and decreasing, and working in continuous rounds for the stems. The leaf shaping requires following the pattern carefully, but nothing here is technically difficult.
Finished Dimensions
Materials Needed
Yarn:
I recommend a cotton or cotton blend yarn for excellent stitch definition and that crisp, sculptural look you see in the photos. Acrylic works too but may be slightly softer.
Hook:
Notions:
Abbreviations and Stitch Definitions
Let me walk you through every stitch abbreviation before we begin. No surprises here.
Ch = Chain. Wrap yarn over hook, pull through loop. This creates your foundation.
Sl st = Slip stitch. Insert hook, yarn over, pull through both loops at once. Used to join rounds or move across stitches invisibly.
Sc = Single crochet. Insert hook, yarn over, pull up a loop (two loops on hook), yarn over, pull through both loops. For example, "sc 5" means work 5 single crochets in a row.
Hdc = Half double crochet. Yarn over, insert hook, yarn over, pull up a loop (three loops on hook), yarn over, pull through all three loops.
Dc = Double crochet. Yarn over, insert hook, yarn over, pull up a loop (three loops on hook), yarn over, pull through two loops, yarn over, pull through remaining two loops.
Inc = Increase. Work 2 stitches into the same stitch.
Dec = Decrease. Work 2 stitches together as one. For sc dec, insert hook in first stitch, pull up loop, insert hook in next stitch, pull up loop (three loops on hook), yarn over, pull through all three.
Sk = Skip. Skip over the indicated stitch without working into it.
St(s) = Stitch(es).
Gauge
Gauge isn’t critical for this decorative project, but aim for approximately 16 sc and 18 rows = 4 inches in single crochet. If your leaves seem too floppy, try going down a hook size.
Pattern Notes Before You Begin
Read this section completely before starting. Trust me, it helps.
Large Monstera Leaf Pattern (Make 3 to 4)
This leaf has the most dramatic fenestrations. You’ll make two identical pieces per leaf.
Using sage green yarn and 4.0mm hook:
Row 1: Ch 4, sc in 2nd ch from hook, sc in next 2 ch, turn. (3 sts)
Row 2: Ch 1, 2 sc in first st (inc), sc in next st, 2 sc in last st, turn. (5 sts)
Row 3: Ch 1, 2 sc in first st, sc across to last st, 2 sc in last st, turn. (7 sts)
Rows 4 through 8: Repeat Row 3, increasing at both ends each row. (17 sts after Row 8)
Row 9: Ch 1, sc in first 4 sts, ch 3, sk 3 sts (this creates first fenestration), sc in next 3 sts, ch 3, sk 3 sts, sc in last 4 sts, turn. (11 sc, 2 ch-3 spaces)
Row 10: Ch 1, sc in first 4 sts, 3 sc in ch-3 space, sc in next 3 sts, 3 sc in ch-3 space, sc in last 4 sts, turn. (17 sts)
Rows 11 through 14: Ch 1, sc across, turn. (17 sts)
Row 15: Ch 1, sc in first 3 sts, ch 4, sk 4 sts, sc in next 3 sts, ch 4, sk 4 sts, sc in last 3 sts, turn. (9 sc, 2 ch-4 spaces)
Row 16: Ch 1, sc in first 3 sts, 4 sc in ch-4 space, sc in next 3 sts, 4 sc in ch-4 space, sc in last 3 sts, turn. (17 sts)
Creating the Split (Row 17 onward):
Left Side:
Row 17: Ch 1, sc in first 7 sts only, turn. Leave remaining sts unworked. (7 sts)
Row 18: Ch 1, sc dec over first 2 sts, sc to end, turn. (6 sts)
Rows 19 through 22: Continue decreasing at the split edge every row. (2 sts after Row 22)
Row 23: Ch 1, sc dec, fasten off. (1 st)
Right Side:
With right side facing, rejoin yarn to the 11th stitch of Row 16 (skip 3 center stitches to create the split).
Row 17: Ch 1, sc in same st and next 6 sts, turn. (7 sts)
Rows 18 through 23: Mirror the left side, decreasing at the split edge. Fasten off.
Adding Variegation:
Using cream or light sage yarn, surface crochet or embroider accent lines following the natural vein pattern of a monstera leaf. Work from the center stem outward toward each lobe. This creates that gorgeous variegated effect.
Medium Monstera Leaf Pattern (Make 2 to 3)
Work the same as the large leaf but stop increasing at Row 6 (13 sts) and reduce the number of fenestration rows. Create only one ch-3 fenestration on each side.
Small Monstera Leaf Pattern (Make 2)
These juvenile leaves have no splits or holes, just like real young monstera leaves.
Row 1: Ch 4, sc in 2nd ch from hook, sc across, turn. (3 sts)
Rows 2 through 6: Inc at both ends each row. (13 sts)
Rows 7 through 10: Sc across evenly. (13 sts)
Rows 11 through 15: Dec at both ends each row. (3 sts)
Row 16: Ch 1, sc3tog, fasten off. (1 st)
Assembling Each Leaf
1. Block both leaf pieces gently with steam or wet blocking
2. Cut floral wire 2 inches longer than your leaf
3. Wrap wire with floral tape for a cleaner finish
4. Place wire between both leaf pieces, aligned with the center
5. Using matching yarn and yarn needle, whip stitch around the entire perimeter, encasing the wire
6. The wire should extend beyond the leaf base to become part of the stem
Stem Pattern
Stems give your monstera that realistic upright posture. You’ll work these in continuous rounds around floral wire.
Using sage green yarn and 3.5mm hook:
Round 1: Make a magic ring, 6 sc in ring. Do not join. (6 sts)
Round 2 onward: Sc in each st around continuously.
Work until the stem reaches your desired length, typically 4 to 8 inches depending on the leaf size. Larger leaves look best on longer stems.
To close the stem:
Alternatively, you can skip crocheted stems and simply wrap yarn tightly around wire-taped stems. Both methods work beautifully.
Main Stem and Base
Create a thicker central stem by crocheting a larger tube (start with 8 to 10 sc in your magic ring) or by bundling several wire stems together and wrapping them as one.
Final Assembly
1. Arrange your leaves from tallest in back to shortest in front
2. Bundle all stems together at the base
3. Secure with floral tape, wrapping tightly
4. Trim stems to even length at the bottom
5. Insert the bundled stems into floral foam inside your pot
6. Use hot glue to secure if needed
7. Gently bend and pose each leaf for the most natural arrangement
Tips for a Professional Finish
Stiffening your leaves: If your leaves seem droopy, spray with fabric stiffener or brush with a mixture of white glue and water (1:1 ratio). Let dry completely before handling.
Color placement: For the most realistic variegation, concentrate the lighter colors along the vein lines and outer edges of the leaves.
Pot cover: The pot cover shown uses a lace or filet crochet technique. You can crochet your own or simply place a plain pot inside a decorative basket or fabric-wrapped container.
Adjusting sizes: Want a bigger plant? Make more large leaves and use longer stems. Smaller tabletop version? Stick to medium and small leaves with shorter stems.
Care Instructions
Your crochet monstera is wonderfully low maintenance. Dust occasionally with a soft brush or blow dryer on cool setting. Keep away from direct sunlight to prevent fading. If using cotton yarn, you can spot clean with a damp cloth.
Gift and Display Ideas
This crochet monstera plant makes an unforgettable housewarming gift, especially for friends who love plants but can’t keep them alive. It’s perfect for dorm rooms, offices, or any space that needs a pop of green without the commitment.
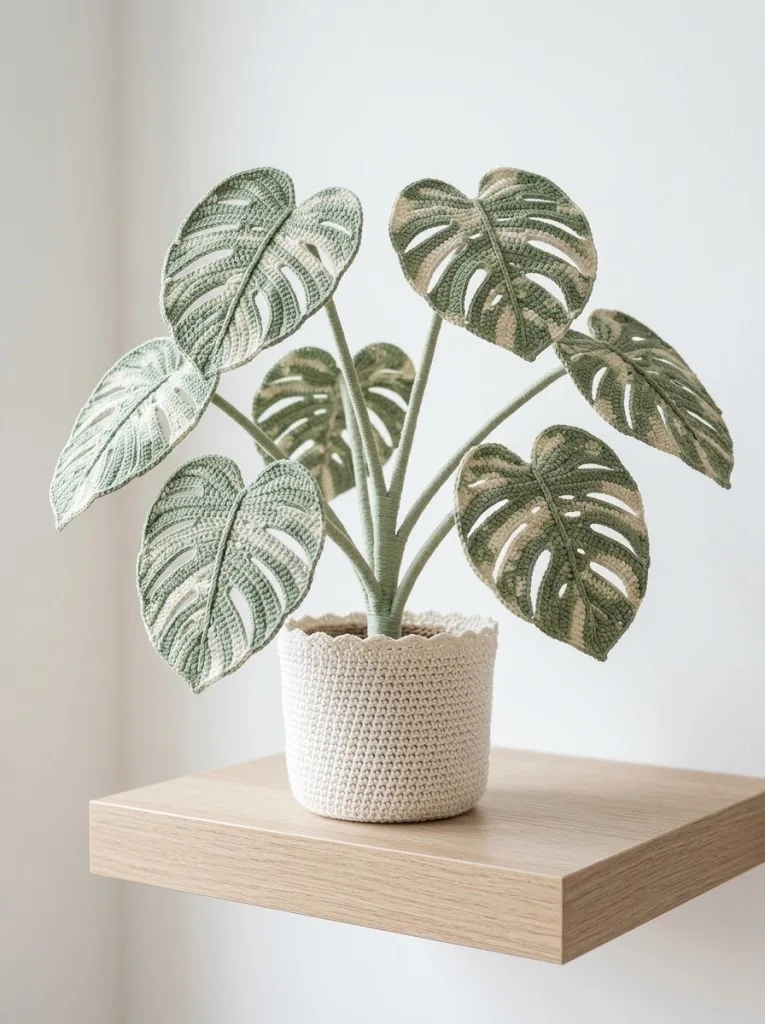
Display on a bookshelf, desk, windowsill, or as a centerpiece. The neutral sage and cream palette works with virtually any decor style, from boho to minimalist to modern.
You Did It!
Thank you so much for choosing this pattern for your next crochet adventure. I hope the process felt manageable and the results make you incredibly proud. These leaves take time, but watching your plant come together is so satisfying.
I would absolutely love to see your finished monstera plants. Tag me on Instagram or share in our Facebook group. Seeing your creations genuinely makes my day.
If this pattern inspired you, please save it to your Pinterest boards so you can find it again later, and so other crafters can discover it too. And if you make this crochet monstera, drop a comment below and tell me how it went. I read every single one, and I’m always cheering you on.