
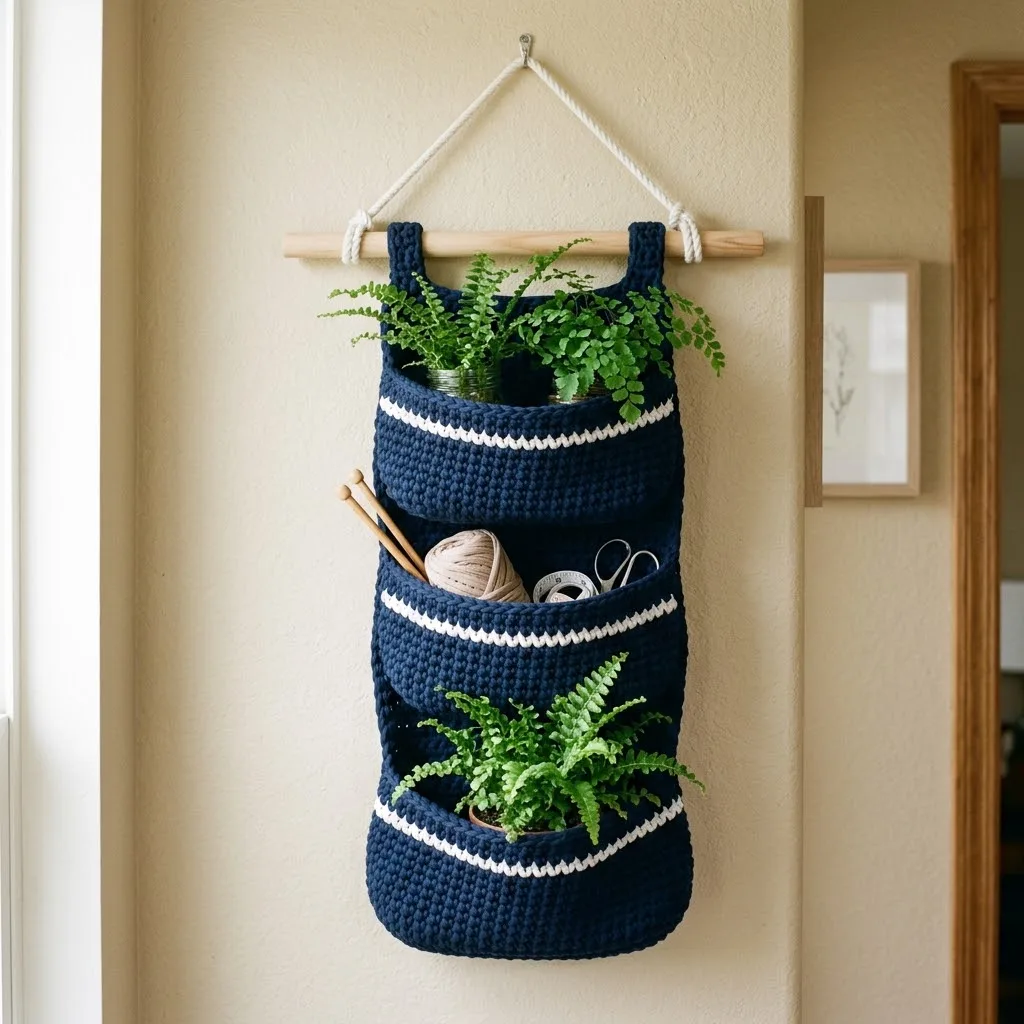
I had a very specific vision for this project. I wanted to create a hanging organizer that felt coastal and clean, something that could hold plants or craft supplies without looking cluttered. The three-pocket design needed to be sturdy enough for real daily use, and I wanted those crisp white stripes to pop against a deep navy background. I also wanted the construction to be straightforward, working each pocket separately before joining them together. I am SO pleased with how this turned out! The nautical vibe is exactly what I was hoping for, and it hangs beautifully on a simple wooden dowel.
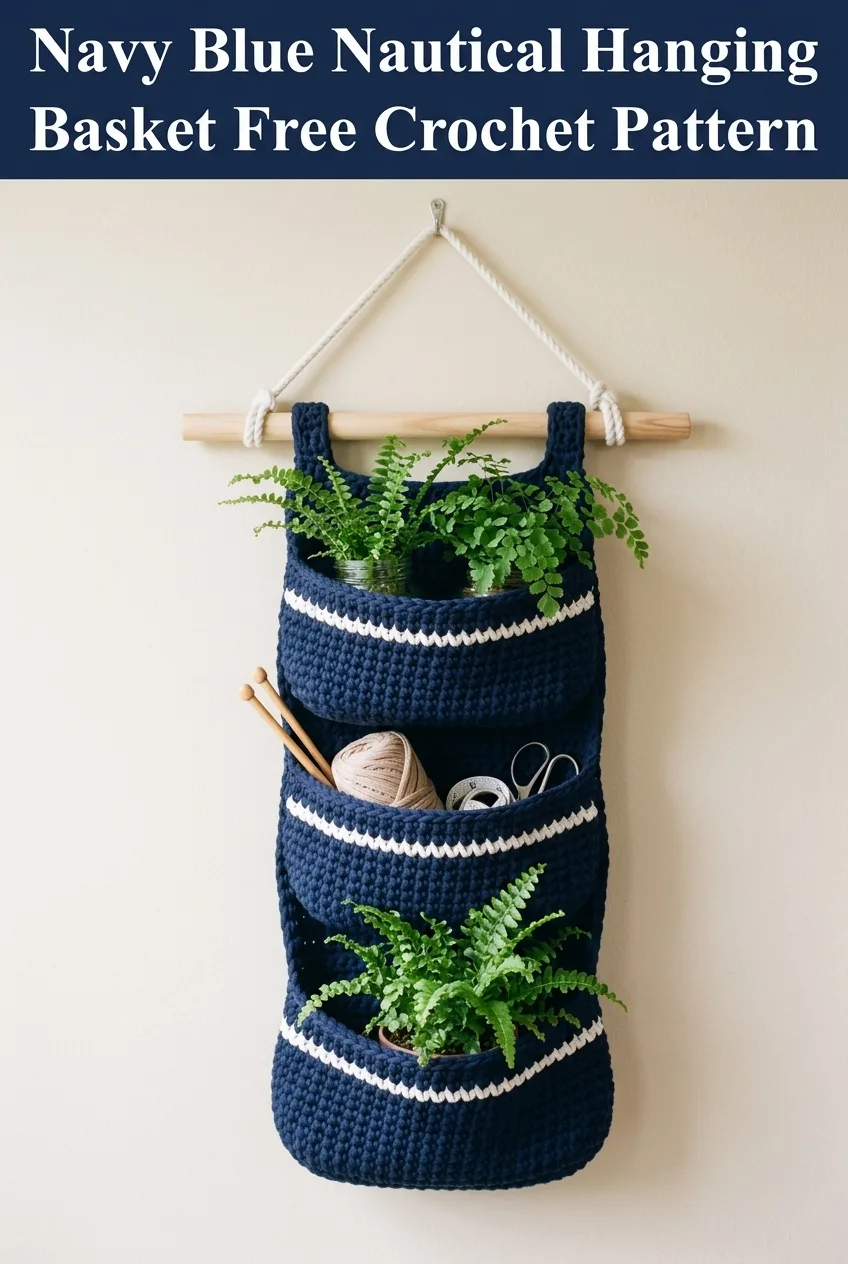
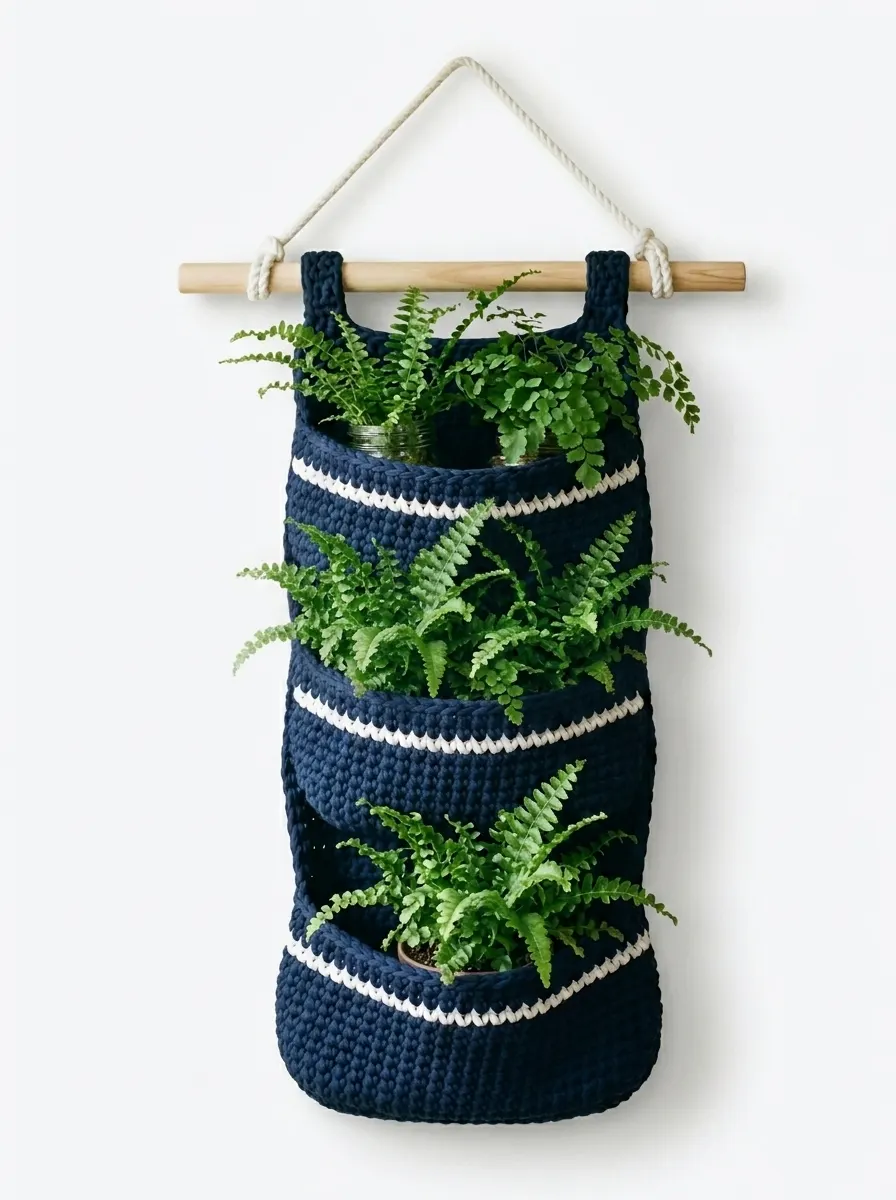
This crochet hanging basket pattern creates a functional wall organizer with three generous pockets. Each pocket features clean white stripe accents that give it that classic nautical aesthetic. Whether you use it in your entryway for mail and keys, in your craft room for yarn and scissors, or as a unique way to display small potted plants, this organizer earns its spot on your wall.
Why You Will Love This Crochet Hanging Basket Pattern
This crochet tutorial walks you through creating something both beautiful and genuinely useful. The pockets are deep enough to hold items securely, and the sturdy construction means this organizer will last for years.
The entire project uses only single crochet stitches and basic increases. If you can chain and single crochet, you can absolutely make this. The stripe colorwork is simple too. You just change colors at the end of a round. No complicated techniques or confusing stitch patterns to navigate.
I designed this step by step pattern with beginners in mind, but experienced crocheters will appreciate how quickly it works up. Each pocket takes about an hour or two, so you could easily finish this entire project over a weekend.
Skill Level
Confident Beginner to Intermediate
You should be comfortable with:
If you have never worked in the round before, I recommend practicing a simple coaster first. But honestly, this is a forgiving project. The thick yarn hides small inconsistencies beautifully.
Finished Measurements
Your measurements may vary slightly depending on your tension and the specific yarn you choose.
Materials Needed
Yarn
I highly recommend 100% cotton yarn for this project. Cotton provides excellent structure and holds its shape when weighted down with items. It also has that lovely matte finish that suits the nautical aesthetic perfectly. Brands like Lily Sugar’n Cream, Peaches & Creme, or any kitchen cotton would work beautifully.
You could substitute a cotton blend or acrylic if preferred, but your pockets may stretch more over time.
Hook
You may need to adjust your hook size to achieve proper gauge. A tighter gauge will create sturdier pockets that hold their shape better.
Additional Supplies
Gauge
14 single crochet stitches and 16 rows = 4 inches in single crochet worked flat
Gauge matters for this project because you want the pockets to be uniform in size. Take a few minutes to check your gauge before diving in.
Abbreviations and Stitch Definitions
Let me walk you through each stitch and term you will encounter in this pattern.
Ch = Chain. Wrap yarn over hook, pull through loop on hook. This creates the foundation for your work.
Sl st = Slip stitch. Insert hook into stitch, yarn over, pull through both the stitch and the loop on your hook in one motion. Used for joining rounds.
Sc = Single crochet. Insert hook into stitch, yarn over and pull up a loop (two loops on hook), yarn over and pull through both loops. This is your main stitch for the entire project.
Inc = Increase. Work two single crochet stitches into the same stitch. This makes your work wider.
St(s) = Stitch(es)
MC = Main Color (navy blue)
CC = Contrast Color (white)
BLO = Back loop only. Instead of inserting your hook under both loops at the top of the stitch, insert it only under the back loop. This creates a ridge effect.
Pattern Notes Before You Begin
This hanging basket is constructed in several pieces that are then assembled:
1. Three identical pocket pieces (each worked in two parts: a flat back panel and a rounded front pocket)
2. Two hanging loops
3. Final assembly onto the dowel
Each pocket is worked from the bottom up. The front of the pocket is worked in continuous rounds (no joining at the end of each round), while the back panel is worked in rows.
About continuous rounds: You will not slip stitch to join at the end of each round. Instead, you spiral upward continuously. Use a stitch marker to track the beginning of each round. Move it up as you go.
Changing colors: When adding the white stripe, complete the last stitch of the round before the color change, but on the final yarn over of that stitch, use the new color. This creates a clean color transition.
Crochet Pattern Instructions
Pocket Front (Make 3)
You will work the pocket front in continuous rounds, starting with a flat oval base and then building up the sides.
Base:
With MC, ch 15.
Round 1: Sc in 2nd ch from hook, sc in next 12 ch, 3 sc in last ch (this creates the turn at the end). Working along the opposite side of the foundation chain, sc in next 12 ch, 2 sc in last ch. Place stitch marker. (30 sts)
Round 2: Inc in first st, sc in next 12 sts, inc in next 3 sts, sc in next 12 sts, inc in next 2 sts. (36 sts)
Round 3: Sc in first st, inc in next st, sc in next 12 sts, (sc in next st, inc in next st) 3 times, sc in next 12 sts, (sc in next st, inc in next st) 2 times. (42 sts)
Round 4: Sc in next 2 sts, inc in next st, sc in next 12 sts, (sc in next 2 sts, inc in next st) 3 times, sc in next 12 sts, (sc in next 2 sts, inc in next st) 2 times. (48 sts)
Your oval base is now complete. It should measure approximately 6 inches long and 3 inches wide.
Sides:
Round 5: Working in BLO only for this round, sc in each st around. (48 sts)
This back loop only round creates a defined edge at the base of your pocket. You will feel the piece start to turn upward.
Rounds 6-10: Sc in each st around. (48 sts)
Round 11: Change to CC on the last yarn over of Round 10. Sc in each st around with CC. (48 sts)
Round 12: Change to MC on the last yarn over of Round 11. Sc in each st around with MC. (48 sts)
Rounds 13-18: Continue with MC, sc in each st around. (48 sts)
Round 19: Sl st in next st. Fasten off, leaving a long tail for seaming.
Your pocket front should measure approximately 6 inches tall from base to top edge.
Pocket Back Panel (Make 3)
The back panel is worked flat in rows and will be slightly taller than the front to allow for attachment to the pocket above.
With MC, ch 25.
Row 1: Sc in 2nd ch from hook, sc in each ch across. Ch 1, turn. (24 sts)
Rows 2-26: Sc in each st across. Ch 1, turn. (24 sts)
After Row 26, fasten off, leaving a long tail for seaming.
Your back panel should measure approximately 7 inches wide and 6.5 inches tall.
Hanging Loops (Make 2)
With MC, ch 31.
Row 1: Sc in 2nd ch from hook, sc in each ch across. (30 sts)
Fasten off, leaving a long tail.
Fold each strip in half to form a loop. The loop should be approximately 3 inches long when folded.
Assembly Instructions
Take your time with assembly. This is where your organizer really comes together, and neat seaming makes a big difference in the finished look.
Step 1: Attach Back Panels to Pocket Fronts
Take one pocket front and one back panel. With the right sides facing out, align the back panel with the back half of the pocket front opening. The back panel should sit behind the pocket, with the top edges roughly aligned.
Using your yarn needle and the long tail from the back panel, whip stitch the sides and bottom of the back panel to the corresponding edges of the pocket front. Work through both layers, keeping your stitches even and approximately 1/4 inch apart.
Repeat for all three pockets.
Step 2: Connect the Three Pockets
Stack the three pockets vertically with the back panels facing the same direction.
Take the top pocket and the middle pocket. Overlap the bottom edge of the top pocket’s back panel with the top edge of the middle pocket’s back panel by approximately 1 inch. Whip stitch them together securely.
Repeat to attach the middle pocket to the bottom pocket in the same manner.
Your three pockets should now form one continuous hanging unit.
Step 3: Attach Hanging Loops
Position the two hanging loops at the top of the back panel of the uppermost pocket. Space them approximately 4 inches apart, centered on the width of the panel.
Fold each loop in half and stitch both raw ends securely to the back of the top pocket. Reinforce these attachment points with extra stitches, as they will bear the weight of the entire organizer.
Step 4: Add the Dowel and Hanging Rope
Slide the wooden dowel through both hanging loops.
Cut your rope to approximately 24 inches. Tie each end securely around the dowel, about 1 inch from each end. The rope should form a triangle shape for hanging.
Trim any excess rope and secure the knots with a dab of clear glue if desired.
Finishing Touches
Weave in all remaining yarn ends using your yarn needle. For cotton yarn, I recommend weaving through at least 2 inches of stitches in multiple directions to ensure the ends stay put.
If your pockets seem a bit floppy, you can lightly spray them with fabric stiffener or a mixture of water and white glue. Let them dry completely while stuffed with tissue paper to hold their shape.
Customization Ideas
This beginner friendly crochet pattern adapts beautifully to your personal style.
Try different stripe placements. Add stripes at the top and bottom of each pocket, or create a gradient effect with multiple stripe colors.
Change the colors entirely. Soft gray with blush pink stripes would look lovely in a nursery. Bright rainbow stripes against a white background would be cheerful in a craft room.
Adjust the pocket depth. Add or remove rounds in the sides section to make deeper or shallower pockets depending on what you plan to store.
Add pom poms or tassels. A row of small tassels along the top of each pocket would add playful texture.
How to Care for Your Hanging Basket
Cotton yarn is wonderfully durable and easy to care for. If your organizer gets dusty, simply spot clean with a damp cloth. For a deeper clean, hand wash in cool water with mild detergent, reshape while damp, and lay flat to dry.
Avoid hanging heavy items that might stretch the pockets over time. This organizer works best for lightweight items like mail, small plants in plastic containers, craft supplies, or accessories.
Troubleshooting Common Issues
My pockets are different sizes. This usually comes down to tension changes as you work. Try to maintain consistent tension throughout, and count your stitches at the end of each round to catch mistakes early.
The base curls up at the edges. Working the BLO round too tightly can cause this. Try using a slightly larger hook for Round 5 only.
My color changes look messy. Remember to change colors on the final yarn over of the stitch before the color change round, not at the beginning of the new round.
The pockets sag when filled. Cotton yarn can relax over time. Using a slightly smaller hook than recommended will create a tighter, sturdier fabric. You can also line the inside of each pocket with fabric for extra support.
Thank you so much for choosing this pattern for your next crochet project! I truly hope you enjoy making this hanging basket as much as I enjoyed designing it. If you create one, I would absolutely love to see it. Tag me on Instagram or share a photo in my Facebook group so I can celebrate your finished piece with you.
If you found this crochet pattern helpful, please save it to your Pinterest boards so you can find it easily when you are ready to start. And I would love to hear from you in the comments below. Let me know if you make this organizer, what colors you choose, or where you plan to hang it in your home!