
I don’t know about you, but I’ve always had a soft spot for lace dresses that look like they took months to create but actually follow a logical, repeatable rhythm. All that elegance with a construction method that actually makes sense.
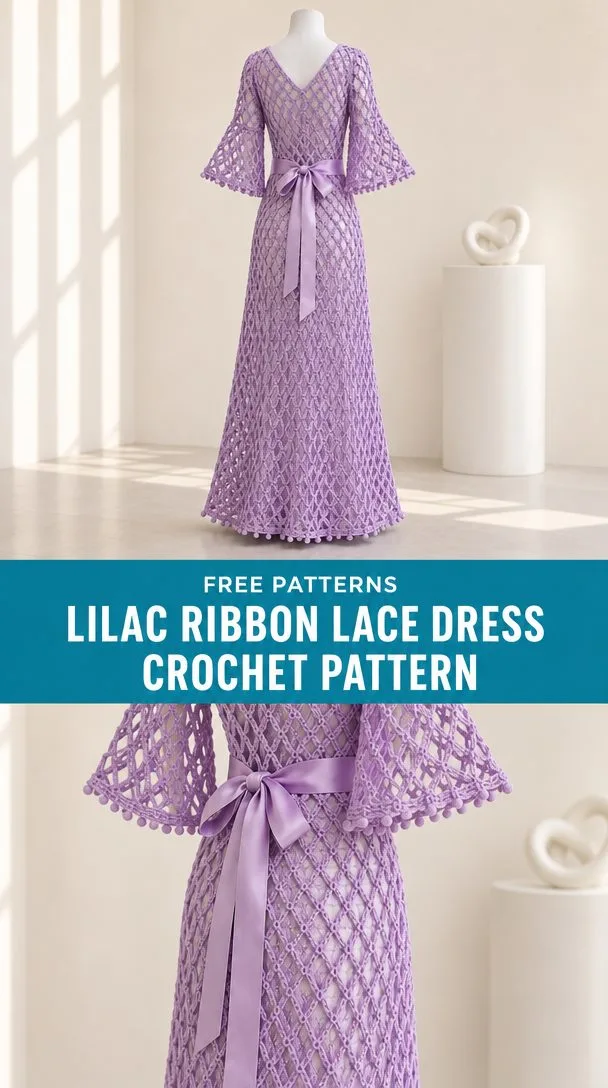
This lilac ribbon lace dress delivers exactly that feeling. The diamond mesh creates an airy, romantic drape while the satin ribbon at the waist adds a polished finishing touch. It’s the kind of piece that looks like heirloom couture but builds from straightforward chain arches and single crochets.
Whether you’re dreaming of a garden party, a beach wedding overlay, or just a stunning addition to your handmade wardrobe, this floor-length dress is absolutely worth the yarn investment. Let’s walk through everything you need to bring this gorgeous design to life.
About This Lilac Lace Dress Design
This crochet dress pattern creates a fitted bodice with a gradually flaring skirt that reaches approximately 145 cm from shoulder to hem. The worked example fits a 100 cm bust and 90 cm waist, making it suitable for body measurements of 90 to 94 cm bust and 80 to 84 cm waist.
The construction is refreshingly logical. You’ll make two flat bodice panels, working from waist to shoulder, then join them at the shoulders and sides. The skirt attaches to the waist foundation and works downward in the round, flaring gently through strategic increases. Bell sleeves are worked separately and set into the armholes, and the whole piece finishes with a delicate picot edging at the hem and cuffs.
The diamond mesh stitch creates that beautiful lattice effect you see in the photos. Each "cell" is simply a chain 3 arch anchored with a single crochet, and they drift naturally into the diamond pattern as you work row after row. It’s hypnotic once you get going.
Materials You’ll Need
Gathering your supplies before you start will make this project so much smoother. Here’s your complete list:
Yarn:
- Sport weight smooth cotton, 160 m per 50 g
- Lilac colorway: 650 g total (approximately 2080 m)
Hooks:
- 3.5 mm hook (or size needed to obtain gauge) for main fabric
- 3 mm hook for edging work
Notions:
- Tapestry needle
- 12 stitch markers
- Measuring tape
- Blocking mat and pins
- One 20 cm invisible zipper in matching lilac
- Matching sewing thread and needle
- 2 m of 12 mm lilac satin ribbon
The smooth cotton is essential here. It gives the mesh structure, blocks beautifully, and creates that crisp diamond definition you see in the finished dress. A fuzzy or textured yarn would muddy the lace effect.
Gauge Information
Getting gauge right matters enormously for a fitted garment like this. All measurements are taken after blocking, not while the fabric is still on the hook.
Diamond mesh gauge: 8 chain 3 arches and 8 rows equals 10 x 10 cm
Square mesh gauge (if using that version): 8 cells and 8 rows equals 10 x 10 cm, where 1 cell equals 1 double crochet (dc) plus 1 chain 1 space
Shell lace gauge (if using that version): 4 shell repeats and 8 rows equals 10 x 10 cm
To check your gauge, swatch at least 16 arches wide and 16 rows deep. Wash and dry flat exactly as you would the finished dress. Measure the central 10 cm in both directions. If your measurements are off, adjust your hook size and try again. This step takes time, but it saves heartache later.
If your row gauge differs slightly from the stitch gauge, work to measurements rather than row counts. The pattern provides both throughout.
Abbreviations and Special Stitches
Let’s define every term you’ll encounter so there’s no confusion mid-project.
Basic abbreviations:
- ch = chain
- sl st = slip stitch
- sc = single crochet (insert hook, yarn over, pull up a loop, yarn over, pull through both loops)
- hdc = half double crochet
- dc = double crochet (yarn over, insert hook, pull up a loop, yarn over, pull through 2 loops, yarn over, pull through remaining 2 loops)
- tr = treble crochet
- st(s) = stitch(es)
- sp = space
- sk = skip
- rep = repeat
- RS/WS = right side/wrong side
- BLO = back loop only
- yo = yarn over
- rnd = round
Special techniques:
FPdc/BPdc (Front Post Double Crochet/Back Post Double Crochet): Work a dc around the post of the next stitch, inserting your hook from the front or back respectively.
FPtr (Front Post Treble): Work a tr around the indicated post from the front.
dc2tog (Double Crochet 2 Together): Work 2 incomplete dc over the next 2 stitches (yarn over, insert, pull up loop, yarn over, pull through 2 loops for each), then yarn over and pull through all 3 loops on hook. This decreases 2 stitches down to 1.
Bobble: Work 5 incomplete dc in one stitch (stop each dc before the final pull through), then yarn over and draw through all 6 loops. Counts as 1 stitch.
Picot: Chain 3, slip stitch into the first chain. These decorative elements are not counted as base stitches.
Diamond D(C): Foundation chain (4C+2). Single crochet in second chain from hook, then work [ch 3, skip 3 chains, sc in next chain] C times. For subsequent rows: ch 1, sc in first sc, [ch 3, sc in next ch 3 arch] repeat across, ending ch 3, sc in last sc. This creates C arches that drift into a diamond lattice pattern.
Diamond Increase DI(C): Chain 1, sc in first sc, ch 3, sc in same sc (this creates the first increase), work [ch 3, sc in next arch] across the middle, then ch 3, sc in last sc, ch 3, sc in same last sc (second increase). Result: C+2 arches.
Pattern Notes Before You Begin
Read through these important details before casting on:
Turn after every flat row. Chain 1 for sc/hdc fabrics and chain 2 for dc/post stitch fabrics do not count as stitches. Always work your first stitch into the first stitch of the row. The mesh turning chains are the stated exception to this rule.
Joined rounds are not turned unless specifically noted. End every joined round with a slip stitch to the first stitch. The join slip stitch does not count in your stitch totals.
Square brackets indicate a repeat section. Stitch counts in brackets at the end of rows refer only to the active piece you’re working on.
Right and left refer to the wearer’s right and left, not yours as you’re looking at the work.
Finished measurements:
- Bust circumference: 100 cm
- Waist circumference: 90 cm
- Shoulder to hem length: approximately 145 cm
- Hem circumference: 150 cm
To resize: Add or subtract 4 mesh units to each bodice panel for every 10 cm circumference change you need. Divide the neckline in the same proportions and sketch a new schematic before beginning.
Back Bodice Instructions
The bodice panels work from waist to shoulder. You’ll make the back first, then the front with its V-neck shaping.
Row 1: Make D(36) for diamond fabric. [36 units]
Rows 2 through 4: Work diamond mesh even with no increases or decreases. [36 units]
Row 5: Work DI(36) to increase. [38 units]
Rows 6 through 8: Work even. [38 units]
Row 9: Work DI(38) to increase again. [40 units]
Rows 10 through 28: Work even. Rows 17 through 28 form the lower armhole zone. [40 units]
Row 29 (Begin shoulder shaping): Work the first 12 units only. Leave the middle 16 units and the last 12 units unworked. [12 units]
Rows 30 through 32: Work the first shoulder even, then fasten off. [12 units]
Second Shoulder, Rows 29 through 32: Rejoin yarn at the outer edge of the final 12 units. Work even for 4 rows and fasten off. [12 units]
Front Bodice Instructions
The front begins identically to the back but introduces V-neck shaping partway through.
Rows 1 through 16: Repeat Back Rows 1 through 16 exactly. [40 units]
Row 17: Work the first 20 units and turn, leaving the remaining 20 units for the second half. [20 units]
Neck shaping explanation: To reduce one unit at the neck edge when approaching the neck, leave the final unit unworked. When starting at the neck edge, slip stitch across that one unit before working the row. The slip stitch does not count in your totals. Keep the outer armhole edge straight throughout.
Rows 18 through 32: Reduce 1 neck unit on Rows 18, 20, 22, 24, 26, 28, 30, and 32. Work the other rows even with no decreases.
Counts after each decrease row: 19, 18, 17, 16, 15, 14, 13, 12. [12 units at Row 32]
Second Half, Rows 17 through 32: Rejoin yarn at the opposite outer edge. Mirror the first half exactly. [12 units]
Skirt Instructions
The skirt attaches after you’ve joined the bodice seams (see Assembly section). Work into the lower foundation edge of the bodice.
Important: Work Skirt Rounds 1 through 8 as FLAT ROWS, turning each row and leaving the left side open. This creates the lower half of your 20 cm side zipper opening. From Round 9 onward, join and work in closed rounds.
For diamond mesh, pick up one chain 3 arch per original arch. The front and back each contribute 36 arches. At the right seam, the shared post counts once. The two left edge posts remain separate until Round 9 joins them.
Round 1: Work evenly around the waist. [72 units]
Place 8 markers equally spaced (9 units apart at Round 1). These mark your increase points.
On increase rounds: Work (sc, ch 3, sc) into each marked arch. This adds one unit per marker. Move markers to the first new unit at each position after completing the increase round.
Round 4: Increase once at all 8 markers. [80 units]
Round 8: Increase once at all 8 markers. [88 units]
Round 12: Increase once at all 8 markers. [96 units]
Round 16: Increase once at all 8 markers. [104 units]
Round 20: Increase once at all 8 markers. [112 units]
Round 24: Increase once at all 8 markers. [120 units]
All other rounds through Round 80: Work diamond mesh even with no increases. [120 units after Round 24]
Sleeve Instructions (Make Two)
The bell sleeves work flat, then seam and set into the armholes.
Row 1: Make 32 units of diamond mesh for a 40 cm upper arm edge. [32 units]
Rows 2 through 20: Work even. [32 units]
Row 21: Add 1 unit every fourth unit across the row. [40 units]
Rows 22 through 25: Work even. [40 units]
Assembly
You’ll need your lilac yarn, 3.5 mm hook, tapestry needle, and markers.
Seam Pass 1: Mattress stitch each shoulder across the 12 matching units. [2 seams x 12 units]
Seam Pass 2: Join the right side seam across Rows 1 through 16. Join the left side seam across Rows 9 through 16 only, leaving Rows 1 through 8 open for the zipper. [16 right side row ends + 8 left side row ends]
Seam Pass 3: After completing the skirt, pin the zipper into the left opening (8 bodice row ends plus 8 skirt row ends). Hand backstitch each tape to the wrong side 5 mm from the teeth. Reinforce both ends and test the opening. [1 zipper, 20 cm]
Seam Pass 4: Close each sleeve along its long edge. Ease the 32 unit top around the 32 row end armhole edge. [2 sleeves]
Checkpoint: Waist circumference should measure 90 cm. Bust circumference should measure 100 cm. The neckline and both armholes should lie flat. Try the bodice over your intended underlayer before adding the skirt.
Edgings and Finishing Details
Switch to your 3 mm hook for all edging work.
Neck Round 1: Single crochet once into each post and once into each chain 1 space (or 3 sc per chain 3 arch for diamond mesh). At side row ends, use 2 sc per square mesh row or 3 sc per diamond row. Record your total as E. Ease the rate only if needed to keep the edge lying flat. [E sc]
Neck Round 2: Single crochet in every sc. For the V-neck point, work sc3tog (work 3 incomplete sc then pull through all loops). [E sc; V-neck E-2 sc]
Hem Preparation Round 1: For diamond mesh, work 3 sc per arch. [360 sc]
Hem Round 2: [Sc in next 3 sc, picot] around. [360 sc + 120 picots]
Ribbon: Thread the 2 m lilac satin ribbon through the waist cells. Trim the ends diagonally and hand tack the ribbon at each side seam to keep it centered.
Final Checkpoint: Hem and cuffs should remain flat with no tight ridges or accidental increases. The neck opening should pass over the head comfortably.
Finishing Your Crochet Lace Dress
Finishing Pass 1: Weave each tail through at least 5 cm of stitches, reverse direction and repeat. [0 loose tails]
Finishing Pass 2: Wash gently in cool water, squeeze in a towel, and pin to measurements without stretching the neckline. [1 blocked garment]
After drying, your dress should measure: bust 100 cm, waist 90 cm, length approximately 145 cm. Let the dress hang for 24 hours over your intended underlayer and check the hem level before trimming any remaining ends.
Care Instructions
Follow your yarn label for specific guidance. Hand wash gently in cool water with mild detergent. Do not wring. Support the wet garment fully, reshape on a towel, and dry flat away from direct heat. Store folded to prevent stretching.
This is a mesh garment and will need an opaque underlayer for everyday wear. Avoid wearing near moving equipment or anything that could snag the delicate lace.
Final Thoughts on This Crochet Dress Pattern
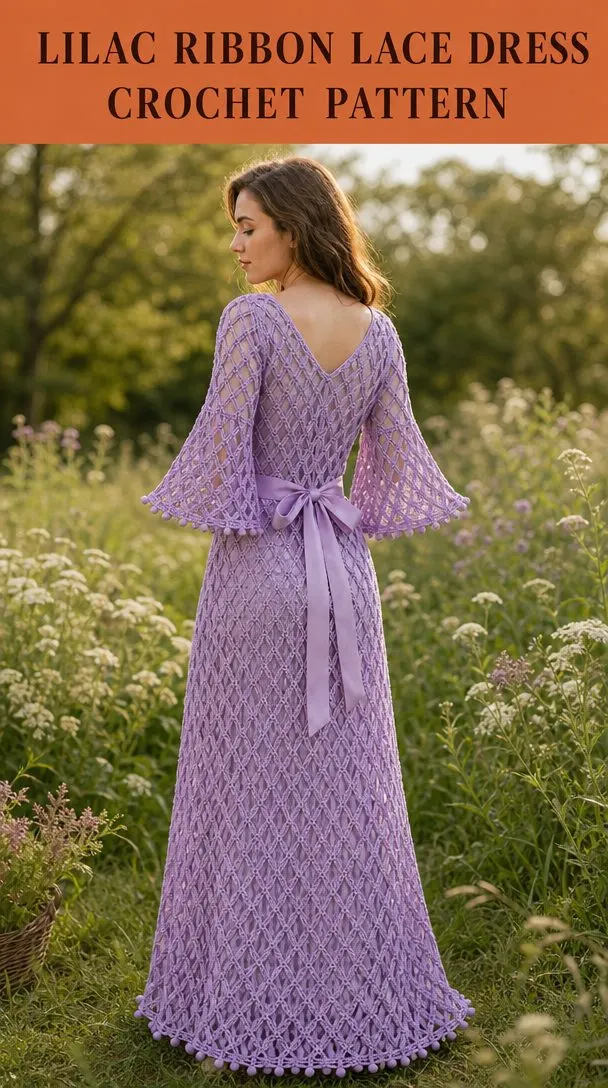
This lilac ribbon lace dress is a true showstopper. The diamond mesh creates movement and drama while the fitted bodice and flared skirt offer timeless silhouette appeal. The bell sleeves add romantic flair, and that satin ribbon pulls everything together beautifully.
Yes, this is a larger project. But the construction is logical, the stitches are simple, and the results are absolutely stunning. Each section builds naturally on the last, and before you know it, you’ll be threading that ribbon through the waist and admiring your work.
Thank you so much for choosing this pattern for your next crochet adventure. I’d love to see your finished dress! Share your photos on Instagram or Facebook and tag us so we can celebrate your beautiful work.
If this pattern inspires you, save it to your Pinterest boards so you can find it whenever you’re ready to cast on. And if you make this dress, please leave a comment below. I’d love to hear how it turned out for you!