
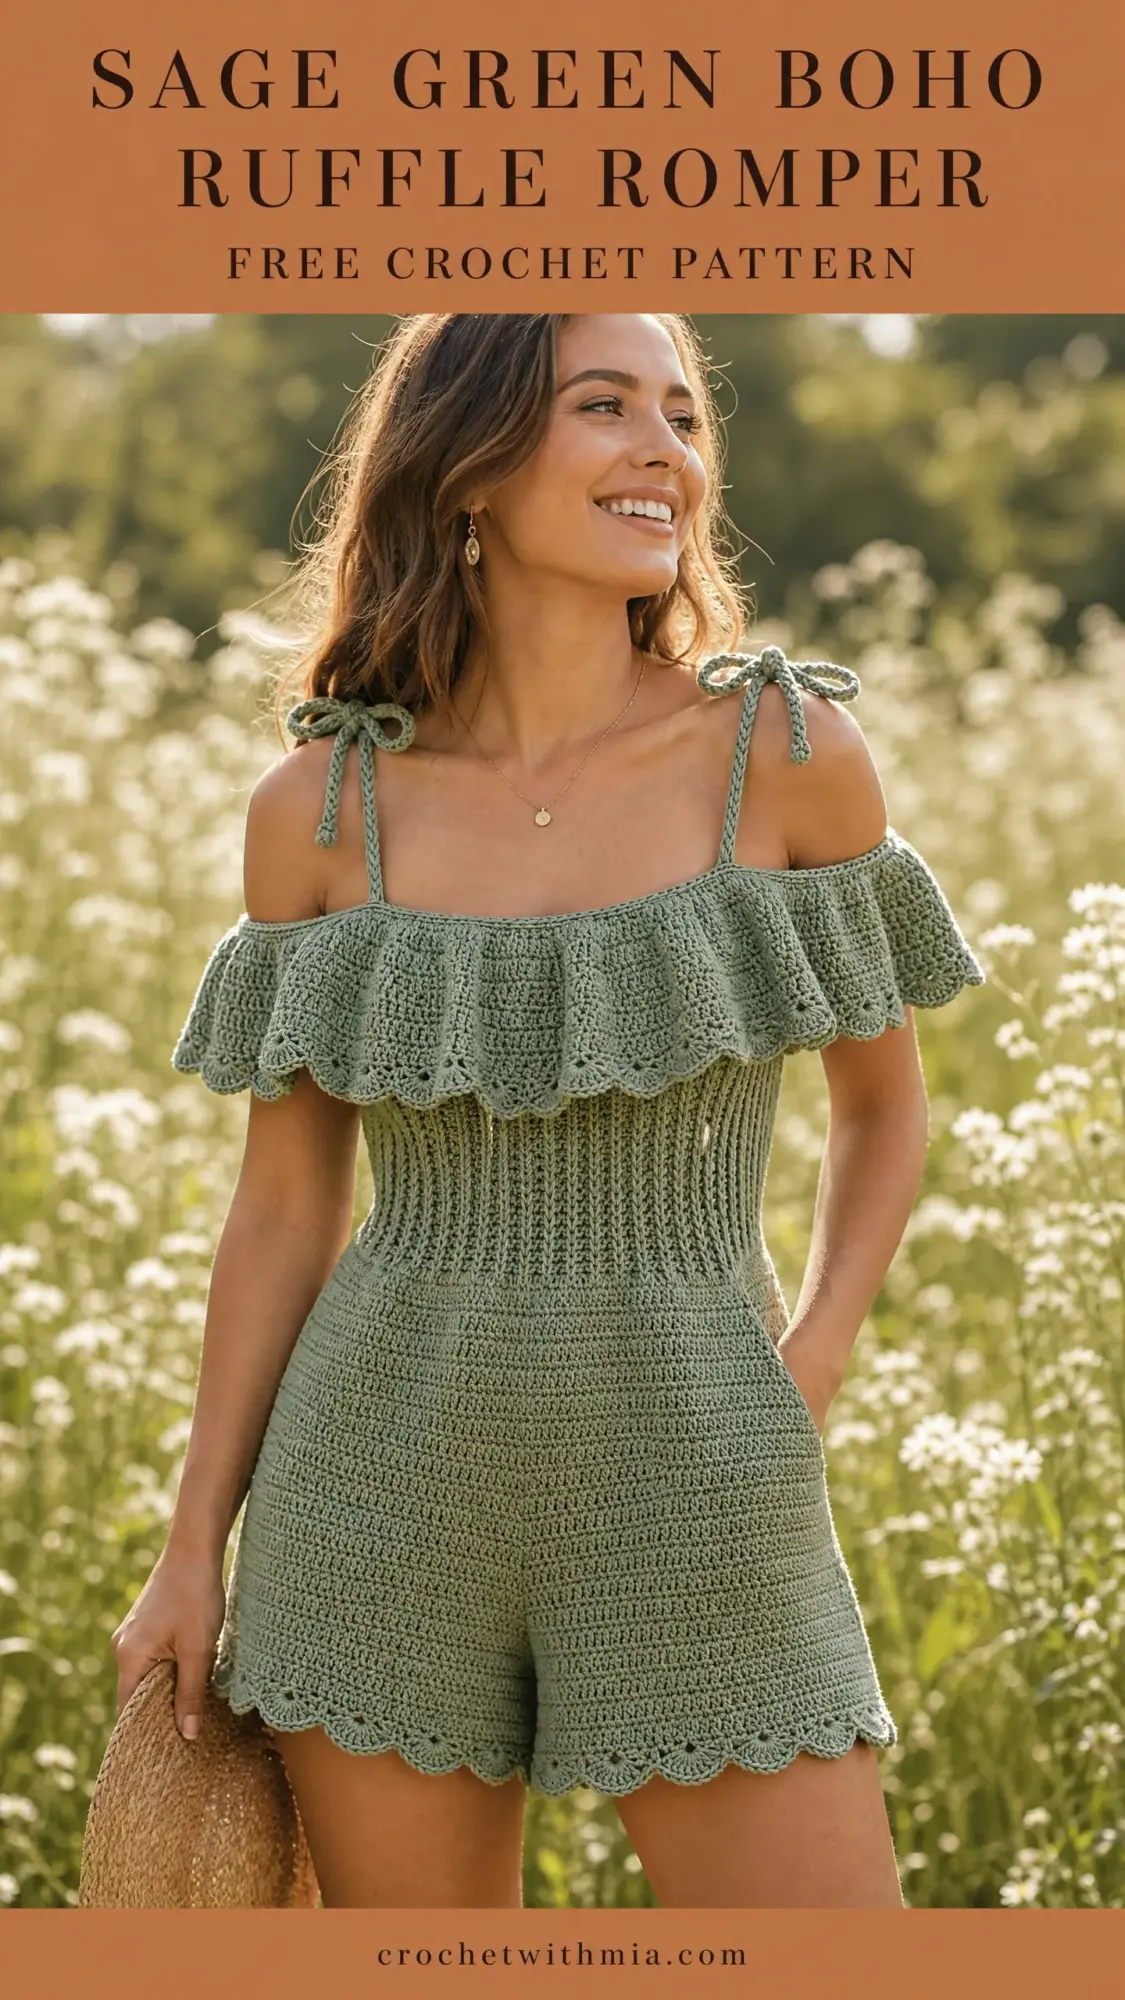
When I sat down to design this romper, I had a very specific vision in mind. I wanted something that looked boutique-quality but was still achievable for intermediate crocheters. I wanted that soft boho aesthetic with the off-shoulder ruffle, the fitted ribbed bodice, and those adorable scalloped leg hems.
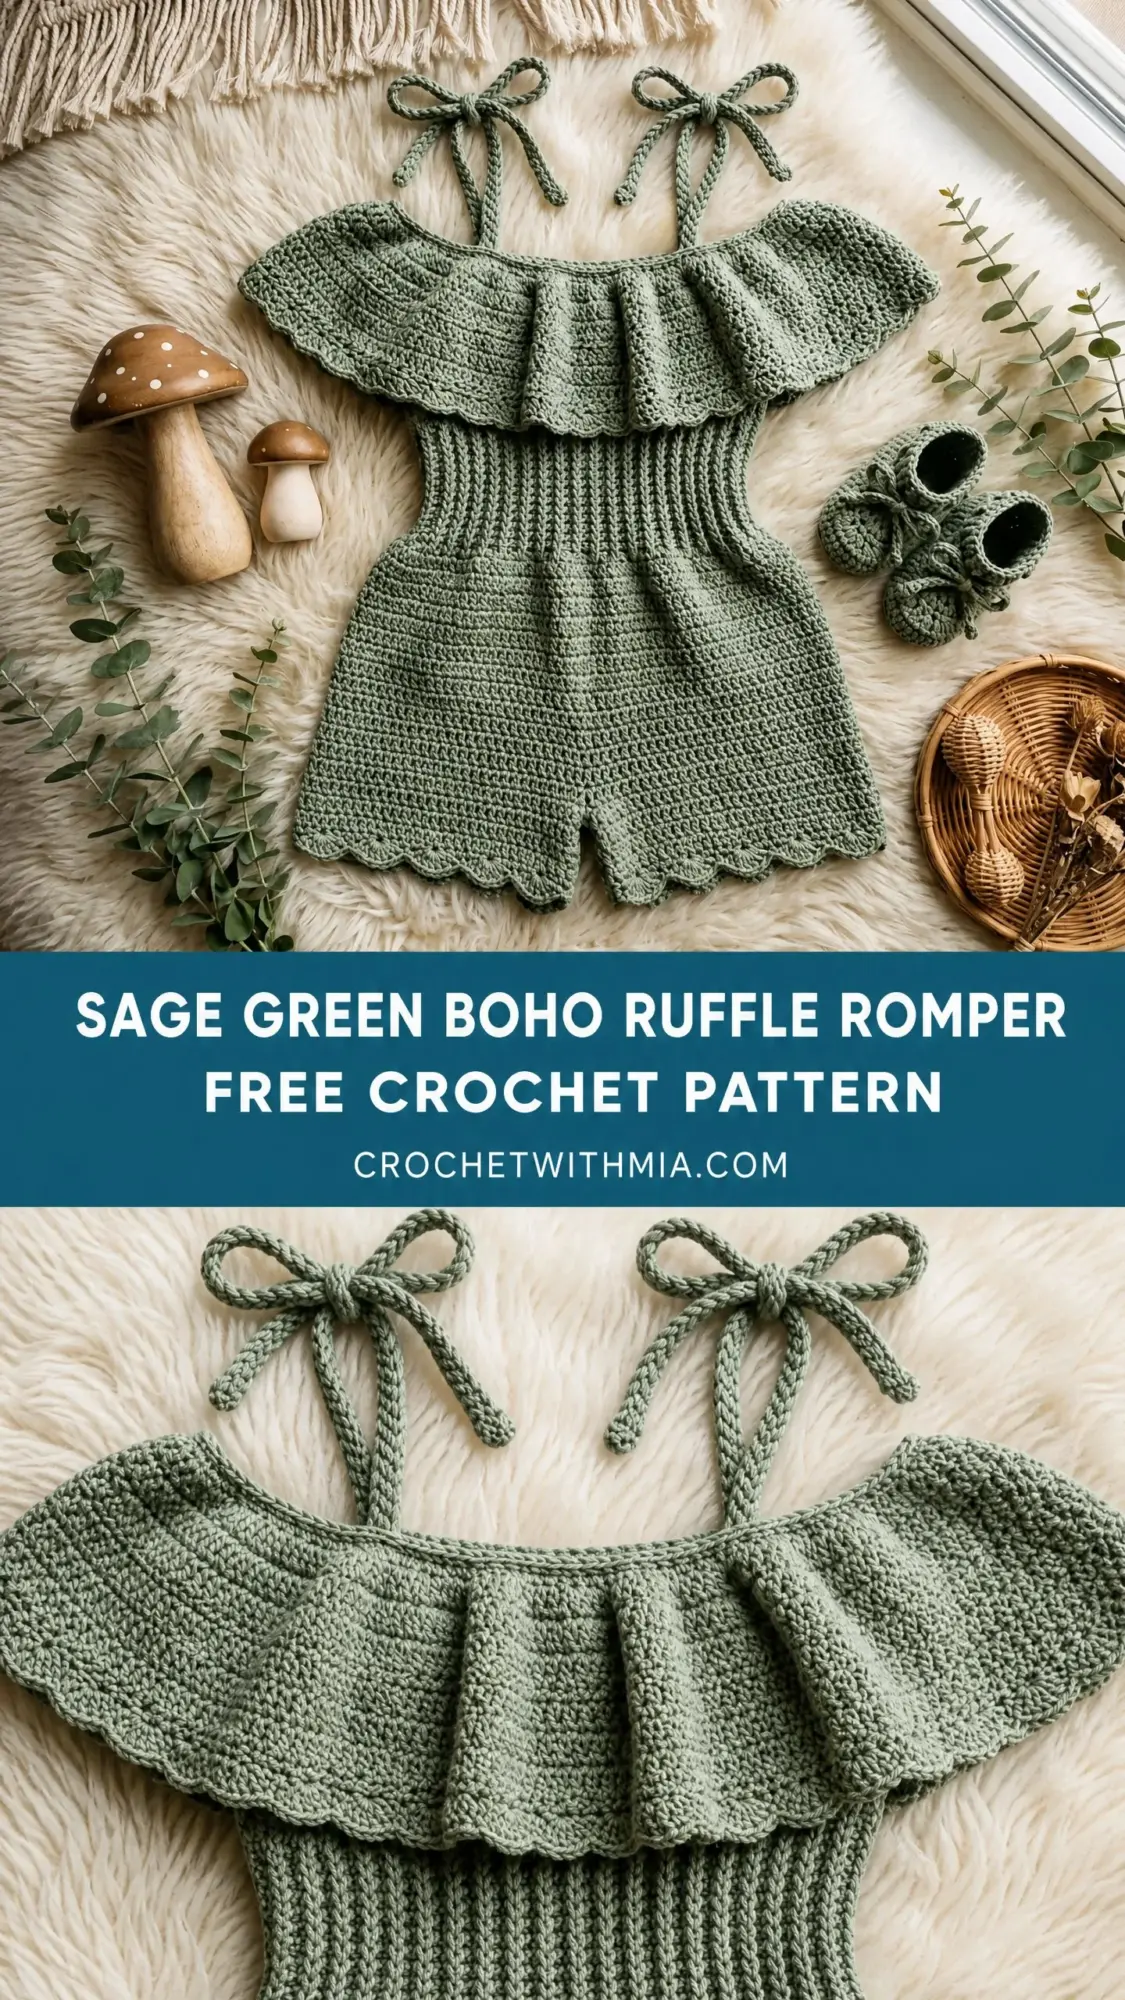
And honestly? I am SO pleased with how it turned out. The sage green color gives it such an earthy, natural vibe. The construction is broken into manageable sections so you never feel overwhelmed. Every detail from the tie straps to the waist shaping came together exactly as I hoped.
This baby romper is perfect for warm weather, photo shoots, or gifting to new parents who appreciate handmade pieces. Let me walk you through every step of creating this gorgeous little outfit.
About This Crochet Romper Pattern
This adorable crochet romper features several design elements working together to create that polished, boho look you see in the photos. The off-shoulder ruffle yoke falls softly across the chest. Below that, a ribbed bodice creates structure and a flattering cinched waist. The short-style bottoms have sweet scalloped hems at each leg opening. Adjustable tie straps at the shoulders mean you can customize the fit.
The romper is sized for 12 to 18 months, though I have included sizing notes if you need to go smaller or larger. The finished chest circumference measures approximately 18 inches with gentle stretch. Total length from strap to leg hem is about 14 inches.
Skill level: Intermediate. You should be comfortable working in the round, creating ribbed texture with back loop only stitches, joining rounds, and following stitch counts carefully. Nothing here is terribly complex on its own, but the multi-section construction makes this unsuitable for true beginners.
Time estimate: Plan for 8 to 12 hours of work at a comfortable pace. That includes all sections, finishing, and blocking.
Materials You Will Need
Yarn: DK weight yarn (CYCA 3) in sage green. You will need approximately 350 to 400 yards total. I recommend 100% cotton or a cotton blend for breathability and stitch definition. This is a baby garment for warmer weather, so cotton works beautifully.
Yarn suggestions:
Hook: US size E-4 / 3.5 mm as your primary hook. Optionally, a US size D-3 / 3.25 mm for the straps if you prefer a tighter finish.
Notions:
Gauge (Do Not Skip This)
Getting gauge right matters for a fitted garment like this. If your gauge is off, the romper will not fit properly.
Single crochet gauge: 18 sc x 20 rows = 4 inches / 10 cm, blocked
Ribbing gauge: 16 hdc-blo x 14 rows = 4 inches / 10 cm, blocked
Make a gauge swatch before starting. If your swatch is too big, go down a hook size. If too small, go up a hook size. This step saves heartache later.
Abbreviations and Stitch Definitions
Let me define every abbreviation you will encounter. I have included plain-English explanations so nothing catches you off guard.
blo = back loop only (insert your hook under just the back loop of the stitch instead of both loops)
ch = chain (the basic foundation stitch)
dc = double crochet (yarn over, insert hook, pull up loop, yarn over and pull through 2 loops twice)
hdc = half double crochet (yarn over, insert hook, pull up loop, yarn over and pull through all 3 loops at once)
hdc-blo = half double crochet worked in back loop only (creates that stretchy ribbed texture)
hdc2tog-blo = half double crochet two together in back loop only (a decrease stitch)
sc = single crochet (insert hook, pull up loop, yarn over and pull through both loops)
sl st = slip stitch (insert hook, pull up loop and draw through loop on hook in one motion)
st(s) = stitch(es)
RS = right side (the public-facing side of your work)
WS = wrong side
rem = remaining
rep = repeat
Numbers in parentheses at the end of each row or round indicate your total stitch count.
Special Stitches Explained
Foundation Double Crochet (fdc)
This technique creates a foundation chain and first row simultaneously. The result is more flexible than a regular chain.
Make a slip knot. Chain 3 (counts as first dc). Yarn over. Insert hook into 3rd chain from hook. Draw up a loop so you have 3 loops on hook. Yarn over and draw through just 1 loop. This creates the chain base. Yarn over and draw through 2 loops. Yarn over and draw through remaining 2 loops. First fdc complete.
For each additional fdc: yarn over, insert hook under the 2 loops of the chain base from the previous stitch, draw up a loop, yarn over and pull through 1 loop, then complete as a regular dc.
Scallop Stitch (for hem edging)
This creates those pretty shell-shaped scallops at the leg openings and ruffle edge.
Slip stitch into first stitch. Skip 1 stitch. Work 5 dc into next stitch (this makes one shell). Skip 1 stitch. Slip stitch into next stitch. Repeat this sequence across. Each scallop unit uses 4 stitches total.
Back Loop Only Ribbing
Working only into the back loop creates raised ridges that look like knit ribbing. The fabric becomes stretchy and textured. This is what gives the bodice its fitted, professional appearance.
Pattern Instructions
This romper is worked in sections: ruffle yoke panel, bodice tube, crotch panel, leg openings, then final assembly with edging and straps.
Section 1: Ruffle Yoke Panel
The ruffle is worked flat in rows. It starts wider than the bodice to allow for gathering.
Row 1 (RS): Using your E-4 hook, ch 100. Sc in 2nd ch from hook and in each ch across. Turn. (99 sc)
Row 2: Ch 1, turn. Work 2 dc in each sc across. Turn. (198 dc)
Row 3: Ch 1, turn. Sc in each dc across. Turn. (198 sc)
Row 4: Ch 1, turn. Work 2 dc in each sc across. Turn. (396 dc)
This creates the full ruffle volume. The panel will look very wide and ruffled at this point. This is exactly what you want.
Set aside the panel. Leave working yarn attached at the top edge for seaming later. Weave in ends only on the cast-on edge side.
Checkpoint: Your ruffle panel should measure approximately 22 inches wide at the widest point and about 4 inches tall.
Section 2: Bodice
The bodice is worked in joined rounds of hdc-blo to create ribbed texture. You start at the top and work downward toward the crotch.
Important: The ch-2 at the start of each round does NOT count as a stitch. Always work your first hdc into the first actual stitch.
Foundation Round: Ch 82, sl st to first ch to form a ring. Be careful not to twist.
Round 1: Ch 2 (does not count as st). Hdc in same ch as sl st and in each ch around. Sl st to first hdc to join. (82 hdc)
Rounds 2 through 5: Ch 2. Hdc-blo in each st around. Sl st to first hdc. (82 hdc)
Round 6 (decrease round): Ch 2. [Hdc-blo in next 18 sts, hdc2tog-blo] 4 times. Hdc-blo in rem 2 sts. Sl st to first hdc. (78 hdc)
Round 7: Ch 2. Hdc-blo in each st around. Sl st to first hdc. (78 hdc)
Round 8 (decrease round): Ch 2. [Hdc-blo in next 17 sts, hdc2tog-blo] 4 times. Hdc-blo in rem 2 sts. Sl st to first hdc. (74 hdc)
Round 9: Ch 2. Hdc-blo in each st around. Sl st to first hdc. (74 hdc)
Round 10 (decrease round): Ch 2. [Hdc-blo in next 16 sts, hdc2tog-blo] 4 times. Hdc-blo in rem 2 sts. Sl st to first hdc. (70 hdc)
Round 11: Ch 2. Hdc-blo in each st around. Sl st to first hdc. (70 hdc)
Round 12 (decrease round): Ch 2. [Hdc-blo in next 15 sts, hdc2tog-blo] 4 times. Hdc-blo in rem 2 sts. Sl st to first hdc. (66 hdc)
Round 13: Ch 2. Hdc-blo in each st around. Sl st to first hdc. (66 hdc)
Now the waist flares back out with increase rounds.
Round 14 (increase round): Ch 2. [Hdc-blo in next 15 sts, 2 hdc-blo in next st] 4 times. Hdc-blo in rem 2 sts. Sl st to first hdc. (70 hdc)
Round 15: Ch 2. Hdc-blo in each st around. Sl st to first hdc. (70 hdc)
Round 16 (increase round): Ch 2. [Hdc-blo in next 16 sts, 2 hdc-blo in next st] 4 times. Hdc-blo in rem 2 sts. Sl st to first hdc. (74 hdc)
Round 17: Ch 2. Hdc-blo in each st around. Sl st to first hdc. (74 hdc)
Round 18 (increase round): Ch 2. [Hdc-blo in next 17 sts, 2 hdc-blo in next st] 4 times. Hdc-blo in rem 2 sts. Sl st to first hdc. (78 hdc)
Round 19: Ch 2. Hdc-blo in each st around. Sl st to first hdc. (78 hdc)
Round 20 (increase round): Ch 2. [Hdc-blo in next 18 sts, 2 hdc-blo in next st] 4 times. Hdc-blo in rem 2 sts. Sl st to first hdc. (82 hdc)
Rounds 21 and 22: Ch 2. Hdc-blo in each st around. Sl st to first hdc. (82 hdc)
Do not fasten off. Continue to the crotch panel.
Checkpoint: Bodice should measure approximately 6 inches in height. The narrowest point at the waist should be about 14.5 inches around.
Section 3: Crotch Panel
This flat panel divides the front from the back to create leg openings.
Row 1: With RS facing, sl st across first 20 sts. Ch 1. Sc in each of next 42 sts. Leave remaining 20 sts unworked. Turn. (42 sc)
Rows 2 through 4: Ch 1. Sc in each sc across. Turn. (42 sc)
Fasten off after Row 4.
Section 4: Leg Openings (Make 2)
Join yarn at the inner crotch seam edge.
Setup Round: Sc evenly around leg opening: 20 sc along front bodice edge, approximately 4 sc across short end of crotch panel, 20 sc along back bodice edge, approximately 4 sc across opposite short end of crotch panel. Sl st to first sc. (48 sc)
Rounds 1 through 5: Ch 1. Sc in each sc around. Sl st to first sc. (48 sc)
Scallop Edging Round: Sl st in first sc. [Skip 1 sc, 5 dc in next sc, skip 1 sc, sl st in next sc] repeat around. Sl st to first sl st to close. (12 scallop shells)
Fasten off and weave in ends. Repeat for the second leg.
Section 5: Attaching the Ruffle Yoke
With right sides facing outward, align the top edge of the ruffle panel (the Row 1 edge with 99 stitches) around the top of the bodice (82 stitches). The extra width creates natural gathering.
Divide both pieces into 4 equal sections with stitch markers. Join yarn at one side seam. Sc through both layers around, easing in the extra ruffle fullness evenly. Sl st to first sc. (82 sc joining round)
Fasten off and weave in ends.
Section 6: Ruffle Lower Scallop Edging
Join yarn at one end of the Row 4 edge of the ruffle.
Sl st in first dc. [Skip 1 dc, 5 dc in next dc, skip 1 dc, sl st in next dc] repeat across all 396 stitches. (99 scallop shells)
Fasten off and weave in ends.
Section 7: Tie Straps (Make 2)
Ch 60. Sl st in 2nd ch from hook and in each ch back to beginning. Fasten off.
Thread one strap through the ruffle top edge at the right shoulder, approximately 2.5 inches from the side edge. Repeat for the left shoulder. Tie each strap in a bow.
Finishing Your Boho Crochet Romper
Weave in all remaining ends, working through at least 2 inches of fabric in multiple directions for security.
Soak the finished romper in cool water for 10 to 15 minutes. Press out excess water gently with a towel. Do not wring.
Lay flat on a blocking board. Pin to finished measurements and allow to dry completely.
Size Customization Tips
For 2T to 3T: Increase bodice foundation chain from 82 to 98 stitches. Increase ruffle foundation chain from 100 to 118. Add 2 plain rounds to bodice and leg openings. Keep scallop counts divisible by 4.
For 6 to 12 months: Decrease bodice foundation chain from 82 to 66 stitches. Reduce ruffle foundation chain from 100 to 82. Work only Rounds 1 through 20 on the bodice. Reduce leg rounds from 5 to 3 before scallop edging.
Care Instructions
Machine wash cold on gentle cycle for cotton or cotton-blend yarns. Lay flat to dry. Never tumble dry or iron directly. Store folded rather than hung to prevent stretching of the ribbed bodice.
I really hope you love making this boho ruffle romper as much as I loved designing it. If you create one, please save this pattern to your Pinterest boards so you can find it easily later. And I would absolutely love to see your finished rompers, so drop a comment below or tag me on Instagram or Facebook with your photos!