
I call this one the Twilight Stars set, and honestly, it has been living rent-free in my head for about three years now. The original sketch sits in a tattered notebook I keep by my bed, scribbled down one night when my youngest couldn’t sleep and we were counting stars through her window. She wanted a sweater "with the night sky on it," and somehow that request turned into these raised purple stars floating on lavender squares.
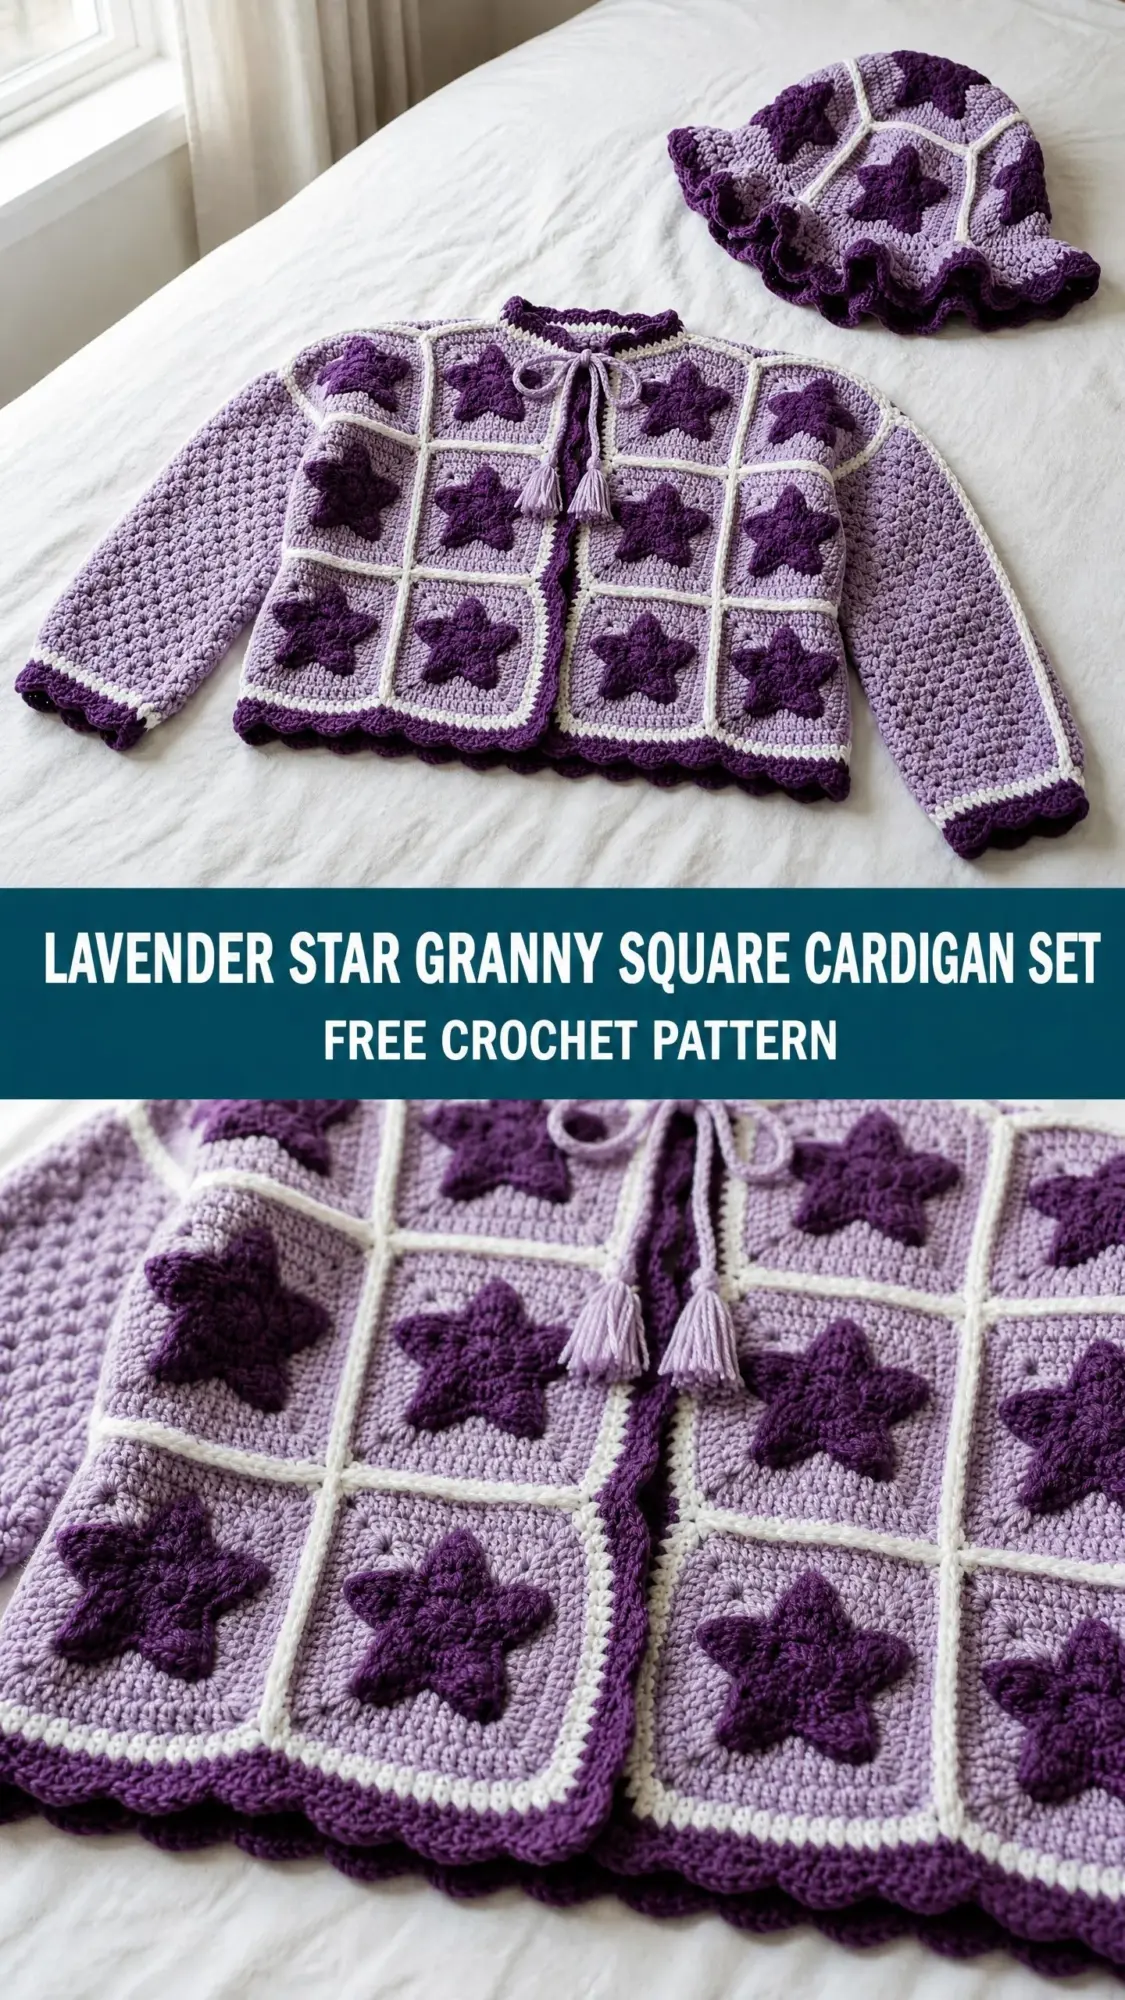
What started as a bedtime promise became one of my favorite designs to date. The three-dimensional star motifs actually pop up from the fabric, giving each granny square real depth and personality. And that white grid joining the squares together? It reminds me of window panes looking out at a starry sky.
This set includes both a cardigan and a matching bucket hat, sized for children around 4 to 6 years old. The construction is modular, which means you work individual squares first, then join them together. If you have made a granny square blanket before, you already have most of the skills you need. The 3D stars add some intermediate techniques, but I will walk you through every single stitch.
Why This Lavender Star Cardigan Pattern Works So Well
The beauty of granny square construction is that it breaks a seemingly complex garment into manageable pieces. Instead of working one enormous project, you create 25 identical squares, block them, and then assemble. Each square takes roughly 25 to 35 minutes once you get the rhythm down.
The raised star motif uses front post treble crochet stitches worked as a cluster. This sounds fancy, but it just means you wrap your yarn around the post of stitches from a previous round instead of through the top loops. The result is a star that literally stands up from the surface of your work.
The color combination of lavender, deep purple, and white creates that dreamy celestial effect. The white join lines form a grid pattern that frames each star beautifully. And the deep purple scallop edging ties everything together with a polished finish.
Materials You Will Need
Yarn (Worsted Weight, Category 4):
Hook: US size J / 6.0 mm
Notions:
Yarn Suggestions:
Lion Brand Pound of Love works beautifully here with excellent stitch definition and machine washability. Paintbox Yarns Simply Aran in Wisteria Purple and Pansy Purple gives gorgeous color fidelity. Caron Simply Soft is widely available and wonderfully soft against children’s skin.
Avoid brushed or fuzzy yarns for this project. They will obscure the 3D star detail that makes this pattern special.
Gauge Information
One completed granny square (after Round 4) measures 4.5 inches / 11.4 cm square, blocked.
In half double crochet flat rows with J hook: 14 hdc x 10 rows = 4 inches / 10 cm square.
Gauge is critical for this garment. If your squares are too small, go up a hook size. Too large, go down. All finished dimensions depend on each square measuring exactly 4.5 inches after blocking.
Finished Measurements
Cardigan:
Hat:
Abbreviations and Stitch Definitions
Before we dive in, let me explain every stitch abbreviation you will encounter:
Special Techniques
Scallop Stitch (for all edging)
This creates the pretty wavy edge you see on the hem, cuffs, and neckline:
1. Skip 2 stitches
2. Work 5 double crochets into the next stitch
3. Skip 2 stitches
4. Slip stitch into the next stitch
5. Repeat across
One scallop unit uses 6 stitches total. Your edge stitch count needs to be divisible by 6 before beginning.
Front Post Treble Crochet (fptr)
This is how we create the raised star points:
1. Yarn over twice
2. Insert hook from front to back to front around the post of the indicated stitch (not through the top, around the vertical post)
3. Yarn over and pull up a loop (4 loops on hook)
4. Yarn over and draw through 2 loops (3 loops remain)
5. Yarn over and draw through 2 loops (2 loops remain)
6. Yarn over and draw through remaining 2 loops
3D Star Point Cluster
Each star point is 5 fptr worked together as a cluster:
1. Work the first fptr around the first designated dc post, but stop with 2 loops remaining on hook
2. Work another fptr around the next dc post, stopping with 3 loops on hook
3. Repeat for the next 3 dc posts until you have 6 loops on hook
4. Yarn over and draw through all 6 loops
5. Chain 1 to close and lock the point
This creates one raised, three-dimensional star point projecting from the fabric surface. Each square has 4 star points, one on each side.
Flat Slip Stitch Join
This joins your squares together:
1. Hold two squares with wrong sides together
2. Working through both thicknesses, insert hook under the back loop of the corresponding stitch on both squares simultaneously
3. Yarn over and draw through both loops and the loop on hook
4. Continue across the edge
Use Color C (white) for all joins to create the visible grid line.
Tassel Instructions (Make 2)
1. Wrap Color A around a 3-inch wide piece of cardboard 20 times
2. Cut a 10-inch length, slide it under all wraps at the top, tie tightly with a double knot (this becomes the hanging loop)
3. Slide wraps off the cardboard
4. Cut another 10-inch length and wrap it tightly around all strands about 0.5 inch below the top tie, knot securely
5. Cut through all loops at the bottom, trim ends even
The Granny Square Pattern (Make 25 Total)
You will need 18 squares for the cardigan and 7 for the hat. All squares are identical.
Round 1 (Color B, Deep Purple)
Magic ring (or ch 4, sl st to join into ring). Ch 3 (counts as first dc), work 2 dc into ring, ch 2, (3 dc into ring, ch 2) 3 times. Sl st to top of beg ch-3 to join. (12 dc, 4 ch-2 corner spaces)
Round 2 (Color B, Deep Purple)
Ch 3 (counts as dc). Work 1 dc into each of next 2 dc, (2 dc, ch 2, 2 dc) into corner ch-2 sp, 1 dc into each of next 3 dc, (2 dc, ch 2, 2 dc) into corner ch-2 sp. Repeat from beginning of round for remaining 2 corners, ending with sl st to top of beg ch-3. (28 dc, 4 ch-2 corner spaces)
After this round, you have 7 dc across each side. The 5 center dc of each side will form one star point in the next round.
Round 3 (Color A, Lavender) Star and Background Round
Join Color A with sl st into any corner ch-2 sp. Ch 3 (counts as dc), dc into same sp, ch 1.
Now work the star point: skip the first dc of the side, work 1 fptr around each of the 5 center dc posts from Round 2 as a cluster (5-fptr cluster as described above), ch 1. Skip the last dc of the side before the corner.
Work (2 dc, ch 2, 2 dc) into corner ch-2 sp.
Repeat the star point sequence for each of the remaining 3 sides, ending with 2 dc into the starting corner sp, ch 2, sl st to top of beg ch-3. (4 star points made, 4 corner clusters made)
Round 4 (Color C, White)
Join Color C with sl st into any corner ch-2 sp. Ch 3 (counts as dc). Work (dc, ch 2, 2 dc) into same corner sp. Work 1 dc into each of next 2 dc, 1 dc into ch-1 sp, 1 dc over the top of the star point cluster (into the closing ch-1 of that point), 1 dc into next ch-1 sp, 1 dc into each of next 2 dc. Work (2 dc, ch 2, 2 dc) into corner ch-2 sp. Repeat across remaining 3 sides. Sl st to join. Fasten off. (9 dc across each side between corner clusters, 4 corners each with ch-2 sp)
Block all 25 squares to exactly 4.5 inches / 11.4 cm square before joining.
Cardigan Assembly
Square Layout
The cardigan uses 18 squares arranged as follows:
Joining Steps
Use Color C and the flat slip stitch join for all seams. Work joins on the wrong side so the white ridge shows on the right side.
Step 1: Join 3 squares side by side into one row. Join another 3 squares into a second row. Join these rows together for the back panel (3 wide, 2 tall).
Step 2: For each front panel, join 1 square on top of another (1 wide, 2 tall).
Step 3: Join the right edge of the right front to the right edge of the back. Repeat for the left front.
Step 4: Place 1 shoulder square on top of the back’s top corner, joining it to both the back and front top edges. Repeat for the other shoulder. You now have a square armhole opening on each side (4.5 inches x 4.5 inches).
Sleeves (Make 2)
Join two squares into a tube by seaming the top and bottom edges together (leaving a tube with 9-inch circumference).
Sleeve Extension (Color A):
Join Color A to the top opening of the sleeve square tube with sl st. Pick up and work 1 sc into each dc around the tube opening. (36 sc)
Round 1: Ch 2 (does not count as st), hdc in each sc around, sl st to join. (36 hdc)
Rounds 2 through 8: Ch 2, hdc in each hdc around, sl st to join. (36 hdc each round)
Set in the sleeve by pinning the top of the hdc tube into the armhole opening. With RS facing, use Color C to sl st join the sleeve to the armhole all the way around. Fasten off.
Neckline Edging
With RS facing and Color A, starting at the top right front corner, pick up and sc evenly around the neckline opening. Pick up 9 sc across each square edge. (36 sc)
Neckline Round 2 (Color B): Ch 1. Work scallop stitch sequence across all 36 sts: (skip 2 sc, 5 dc in next sc, skip 2 sc, sl st in next sc) 6 times. Sl st to join. Fasten off. (6 scallops)
Tassel tie: With Color A, make a crochet chain approximately 10 inches long. Fasten off. Attach one tassel to each end. Sew the center of the chain to the center front neckline point.
Hem Edging
With RS facing and Color B, pick up 1 sc into each dc across the bottom edge of all 5 bottom squares. Add 3 sc evenly in the corners between squares to bring the total to 48 sc.
Hem Round 2 (Color B): (Skip 2 sc, 5 dc in next sc, skip 2 sc, sl st in next sc) 8 times. Fasten off. (8 scallops)
Front Edge Borders
Work along each front opening edge separately. Pick up 18 sc per front edge. Work scallop sequence 3 times per front edge. Fasten off.
Cuff Edging
Pick up 36 sc around each cuff opening. Join Color B.
(Skip 2 sc, 5 dc in next sc, skip 2 sc, sl st in next sc) 6 times. Fasten off. (6 scallops per cuff)
Hat Construction
The hat uses 7 granny squares: 1 center square (the crown) and 6 squares joined around it.
Assembly
Step 1: Join one square to each of the 4 sides of the center square. Join the remaining 2 squares into the gaps to create a roughly circular dome layout.
Step 2: With WS facing inward, fold the outer edges upward and sl st the adjacent side edges of neighboring outer squares together using Color C.
Step 3: The brim pickup edge equals 6 outer squares x 9 dc per bottom edge. (54 sts)
Hat Brim
Join Color B to the brim edge with sl st.
Round 1: Ch 1, sc in each st around. Work 1 extra sc into each of the 6 join points between squares. (60 sc)
Round 2: Ch 1, (sc in next 4 sc, 2 sc in next sc) 12 times. Sl st to join. (72 sc)
Round 3: Ch 1, (sc in next 5 sc, 2 sc in next sc) 12 times. Sl st to join. (84 sc)
Round 4: Ch 1, (sc in next 6 sc, 2 sc in next sc) 12 times. Sl st to join. (96 sc)
Rounds 5 and 6: Ch 1, sc in each sc around. Sl st to join. (96 sc)
Ruffle
Ruffle Round 1: Ch 3 (counts as dc), 2 dc in same st as join, 3 dc in each sc around. Sl st to top of beg ch-3. (288 dc)
Ruffle Round 2: Ch 1, sc in each dc around. Sl st to join. Fasten off and weave ends. (288 sc)
Size Customization Tips
To size up (child 7 to 8 years): Use a K / 6.5 mm hook or add a Round 5 to each square, making them 5.5 inches each.
To size down (child 2 to 3 years): Reduce to an I / 5.5 mm hook. Squares will measure approximately 3.75 inches each.
For adult sizing: Use bulky weight yarn with an M hook, or add 2 additional squares to the back panel width.
Finishing and Care
Weave in all ends securely, weaving at least 1 inch in two directions to prevent unraveling.
Blocking: Wet block all squares before joining. Soak in cool water for 10 minutes, press out excess water in a towel, pin to exactly 4.5 inches square, and allow to dry completely. After assembly, mist the whole piece and let it dry flat.
Care: Hand wash in cool water with gentle detergent. Press out water gently, never wring or twist. Lay flat to dry. Do not tumble dry or iron directly on the 3D star points. Store folded, not hung.
You Did It!
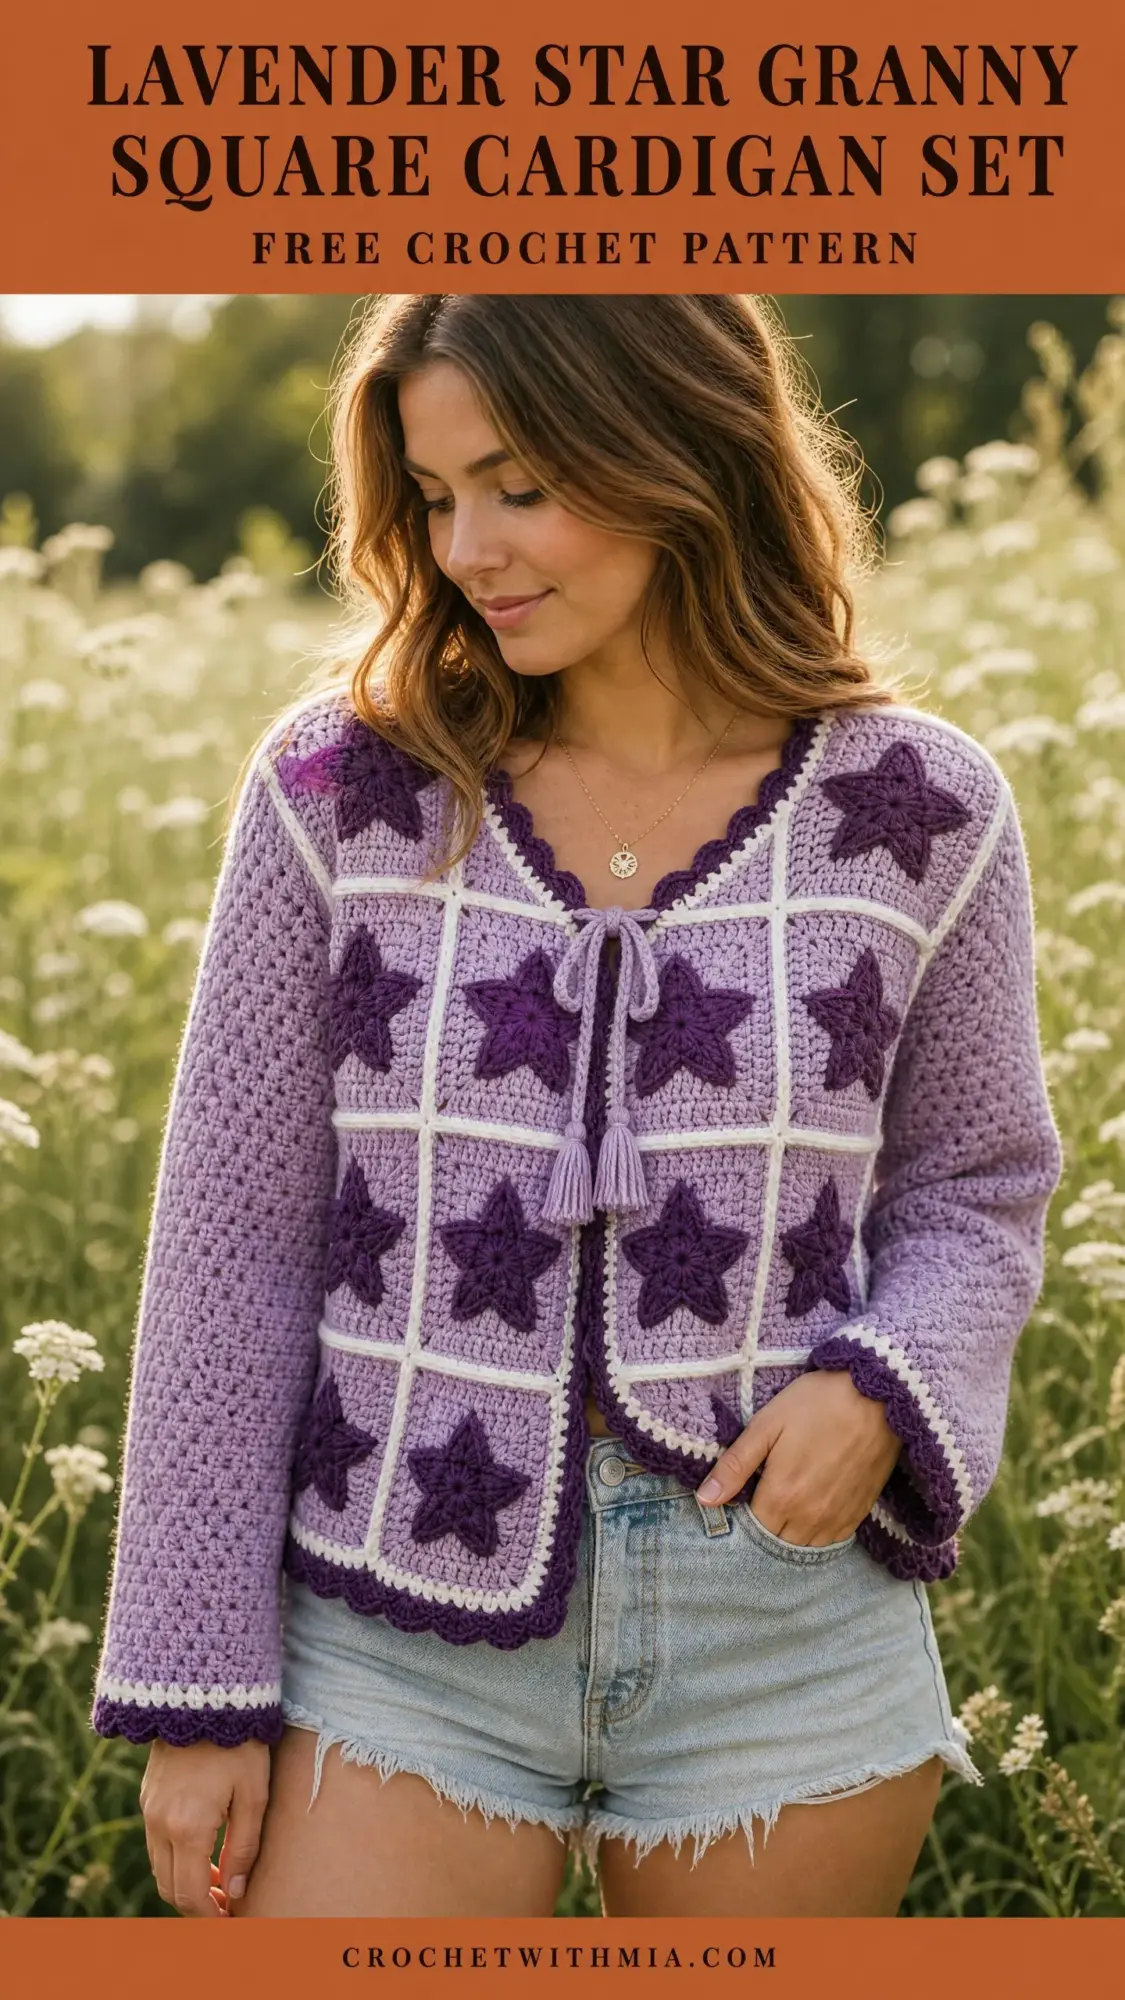
This Lavender Star Granny Square Cardigan Set is such a rewarding project. The modular construction means you can work on squares during car rides, waiting rooms, or those precious quiet moments after the kids are in bed. And when you finally assemble everything and see those raised stars against the lavender background, framed by crisp white grid lines? Pure magic.
Thank you so much for choosing this crochet pattern for your next project. I genuinely hope you love making it as much as I loved designing it. If you finish your set, I would absolutely love to see photos! Tag me on Instagram or share in my Facebook group.
If this pattern is calling your name, go ahead and pin it to your favorite Pinterest board so you can find it when you are ready to start. And please drop a comment below if you make one. I read every single comment and nothing makes my day quite like seeing your finished creations.