
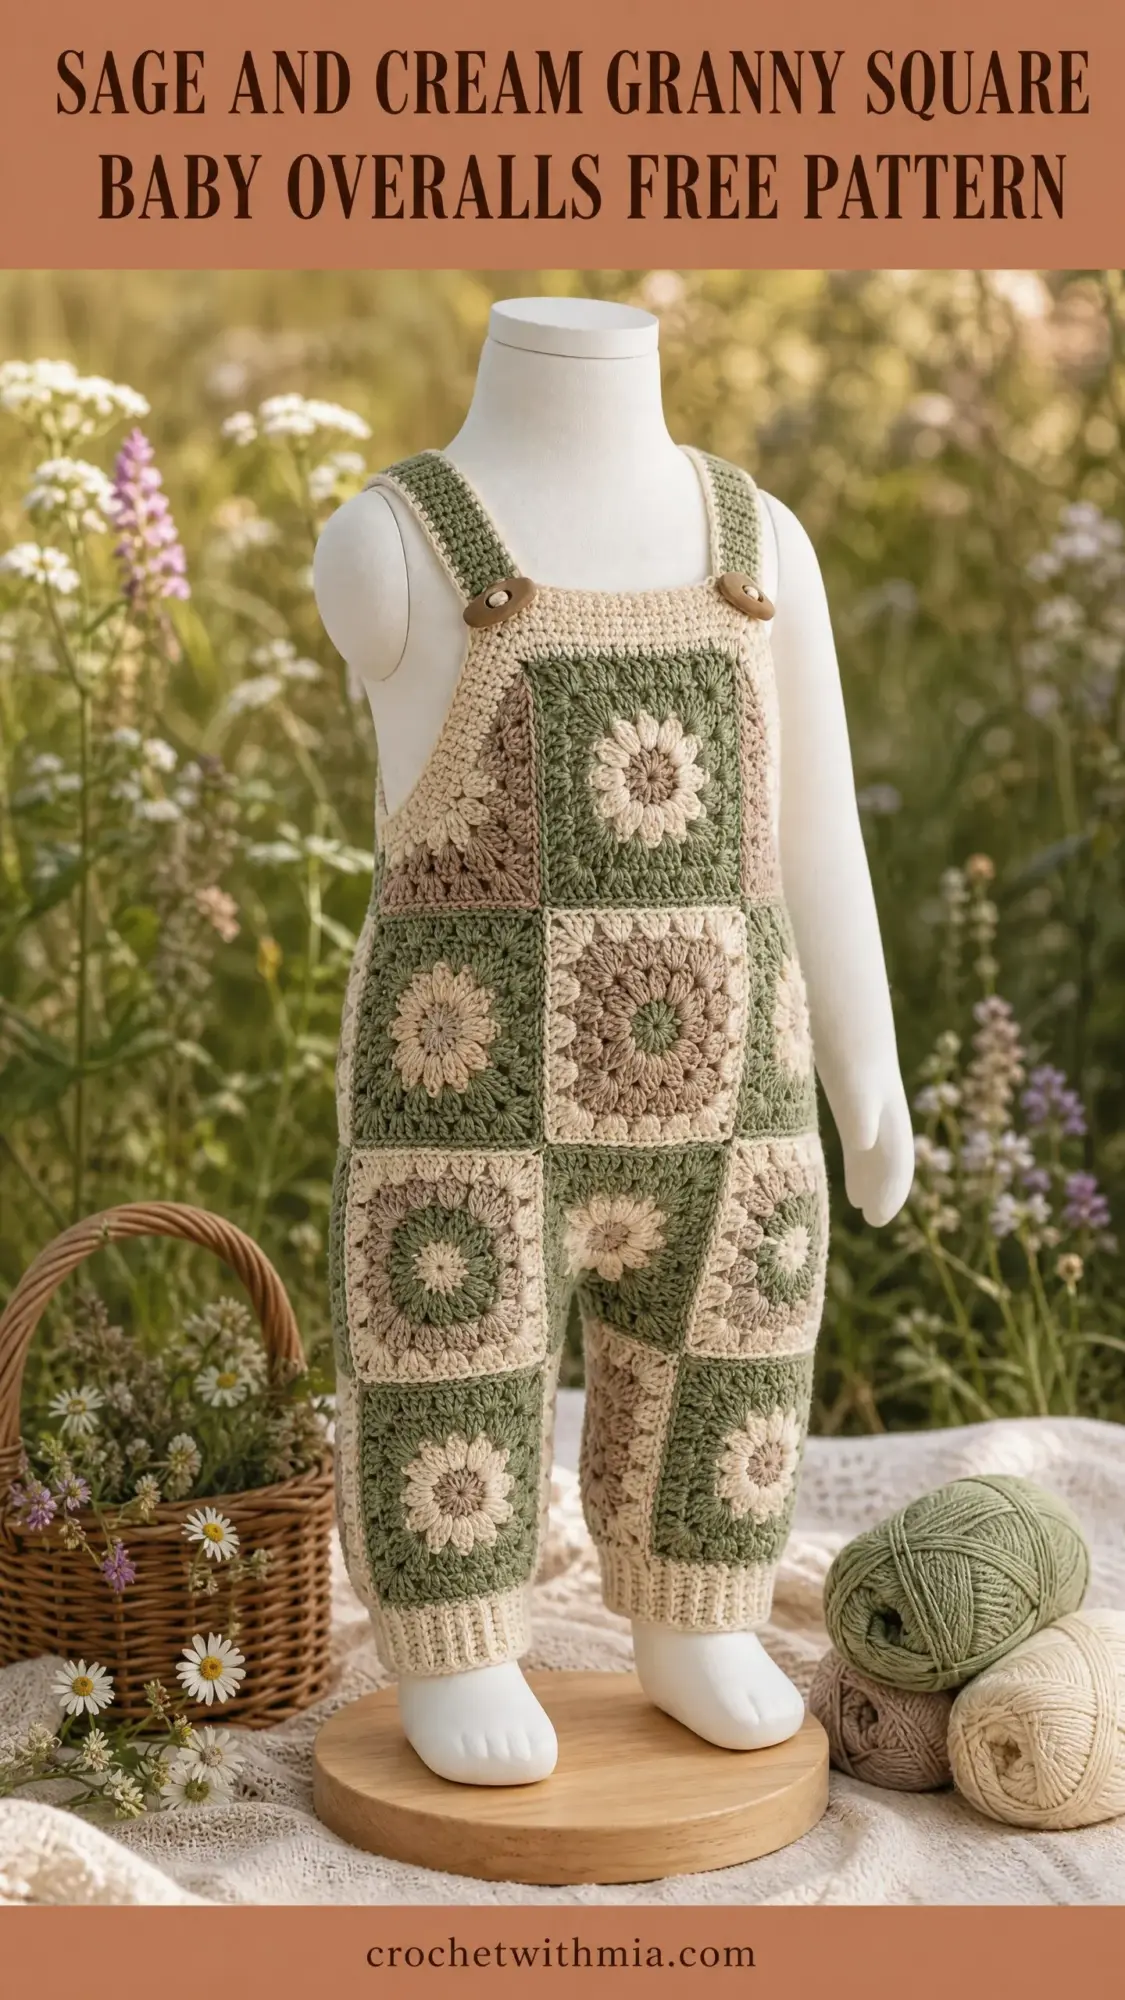
These baby overalls are made from sunflower granny squares in sage green, cream, and warm taupe. The construction is straightforward. You make 20 squares, join them flat, add ribbed cuffs, and finish with crocheted straps and wooden buttons.
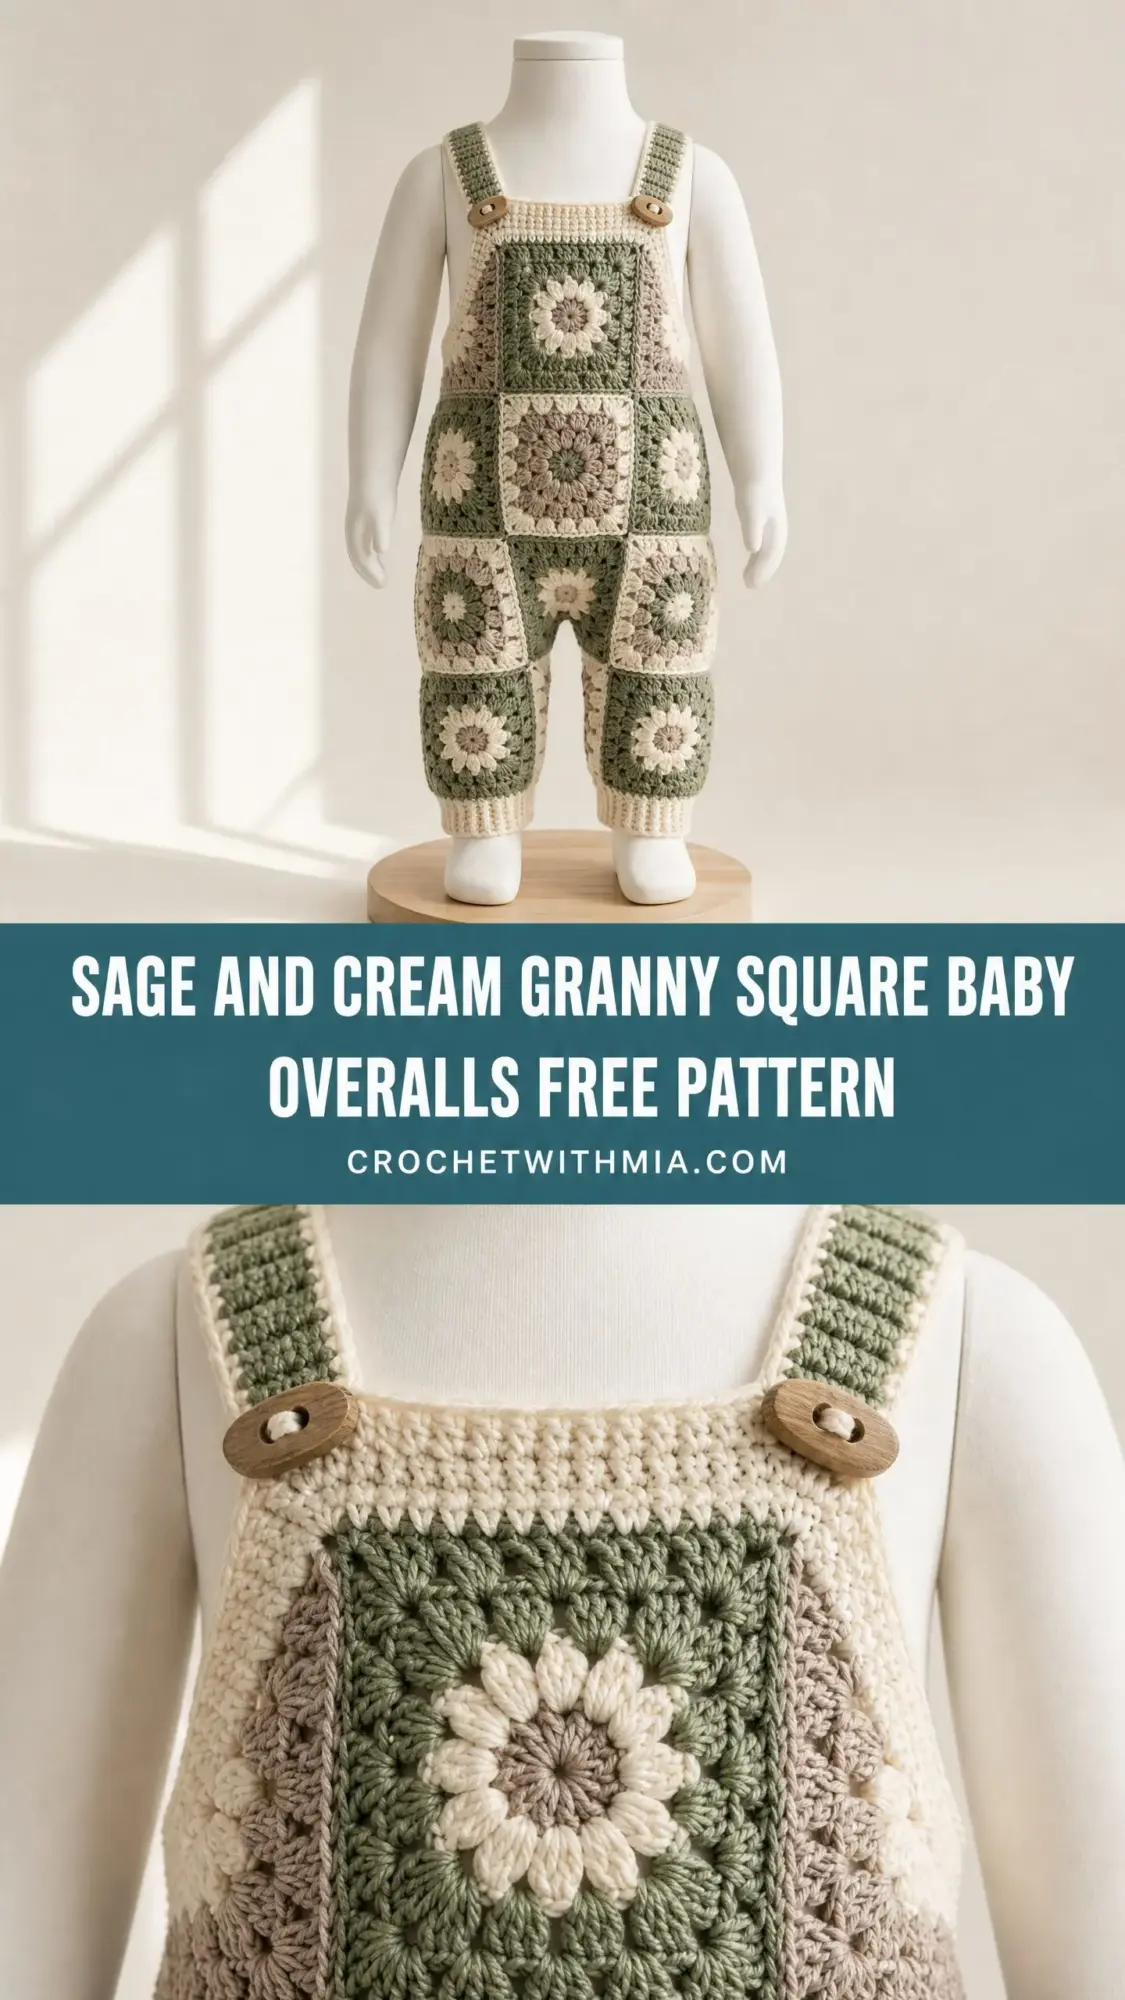
The squares come together in a grid layout. Two across the bib front, two across the bib back, and four for each leg. The result is a cozy textured romper perfect for babies around 6 to 12 months old.
If you can crochet a granny square and follow a simple assembly order, you can absolutely make these. Let me walk you through every step.
Why You Will Love This Crochet Pattern
These overalls hit that sweet spot between heirloom quality and practical baby wear. The granny square construction means you can work on individual motifs during naptime or while watching TV. Then you join them all together for a surprisingly polished garment.
The sunflower center on each square adds beautiful texture without complicated stitches. And the alternating color placement creates visual interest without you having to think too hard about color theory.
The wooden button closures at the front make diaper changes easier. The ribbed cuffs add stretch and a professional finish. Everything about this design balances beauty with function.
Skill Level
This pattern is intermediate level. You should be comfortable working in the round, changing colors within a motif, and seaming pieces together. If you have made granny squares before but never assembled them into a garment, this is a perfect first project. Just give yourself extra time to understand the assembly steps.
Finished Measurements
Size: 6 to 12 months
Size Customization Tips
Want to size up to 12 to 18 months? Work each granny square to measure 3.5 inches by 3.5 inches (9 cm by 9 cm) by adding one additional round of single crochets or shells before joining. The assembly grid stays the same.
For a 0 to 6 month size, reduce each square to 2.5 inches by 2.5 inches (6.5 cm by 6.5 cm) by stopping one round earlier on each motif. Adjust the strap length by 1 inch (2.5 cm) shorter.
Materials Needed
Yarn
Worsted weight yarn (category 4), smooth and washable
Yarn Suggestions
Lion Brand Pound of Love in Sage, Cream, and Taupe works beautifully. It is 100% acrylic, machine washable, and very soft against baby skin.
Paintbox Yarns Simply DK held double (or their Simply Chunky line) in Grass Green, Champagne White, and Coffee gives excellent stitch definition.
Cascade 220 Superwash in Shire, Cream, and Doeskin Heather is luxuriously soft and blocks beautifully if you prefer wool.
Any smooth worsted weight yarn that achieves gauge will work. Avoid fuzzy or bouclé yarns since they will obscure the granny square detail. Make sure the yarn is machine washable for practicality.
Hook
US size G-6 / 4.0 mm (or size needed to achieve gauge)
Notions
Gauge
One completed granny square (after 5 rounds) equals 3 inches by 3 inches (7.5 cm by 7.5 cm), measured after light blocking.
In single crochet (sc) flat swatch: 18 sc by 20 rows equals 4 inches by 4 inches (10 cm by 10 cm) with US G-6 / 4.0 mm hook.
Gauge is critical for this garment. Block your first square and measure before proceeding. If your square is larger than 3 inches, go down a hook size. If smaller, go up a hook size.
Abbreviations
Here are all the abbreviations used in this pattern with plain English definitions:
Special Stitches
Sunflower Granny Square (5 rounds)
This square features a raised petal center in Color C (taupe), surrounded by Color A (sage) and Color B (cream) shell and chain rounds.
Round 1 (Petal Round, Color C):
Make a magic ring (or ch 4, join with sl st to form ring).
Ch 1 (does not count as st), work 16 sc into the ring. Join with sl st to first sc. (16 sc)
Round 2 (Petal Tops, Color C):
Ch 1, (sc in next sc, ch 3, sk 1 sc) 8 times. Join with sl st to first sc. (8 sc, 8 ch-3 loops forming petals)
The ch-3 loops form the sunflower petals. Fasten off Color C after this round and weave end.
Round 3 (First Shell Round, Color A):
Join Color A with a sl st in any ch-3 petal loop.
Ch 3 (counts as first dc), work 2 dc in same ch-3 sp (half corner begun), ch 2, 3 dc in same sp (corner made), ch 1, (3 dc in next ch-3 sp, ch 1) 1 time, THEN in next ch-3 sp: 3 dc, ch 2, 3 dc (corner), ch 1, (3 dc in next ch-3 sp, ch 1) 1 time.
Repeat corner, ch 1, side shell, ch 1 two more times to complete 4 corners and 4 sides.
Join with sl st to top of beginning ch-3.
Stitch count for Round 3:
Fasten off Color A.
Round 4 (Second Shell Round, Color B):
Join Color B with sl st in any ch-2 corner sp.
Ch 3 (counts as first dc), 2 dc in same sp, ch 2, 3 dc in same sp (corner), ch 1, 3 dc in next ch-1 side sp, ch 1, [3 dc, ch 2, 3 dc in next ch-2 corner sp, ch 1, 3 dc in next ch-1 side sp, ch 1] rep 3 more times.
Join with sl st to top of beginning ch-3.
(4 corner groups, 8 side groups, total 12 shell groups of 3 dc = 36 dc, 8 ch-1 sps, 4 ch-2 corner sps)
Fasten off Color B.
Round 5 (Finishing Round, Color A):
Join Color A with sl st in any ch-2 corner sp.
Ch 1, (sc, ch 2, sc) in corner sp (corner made), sc in each dc and in each ch-1 sp across to next corner sp, rep for all 4 sides.
Each side has: 3 dc group + 1 ch-1 sp + 3 dc group + 1 ch-1 sp + 3 dc group = 11 sts across each side between corner sts.
Work (sc, ch 2, sc) at each corner, sc in each of 11 sts across each side.
Join with sl st to first sc. (4 corner ch-2 sps, 11 sc along each side, 2 corner sc per corner = 48 sc total plus 4 ch-2 corner sps)
Fasten off Color A. Weave all ends.
The completed square should measure 3 inches by 3 inches (7.5 cm by 7.5 cm) after light blocking.
Flat Join Method
With RS of two squares facing up and held together, insert hook through corresponding corner or edge stitches of both squares simultaneously. Join with sl st through both layers, working along the edge stitch for stitch. This creates a visible but flat ridge on the WS.
Ribbed Cuff
Worked in rows, then seamed.
Row 1: Ch 13, sc in 2nd ch from hook and in each ch across. (12 sc)
Row 2: Ch 1, turn, sc in BLO of each sc across. (12 sc)
Repeat Row 2 for length required. The BLO sc creates a stretchy ribbed texture.
Pattern Notes
1. All granny squares are worked in rounds with a magic ring start. Join each round with a slip stitch unless otherwise stated.
2. Color placement: Squares alternate placement of Color A and Color B as the dominant outer color. Color C is always used for the center petal rounds.
3. This pattern uses a flat join throughout.
4. The bib is formed by a 2 by 2 arrangement of squares. Each leg is formed by a 2 by 2 arrangement.
5. Straps are crocheted separately and attached with wooden buttons at the front bib. Straps attach permanently at the back.
6. Block each square before assembly for best results.
7. You need 20 total granny squares.
8. For rows of sc, ch 1 does not count as a stitch. For rows of dc, ch 3 counts as first dc unless noted.
Step by Step Instructions
Section 1: Make the Granny Squares
Using the Sunflower Granny Square instructions above, make a total of 20 squares.
Group 1 squares (make 10):
Group 2 squares (make 10):
Block all 20 squares to 3 inches by 3 inches (7.5 cm by 7.5 cm). Label them Group 1 and Group 2 with removable markers.
Section 2: Assemble the Bib Front Panel
The bib front is a 2 square wide by 2 square tall rectangle.
Arrange squares as follows (viewed from front):
Step 1: Join top-left and top-right squares along their shared vertical edge using the flat join method. Work sl st through corresponding sc sts on Round 5 edges of both squares. (11 sl sts along the edge between corner sts)
Step 2: Join bottom-left and bottom-right squares along their shared vertical edge in the same way. (11 sl sts)
Step 3: Join the top row to the bottom row along their shared horizontal edge. Work sl st through corresponding sc sts and corner ch-2 sps, matching corners. (11 sl sts plus corner joins)
Checkpoint: After assembling the bib front panel, you should have a flat rectangle measuring approximately 6 inches wide by 6 inches tall (15 cm by 15 cm).
Section 3: Assemble the Bib Back Panel
The bib back is also 2 square wide by 2 square tall.
Arrange squares as follows (viewed from back):
Join in the same sequence as the bib front panel.
Step 1: Join top-left to top-right vertically. (11 sl sts)
Step 2: Join bottom-left to bottom-right vertically. (11 sl sts)
Step 3: Join top row to bottom row horizontally. (11 sl sts plus corners)
Checkpoint: Bib back panel measures approximately 6 inches by 6 inches (15 cm by 15 cm).
Section 4: Assemble the Left Leg Panel
Each leg is a 2 square wide by 2 square tall rectangle.
Left leg square arrangement:
Join all four squares following the same steps as bib panel assembly.
Completed left leg panel: approximately 6 inches wide by 6 inches tall (15 cm by 15 cm).
Section 5: Assemble the Right Leg Panel
Right leg square arrangement:
Join all four squares following the same steps as bib panel assembly.
Completed right leg panel: approximately 6 inches wide by 6 inches tall (15 cm by 15 cm).
Section 6: Assemble the Side Panels
You have 4 remaining squares (2 Group 1, 2 Group 2). These form the side panels that connect the bib front to the bib back around the body.
Make two side panels, each consisting of 2 squares joined vertically (1 square wide, 2 squares tall):
Left side panel:
Right side panel:
Section 7: Join All Body Panels
The overall layout when laid flat is:
[Left Side Panel] [Bib Front Panel] [Right Side Panel] [Bib Back Panel]
This forms a horizontal strip that wraps around the baby’s body.
Step 1: Join the right edge of the Left Side Panel to the left edge of the Bib Front Panel. Work sl st flat join along the full 6 inch edge. (22 sl sts)
Step 2: Join the right edge of the Bib Front Panel to the left edge of the Right Side Panel. (22 sl sts)
Step 3: Join the right edge of the Right Side Panel to the left edge of the Bib Back Panel. (22 sl sts)
Step 4: Join the right edge of the Bib Back Panel to the left edge of the Left Side Panel, forming a tube. (22 sl sts)
Checkpoint: The body is now a tube measuring approximately 18 inches in circumference (46 cm) and 6 inches tall (15 cm).
Section 8: Attach Leg Panels
Mark the center bottom of the bib front panel and the center bottom of the bib back panel with stitch markers.
Step 1: Attach the Left Leg Panel.
Align the top edge of the Left Leg Panel with the left half of the body tube bottom edge.
Step 2: Attach the Right Leg Panel.
Step 3: Seam the inner leg (crotch).
Join the center front bottom edge to the center back bottom edge. Use yarn needle and mattress stitch or sl st seam, working through both layers. (approximately 11 sts each side)
Step 4: Close the left leg tube.
Join the left edge of the Left Leg Panel to the right edge of the Left Leg Panel along the full 6 inch vertical seam. (22 sl sts)
Step 5: Close the right leg tube.
Join the left edge of the Right Leg Panel to the right edge of the Right Leg Panel along the full 6 inch vertical seam. (22 sl sts)
Checkpoint: The overall garment body should measure approximately 12 inches (30.5 cm) from the top of the bib to the bottom of the leg panels.
Section 9: Work the Ribbed Cuffs
Make 2 cuffs, one for each leg opening.
Measure the circumference of the leg opening at the bottom of the leg panel. It should be approximately 12 inches (30 cm).
Cuff (make 2):
Using Color B and US G-6 hook:
Foundation chain: Ch 9, sc in 2nd ch from hook and in each ch across. (8 sc)
Row 1: Ch 1, turn, sc in BLO of each sc across. (8 sc)
Repeat Row 1 until cuff measures approximately 12 inches (30 cm) in length. This will be approximately 50 to 54 rows. Do not fasten off.
Join cuff into a ring: Sl st through the last row and the foundation chain end to seam into a ring.
Attach cuff to leg opening:
Hold cuff with RS facing out. Align the long outer edge of the cuff with the bottom edge of the leg panel. Using Color B, sc cuff to leg panel, working through both layers. Space stitches evenly around the leg opening, approximately 1 sc per row end of cuff. Join with sl st. Fasten off. Weave ends.
Repeat for second leg.
Checkpoint: After attaching both cuffs, the garment should measure approximately 13.5 inches (34 cm) from top of bib to bottom of cuffs.
Section 10: Work the Top Edge Border
Using Color A and US G-6 hook:
Front bib top edge: Work sc across the 2 top squares of the front bib.
Each square top edge has 11 sc (from Round 5) plus 1 corner sc at each end = 13 sc per square.
Across 2 squares with shared center corner combined: (13 + 11) = 24 sc along the front bib top.
Ch 1, sc in each of 24 sc across. Fasten off.
Back bib top edge:
Repeat for back bib. 24 sc across. Fasten off.
Section 11: Make the Straps (make 2)
Each strap is worked in rows of sc and attaches at the back bib top corners.
Using Color A and US G-6 hook:
Foundation chain: Ch 9, sc in 2nd ch from hook and in each ch across. (8 sc)
Row 1: Ch 1, turn, sc in BLO of each sc across. (8 sc)
Row 2: Ch 1, turn, sc in BLO of each sc across. (8 sc)
Repeat Rows 1 and 2 until strap measures approximately 10 inches (25.5 cm) from foundation. Do not fasten off.
Button loop:
Ch 5, sl st in first ch to form a loop. Fasten off.
Make second strap identical.
Section 12: Attach Straps and Buttons
Step 1: Identify the two top back corners of the back bib panel.
Step 2: Using yarn needle and Color A, sew the foundation chain end of each strap securely to the top back corners of the back bib. Work several passes through the strap and bib edge to secure firmly.
Step 3: Bring each strap up over the shoulder and down the front of the bib.
Step 4: Mark button placement on front bib approximately 0.75 inch (2 cm) from the top edge of the front bib and approximately 1.5 inches (4 cm) from each side edge.
Step 5: Sew one wooden button at each marked placement on the front bib RS.
Step 6: Loop the button loop of each strap over the corresponding wooden button to close.
Checkpoint: The overall length from the top of the strap over the shoulder and down to the bottom of the cuffs should measure approximately 19 inches (48 cm).
Finishing and Blocking
Step 1: Weave in all remaining yarn ends securely, locking ends within the back of the granny square stitching.
Step 2: Fill a basin with cool water and a small amount of gentle wool wash or baby-safe soap. Submerge the garment and gently press to saturate. Do not wring.
Step 3: Press out excess water by rolling in a clean towel.
Step 4: Lay flat on a blocking mat. Pin each square to its finished 3 inch by 3 inch dimensions, smoothing corners square. Pin cuffs open. Allow to dry fully (12 to 24 hours).
Step 5: Once dry, check all seams and strap attachments. Reinforce any joins that feel loose with additional yarn needle stitching.
Care Instructions
Machine wash on gentle cycle in cold water if using superwash or acrylic yarn. Lay flat to dry. Do not tumble dry. Do not iron directly on crochet fabric. If using non-superwash wool, hand wash only in cool water and lay flat to dry. Check button attachments before each use and re-sew if any loosening is detected. Inspect regularly as the garment is worn by an infant.
Time Estimate
Plan for approximately 15 to 22 hours across multiple sessions, depending on your speed and experience with granny squares. Working the individual squares goes quickly once you get into a rhythm. The assembly takes longer than you might expect, so give yourself plenty of time for that stage.
You Did It!
Thank you so much for choosing this pattern. I really hope you love making these sweet little overalls as much as I loved designing them. They make the most thoughtful baby shower gift or a special keepsake for your own little one.
I would absolutely love to see your finished overalls! Tag me on Instagram or share in my Facebook group so I can celebrate your work with you.
If you enjoyed this crochet tutorial, please save it to your Pinterest boards so you can find it easily when you are ready to start. And if you make these baby overalls, drop a comment below. I read every single one and it truly makes my day to hear from you!