
Last year, my best friend called me in a panic three weeks before her baby shower. She had seen a star-shaped baby cocoon online and wanted one desperately, but every pattern she found was either too complicated or looked nothing like the picture. "You can figure this out, right?" she asked. Famous last words.
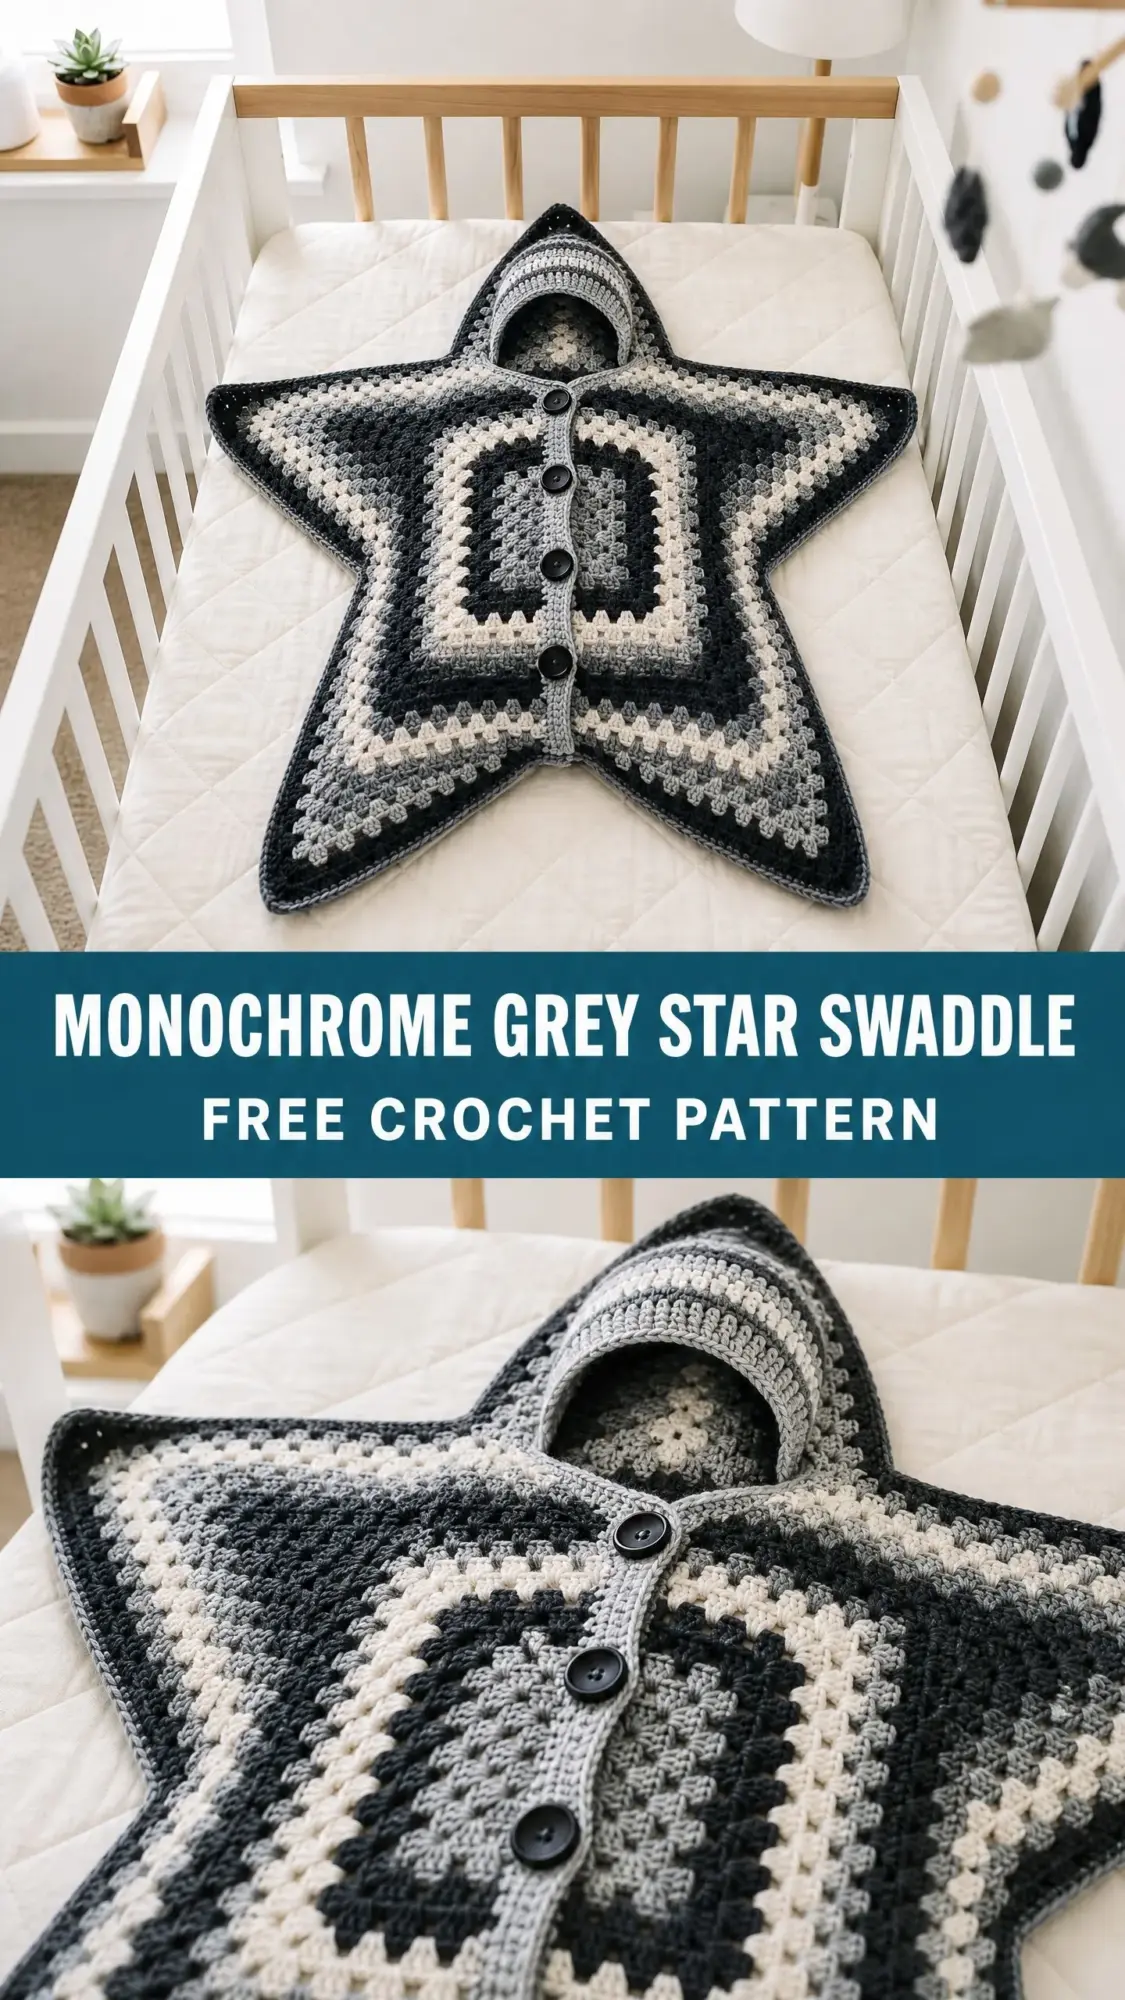
I spent the next two weeks hunched over my hook, frogging more times than I care to admit, until I finally cracked the code. The result? A stunning five-pointed star swaddle that made every single person at that shower gasp when she unwrapped it. My friend cried. I almost cried. The baby, of course, slept through the whole thing looking absolutely adorable.
Now I am thrilled to share this pattern with you. This monochrome grey star swaddle crochet pattern combines the beloved granny square texture with clever shaping to create something truly show-stopping. It looks incredibly impressive, but I promise the construction is more straightforward than you might think.
About This Star Swaddle Crochet Pattern
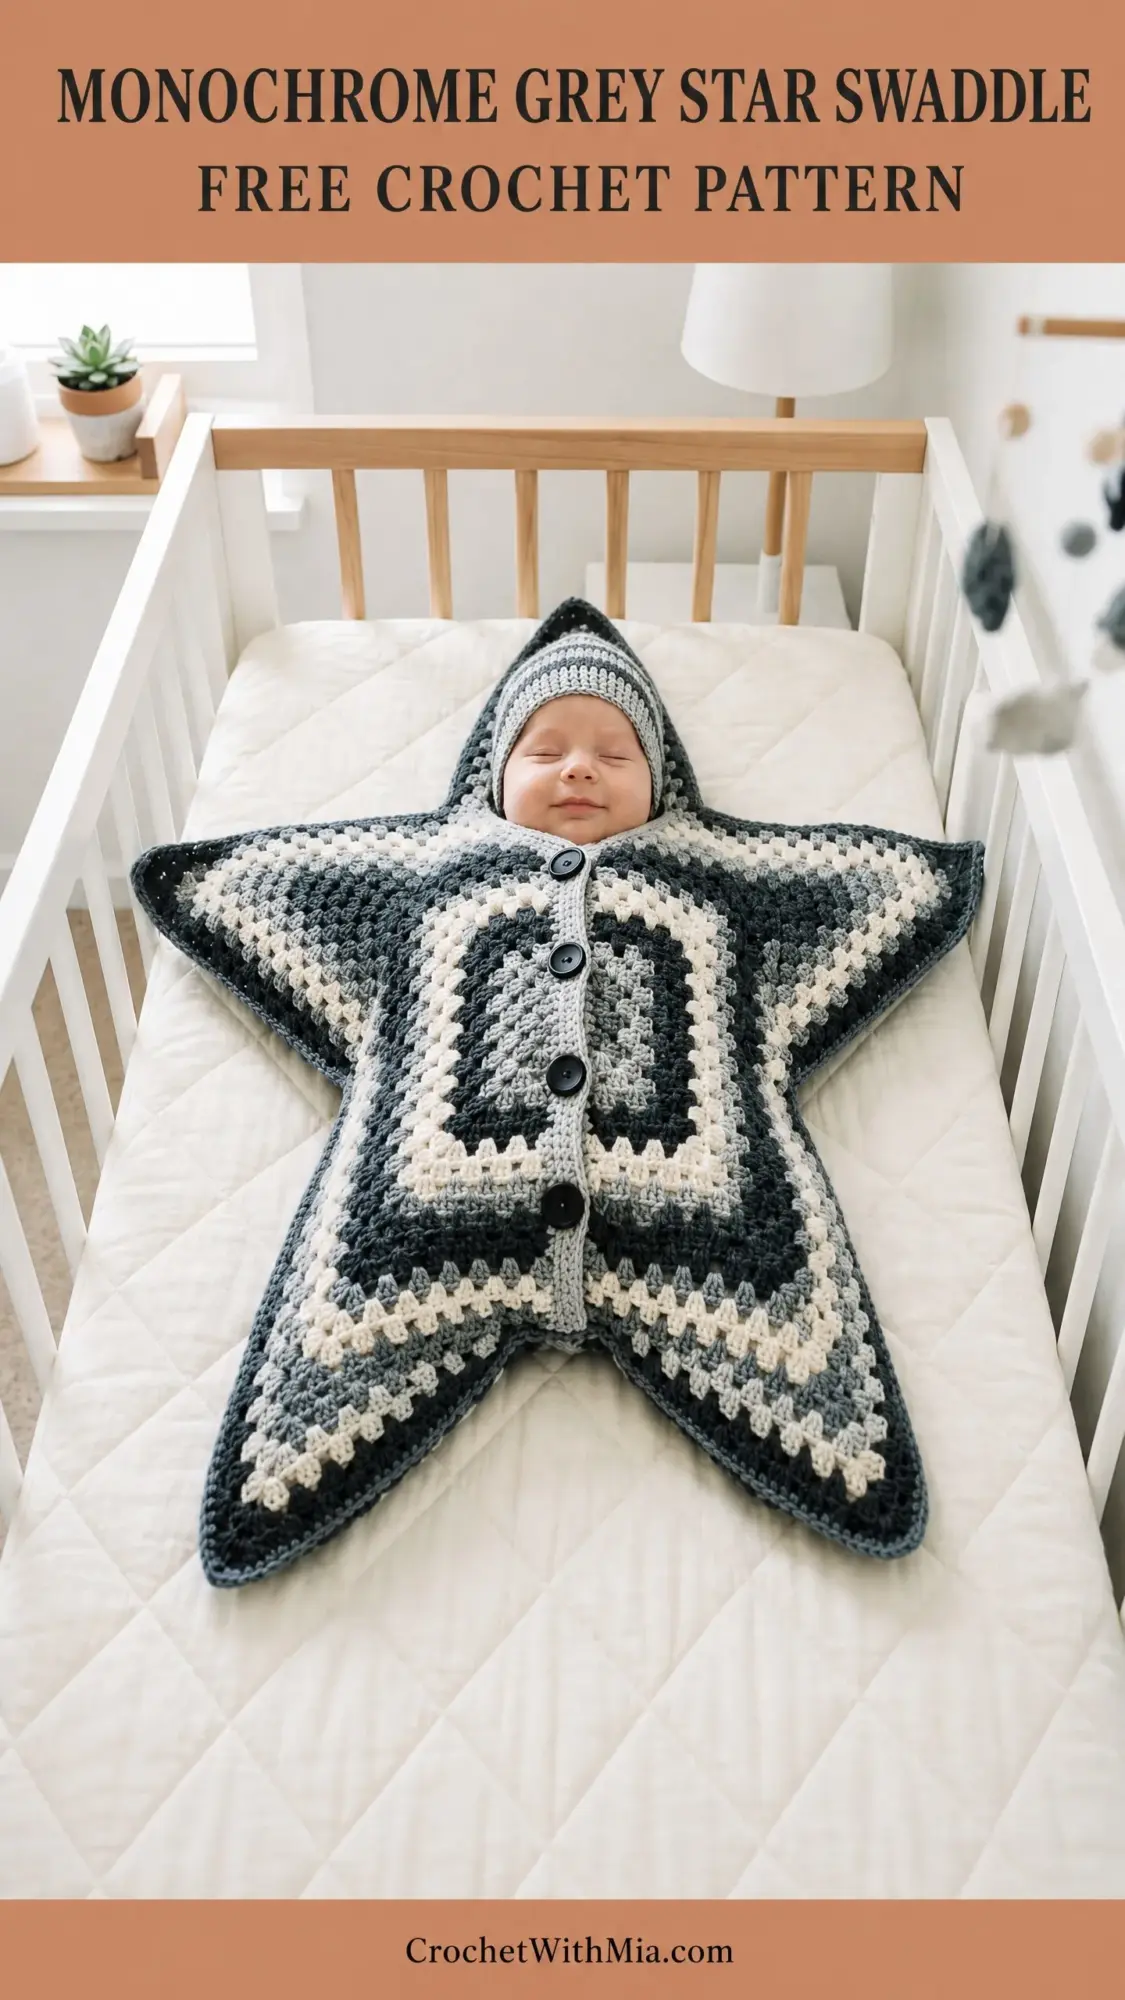
This cozy cocoon wraps a newborn in a gorgeous five-pointed star shape using the classic granny cluster stitch. The design features four coordinating grey tones, from deep charcoal to soft cream, arranged in concentric bands that radiate outward from the center. The effect is modern, gender-neutral, and absolutely perfect for gifting.
The swaddle consists of two identical star-shaped panels joined together with a single crochet seam. A buttoned front opening allows easy access for diaper changes and lets the baby’s sweet face peek through. A matching pointed hat completes the set.
Finished measurements: The swaddle measures approximately 26 inches from point to point in both directions. The interior pocket depth is about 18 inches from neck to bottom. The hat fits newborn head circumferences of 12 to 14 inches.
Skill level: Intermediate. You should be comfortable with granny square construction, working in joined rounds, color changes, and seaming flat pieces together. The star points require switching between working in the round and working flat rows.
Time estimate: Plan for 18 to 24 hours total. Each star panel takes 7 to 9 hours, joining and finishing adds 2 to 3 hours, and the hat takes about 2 hours.
Materials You Will Need
Gathering your supplies before you start makes the whole process smoother. Here is everything you need for this crochet tutorial.
Yarn: Worsted weight (category 4), approximately 680 yards total broken down as follows:
Recommended yarns: Lion Brand Pound of Love works beautifully for this project. The Charcoal, Oxford Grey, Silver Grey, and Fisherman shades create the perfect monochrome palette. Cascade 220 Superwash is another excellent choice if you prefer wool.
Hook: US size J-10 / 6.0 mm
Notions:
Gauge
Getting gauge right matters for this project. You want the swaddle to fit a newborn properly.
With your J-10 hook and worsted weight yarn: One granny cluster group plus one chain-1 space equals approximately 1 inch wide. Four rounds of granny cluster pattern equals approximately 2 inches tall.
Make a gauge swatch: Create a standard granny square for 4 rounds. After blocking lightly, it should measure about 4 inches across. If your swatch is too big, try a smaller hook. Too small? Go up a hook size.
Abbreviations and Special Stitches
Let me walk you through every stitch you will use in this step by step pattern.
Standard abbreviations:
Granny Cluster (GC): This is the building block of the entire pattern. Work 3 double crochets into the same space. Here is how: Yarn over, insert hook into the indicated space, pull up a loop. Yarn over, pull through 2 loops. Repeat this two more times into the same space, then yarn over and pull through all 4 loops on your hook. You have made one granny cluster.
Corner Granny Shell (CGS): Work (GC, ch 2, GC) all into the same corner chain-2 space. This creates the characteristic corner of a granny square.
Side Granny Unit (SGU): Work (GC, ch 1, GC) all into the same side chain-1 space.
Pattern Notes Before You Begin
A few important things to know before casting on:
1. You will make two identical star panels, then join them together.
2. The color sequence repeats for both panels. Follow it exactly for that beautiful striped effect.
3. Change colors at the end of each round. Complete your last stitch until two loops remain, drop the old color, and draw the new color through both loops.
4. All rounds are joined rounds unless noted otherwise. Join with a slip stitch to the top of the beginning chain-3.
5. The chain-3 at the start of each round counts as your first double crochet.
Color sequence for both panels:
Star Panel Instructions (Make 2)
The star panel is built in two phases. Phase A creates the central granny square base and expands it into a pentagon. Phase B shapes each of the five individual star points.
Phase A: Central Square Base (Rounds 1 through 8)
These rounds build the traditional granny square center visible in the finished swaddle.
Join Color A. Make a magic ring.
Round 1 (Color A): Chain 3 (counts as first dc), work 2 dc into ring, ch 2, (work 3 dc into ring, ch 2) 3 times, join with sl st to top of beg ch-3. Pull magic ring closed. (4 GC clusters, 4 ch-2 corner spaces)
Round 2 (Color A): Sl st into corner ch-2 sp. Ch 3, work 2 dc into same corner sp, ch 2, work 3 dc into same corner sp, ch 1, (CGS into next corner ch-2 sp, ch 1) 3 times, join with sl st to top of beg ch-3. (8 GC clusters total)
Change to Color D.
Round 3 (Color D): Sl st into corner ch-2 sp. Ch 3, 2 dc into same sp, ch 2, 3 dc into same sp (CGS), ch 1, 3 dc into next ch-1 side sp, ch 1, (CGS into next corner sp, ch 1, 3 dc into next ch-1 side sp, ch 1) 3 times, join. (12 GC clusters total)
Round 4 (Color D): Sl st into corner ch-2 sp. Work CGS, ch 1, work GC into each ch-1 sp along side with ch 1 between each, repeat around all 4 corners. Each side now has 2 side GC groups between corners. (16 GC clusters total)
Change to Color C.
Round 5 (Color C): Work as Round 4 pattern, adding one more GC group per side. (20 GC clusters total)
Round 6 (Color C): Continue pattern. Each side now has 4 side GC groups. (24 GC clusters total)
Change to Color A.
Round 7 (Color A): Continue pattern. Each side now has 5 side GC groups. (28 GC clusters total)
Round 8 (Color A): Continue pattern. Each side now has 6 side GC groups. (32 GC clusters total)
Checkpoint: Your square should measure approximately 8 inches across. You should have 4 ch-2 corner spaces and 7 ch-1 spaces per side.
Phase A: Pentagonal Transition (Rounds 9 through 16)
Here is where the magic happens. You will transform your square into a pentagon by adding a fifth corner.
Round 9 (Color D): Begin at any existing ch-2 corner. Work CGS into this corner. Along the next side, work 3 GC groups into the ch-1 spaces. At the midpoint of this side, work (GC, ch 2, GC) into the center ch-1 space to create a new fifth corner. Continue with 3 more GC groups along the remainder of that side. Work CGS into the next existing corner. Continue around the remaining 3 original sides with CGS at each corner, filling side ch-1 spaces with single GC groups. Join. (5 ch-2 corner spaces, approximately 40 GC clusters)
Round 10 (Color D): Work a full expansion round treating all 5 ch-2 spaces as corners. Work CGS into each of the 5 corners, fill all ch-1 side spaces with single GC groups. (Approximately 50 GC clusters)
Change to Color B.
Rounds 11 and 12 (Color B): Continue expansion pattern with 5 corners. (Approximately 60 to 70 GC clusters)
Change to Color C.
Rounds 13 and 14 (Color C): Continue expansion pattern. (Approximately 80 to 90 GC clusters)
Change to Color A.
Rounds 15 and 16 (Color A): Continue expansion pattern. (Approximately 100 to 110 GC clusters)
Checkpoint: Your pentagon should measure approximately 22 inches across at its widest span. Do not fasten off.
Phase B: Star Point Shaping
Each of the five ch-2 corner spaces becomes a star point. You will work each point flat, decreasing until you reach the tip.
For each point, identify the ch-2 corner space. Count 4 ch-1 spaces to the left and 4 to the right. This section of 9 spaces is your working area. Join Color A to the 4th ch-1 space to the right of the corner.
Point Base Row (Row 1, RS): Ch 3, complete GC in same space, (ch 1, GC in next sp) 3 times to reach corner, ch 1, CGS in corner ch-2 sp, (ch 1, GC in next sp) 4 times. Turn. (10 GC clusters)
Row 2 (WS): Ch 3, GC in first ch-1 sp, (ch 1, GC in next ch-1 sp) across to corner ch-2 sp, ch 1, CGS in corner ch-2 sp, (ch 1, GC in next ch-1 sp) across. Turn. (10 GC clusters)
Row 3 (RS, first decrease): Sl st across first ch-1 sp and first GC. Ch 3, GC in next ch-1 sp, (ch 1, GC in next ch-1 sp) across to corner, ch 1, CGS in corner, (ch 1, GC in next ch-1 sp) across until 1 cluster remains. Turn. (8 GC clusters)
Row 4 (WS, decrease): Sl st across first cluster and ch-1 sp. Continue pattern. (6 GC clusters)
Row 5 (RS, decrease): Sl st across first cluster. Continue pattern. (4 GC clusters)
Row 6 (WS, decrease): Sl st across first cluster. Ch 3, GC in next ch-1 sp, ch 1, CGS in corner ch-2 sp, ch 1, GC in next ch-1 sp. Turn. (2 GC clusters flanking the corner)
Row 7 (RS, final tip): Ch 3, 2 dc in corner ch-2 sp. Sl st into last dc to close tip. Fasten off. (1 GC cluster at tip)
Repeat for all 5 corners. Then make a second identical star panel.
Button Band and Front Opening
On the front panel only, mark the center of the top point. Using small scissors, carefully cut a 5-inch vertical slit from the tip downward.
Right Button Band: Join Color A at the bottom of the right edge. Ch 1, work sc evenly up the edge (approximately 20 to 24 sc). Work 2 more rows of sc. Fasten off.
Left Button Band (with buttonholes): Join Color A at the tip of the left edge. Sc evenly down. Row 2: Work sc across with 4 evenly spaced buttonholes (ch 2, sk 2 sc). Row 3: Sc across, working 2 sc into each buttonhole space. Fasten off.
Joining the Panels
Hold both panels with wrong sides together, aligning all points. Pin at each tip and indentation.
Using Color A, join with sl st at the right edge of the opening slit. Work sc seam along the entire outer edge, inserting your hook through both layers simultaneously. Work 3 sc into each point tip to turn the corner neatly. Leave the top opening unseamed for the head. Fasten off.
Sew buttons onto the right band, aligned with the buttonholes.
Hat Instructions
The matching hat is worked in the round from the crown down.
Join Color A. Make a magic ring.
Round 1: Ch 3, work 11 dc into ring, join. (12 dc)
Round 2: Ch 3, dc in same st, 2 dc in each dc around, join. (24 dc)
Round 3: Ch 3, dc in same st, dc in next dc, (2 dc in next dc, dc in next dc) around, join. (36 dc)
Round 4: Ch 3, dc in same st, dc in next 2 dc, (2 dc in next dc, dc in next 2 dc) around, join. (48 dc)
Round 5: Ch 3, dc in same st, dc in next 3 dc, (2 dc in next dc, dc in next 3 dc) around, join. (60 dc)
Change to Color D.
Rounds 6 and 7: Ch 3, dc in each dc around, join. (60 dc)
Change to Color C.
Rounds 8 and 9: Ch 3, dc in each dc around, join. (60 dc)
Change to Color A.
Round 10: Ch 3, dc in each dc around, join. (60 dc)
Round 11: Ch 3, (dc2tog over next 2 dc, dc in next 4 dc) around, join. (50 dc)
Round 12: Ch 3, (dc2tog, dc in next 3 dc) around, join. (40 dc)
Round 13: Ch 3, (dc2tog, dc in next 2 dc) around, join. (30 dc)
Round 14: Ch 3, (dc2tog, dc in next dc) around, join. (20 dc)
Round 15: Ch 3, (dc2tog) around, join. (10 dc)
Round 16: (dc2tog) 5 times, join. (5 dc)
Fasten off, leaving a 10-inch tail. Thread through remaining stitches, pull tight, and secure on the wrong side.
Hat edging: Join Color A at brim. Ch 1, sc in each dc around. Join, fasten off.
Finishing and Care
Weave in all ends securely. Wet block by submerging in cool water, squeezing gently, and laying flat. Pin each point outward to emphasize the star shape. Allow to dry completely.
Machine wash cold on gentle cycle, inside out. Lay flat to dry. Never tumble dry or iron directly.
Size Adjustments
For 3 to 6 months: Add Rounds 17 and 18 to Phase A before shaping points. For the hat, add one more increase round to reach 66 dc.
For premature newborns: Stop Phase A at Round 14 instead of 16.
I hope this monochrome grey star swaddle crochet pattern brings as much joy to your life as it did to mine. There is something incredibly satisfying about watching those concentric bands grow and those star points take shape. And the look on a new parent’s face when they see it? Absolutely priceless.
If you are planning to make this for a baby shower or a special little one in your life, save this pattern to your Pinterest boards so you can find it easily when you are ready to start. And please, leave a comment below if you make one. I would love to hear how it turned out and see your color choices!