
Let me guess. You saw this adorable little dress with its rainbow granny squares and thought, "That looks way too complicated for me." I get it. Multiple colors, granny square construction, a flared skirt, those cute little ties. It seems like a lot.
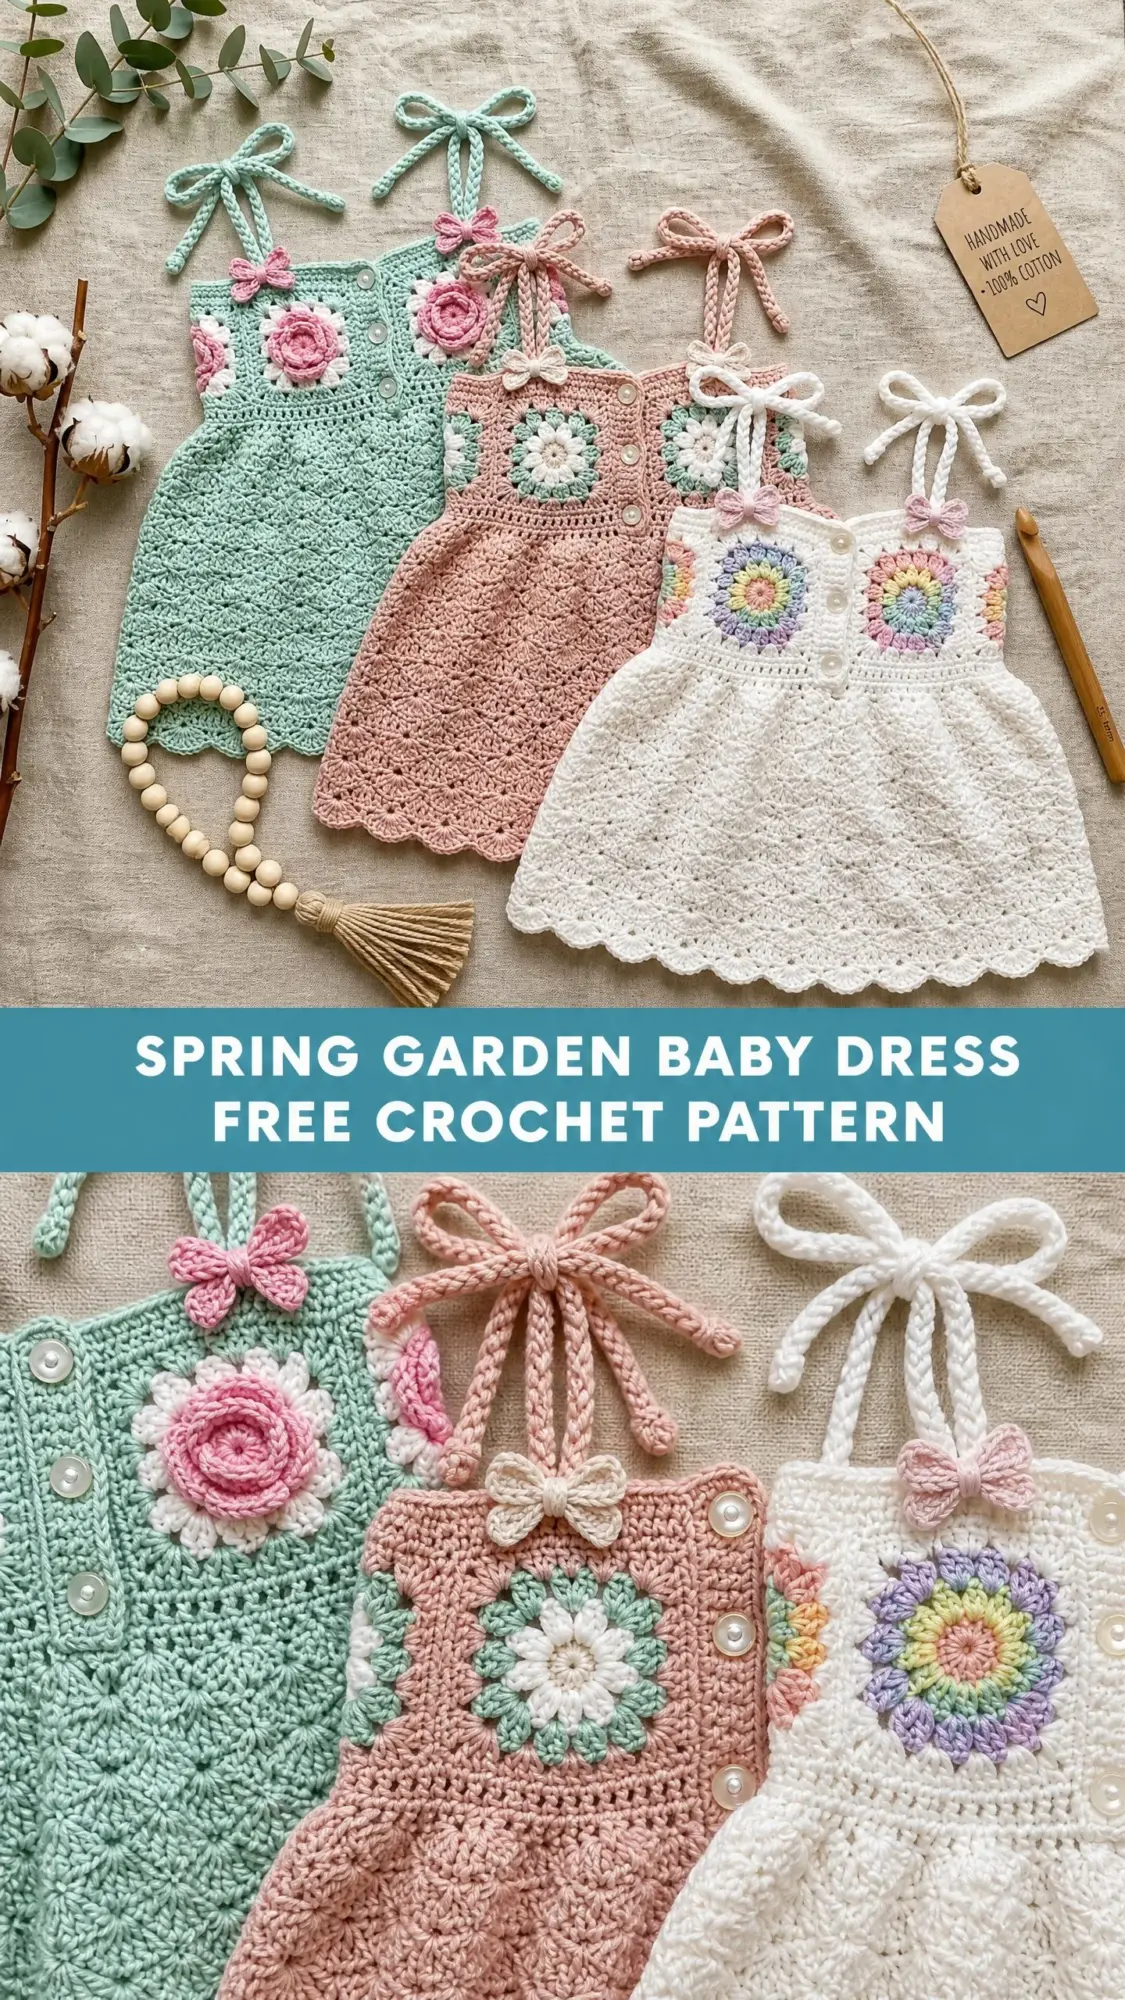
But here is the truth. If you can make a basic granny square and work a double crochet, you can absolutely make this dress. The whole thing breaks down into simple, manageable pieces. You make six squares. You join them together. You work the skirt in rounds. That is genuinely it.
Whether you have been crocheting for years or you just mastered your first granny square last month, this Spring Garden Baby Dress crochet pattern will walk you through every single step. No guessing, no confusion, no panic. Just a beautiful handmade dress sized for a 6 to 12 month old baby, ready to become someone’s most treasured gift.
Why This Baby Dress Pattern Works for Multiple Skill Levels
This pattern sits comfortably at an intermediate skill level, but do not let that word scare you off. Intermediate simply means you need comfort with a few specific techniques: working granny squares in the round, changing colors cleanly, joining motifs together, and working shell stitch in rounds.
If you have never done any of these things before, that is perfectly fine. I will explain each technique as we go. The construction method is logical and forgiving. You work each piece separately, so if something goes wrong with one granny square, you just redo that square. No ripping out an entire garment.
The shell stitch pattern on the skirt creates that gorgeous flared A-line silhouette you see in the photos. It looks fancy but follows a simple repeat. Once you complete one round, you have the rhythm. The rest flows naturally.
Materials You Will Need
Before you start, gather everything on this list. Having your materials ready prevents frustrating mid-project stops.
Yarn: 100% cotton DK weight yarn (also labeled Light #3)
Hook: US size E-4 / 3.5 mm crochet hook
Notions:
Recommended Yarn Brands:
1. Lion Brand 24/7 Cotton in Ecru and coordinating pastels. Mercerized with excellent stitch definition, machine washable, widely available.
2. Paintbox Yarns Simply DK in Pure White plus their pastel palette. Smooth and consistent, photographs beautifully, gentle on baby skin.
3. We Are Knitters The Pima Cotton in White plus individual pastel skeins. Premium pima cotton with a slight sheen. Slightly heavier on the DK spectrum, so swatch carefully.
Substitution Note: Any smooth, tightly plied 100% cotton DK yarn will work. Avoid fuzzy or hairy fibers because they hide the beautiful stitch definition in both the shell stitch and granny square sections.
Gauge Information
Getting gauge right matters more than usual here. Cotton yarn has very little stretch, and this dress is sized for a young infant. Even a half-stitch difference affects the final fit significantly.
Shell Stitch Gauge (Skirt Section):
14 stitches and 8 rows = 4 inches / 10 cm in shell stitch pattern, blocked
Granny Square Gauge:
One completed 5-round granny square = 3.75 inches / 9.5 cm measured corner to corner
Take time to make a gauge swatch before starting. Adjust your hook size up or down as needed until you match these measurements.
Finished Measurements
Size: 6 to 12 months
Abbreviations and Stitch Definitions
Understanding these terms before you begin makes the pattern instructions much easier to follow.
Special Stitches Explained
Shell Stitch
A shell stitch in this pattern consists of 5 double crochet stitches worked into the same stitch or space. This creates a fan shape that flares outward and forms the primary texture of the skirt.
To work a shell: Yarn over, insert hook into indicated stitch or space, yarn over and draw up a loop, yarn over and draw through 2 loops (1 dc made). Without moving to a new stitch, repeat 4 more times into the same stitch or space. You now have 5 dc total in the same location.
Half Shell
Work 3 dc into the same stitch or space. This creates a half-fan used at row or round edges to maintain the pattern repeat.
Scallop Edging
Into each indicated space along the hem edge, work: sc, hdc, 3 dc, hdc, sc. This creates the curved scallop border visible at the hem.
Crochet Bow (Optional)
If you prefer a crocheted bow instead of fabric ribbon:
With CF (soft pink), ch 15.
Row 1: sc in 2nd ch from hook and in each ch across. (14 sc)
Fasten off, leaving a 6-inch tail. Pinch the rectangle at its center and wrap the tail tightly around the pinch point several times. Knot securely. Trim and weave ends. Sew to garment at strap base.
Pattern Instructions
Granny Square Sunburst Motif (Make 6 Total)
You need 3 squares for the front bodice and 3 squares for the back bodice. Each square is worked in the round, beginning with a magic ring. The color sequence creates that beautiful rainbow sunburst effect.
Round 1:
With CA (lavender), make a magic ring.
Ch 3 (counts as first dc), work 11 dc into the ring. Join with sl st to top of beginning ch-3. (12 dc)
Fasten off CA.
Round 2:
Join CB (yellow) to any dc with sl st.
Ch 1 (does not count as st). Work 2 sc in each dc around. Join with sl st to first sc. (24 sc)
Fasten off CB.
Round 3:
Join CC (peach) to any sc with sl st.
Ch 2 (counts as first hdc). Work 1 hdc in same st. Work 2 hdc in each sc around. Join with sl st to top of beginning ch-2. (48 hdc)
Fasten off CC.
Round 4:
Join CD (mint) to any hdc with sl st.
Ch 3 (counts as first dc). Work 1 dc in next hdc. 2 dc in next hdc, 1 dc in next hdc. Rep from around. Join with sl st to top of beginning ch-3. (72 dc)
Fasten off CD.
Round 5:
Join CE (baby blue) to any dc with sl st.
Ch 3 (counts as first dc). 1 dc in each of next 2 dc. 2 dc in next dc, 1 dc in each of next 2 dc. Rep from around. Join with sl st to top of beginning ch-3. (96 dc)
Fasten off CE.
At this stage you have a flat circle with 96 dc. The next round begins shaping the circle into a square.
Round 6 (Squaring Round):
Join MC (white) to any dc. Ch 3 (counts as dc).
Work as follows to create 4 corner ch-2 spaces and 4 equal sides:
Work 10 dc (one per dc in the circle), then corner: (dc, ch 2, dc) into next dc. Work 22 dc (one per dc), then corner: (dc, ch 2, dc) into next dc. Rep from 2 more times. Work remaining 12 dc. Join with sl st to top of beginning ch-3.
Stitch count: 96 dc total plus 4 ch-2 corner spaces. (96 dc + 4 ch-2 sp)
Fasten off MC.
Round 7 (Border Round):
Join MC to any corner ch-2 sp.
Ch 3 (counts as first dc). Work (dc, ch 2, 2 dc) into same corner ch-2 sp (corner made).
Work 1 dc in each dc across the side to next corner ch-2 sp. Into corner ch-2 sp work (2 dc, ch 2, 2 dc). Rep from around all 4 sides. Work 1 dc in each remaining dc to start. Join with sl st to top of beginning ch-3.
Stitch count: 26 dc per side, 4 sides total. Plus 4 ch-2 corner spaces. (104 dc + 4 ch-2 sp)
Fasten off and weave in all ends.
Finished square measures approximately 3.75 inches / 9.5 cm from corner ch-2 sp to corner ch-2 sp.
Joining the Granny Squares into Bodice Panels
You will make two bodice panels: one for the front and one for the back. Each panel consists of 3 squares joined side by side in a horizontal row.
To join:
Hold two squares with WS together. Align one side of each square (from one corner ch-2 sp to the next corner ch-2 sp). With MC, join yarn to the corner ch-2 sp of the first square with sl st.
Work sl st through the corresponding outer loops of both squares simultaneously stitch by stitch across: sl st through both corner ch-2 sp, then sl st through each corresponding dc pair (26 dc on each side), ending with sl st through the final corner ch-2 sp.
This flat join creates a seam of 28 sl sts (1 for corner sp + 26 for dc pairs + 1 for second corner sp). Fasten off. Weave in ends.
Join the third square to the second square in the same manner to complete the panel.
One completed bodice panel measures approximately 11.25 inches / 28.5 cm wide and 3.75 inches / 9.5 cm tall.
Make two panels (front and back) in this manner.
Bodice Side Seams
Hold the front and back panels with WS together and RS facing out. Using MC and the flat join method (sl st through corresponding outer loops of both layers simultaneously), seam the two side edges (the short left and right edges of each panel), joining front to back on both sides.
After seaming both sides, you have a rectangular tube that will form the torso of the dress. The top edge is open (for the chest and straps) and the bottom edge is open (for attaching the skirt).
The joined bodice tube measures approximately 7.5 inches / 19 cm wide laid flat (15 inches / 38 cm around), and 3.75 inches / 9.5 cm tall.
Bodice Edging (Top Edge)
Join MC to any stitch along the top edge of the bodice tube.
Work 1 round of sc evenly around the top edge, working 1 sc into each dc, 1 sc into each sl st seam stitch, and 2 sc into each corner ch-2 sp. The goal is a smooth, even edge of approximately 60 sc around the full top circumference. Adjust by 1 or 2 sts as needed to keep the edge flat and even. Join with sl st to first sc. Fasten off MC. (approximately 60 sc)
This edge will be the attachment point for the straps. Mark the 4 attachment points: count in 8 sts from each side seam on both the front and back panels. Place a stitch marker at each of these 4 positions.
Straps (Make 4)
With MC, make a chain of 55 chains (approximately 15 inches / 38 cm long before stretching). Fasten off, leaving a 6-inch tail for sewing.
Fold the chain in half to find the midpoint. Sew the midpoint of the strap to one of the marked anchor positions on the top edge of the bodice using the tail. Pull both halves of the strap upward and over the shoulder, then tie in a bow at the desired length.
Repeat for all 4 strap positions (2 on front, 2 on back, left and right).
The straps should feel long enough to tie in a bow with at least a 2.5 inch / 6 cm loop visible. If straps are too short, remove and rework longer.
Skirt Construction
The skirt is worked downward from the bottom edge of the bodice tube in joined rounds of shell stitch.
Foundation Round:
Join MC to any st along the bottom edge of the bodice tube. Ch 1. Sc evenly around the entire bottom opening, working 1 sc per dc and 2 sc into each corner ch-2 sp, adjusting as needed to reach 108 sc total. Join with sl st to first sc. (108 sc)
Skirt Round 1 (Shell Setup):
Sl st into next sc. Ch 3 (counts as dc). 4 dc into same sc (shell made, 5 dc). Sk 2 sc, sc into next sc, sk 2 sc, shell (5 dc) into next sc. Rep from around, ending with sk 2 sc, sc into next sc, sk 2 sc. Join with sl st to top of beginning ch-3. (18 shells and 18 sc, 108 sts)
Skirt Round 2 (Shell Continuation):
Sl st into next dc (move to center of first shell). Ch 1. Sc into center (3rd) dc of first shell. Shell (5 dc) into next sc, sc into center (3rd) dc of next shell. Rep from around, ending with shell into last sc. Join with sl st to first sc. (18 shells, 18 sc, 108 sts)
Skirt Round 3 (Increase Round):
At this round, you add 3 shell repeats by placing a shell into the center dc of a shell (rather than into a sc) at 3 evenly spaced points around the round. Place 1 increase every 6 repeats.
Work shell into each sc and sc into center dc of each shell as normal, but at every 6th repeat, work shell into center dc of the shell instead. Join with sl st. (21 shells, 21 sc, 126 sts)
Skirt Round 4 (Work Even):
Work shell into each sc, sc into center dc of each shell around. Join with sl st to first st. (21 shells, 21 sc, 126 sts)
Skirt Round 5 (Work Even):
Work shell into each sc, sc into center dc of each shell around. Join with sl st to first st. (21 shells, 21 sc, 126 sts)
Skirt Round 6 (Increase Round):
Work as Round 3 increase logic but now working 3 increase points evenly spaced every 7 repeats. At each increase point, place a shell into the center dc of the shell from the previous round to add 1 extra repeat. Join with sl st. (24 shells, 24 sc, 144 sts)
Skirt Round 7 (Work Even):
Work shell into each sc, sc into center dc of each shell around. Join with sl st to first st. (24 shells, 24 sc, 144 sts)
Skirt Round 8 (Work Even):
Work shell into each sc, sc into center dc of each shell around. Join with sl st to first st. (24 shells, 24 sc, 144 sts)
Do not fasten off. Proceed to scallop hem edging.
Scallop Hem Edging
The scallop edging is worked into the sc stitches between shells from the final round.
Scallop Round:
Ch 1. Into next sc work (sc, hdc, 3 dc, hdc, sc) to form one scallop. Sk the shell, move to next sc. Rep from around all 24 sc positions. Join with sl st to first sc.
Fasten off. Weave in all ends.
Finishing Details
Buttons:
Sew 3 pearl-style buttons down the center front bodice seam line, spacing them evenly. These are decorative only and do not function as closures.
Decorative Bows:
Attach 2 small pink bows at the front strap attachment points, just below where the straps meet the bodice edge. Use fabric ribbon bows or the crocheted bows from the special stitches section.
Blocking:
Wet block the finished dress by soaking it in cool water, gently squeezing out excess moisture (do not wring), and laying flat to dry on a towel. Shape the skirt into a gentle flare and smooth the scallop edging. Cotton holds its blocked shape well.
Helpful Tips for Success
Color Changes: Complete the last yarn over of the last stitch of the old color by pulling through with the new color. This creates clean color transitions. Fasten off each color and weave ends as you go to keep the wrong side tidy.
Checking Your Work: After completing the bodice panels, measure them against the pattern specifications before moving on. Catching gauge issues early saves frustration later.
Strap Length: Every baby is different. Have the intended recipient try on the dress (or use a similarly sized garment for reference) before finalizing strap length. You want enough length for a bow plus room to grow.
Cotton Care: 100% cotton is durable and machine washable, making this dress practical for everyday wear. Wash on gentle cycle and lay flat to dry to maintain the shape.
Time Investment
Expect approximately 12 to 18 hours for an experienced crocheter. If you are working with multiple color changes for the first time, allow extra time for the granny square section. The skirt works up quickly once you establish the shell stitch rhythm.
Final Thoughts on This Baby Dress Crochet Pattern
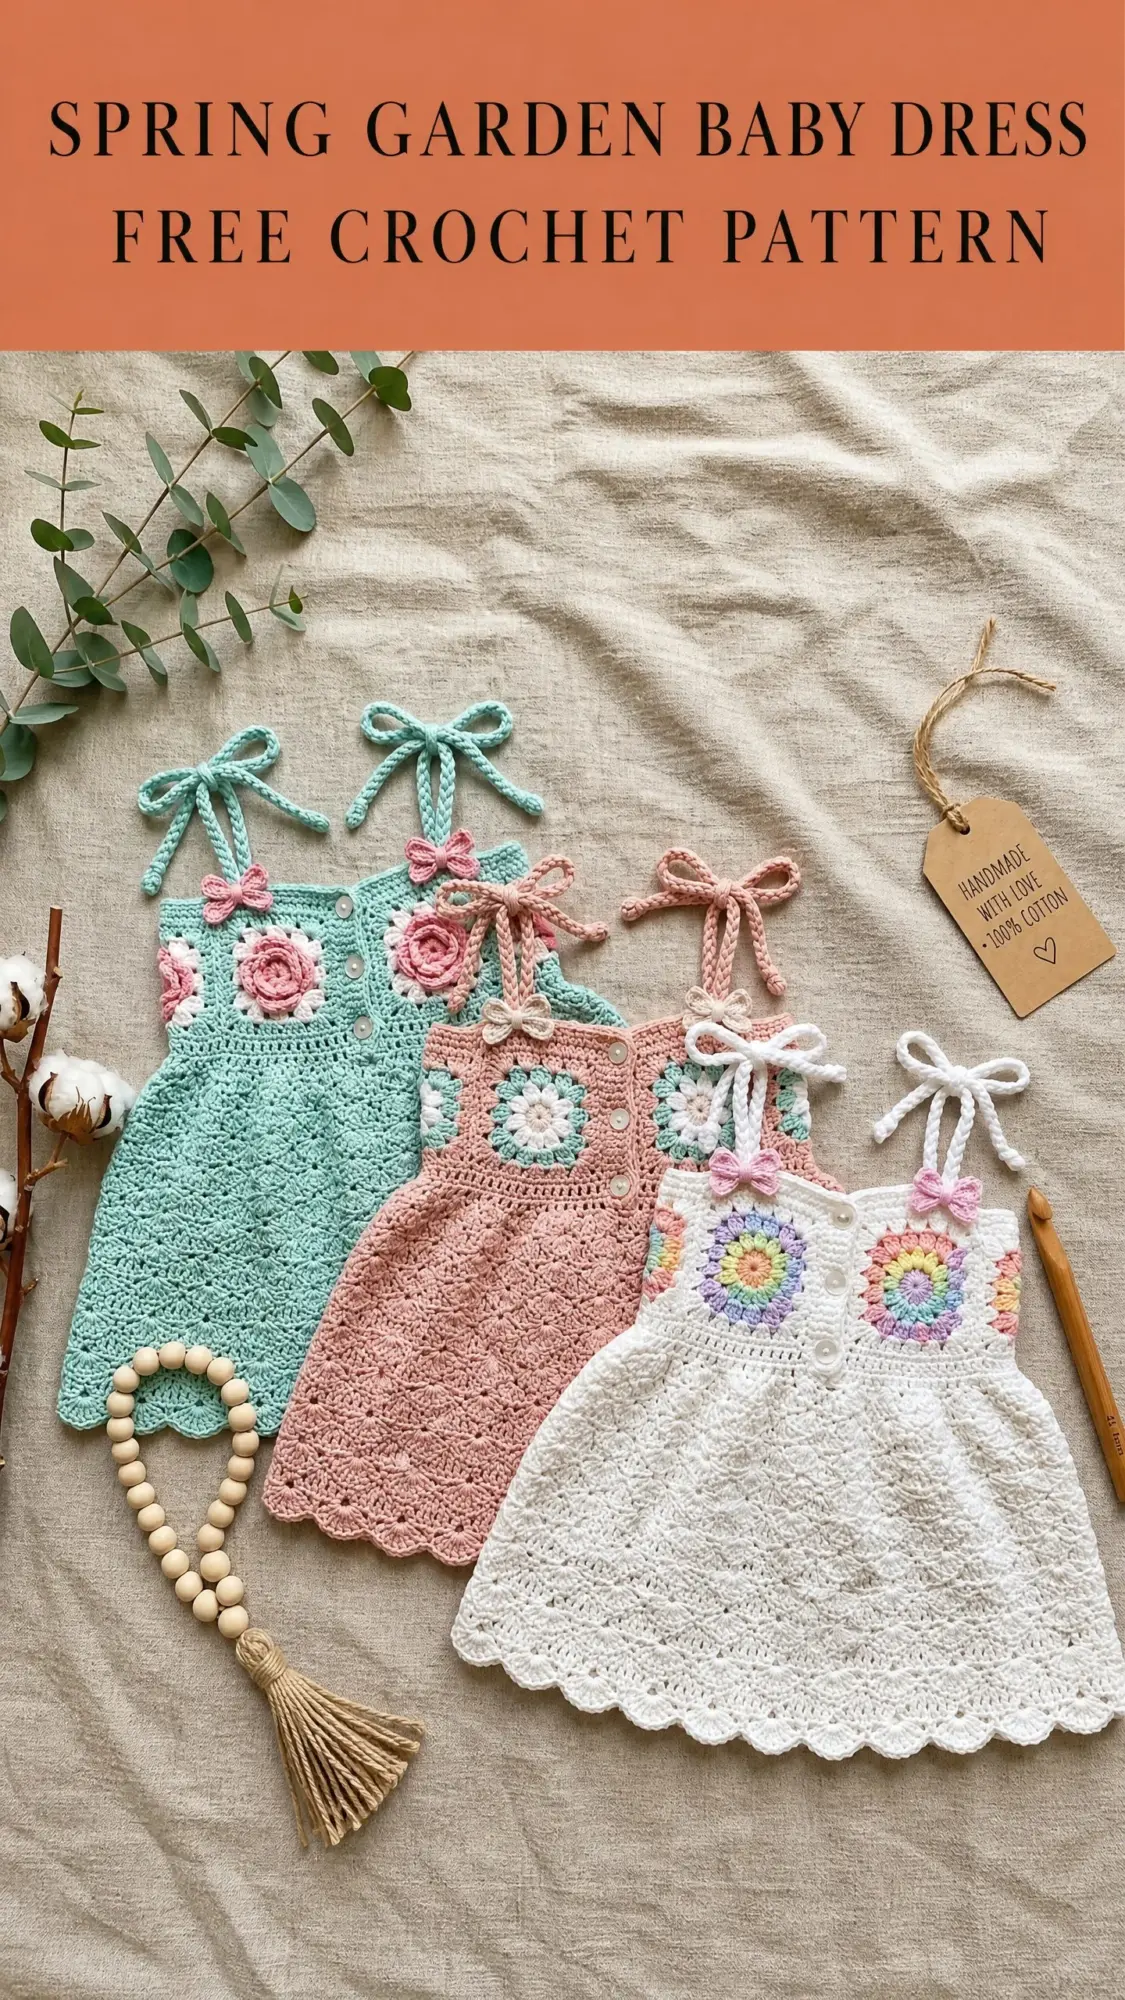
This Spring Garden Baby Dress brings together classic crochet techniques in a way that feels both timeless and fresh. The rainbow sunburst granny squares catch the eye, while the shell stitch skirt adds movement and charm. Every detail, from the tie straps to the scalloped hem, shows the care that went into the design.
Handmade baby clothes carry something store-bought items simply cannot replicate. When you gift this dress, you are giving hours of your time and creativity. That means something.
I hope you enjoy making this pattern as much as I enjoyed writing it for you. Thank you for trusting me with your crafting time. If you make this dress, I would absolutely love to see it. Tag me on Instagram or share a photo on Facebook so I can celebrate your finished project with you.
Save this Spring Garden Baby Dress pattern to your Pinterest boards so you can find it whenever you are ready to start. And if you make one, please drop a comment below. I love hearing which color combinations you choose and seeing how each dress turns out a little different and completely beautiful.