
I call this one the Rose Garden Belt, and it started in a sketchbook I forgot I had.
A few years back, I was cleaning out my craft room and found an old notebook filled with medallion drawings. Scalloped edges, spiral centers, little notes about joining techniques. I had sketched this belt for a friend’s wedding that never happened. Life got complicated, the notebook got buried, and the design sat there waiting.
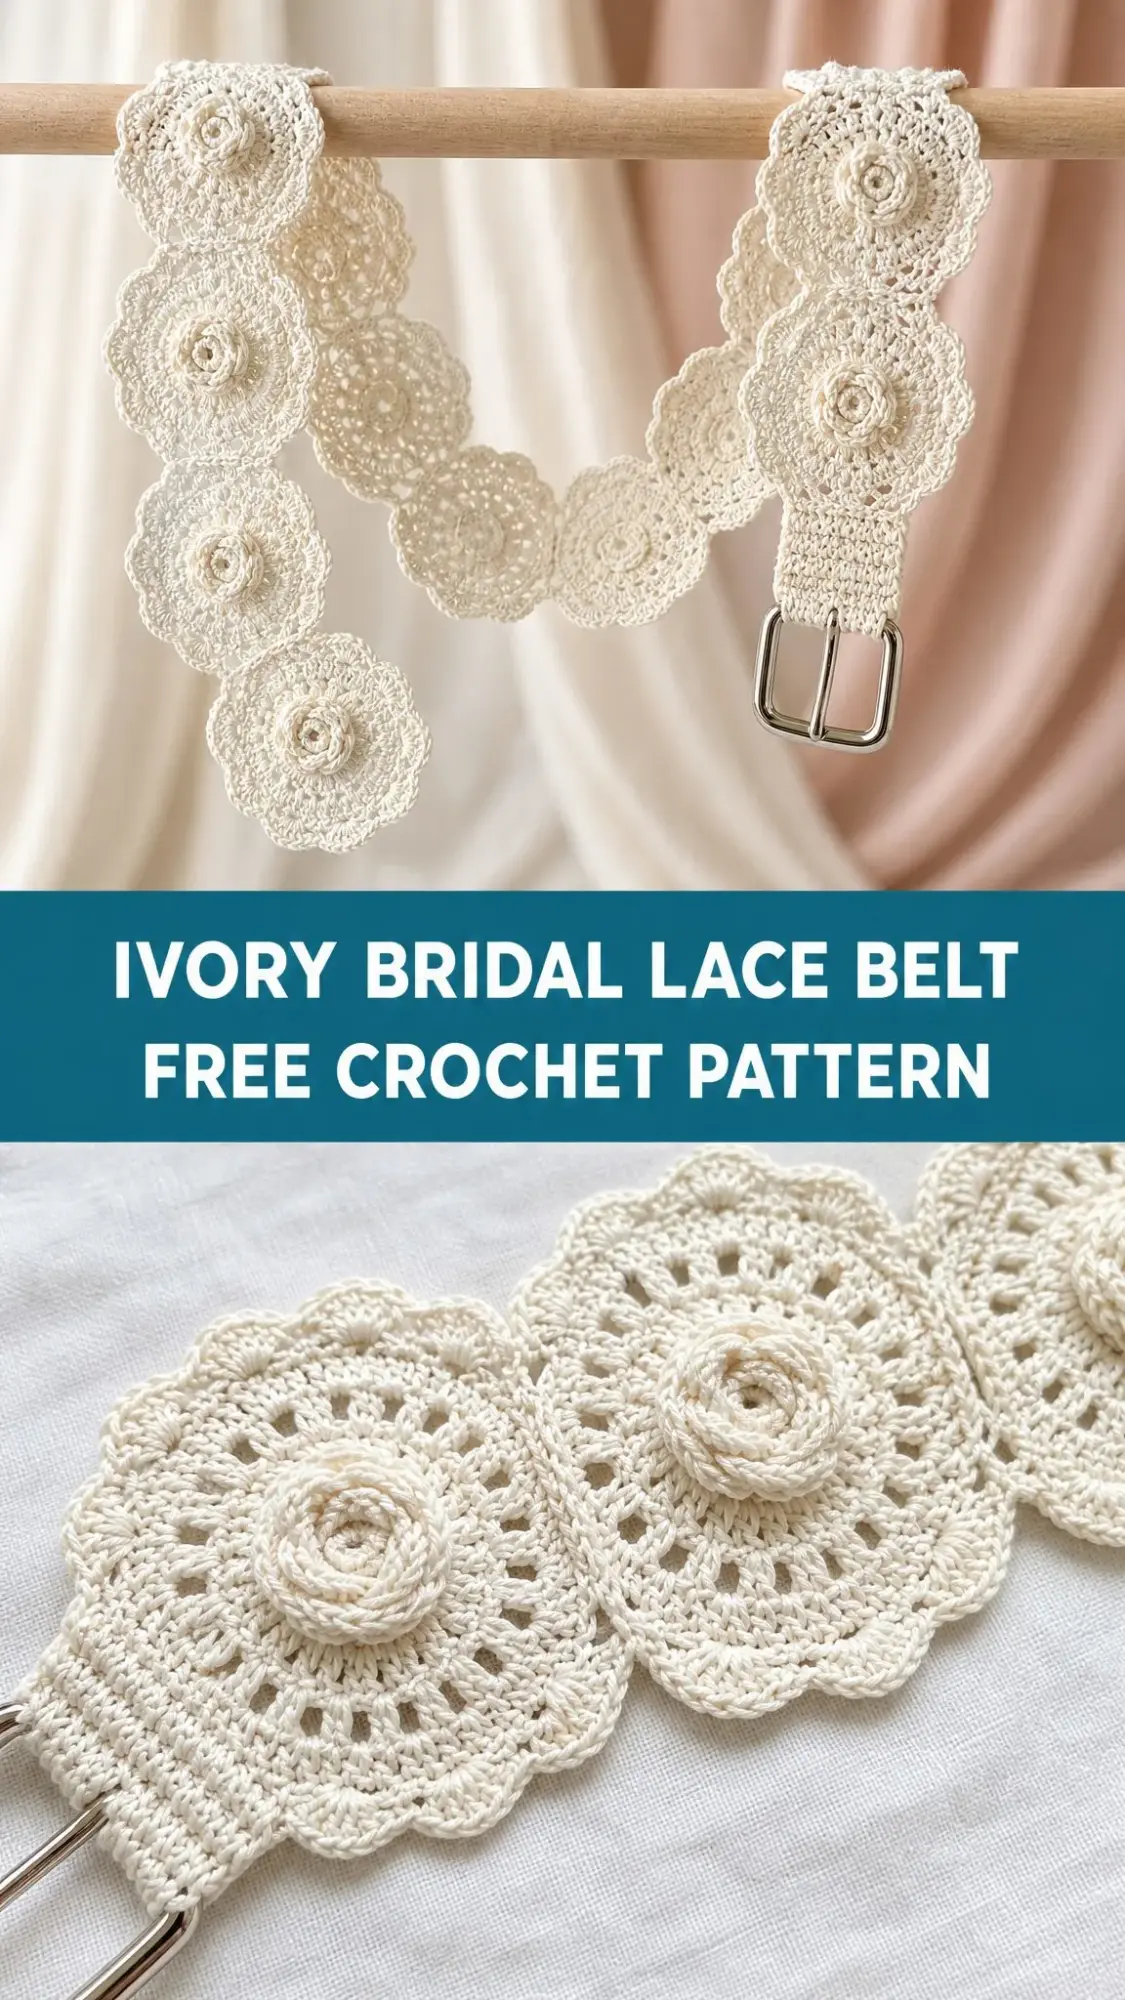
When I finally pulled it out and hooked up the first rose medallion, I knew this pattern had been worth the wait. Those dimensional flowers curling up from the center, the delicate picot edging, the way each circle connects to form one elegant strip. This bridal lace belt is everything I hoped it would be.
Why This Crochet Pattern Works for Bridal and Beyond
This belt is made from individual circular lace medallions, each featuring a raised spiral rose at the center. The roses curl naturally upward without any complicated shaping. You work them in a continuous spiral, then flatten everything out with a ring of stitches before adding the lacy shell border.
The medallions join as you work them. No sewing required at the end. You simply replace two regular picots with joined picots, and the circles connect seamlessly. The scalloped edges happen naturally because of the circular shapes overlapping.
A narrow ribbed strap threads through the last medallion and holds a metal belt buckle. The open lace spaces between shells double as belt holes. No grommets needed.
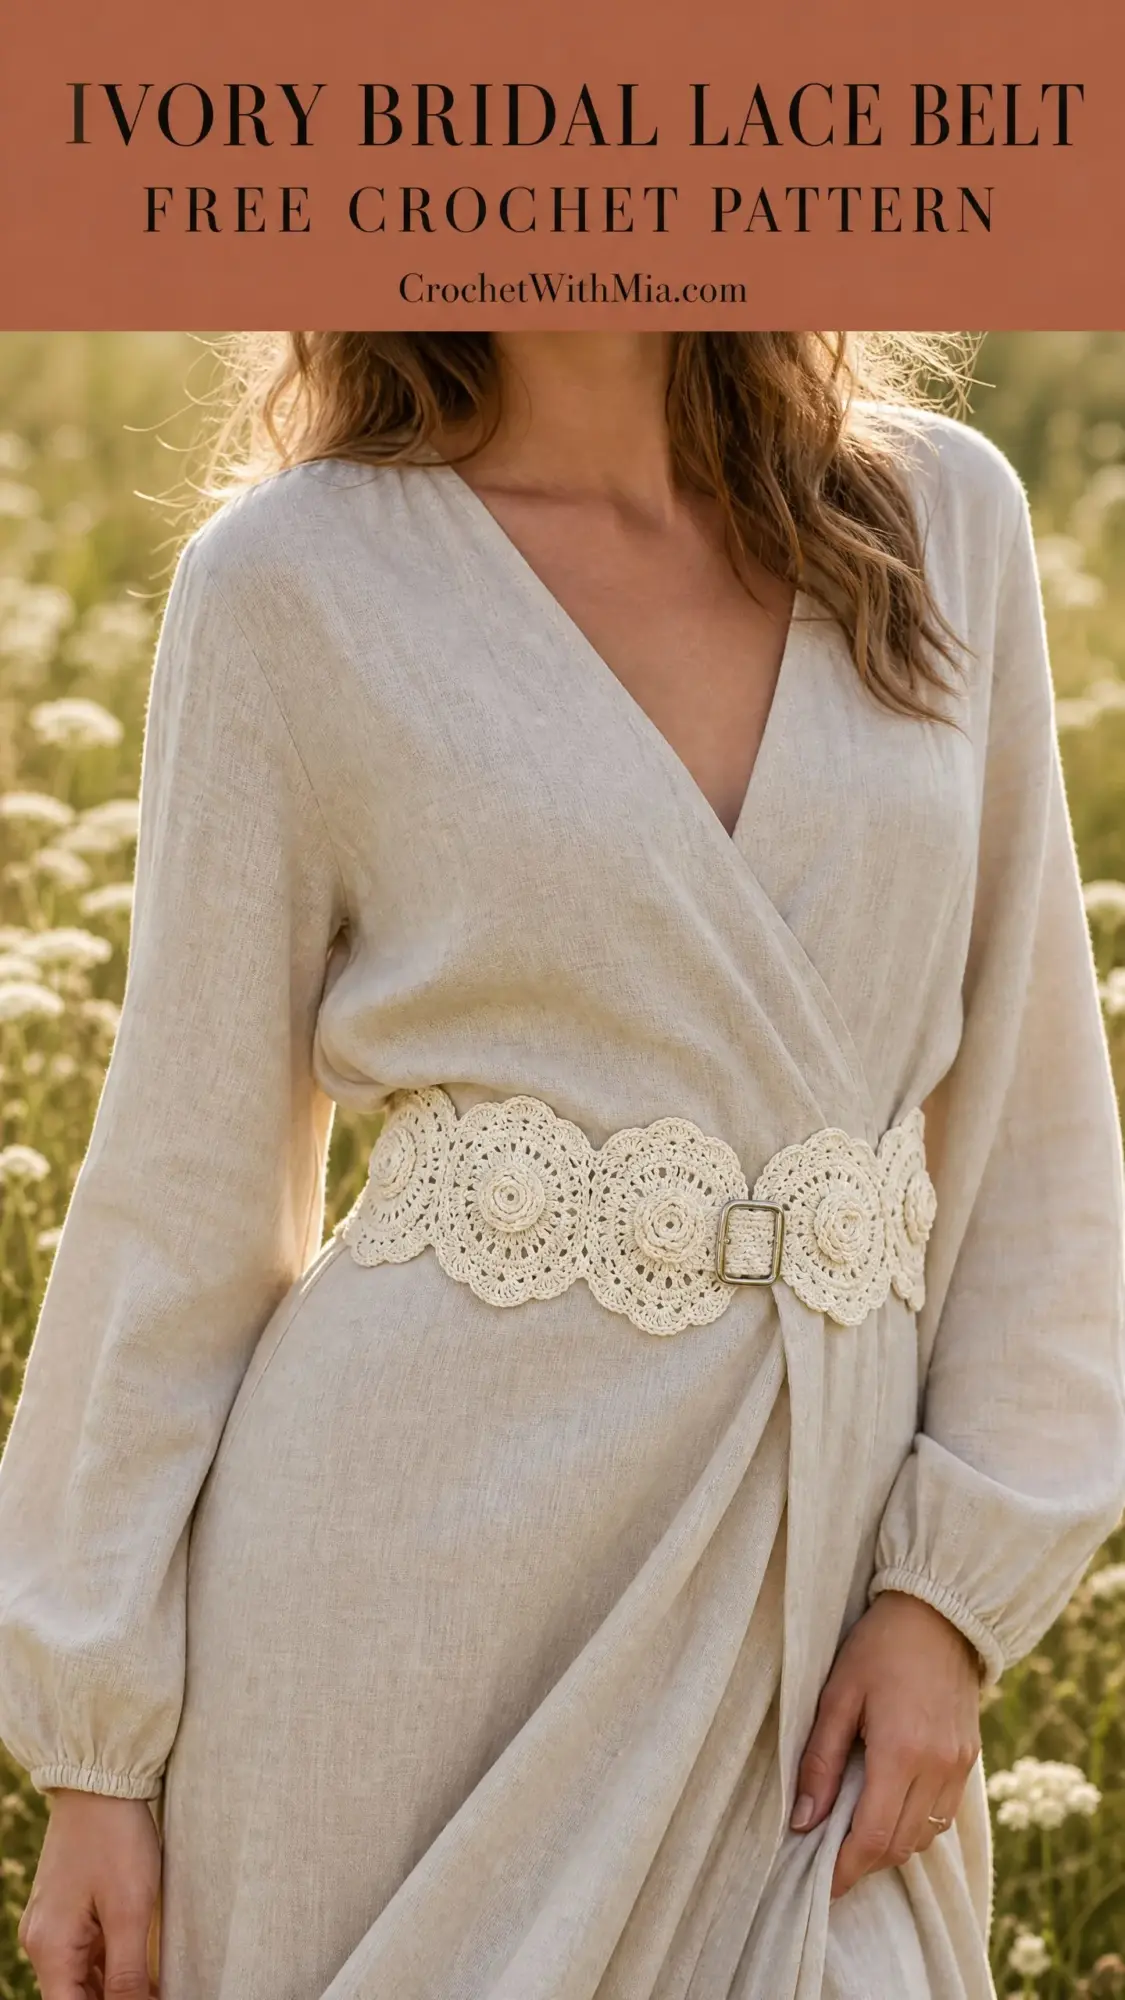
While this design screams wedding day, it works beautifully over a summer dress, a flowy tunic, or even a chunky sweater when you want to define your waist. The ivory color keeps it classic, but imagine this in dusty rose, sage green, or even black for an evening look.
Skill Level and Time Commitment
I would call this advanced beginner to intermediate. The raised spiral rose technique is the trickiest part. You work in a continuous spiral without joining rounds, which can feel disorienting the first time. But once you complete one medallion, the rest go quickly.
If you have solid experience with single crochet (sc) and double crochet (dc), and you have completed at least one motif project before, you will handle this well.
Time estimate: Roughly 6 to 10 hours total. Each medallion takes about 30 to 45 minutes once you find your rhythm. The buckle strap is fast, maybe 20 minutes.
Materials You Will Need
Thread: Approximately 400 yards of size 10 crochet cotton thread in ivory or natural white.
Hook: US Steel Hook Size 7, which is 1.65 mm. Use whatever size gives you the correct gauge.
Notions:
Thread Recommendations
Lizbeth Crochet Cotton Thread Size 10 in Antique White 601 gives excellent stitch definition. The tight smooth twist shows off the lace shells and rose detail beautifully.
DMC Petra Crochet Cotton Thread Size 10 in Ecru 5712 is widely available and has a subtle sheen that works well for bridal pieces.
Aunt Lydia’s Classic Crochet Thread Size 10 in Natural 226 is budget friendly with good stiffness that helps medallions hold their shape.
Whatever you choose, look for a tight smooth twist. Avoid fuzzy or loosely plied threads. The open lace stitches need clarity to look right.
Gauge
One completed medallion through Round 5 measures 2.75 inches or 7 cm in diameter after light blocking.
Alternatively: 10 dc equals 1 inch. Four dc rows equal 1 inch.
Gauge matters here. The belt needs to fit correctly, and the medallions need to align properly when joined. Swatch one full medallion and block it before committing to the full belt.
Finished Measurements
Belt body length (excluding buckle strap): approximately 30 inches or 76 cm using 11 medallions. This fits a 26 to 28 inch waist.
Belt width: approximately 2.75 inches or 7 cm at the widest point.
Buckle strap length: approximately 4 inches or 10 cm.
Buckle strap width: approximately 0.75 inch or 2 cm.
Abbreviations and Definitions
beg = beginning
ch = chain. Wrap yarn over hook, pull through loop on hook.
ch-sp = chain space. The gap created by chains in a previous row or round.
dc = double crochet. Yarn over, insert hook, pull up a loop (3 loops on hook), yarn over and pull through 2 loops (2 loops remain), yarn over and pull through last 2 loops.
hdc = half double crochet. Yarn over, insert hook, pull up a loop (3 loops on hook), yarn over and pull through all 3 loops at once.
join = slip stitch join unless otherwise stated.
lp(s) = loop(s)
picot = chain 3, slip stitch in first chain made. This creates a small decorative knot.
rep = repeat
rnd = round
RS = right side
sc = single crochet. Insert hook, pull up a loop (2 loops on hook), yarn over and pull through both loops.
sk = skip
sl st = slip stitch. Insert hook, yarn over, pull through stitch and loop on hook in one motion.
sp = space
st(s) = stitch(es)
tr = treble crochet
WS = wrong side
yo = yarn over
Special Stitches
Raised Spiral Rose
This is worked in Rounds 1 and 2 of each medallion. The petals curl naturally upward without any special shaping.
Rose Round 1: Make a magic ring (or chain 5, join with slip stitch to form a ring). Chain 1. Work 10 sc into the ring. Do not join. Do not slip stitch. Place a stitch marker in the last sc to mark the end. (10 sc)
Rose Round 2: Working continuously in a spiral, work (chain 4, sc in next stitch) 10 times. Do not join. You now have 10 chain 4 arches curling upward. These are your rose petals. (10 petals)
Rose Round 3: This completes the rose and creates the flat base. Slip stitch into the center ring between the petals, inserting your hook under the original ring threads to anchor. Chain 1, work 1 sc into the center ring, then work 5 sc around each of the 10 petal arches. Work into the chain 4 arch itself, not into the sc tip. After all 10 arches, join with slip stitch to the first sc of this round. You now have a dimensional rose sitting in the center of a flat ring. (50 sc)
The rose petals naturally fold toward the right side. Keep the RS facing up for all remaining rounds.
Shell
Work 5 dc all into the same stitch or space.
Joined Picot
This replaces a regular picot when connecting medallions. Chain 1, slip stitch into the corresponding picot of the adjacent medallion, chain 1, slip stitch back into the base stitch of your current medallion.
Step by Step Instructions
Medallion 1 (No Joining)
Round 1, Spiral Rose Base:
Make a magic ring. Chain 1. Work 10 sc into the ring. Do not join. Do not close the ring yet. Place a stitch marker in the last sc. (10 sc)
Round 2, Rose Petals:
Working continuously without joining, work (chain 4, sc in next sc) 10 times. You have 10 chain 4 petal arches. Do not join. (10 arches)
Round 3, Rose Completion and Base Ring:
Pull the magic ring closed. Slip stitch into the center ring below the petals to anchor. Chain 1. Working into each chain 4 arch (not the sc tips), work 5 sc into each of the 10 arches. After all 10 arches, join with slip stitch to the first sc of this round. The petals curl upward over these stitches. (50 sc)
Round 4, First Lace Round:
Chain 3 (counts as first dc). Dc in same stitch. (Chain 2, skip 2 stitches, 2 dc in next stitch) 16 times. Chain 2, skip 2 stitches. Join with slip stitch to top of beginning chain 3. (34 dc, 17 chain 2 spaces)
Round 5, Shell and Picot Border:
Slip stitch into the first chain 2 space. Chain 3 (counts as first dc). Work 4 more dc into same chain 2 space. Shell made. Chain 1. Picot. Chain 1. Work (shell in next chain 2 space, chain 1, picot, chain 1) 16 times. Join with slip stitch to top of beginning chain 3. (17 shells, 17 picots)
Fasten off. Weave in ends. Set aside.
Checkpoint: Before blocking, the medallion should measure about 2.5 inches across. After misting and pinning, it should measure 2.75 inches.
Medallions 2 Through 11 (Joined Versions)
Work Rounds 1 through 4 exactly as Medallion 1. Do not fasten off after Round 4.
Round 5, Shell and Picot Border with Join:
The medallions join at 2 picot points on one side. These are picots 8 and 9, counting from the first picot of Round 5.
Slip stitch into the first chain 2 space. Chain 3. Work 4 more dc into same space. Shell made. Chain 1. Picot. Chain 1.
Work (shell in next chain 2 space, chain 1, picot, chain 1) 6 times. You now have 7 shells and 7 picots.
Shell in next chain 2 space, chain 1, Joined Picot to picot 8 of previous medallion, chain 1.
Shell in next chain 2 space, chain 1, Joined Picot to picot 9 of previous medallion, chain 1.
Work (shell in next chain 2 space, chain 1, picot, chain 1) 8 times.
Join with slip stitch to top of beginning chain 3. (17 shells, 15 regular picots, 2 joined picots)
Fasten off. Weave in ends.
Repeat for all remaining medallions, always joining the new medallion to the previous one at the same two picot positions.
Checkpoint: After all 11 medallions, the belt body should measure approximately 30 inches from end to end and 2.75 inches from top scallop to bottom scallop.
Buckle Strap
Foundation Chain: Chain 7.
Row 1: Sc in second chain from hook. Sc in each remaining chain across. Chain 1, turn. (6 sc)
Rows 2 through 26: Sc in back loop only of each sc across. Chain 1, turn. (6 sc per row)
Working in back loop only creates the ribbed texture you see in the finished piece. After Row 26, do not fasten off.
Fold the strap in half so the two short ends align. Slip the buckle frame onto the folded strap so it sits at the fold. Bring the two open short ends together.
Joining Row: Holding both open ends together as one layer, slip stitch through both layers across all 6 stitches to seam the strap closed into a loop around the buckle bar. (6 slip stitches)
Fasten off. Leave a 12 inch tail for attaching to the medallion.
Attaching the Buckle Strap
Thread the yarn tail onto your yarn needle. Insert the closed end of the strap through the center opening of Medallion 11 from back to front. The strap end should emerge on the right side.
Sew the closed end securely to the back of Medallion 11. Whipstitch around the strap base several times, catching the thread framework on the back. The buckle should hang free at the front, about 1 inch forward of the medallion edge.
Weave in all remaining ends.
Checkpoint: The buckle prong should pass through the chain 2 spaces or shell openings on the opposite end of the belt. Those open lace spaces serve as belt holes.
Size Customization
For a shorter belt: Remove medallions. Each medallion adds about 2.25 inches to the length because of the overlap at joining points. Nine medallions create a belt of approximately 26 inches, fitting a 22 to 24 inch waist.
For a longer belt: Add medallions. For a 34 inch waist, use 13 medallions.
For a narrower belt: Stop after Round 4 on each medallion, skipping the shell and picot round. Work a single round of sc around the joined strip to finish. This produces a belt about 1.75 inches wide.
For a chunky bohemian version: Work the same pattern in size 3 cotton yarn with a US D or 3.25 mm hook. Each medallion will measure about 4 inches. Adjust your buckle width accordingly.
Blocking Instructions
Wet blocking is essential. The medallions will look uneven before blocking. Trust the process.
Step 1: Weave in all ends securely on the wrong side. Run each tail through at least 3 different stitch structures before trimming.
Step 2: Fill a basin with cool water. Submerge the entire belt and press gently to saturate. Do not wring or twist.
Step 3: Remove the belt and press between two clean towels to remove excess moisture. The belt should be damp, not dripping.
Step 4: Lay the belt on a blocking mat. Pin each medallion to its blocked diameter of 2.75 inches, pinning at each picot point. Ensure the belt lies in a straight line.
Step 5: Allow to dry completely. This takes 4 to 8 hours depending on humidity. Do not remove pins until fully dry.
Step 6: Once dry, if any section remains slightly misshapen, hold a steam iron about 1 inch above the surface. Apply gentle steam without pressing the iron directly onto the thread.
Care Instructions
Hand wash in cool water with gentle soap. Rinse thoroughly. Press between towels to remove water. Reshape by hand and air dry flat. Do not tumble dry. Do not wring. Store flat or rolled loosely. Avoid prolonged direct sunlight, which can cause ivory thread to yellow.
You Did It
This Ivory Bridal Lace Belt crochet pattern combines everything I love about thread work. Delicate roses, elegant lace, practical construction. The join as you go technique means no tedious sewing at the end. The dimensional rose centers add texture without complexity. And the adjustable length means you can customize for any waist size.
Whether you are making this for your own wedding, a special gift, or simply because you love beautiful things, I hope it brings you as much joy to make as it brought me to design.
Thank you so much for choosing this pattern. I would absolutely love to see your finished belt, so please tag me on Instagram or share a photo on Facebook. Seeing your versions is genuinely the best part of my day.
If you loved making this, go ahead and save it to your Pinterest boards so you can find it again whenever inspiration strikes. And if you do make one, drop a comment below. I read every single one, and I would love to hear how it turned out for you.