
I’ve been looking for the perfect structured tote pattern for months. Something romantic but practical. Something that looks impressive but won’t make you tear your hair out. This Winter White Snowflake Tote is exactly what I had in mind, and I’m so excited to share it with you.
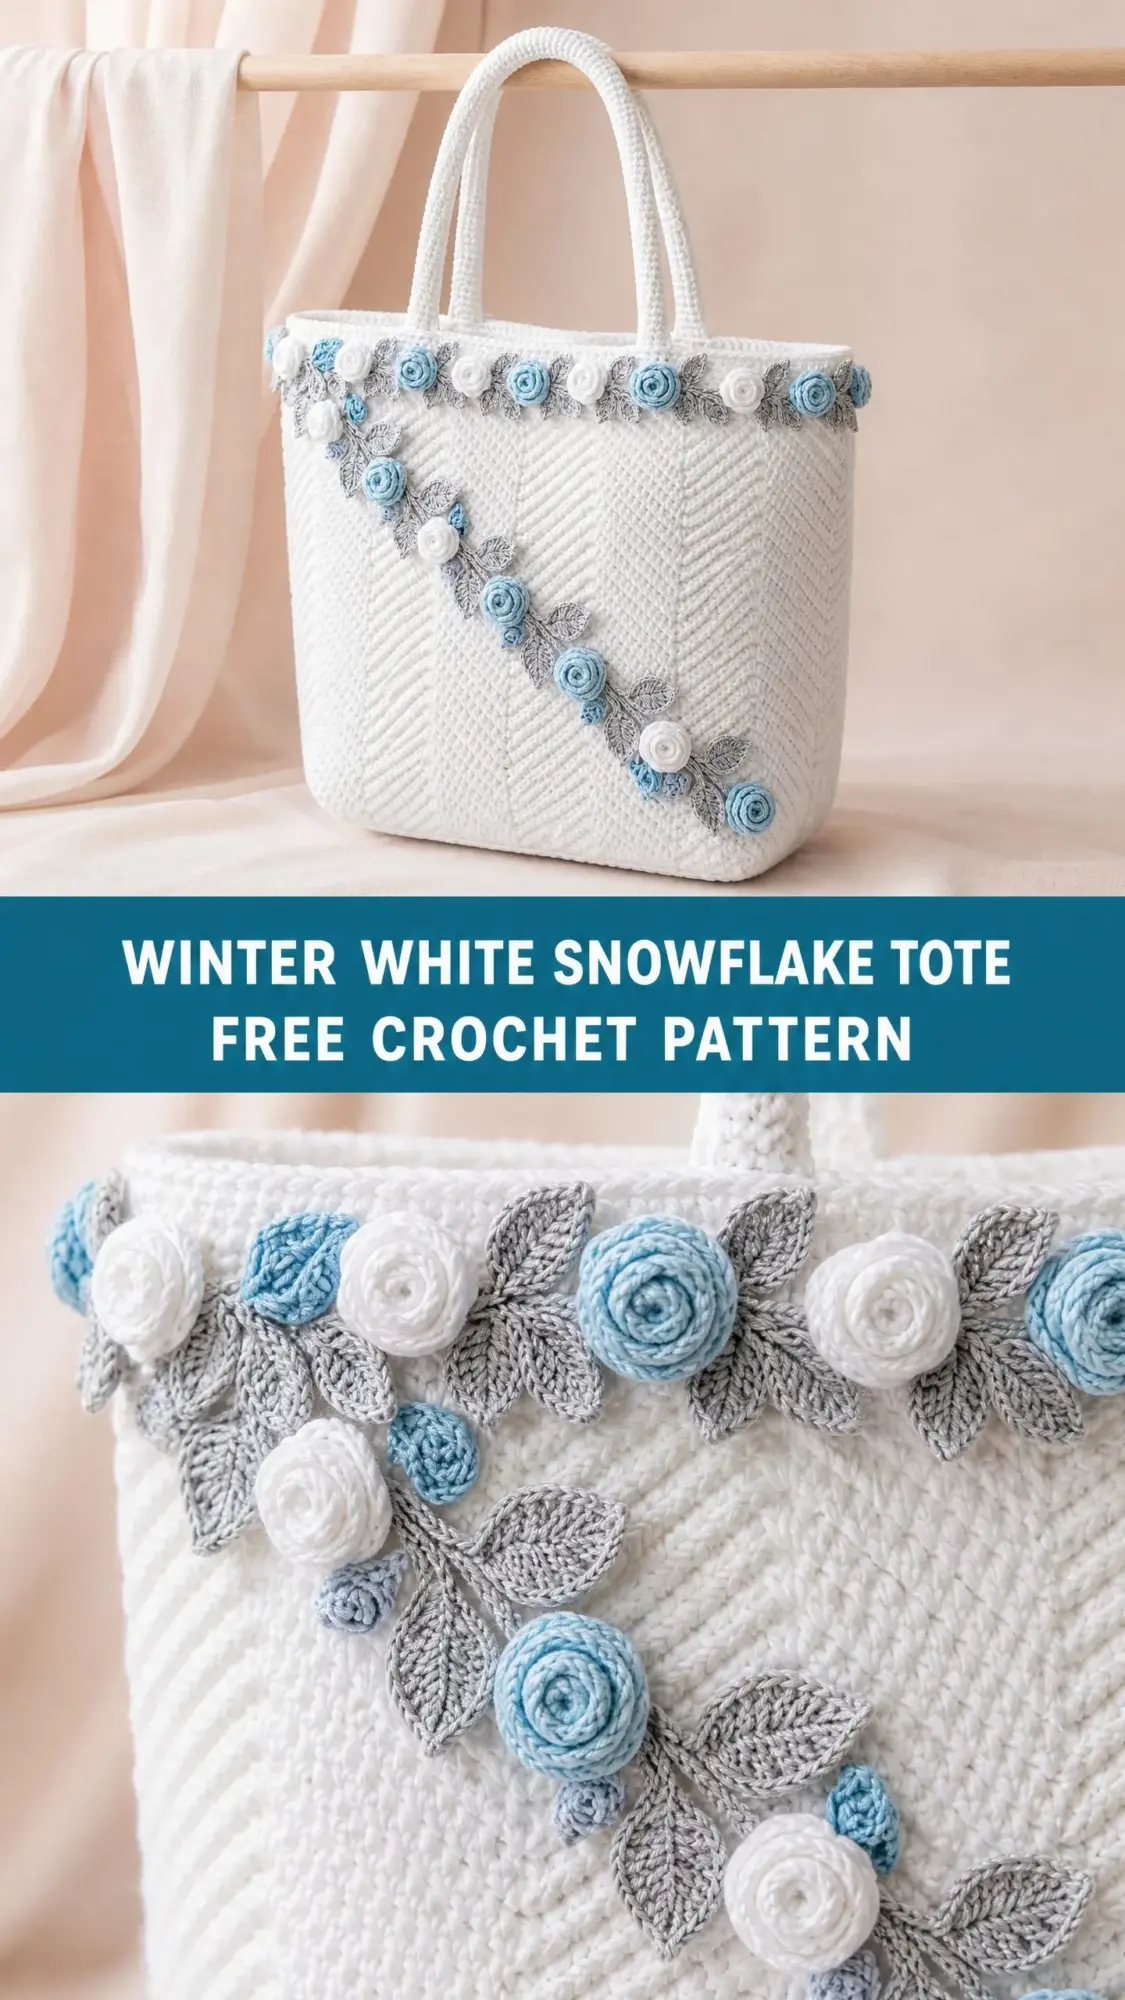
The herringbone texture creates this gorgeous diagonal chevron effect that looks way more complicated than it actually is. And those little roses? They’re surprisingly simple once you get the hang of rolling them up. The whole bag comes together in a weekend or two of dedicated stitching.
Whether you’re making this for yourself or as a gift for someone who deserves something beautiful, this tote delivers. It’s sturdy enough for everyday use, pretty enough for special occasions, and satisfying enough to keep you hooked from the first chain to the last leaf.
Why You’ll Love This Crochet Tote Bag Pattern
This isn’t your average floppy market bag. The herringbone half double crochet stitch creates a firm, structured fabric that holds its boxy shape beautifully. The cotton yarn adds to that stability, giving you a tote that stands up on its own and keeps its form even when loaded with books, groceries, or craft supplies.
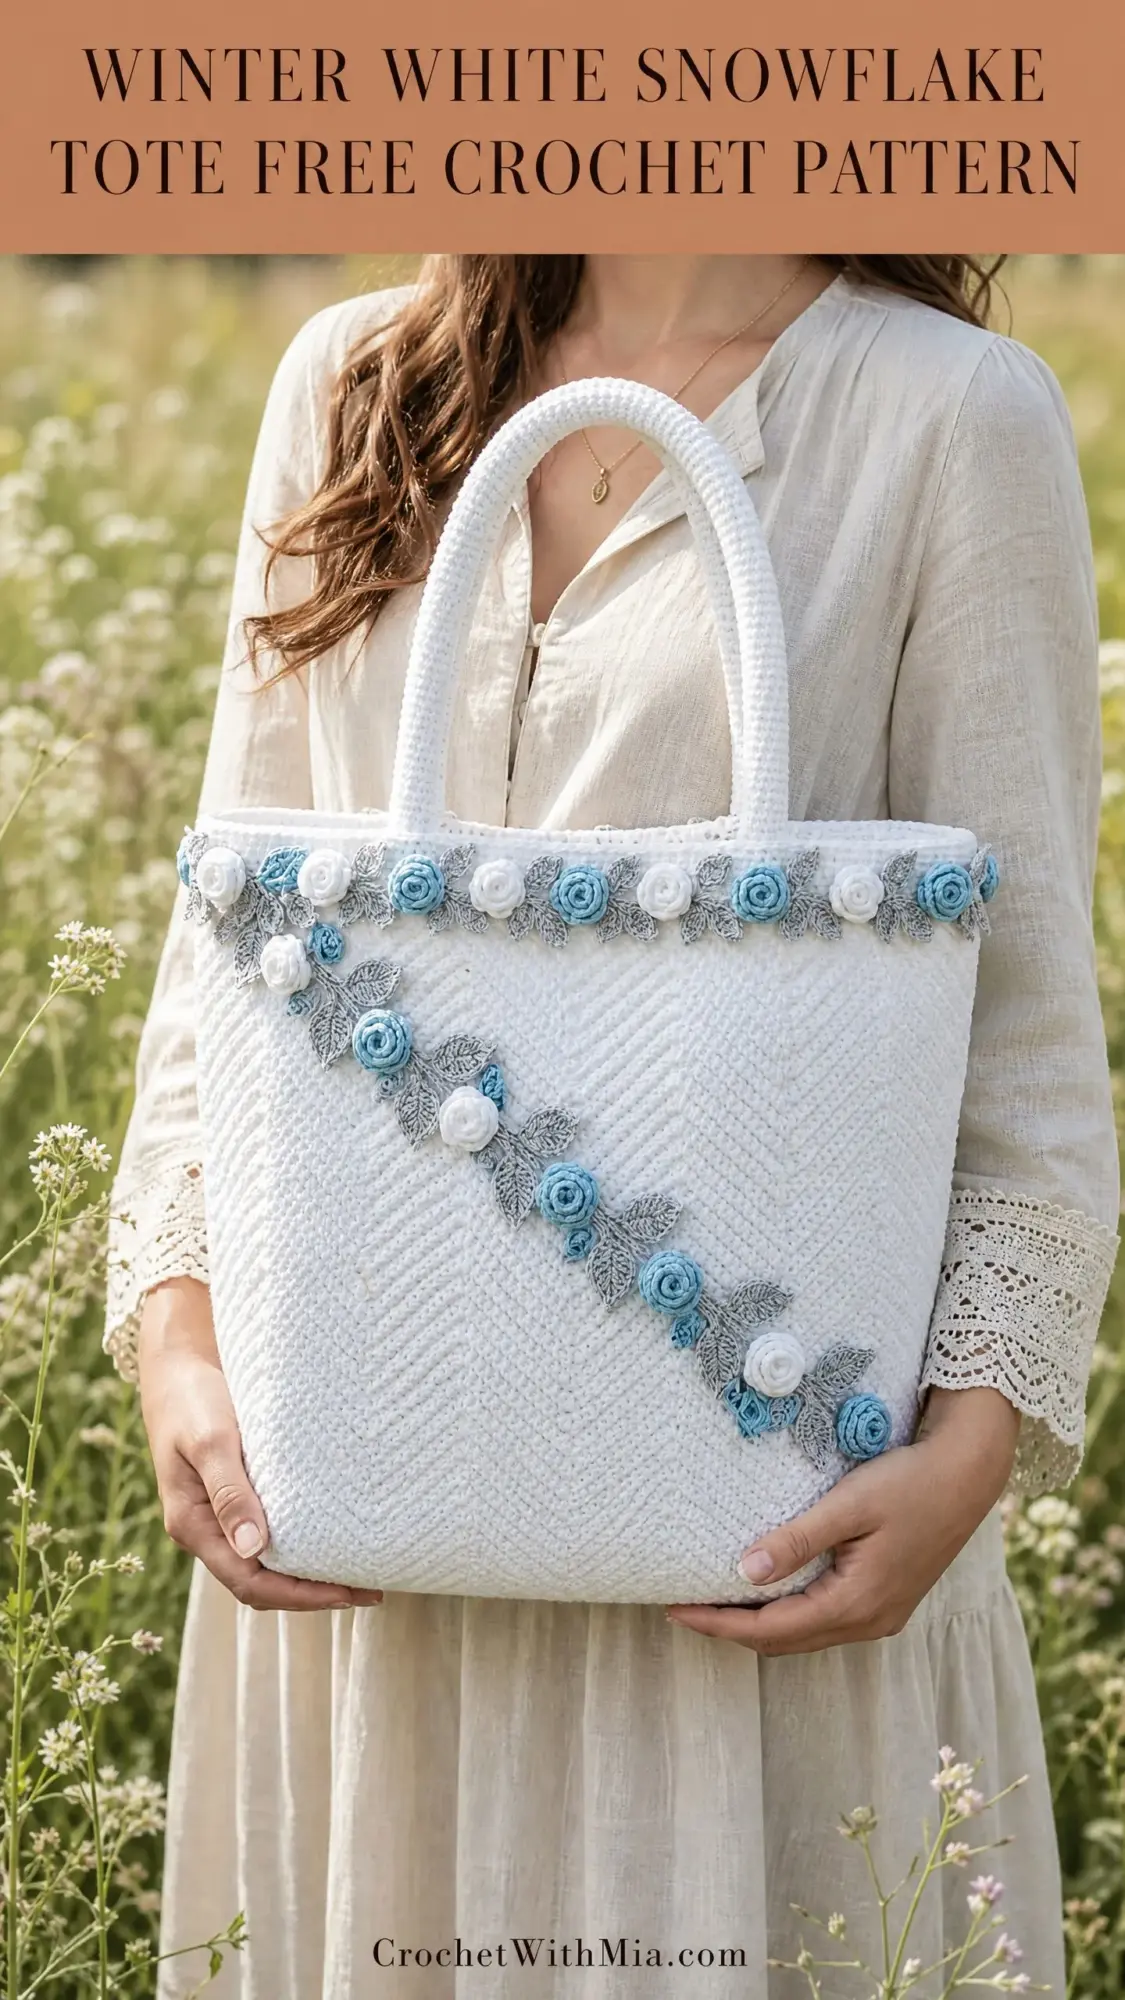
The romantic garden aesthetic sets this bag apart from typical totes. Those delicate roses in soft blue, gray, and white cascade along the top edge and sweep diagonally across the front panel. It’s like carrying a little piece of a cottage garden wherever you go.
What makes this pattern special:
Skill Level and Time Commitment
This pattern is rated intermediate. If you’ve never tried herringbone half double crochet before, don’t worry. I’ll walk you through it step by step. The stitch itself is straightforward once you understand which loop to pull through first.
The roses and leaves are worked separately and sewn on at the end. This means you can work on them while watching TV or sitting in a waiting room. No counting required once you memorize the simple pattern.
Estimated time: 14 to 20 hours for an experienced crocheter. If you’re newer to crochet or taking your time, budget a bit more. There’s no rush here.
Finished Dimensions
Your completed tote will measure:
This gives you a roomy bag that sits comfortably on your shoulder or in the crook of your arm.
Materials Needed for This Crochet Tote Pattern
Yarn
You’ll need worsted weight cotton or cotton-blend yarn in four colors:
Recommended Yarns
Lion Brand 24/7 Cotton in White, Sky, and Silver works beautifully here. This 100 percent mercerized cotton has excellent stitch definition and washes well. The roses keep their shape after blocking.
Paintbox Yarns Simply DK used doubled in Paper White, Slate Blue, and Granite Grey gives a soft but structured result. The cotton-acrylic blend adds durability.
Drops Paris in White, Light Blue, and Grey is widely available and affordable. It maintains the stiffness you want for bag construction.
Substitution note: Avoid purely acrylic yarns for the bag body. They’ll stretch and lose shape over time with regular use. Your embellishment roses can be any smooth yarn that matches the gauge, since they’re decorative rather than structural.
Hooks
Notions
Gauge
Getting gauge right matters for this pattern because it affects your finished dimensions.
In Herringbone Half Double Crochet worked in the round:
Use your 4.0 mm hook and MC yarn. Make a small swatch and measure. If you’re getting more stitches per inch, try a larger hook. Fewer stitches? Go down a hook size.
Abbreviations and Stitch Definitions
Let me walk you through every stitch abbreviation you’ll encounter:
Special Stitches
Herringbone Half Double Crochet (HbHdc)
This stitch is the star of the show. It creates that beautiful diagonal texture you see in the photos. Here’s how to work it:
Step 1: Yarn over as you would for a normal hdc.
Step 2: Insert your hook into the designated stitch.
Step 3: Yarn over and pull up a loop. You now have 3 loops on your hook.
Step 4: Here’s the key difference. Pull the working yarn through ONLY the first loop on your hook. Now you have 2 loops remaining.
Step 5: Yarn over and pull through both remaining loops.
The result is a stitch that leans diagonally, creating that gorgeous herringbone texture. Every body round uses this stitch unless I tell you otherwise.
HbHdc2tog (Herringbone Decrease)
You won’t need this for the main bag, but it’s included for size customization:
Step 1: Yo, insert hook into next st, yo, pull up a loop, pull through first loop. (2 loops on hook)
Step 2: Yo, insert hook into following st, yo, pull up a loop, pull through first loop. (3 loops on hook)
Step 3: Yo, pull through all 3 remaining loops. One decrease complete.
Rose
The roses are worked as flat spirals that naturally curl into 3D flowers.
Foundation: Ch 16 loosely.
Row 1: Starting in 2nd ch from hook, work 1 sc in each of next 2 ch, 1 hdc in each of next 2 ch, 2 dc in each of next 6 ch, 1 tr in each of next 4 ch. (15 sts total)
Fasten off, leaving a 10-inch tail. Roll the strip into a spiral with the sc end as the center. Use the tail to whipstitch the base together as you roll, securing each layer. Your finished rose will be approximately 0.75 inch (2 cm) in diameter.
Small Leaf
Ch 8.
Row 1: Sl st in 2nd ch from hook, sc in next ch, hdc in next ch, dc in next ch, hdc in next ch, sc in next ch, sl st in last ch. Do not turn.
Working along the opposite side of the foundation ch: sc in next ch, hdc in next ch, dc in next ch, hdc in next ch, sc in next ch, sl st in last ch.
Fasten off, leaving a tail for sewing. Each leaf measures approximately 0.75 inch (2 cm) long.
Pattern Notes Before You Begin
1. The bag body is worked in the round, starting with an oval base and working upward in continuous rounds. Use a stitch marker to track the beginning of each round.
2. The herringbone stitch naturally leans to the right. This is correct and creates that beautiful diagonal texture.
3. Make all roses and leaves before attaching them to the finished bag.
4. Handles are worked as separate tubes and sewn to the inside top edge.
5. Stitch counts appear at the end of each round in parentheses.
6. The basic bag has no closure. You can add a button loop or magnetic snap before lining if you’d like.
7. All rounds are worked on the right side. Don’t turn unless I specifically tell you to.
Step by Step Crochet Instructions
Section 1: Oval Base
The base creates that boxy shape. The foundation chain determines the length.
Foundation Chain: Using MC and 4.0 mm hook, ch 29.
Rnd 1: Starting in the 2nd ch from hook, work 1 sc in each of next 27 ch, then work 3 sc in the last ch (this forms the first short-end curve). Rotate your work to stitch along the opposite side of the foundation chain. Work 1 sc in each of next 27 ch along the bottom of the chain, then work 2 sc in the same ch as your very first sc (this forms the second short-end curve). Place marker in the first st of the next round. (60 sc)
Rnd 2: Work 1 HbHdc in each of next 27 sts, 2 HbHdc in each of next 3 sts, 1 HbHdc in each of next 27 sts, 2 HbHdc in each of next 3 sts. (66 HbHdc)
Rnd 3: Work 1 HbHdc in each of next 27 sts, [2 HbHdc in next st, 1 HbHdc in next st] 3 times, 1 HbHdc in each of next 27 sts, [2 HbHdc in next st, 1 HbHdc in next st] 3 times. (72 HbHdc)
Rnd 4: Work 1 HbHdc in each of next 27 sts, [2 HbHdc in next st, 1 HbHdc in each of next 2 sts] 3 times, 1 HbHdc in each of next 27 sts, [2 HbHdc in next st, 1 HbHdc in each of next 2 sts] 3 times. (78 HbHdc)
Rnd 5: Work 1 HbHdc in each of next 27 sts, [2 HbHdc in next st, 1 HbHdc in each of next 3 sts] 3 times, 1 HbHdc in each of next 27 sts, [2 HbHdc in next st, 1 HbHdc in each of next 3 sts] 3 times. (84 HbHdc)
Checkpoint: Your base should now measure approximately 13 inches (33 cm) long and 5 inches (12.7 cm) wide. It should lie flat with no curling at the short ends.
Section 2: Bag Body
Now we work straight up with no more increases. This creates those clean, boxy sides.
Rnds 6-30: Work 1 HbHdc in each st around. (84 HbHdc per round)
That’s 25 rounds of the same simple instruction. Put on a podcast or your favorite show and enjoy the rhythm of the stitch.
Checkpoint: After Round 30, your bag body should measure approximately 10 inches (25.5 cm) tall from the base. The opening measures 13 inches (33 cm) wide and 5 inches (12.7 cm) deep.
Section 3: Top Edge Finishing
Rnd 31: Work 1 sc in each st around. Join with sl st to first sc. Fasten off and weave in ends. (84 sc)
This round stabilizes the opening before you attach the handles.
Section 4: Handles (Make 2)
Each handle is a firm crocheted tube about 18 inches (45.7 cm) long.
Foundation Chain: Using MC and 4.0 mm hook, ch 73.
Join with sl st to first ch, being careful not to twist. Place marker.
Rnd 1: Ch 1, work 1 sc in each ch around. (73 sc)
Rnds 2-4: Work 1 sc in each st around. (73 sc)
Join with sl st to first sc. Fasten off, leaving a long tail for sewing.
The handle is a narrow tube, 4 rounds tall. Work tightly so it maintains its shape. The firm cotton and tight gauge make this self-supporting.
Make a second handle identically.
Handle Attachment
Flatten each handle so the seam runs along one edge. Position each handle centered over the long side (front and back panels). Each handle should sit approximately 3 inches (7.6 cm) from the center of the top opening. Space both attachment points about 7 inches (17.8 cm) apart.
Using your tapestry needle and matching yarn, whipstitch each handle end firmly to the inside top edge. Stitch through 2 to 3 rounds of the bag wall for security. Reinforce with a second row of whipstitching in the opposite direction.
Checkpoint: Hold the bag by the handles. It should hang straight with handles at equal heights and the bag body remaining open and square.
Section 5: Embellishments
Roses
Make the following:
Leaves
Make 20 leaves in Color B (gray).
Placement Guide
Top edge garland: The roses and leaves run continuously along the entire top edge (Rnd 31), alternating colors. Pin approximately 22 roses evenly around the full circumference, spacing them about every 3 to 4 stitches with a leaf between each pair. Adjust spacing as needed for an even distribution.
Diagonal garland on front panel: Position a diagonal line of roses from the upper-left area of the front panel (near the left handle base) sweeping down to the lower-right corner. Use approximately 12 roses and 10 leaves. Arrange them in a gentle S-curve or diagonal line. Pin all pieces before sewing to confirm placement.
Sewing embellishments: Using matching yarn and your tapestry needle, sew each rose base securely to the bag with 4 to 6 stitches through the base into the bag body. Sew each leaf at its base and tip so it lies flat.
Size Customization Tips
For a smaller bag (approximately 11 x 8 inches):
Reduce foundation chain to ch 23. Work through Rnd 3 only for the base increases. Work body rounds through Rnd 24 instead of Rnd 30.
For a larger tote (approximately 15 x 12 inches):
Increase foundation chain to ch 35. Add one additional increase round at the short ends of the base. Work body rounds through Rnd 36.
For a shallower beach bag style:
Work body rounds through Rnd 20 only.
For DK weight yarn:
Switch to a 3.5 mm hook. Expect approximately 18 stitches per 4 inches. Increase foundation chain to ch 35 and add one more base increase round to reach the same finished dimensions.
Finishing and Blocking
Weave in all ends securely, especially at the rose bases and leaf attachment points.
Wet blocking: Submerge your completed bag in cool water. Gently squeeze out excess water without wringing. Lay flat on a blocking board or clean towel. Shape the base to lie flat and square, pull the sides upright, and allow to dry completely (12 to 24 hours). The cotton content stiffens slightly as it dries, helping the bag hold its boxy shape.
Optional stiffening: Lightly spray the exterior with starch or fabric stiffener, focusing on the base and lower body for added structure. Allow to dry fully before use.
Optional lining: Cut lining fabric into two panels of 14 x 11 inches plus two side panels of 6 x 11 inches. Sew together with a 0.5 inch seam allowance. Fold the top edge under 0.5 inch and hand-stitch the lining to the inside top edge of the bag, just below the rose garland.
Care Instructions
Hand wash in cool water with a gentle detergent. Do not wring. Lay flat to dry, reshaping as needed. If your bag loses its structure after washing, re-block while damp. Do not machine wash if the bag contains a fabric lining unless the lining fabric is also machine-washable. Store stuffed with tissue paper to maintain the boxy shape.
Helpful Tips for Success
Practice the herringbone stitch first. Work a small swatch before starting the base. Once you feel the rhythm of pulling through that first loop only, it becomes second nature.
Use stitch markers generously. Place one at the beginning of each round and consider adding extras at the short-end curves of your base to keep track of where increases go.
Don’t stress about perfect roses. They’re meant to look organic and slightly different from each other. That’s what makes them look like real flowers.
Pin before you sew. This applies to both handles and embellishments. Take photos of your pinned arrangement before committing with needle and thread.
Block your base flat. If it’s cupping or curling, wet block it flat before starting the body rounds. A flat base makes everything easier.
I hope this Winter White Snowflake Tote brings you as much joy to make as it does to carry. If you create one, I’d absolutely love to see it. Tag me on Instagram or share a photo in my Facebook group.
Save this crochet tote pattern to your Pinterest boards so you can find it whenever you’re ready to start. And please drop a comment below if you make one. I love hearing about your projects and seeing the color combinations you choose. Happy crocheting!