
I don’t know about you, but I have a serious weakness for baby clothes with ruffles. Something about those tiny layered tiers just gets me every single time.
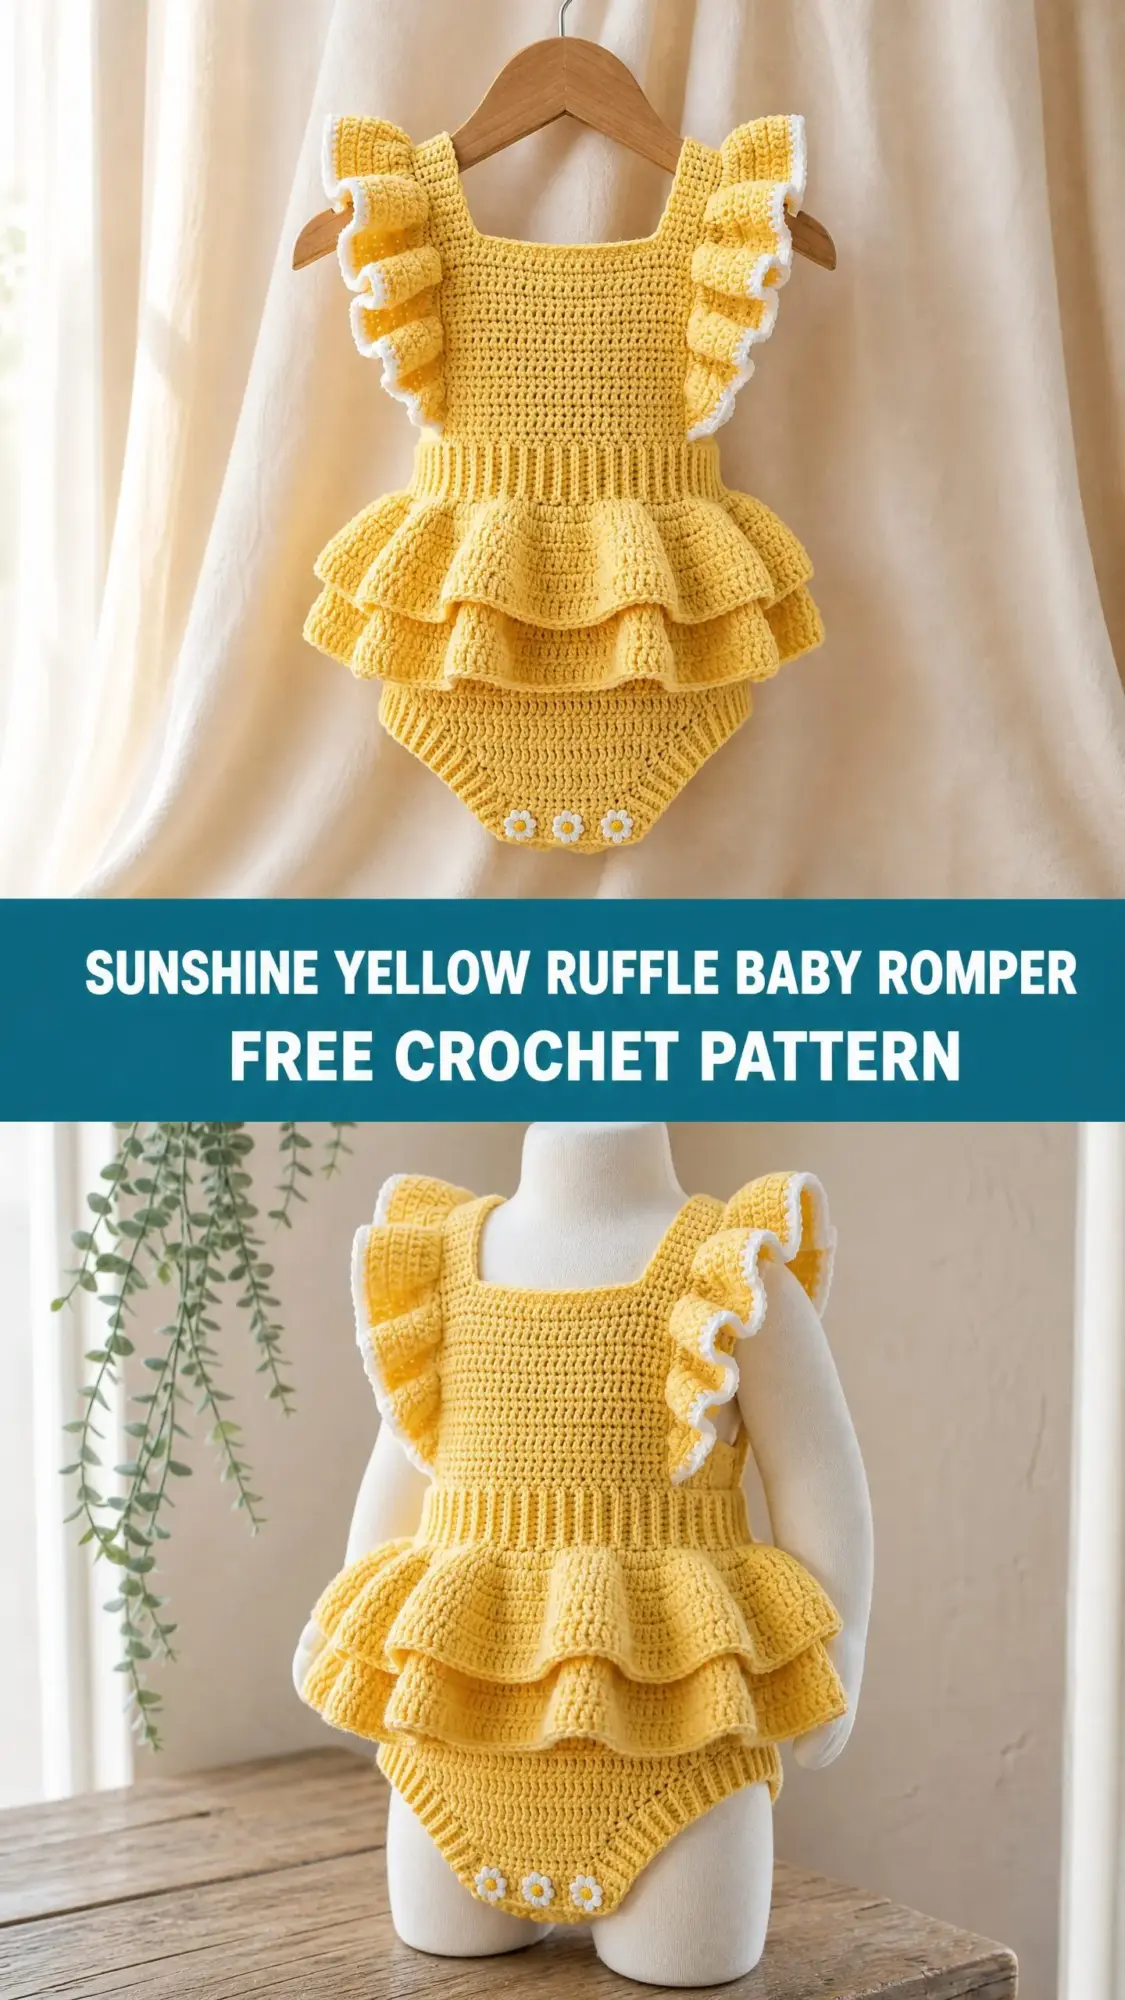
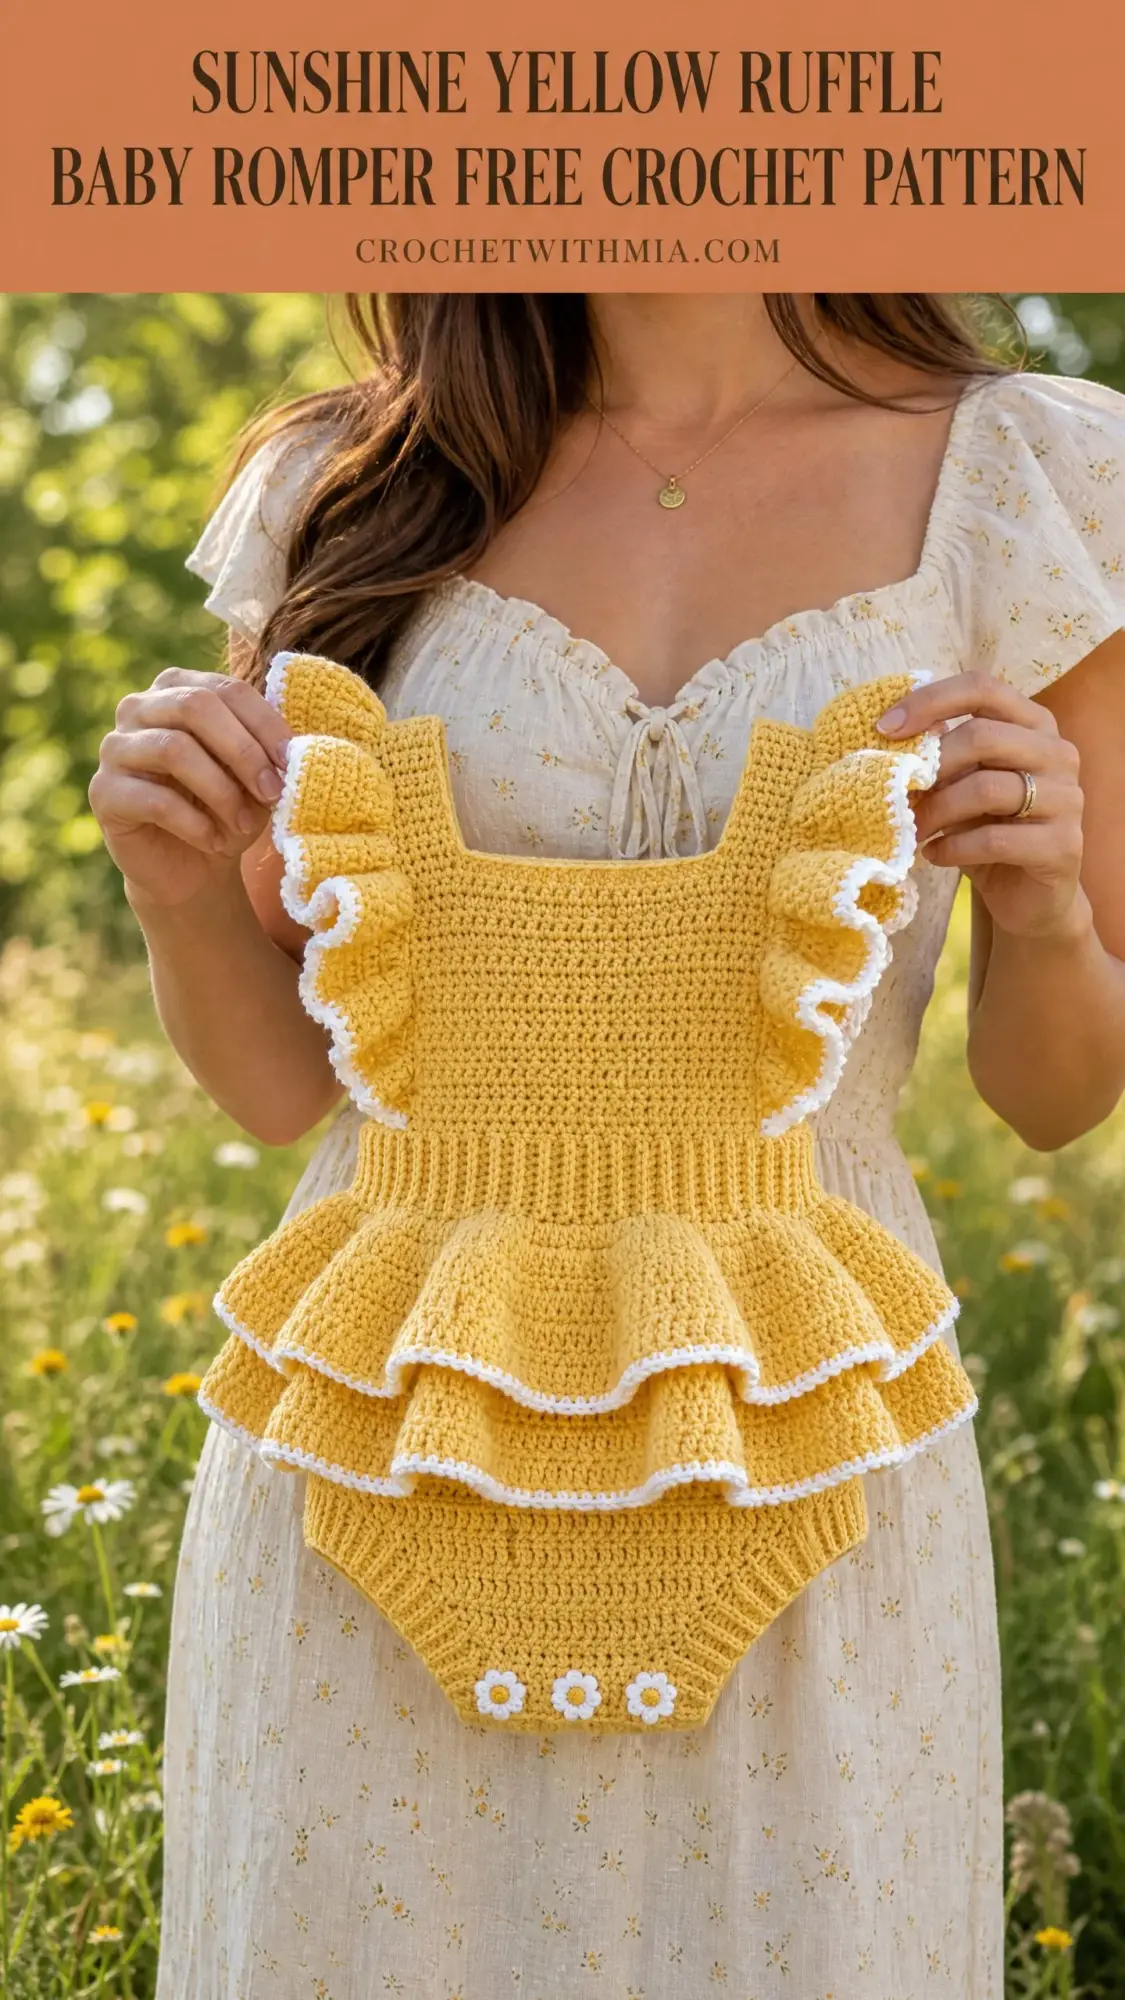
This sunshine yellow romper has been living rent-free in my head since I first sketched it out. The double ruffle skirt, those flutter sleeves with delicate white picot edging, and those sweet little daisy appliques at the leg openings? It’s the kind of handmade baby garment that makes people gasp at baby showers.
If you’ve been wanting to try your hand at a more ambitious baby project, this is the one. It looks impressive, but I promise the construction is more straightforward than it appears. Let me walk you through everything you need to know.
Why This Crochet Baby Romper Pattern Is Worth Your Time
This isn’t your average baby sweater or simple hat. This is an heirloom-quality piece that looks like it came from a fancy baby boutique. The romper features a square neckline, ruffled flutter sleeves with contrasting white trim, a double-tiered ruffle skirt at the waist, a ribbed waistband for stretch and structure, and a practical diaper-cover style bottom with snap closures.
The construction method is clever and keeps things manageable. You’ll work the bodice flat in two panels, seam them together, then work the waistband and ruffles in the round. The flutter sleeves get picked up from the armhole openings last. Breaking it into sections like this makes the whole project feel less overwhelming.
Skill Level and Time Investment
I’m calling this one intermediate level. You should feel comfortable working flat and in the round, seaming pieces together, picking up stitches along an edge, and working into the front loop only or back loop only for ribbing. If you’ve made a few garments before, you’ve got this.
Time estimate: About 10 to 14 hours for an experienced crocheter working at a moderate pace. If this is your first garment construction project, give yourself some extra time and patience. The results are absolutely worth it.
Finished Measurements
This romper is sized for 3 to 6 month old babies. Here are the final dimensions:
I’ve included size customization tips at the end if you need to go smaller for a newborn or larger for 6 to 12 months.
Materials You’ll Need
Yarn
Yarn suggestions that work beautifully:
Lion Brand Pound of Love in Yellow and White. This is 100 percent acrylic, incredibly soft, machine washable, and economical for baby projects.
Paintbox Yarns Simply DK in Buttercup Yellow and Pure White. Excellent stitch definition and very consistent tension.
Drops Safran if you want a natural fiber option. It’s 70 percent cotton and 30 percent polyamide with lovely drape. Note that this one needs hand washing.
Use any DK weight yarn (also labeled Light Worsted or weight category 3). For baby items, I strongly recommend machine-washable yarn because parents will thank you.
Hooks and Notions
Gauge
18 sc x 22 rows = 4 inches (10 cm), worked flat in single crochet using US size E-4 (3.5 mm) hook and Yarn A, blocked.
Please, please check your gauge. This is a fitted garment, not a blanket. Even a small variance will significantly change the fit. Work a 6-inch swatch, block it, and measure the center 4 inches only. Adjust your hook size up or down as needed before you start.
Abbreviations and Stitch Definitions
Let me break down every stitch you’ll need:
Special Stitches You’ll Learn
Picot Stitch (for the sleeve edging)
This creates those pretty little bumps along the white trim. Here’s how:
1. Work 1 sc into the next stitch normally.
2. Chain 3.
3. Insert hook back into the first of those 3 chains just made (the chain closest to the last sc worked).
4. Yarn over and draw through both loops on the hook (this closes the picot).
5. The picot bump now sits on top of the sc. Continue to the next stitch.
Ruffle Stitch (for the skirt tiers)
This is what creates all that gorgeous fullness:
1. Insert hook into the designated stitch.
2. Work 3 dc into that single stitch (this triples the stitch count).
3. Move to the next stitch and repeat.
Daisy Applique (make 6 total)
These tiny daisies are easier than they look:
1. Using CC (White), make a magic ring.
2. Chain 1. Work 6 sc into the magic ring. Pull ring closed tight. Do not join. (6 sc)
3. Work the petals: (Chain 3, sl st into the same st at the base, sl st into next sc) 6 times. You’ll have 6 petals total.
4. Fasten off leaving a tail for sewing.
5. Using MC (Yellow), add a French knot or a single yellow sc at the center.
Pattern Instructions
Bodice Front Panel (make 1)
Using MC (Yellow) and E-4 hook:
Row 1 (WS): Chain 37. Starting in 2nd ch from hook, sc across. Turn. (36 sc)
Rows 2 through 10: Ch 1, sc across all sts. Turn. (36 sc)
Continue even in sc until the panel measures 4 inches (10 cm) from the foundation chain, ending on a WS row. At gauge, this will be approximately 22 rows total.
Neckline Shaping Row (RS): Ch 1, sc 8. Turn leaving remaining 28 sts unworked. (8 sc)
This is your right shoulder strap section.
Work 4 more rows of sc on these 8 sts only.
After 4 rows, fasten off.
Left Shoulder Strap: Skip the center 20 sts (this creates the square neckline opening). Rejoin yarn to the 29th stitch.
Work 1 RS row of sc across the remaining 8 sts. Turn. (8 sc)
Work 4 more rows of sc on these 8 sts only.
Fasten off.
Bodice Back Panel (make 1)
Work identical to the Bodice Front Panel through the plain bodice section (4 inches total height, 36 sc wide).
Important: The back panel does NOT have the square neckline cutout. Instead, continue working all 36 sts across in sc for 4 more rows (same depth as the shoulder straps on the front). Fasten off.
Checkpoint 1: Each bodice panel should measure approximately 5.5 inches (14 cm) tall and 8 inches (20 cm) wide.
Seaming the Bodice
Hold the front and back panels together with right sides facing outward.
Using tapestry needle and MC yarn, whip stitch or sl st seam along both side edges. Leave the top 1.5 inches (3.8 cm) of each side open as the armhole opening.
Match the shoulder straps of the front to the top back edge and seam each front strap to the corresponding top corner of the back panel.
Waistband Ribbing
With RS facing, join MC at the side seam of the bottom edge.
Round 1: Ch 1, sc evenly around the bottom edge of the bodice. Work 1 sc into each foundation chain loop on the front (36 sc) and back (36 sc). Join with sl st to first sc. (72 sc)
Rounds 2 through 9: Ch 1, sc in blo of every st around. Join with sl st to first sc. (72 sc)
The ribbing will measure approximately 1.5 inches (3.8 cm) tall.
Do not fasten off.
Ruffle Skirt Tier 1
Round 1 (Increase Round): Ch 3 (counts as first dc). Working into the front loops only of the last ribbing round, 2 more dc into the same first st. Work 3 dc into every remaining st around. Join with sl st to top of ch-3. (216 dc)
Rounds 2 through 6: Ch 3 (counts as dc), dc in each st around. Join with sl st to top of ch-3. (216 dc)
Tier 1 should measure approximately 2 inches (5 cm) deep.
Ruffle Skirt Tier 2
Join MC to any back loop of the last ribbing round with sl st.
Round 1 (Pick-Up): Ch 1. Sc in each back loop around. Join with sl st. (72 sc)
Round 2 (Increase Round): Ch 3 (counts as first dc). Work 2 more dc in same st. Work 3 dc in each remaining st around. Join with sl st to top of ch-3. (216 dc)
Rounds 3 through 7: Ch 3 (counts as dc), dc in each st around. Join with sl st to top of ch-3. (216 dc)
Checkpoint 3: Both ruffle tiers should cascade from the waist down approximately 4 inches (10 cm) total.
Diaper Cover Bottom
Join MC at the back of the waistband lower edge.
Round 1: Ch 1, sc in each of the 72 sts of the waistband bottom edge. Join with sl st to first sc. (72 sc)
Rounds 2 through 4: Ch 1, sc in each st around. Join. (72 sc)
Round 5 (Increase Round): Ch 1. (Sc 8, 2 sc in next st) repeat around. Join. (80 sc)
Rounds 6 through 8: Ch 1, sc in each st around. Join. (80 sc)
Round 9 (Decrease Round): Ch 1. (Sc 6, sc2tog) repeat around. Join. (70 sc)
Round 10: Ch 1, sc in each st around. Join. (70 sc)
Round 11 (Decrease): Ch 1. (Sc 5, sc2tog) repeat around. Join. (60 sc)
Round 12: Ch 1, sc in each st around. Join. (60 sc)
Round 13 (Decrease): Ch 1. (Sc 4, sc2tog) repeat around. Join. (50 sc)
Round 14: Ch 1, sc in each st around. Join. (50 sc)
Round 15 (Leg Split): Place stitch markers to divide into 25 front sts and 25 back sts.
Front Leg Edge (worked flat):
Row 1: Ch 1, sc across 25 sts. Turn. (25 sc)
Row 2: Ch 1, sc2tog, sc 21, sc2tog. Turn. (23 sc)
Row 3: Ch 1, sc across. Turn. (23 sc)
Row 4: Ch 1, sc2tog, sc 19, sc2tog. Turn. (21 sc)
Row 5: Ch 1, sc across. Turn. (21 sc)
Fasten off.
Back Leg Edge: Rejoin MC and work identically.
Leg Opening Edging: Join MC at leg opening edge. Ch 1, sc evenly around each leg opening. Join and fasten off.
Flutter Ruffle Sleeves (make 2)
With RS facing, join MC at the underarm point of the armhole opening.
Pick-Up Round: Ch 1. Work sc evenly around the entire armhole opening. (22 sc)
Round 1 (Ruffle Increase): Ch 3 (counts as dc). Work 2 more dc in same st. Work 3 dc in each remaining st around. Join with sl st to top of ch-3. (66 dc)
Rounds 2 and 3: Ch 3, dc in each st around. Join. (66 dc)
Second Ruffle Layer: Join MC to any back loop of the 22-sc pick-up round.
Round 1B: Ch 3, 2 dc in same blo st, 3 dc in each blo st around. Join. (66 dc)
Round 2B: Ch 3, dc in each st around. Join. (66 dc)
Picot Edging: Change to CC (White). Work (sc in next st, ch 3, sl st in first ch) in every other st around the lower edge of the sleeve ruffle. Fasten off.
Work picot edging along the neckline front opening as well.
Finishing Touches
Sew 3 daisy appliques evenly spaced across the front lower edge of the diaper cover, just above the leg opening edging. Repeat for the back.
Sew 3 to 4 snap closures along the diaper cover crotch seam area.
Weave in all yarn ends securely.
Blocking Your Finished Romper
Wet blocking makes a huge difference with ruffles. Submerge in cool water with gentle wool wash, squeeze gently (don’t wring), press between towels, then lay flat on a blocking mat. Pin the ruffle tiers into neat shapes and let dry completely.
Size Adjustments
For 6 to 12 months: Add 8 stitches to the bodice foundation chain (44 ch instead of 37). The circumference becomes approximately 19 inches (48 cm).
For Newborn: Reduce the foundation chain by 6 stitches (31 ch). Reduce the neckline center skip to 14 sts.
Care Instructions
Machine wash cold on gentle cycle if using acrylic yarn. Lay flat to dry. Do not tumble dry. Store folded, not on a hanger.
I really hope you love making this little romper as much as I loved designing it. There’s something so satisfying about creating a garment this detailed with your own two hands. When you’re finished, you’ll have a truly special piece that could easily become a treasured keepsake.
If this pattern is calling to you, go ahead and save it to your Pinterest boards so you can find it when you’re ready to cast on. And please, if you make one, drop a comment below or tag me on social media. Seeing your finished projects absolutely makes my day!