
You know that feeling when summer is approaching and you want something breezy, beautiful, and completely unique to wear over your swimsuit or pair with a simple slip? Something that looks like it came from a boutique vacation shop but actually came from your own two hands?
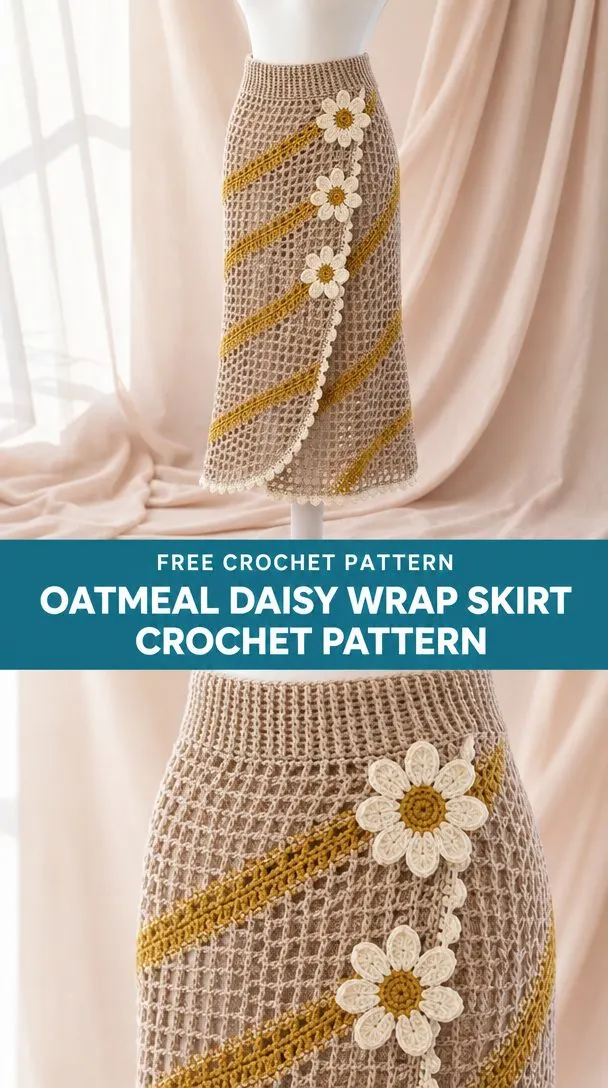
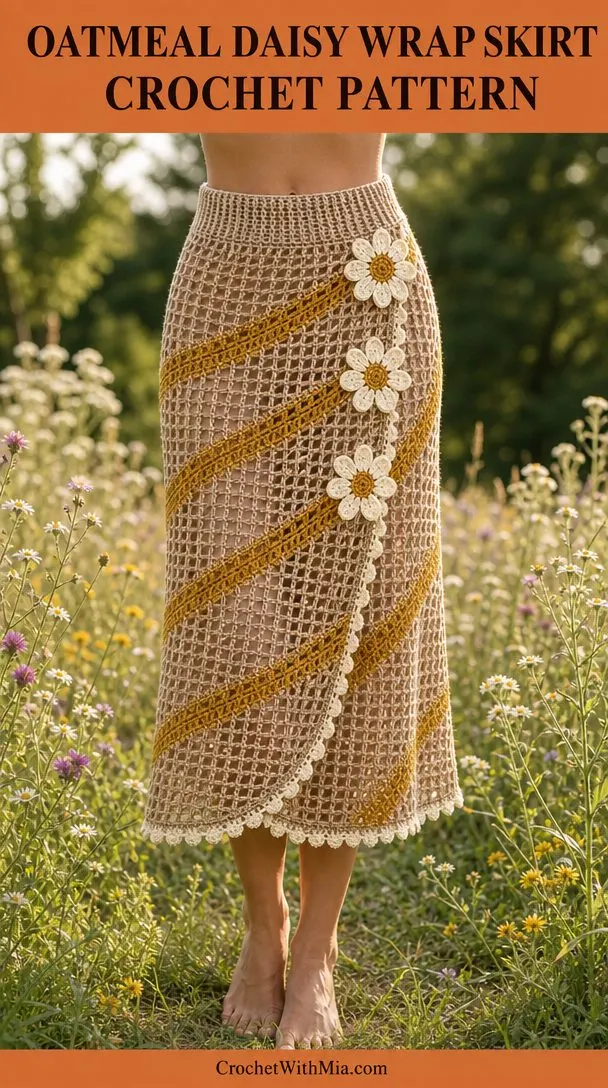
This wrap skirt is exactly that. The Oatmeal Daisy Wrap Skirt combines an airy lattice mesh body with bold diagonal stripes and three cheerful layered daisies cascading down the tapered overlap. It’s the kind of piece that makes people stop and ask, "Wait, you made that?"
The construction is straightforward, working flat from the waist down with gentle shaping on one edge to create that elegant asymmetrical wrap silhouette. A dense ribbed waistband gathers the body for a flattering fit, and long ties let you adjust everything to your comfort. Whether you’re headed to a beach resort, a garden party, or just want to feel put-together on a warm afternoon, this skirt delivers.
Why This Design Works
The genius of this wrap skirt lies in its contrast. You’ve got the structured, stretchy ribbed waistband providing security and shape at the top. Then the body opens up into an open square mesh that’s light, breathable, and shows off any underskirt or lining you choose beneath.
The diagonal solid bands in mustard add visual interest and break up the mesh in a way that’s both modern and playful. And those three cream daisies with their embroidered mustard centers? They transform the piece from "nice crochet skirt" to "wearable art."
This is a single sample size designed to fit waist measurements of 76 to 84 cm and hips of 94 to 102 cm. The pattern includes guidance for recalculating if you need different dimensions, so you’re not locked in.
Skill Level
This pattern suits confident beginners and intermediate crocheters. You’ll work with basic stitches like double crochet (dc), single crochet (sc), and chains (ch), plus a simple decrease technique and some applied flower motifs.
If you’ve made a few scarves and blankets and want to try garment construction, this is a beautiful next step. The shaping is gradual and repetitive, so you’ll get into a rhythm quickly.
Materials You’ll Need
Everything listed here comes directly from the official pattern. Gather these before you start:
| Item | Specification |
|---|---|
| Main yarn (A) | Oatmeal, sport-weight cotton, about 300 m per 100 g. You’ll need 550 g (1650 m total) |
| Accent yarn (B) | Mustard and cream, same yarn weight. 120 g (360 m), split evenly if using two colors |
| Center yarn (C) | Ivory or contrasting cotton, 20 g (60 m) for embroidered flower centers |
| Hooks | 3.5 mm for the main body, 3.0 mm for edging and motifs, or sizes needed to obtain gauge |
| Notions | Tapestry needle, scissors, stitch markers, measuring tape, blocking mats, rustproof pins |
| Additional materials | 2 m opaque lining or separate underskirt, 2 sew-on snaps, optional purchased belt |
The yarn amounts include an approximate 15% allowance. The pattern recommends weighing your washed swatch and scaling by garment area before purchasing extra colors, since fiber type and lace density affect usage.
Gauge
Getting gauge right matters here because you’re making a wearable garment that needs to fit.
Blocked target: 20 stitch positions x 12 dc-height rows = 10 x 10 cm with a 3.5 mm hook.
One chain replacing one stitch counts as one position. Measure across the chosen body texture, not across stretched holes.
To make a swatch:
Chain 43. Row 1: dc in 3rd ch from hook and each remaining ch (41 dc). Work 23 more rows using the lattice texture described below. Wash the swatch and dry it flat. Measure the center 20 positions and 12 rows without stretching.
If your dimensions don’t match, change your hook size and swatch again. For the flower motifs, aim for 5 to 6 cm across, with the large layered flowers measuring 8 to 9 cm.
Abbreviations and Special Stitches
This pattern uses US crochet terms throughout.
- ch = chain
- sl st = slip stitch
- sc = single crochet (insert hook, yarn over, pull up a loop, yarn over, pull through both loops)
- hdc = half double crochet
- dc = double crochet (yarn over, insert hook, pull up loop, yarn over and pull through 2 loops twice)
- tr = treble crochet
- st(s) = stitch(es)
- sp = space
- RS/WS = right side/wrong side
- BLO = back loop only
- rep = repeat
- yo = yarn over
dc2tog (double crochet two together): This is a decrease stitch. Yarn over, insert hook in next stitch, yarn over and pull up a loop, yarn over and draw through 2 loops. Repeat in the next stitch. Yarn over and draw through all 3 loops on hook. It consumes 2 positions and creates 1 stitch.
Increase: Work 2 dc in one stitch. This adds 1 position.
Picot: Chain 3, slip stitch into the first chain. Creates a small decorative bump.
Bobble: Yarn over, insert hook in same stitch, pull up a loop, yarn over and draw through 2 loops. Repeat three more times in the same stitch, then yarn over and pull through all 5 loops on hook. Counts as 1 stitch.
Important Pattern Notes
The photograph included with this pattern is an AI concept visualization. The written stitch map and measurements define the design. Small lace motifs and proportions in the photograph are not a stitch-by-stitch record, so follow the written instructions.
Turning chains: Chain 2 and turn before every dc row. This chain never counts as a stitch. Chain 1 before sc rows, and it does not count either.
Work through both loops unless the pattern specifies otherwise. Count chains as positions when they replace a skipped stitch. On the following solid row, work one dc into each chain.
Edge stitches: Keep the first and last 3 positions solid at shaped edges. All increases and decreases use dc. Begin the texture after these edge stitches, restarting the repeat from the first full unit each row. Finish incomplete units with dc. Never change the required row count to complete a motif.
All measurements are in centimeters. Divide by 2.54 for inches. Dimensions are before seam take-up, so try on basted pieces over your intended lining before final assembly.
Body Texture: The Lattice Pattern
The body uses a 12-position by 8-row chart worked between the solid edge stitches. Start with chart Row 1 on body Row 2, repeat chart Rows 1 through 8 upward, and repeat the columns across.
Chart key:
- x = dc in next position
- o = ch 1, skip next position
Adjacent o symbols form a chain of the corresponding length over that many skipped positions. On the next row, work into individual chains. Every symbol consumes and creates exactly one position.
All 8 chart rows are identical:
x o o x x o o x x o o x (12 positions)
This creates a simple square mesh with pairs of solid stitches alternating with open chain spaces.
Wrap Body Instructions
Work flat from waist down.
With yarn A and your 3.5 mm hook, chain 267.
Row 1: Dc in 3rd ch from hook and across (265 dc). Mark the right edge as the visible overlap. Place a removable marker on the RS.
Row 2: Work texture across, no shaping (265 positions).
Row 3: Texture across, no shaping (265 positions).
Row 4: Decrease twice at the visible-overlap edge, using dc2tog over its outermost 4 stitches. Work texture across remaining positions (263 positions).
Rows 5 through 7: Texture across, no shaping (263 positions each row).
Row 8: Decrease twice at the visible-overlap edge (261 positions).
Continue in this established pattern. You’ll work 3 plain texture rows, then 1 decrease row, throughout the body. The decrease rows are: 4, 8, 12, 16, 20, 24, 28, 32, 36, 40, 44, 48, 52, 56, 60, 64, 68, 72, 76, 80, and 84.
Each decrease row removes 2 positions from the overlap edge only.
Final row (Row 84): After decreasing, you’ll have 223 positions.
Work the overlap-edge decreases at the beginning of RS rows or end of WS rows as needed, so only the marked edge slopes.
The body is deliberately wider than the waist. You’ll gather the top edge to 110 cm for a 30 cm overlap on an 80 cm waist.
Ribbed Waistband with Ties
With yarn B, chain 12.
Row 1: Sc in 2nd ch from hook and across (11 sc).
Rows 2 through 220: Ch 1, turn, sc BLO across (11 sc per row).
Block the waistband to 110 x 5.5 cm. The row gauge of this ribbing must be checked independently. Stop at 110 cm even if your row count differs from 220.
Ties (make 2):
With yarn B, chain 142. Row 1: Sc in 2nd ch from hook and across (141 sc). Row 2: Sc across (141 sc).
Each tie should measure at least 65 cm. Lengthen by adding foundation chains if needed.
Assembly
Block all pieces before joining. Use mattress stitch through matching edge loops and keep seams flat.
Join 1: Mark the top edge of the body in quarters. Gather evenly to 110 cm using two rows of running stitch, creating 4 matched sections.
Join 2: Sew one long waistband edge to the gathered top, matching quarter markers (110 cm seam).
Join 3: Sew one tie to each waistband short end. Secure with two passes (11 stitches per tie end).
Join 4: Try on over an opaque underskirt. Overlap by about 30 cm at waist, secure inner and outer waistband ends with sew-on snaps, and tie securely (2 snaps).
Join 5 (optional sewn lining): Trace the open wrap body, add 1.5 cm seams, finish edges and hem 2 cm shorter. Attach lining to waistband with a loose hand-sewn running stitch.
Checkpoint: Try on with your intended base layer. Seams must lie flat, both sides must hang level, and the waist must not pull. Reblock or adjust seam tension before applying motifs.
Edgings and Daisy Motifs
Border Row 1: With yarn B, sc evenly around each exposed edge. Work 1 sc per horizontal position, 2 sc per dc row-end, and 3 sc at each outer corner. Reduce your pickup rate if the edge ripples.
Border Row 2: Sc in each base sc, adding a picot after every fourth sc. At corners, retain 3 sc in the corner stitch.
Small Flower (make 3)
Round 1: With yarn B, make an adjustable ring, ch 1, work 8 sc into ring. Join to first sc (8 sc).
Round 2: [Ch 3, sl st in next sc] around (8 ch-3 loops).
Round 3: [Sc, hdc, 3 dc, hdc, sc] in each loop. Join (8 petals, 56 stitches total).
Large Rear Flower Layer
Make a second flower in yarn A, changing each ch-3 loop to ch 5 and each petal to [sc, hdc, dc, 3 tr, dc, hdc, sc]. Sew the smaller layer centered over the larger layer (2 layers per flower).
Embroidered Center
With yarn C, work 7 French knots through both flower layers. Pass the needle through each knot base twice to secure (3 embroidered centers total).
Place motifs down the visible overlap edge, with the largest at the hip and the smallest below.
Applique join: Pin placements while the garment is flat. Sew around every outer edge and through the center with matching yarn, avoiding stretch.
Finishing
Weave every tail through at least 5 cm of dense stitches, reverse direction once, then trim. No unsecured tails should remain.
Soak the finished skirt gently, press out water in towels, and lay flat to target measurements. Pin motifs without stretching the holes. Allow to dry completely, remove every pin, and inspect seams, closures, and lining.
Care Instructions
Follow your yarn label for best results. For cotton, hand wash gently in cool water with mild detergent. Rinse without wringing, reshape, and dry flat. Store folded rather than hanging, since hanging can stretch lace over time.
Keep the long ties away from machinery and open flames. Inspect closures and embroidered details regularly.
Final Measurements
- Top edge: 132.5 cm before gathering
- Body length: 70 cm before borders
- Waist fit: 76 to 84 cm
- Hip fit: 94 to 102 cm
This Oatmeal Daisy Wrap Skirt is the kind of project that feels special from the first chain. The rhythm of the lattice stitch is meditative, the shaping is gentle, and watching those daisies come together at the end is genuinely satisfying. You’ll have a one-of-a-kind wearable piece that’s perfect for warm weather adventures.
If you love this design, save it to your Pinterest boards so you can find it when you’re ready to cast on. And if you make one, please leave a comment below. Seeing your finished skirts would absolutely make my day!