
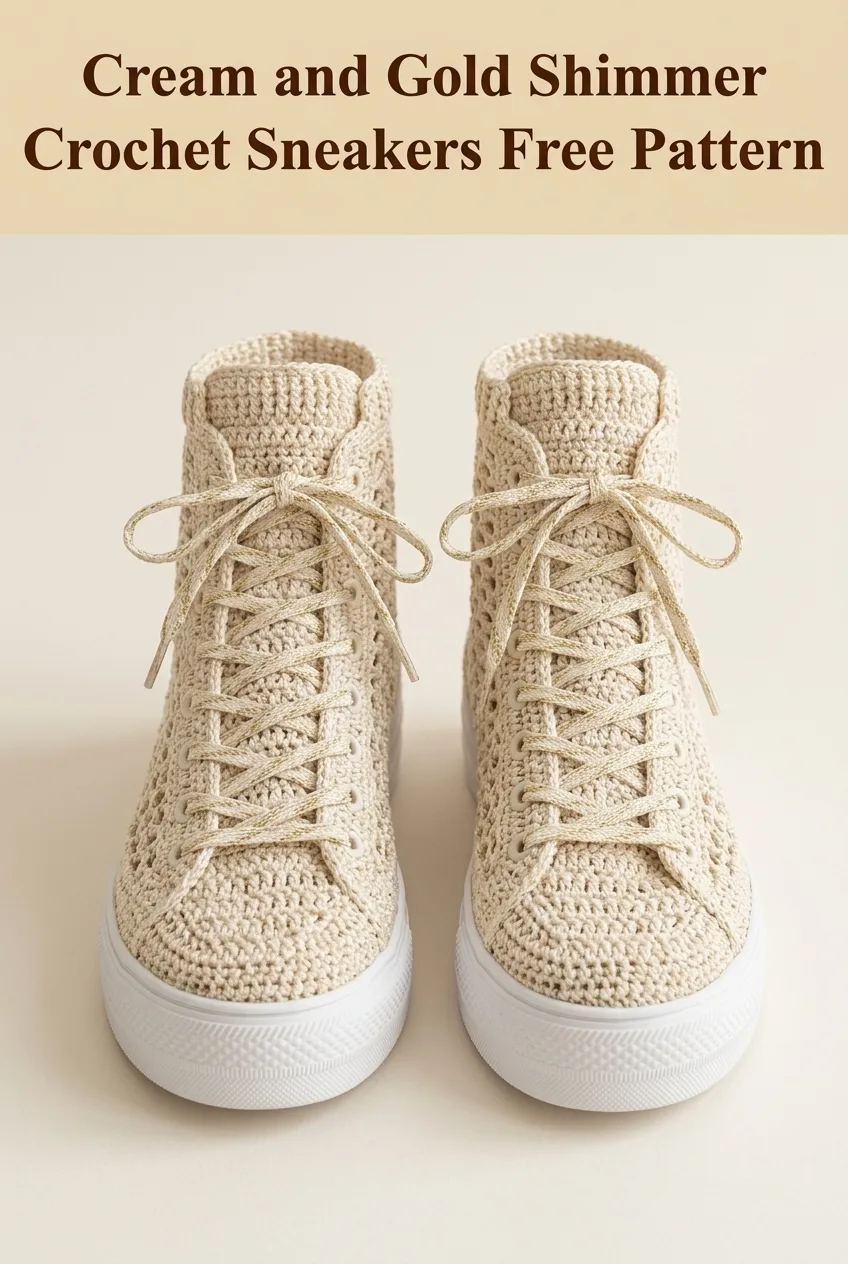
OH WOW, these crochet sneakers are absolutely STUNNING and they work up faster than you’d think! I’m talking about a project that looks like it belongs in a high-end boutique but comes straight from your hook. The mesh construction means less yarn and quicker progress, and that subtle gold shimmer thread? Total game changer for making these look expensive. If you’ve got a weekend and want to create something that will make everyone ask "wait, you MADE those?!" then grab your hook and let’s do this.
Why You’ll Love This Crochet Sneaker Pattern
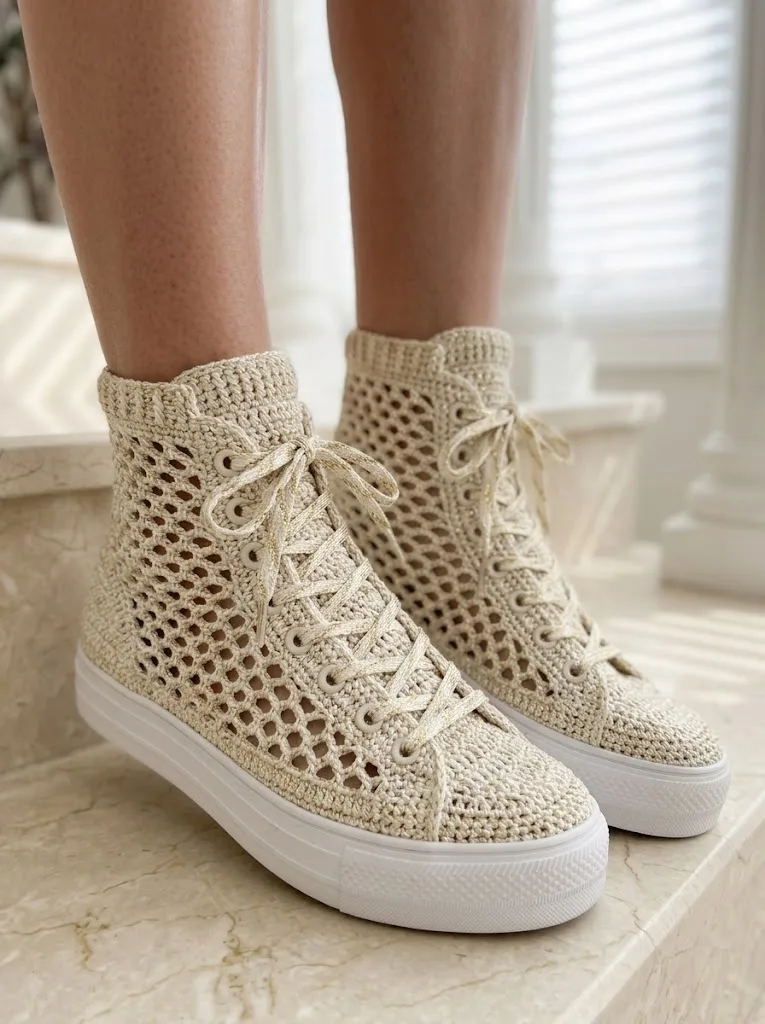
These cream and gold shimmer crochet sneakers combine fashion-forward design with handmade charm. The open mesh stitch pattern creates breathability perfect for warmer months while the ribbed cuff adds structure and a polished finish. What makes this crochet pattern special is how it transforms basic stitches into something that genuinely looks store-bought.
The construction method is clever. You’re working the upper portion separately, then attaching it to a rubber sneaker sole. This gives you real shoes you can actually wear outside, not just house slippers. The high-top silhouette with functional lacing creates that classic sneaker look we all love.
Skill level: Intermediate. If you’re comfortable with basic stitches and have made a few projects in the round, you can absolutely handle this.
Materials Needed for Your Crochet Sneakers
Yarn:
The yarn in the image appears to be a DK weight, which is also called light worsted or size 3 yarn. Look for something with good stitch definition. I recommend 100% cotton or a cotton blend for durability and washability.
Hook:
Additional Supplies:
Gauge (Important!)
With 3.5mm hook and DK yarn held with metallic thread:
Please check your gauge. Sneakers that don’t fit are no fun. Make a small swatch and measure before diving in.
Abbreviations and Stitch Definitions
Let me walk you through every stitch we’ll use. No surprises, I promise.
ch = chain. Wrap yarn over hook, pull through loop on hook. This creates the foundation for most crochet.
sl st = slip stitch. Insert hook, yarn over, pull through both the stitch and the loop on hook in one motion. Used for joining rounds.
sc = single crochet. Insert hook into stitch, yarn over, pull up a loop (2 loops on hook), yarn over, pull through both loops.
dc = double crochet. Yarn over, insert hook into stitch, yarn over, pull up a loop (3 loops on hook), yarn over, pull through 2 loops, yarn over, pull through remaining 2 loops.
ch-sp = chain space. The gap created by chain stitches in the previous row. You’ll work into this space, not into individual chains.
BLO = back loop only. Instead of inserting your hook under both loops at the top of a stitch, only go under the back loop. This creates the ribbed texture.
sk = skip. Pass over the indicated stitch without working into it.
Understanding the Construction
Before we start, let me explain how these crochet sneakers come together. This will make everything click.
1. Sole attachment base: First, you’ll crochet around the rubber sole using the pre-punched holes
2. Toe cap: A shaped section covering the front of the foot
3. Mesh upper: The openwork sides and front panel with lace holes
4. Tongue: A separate piece attached at the toe
5. Ribbed cuff: The ankle portion with stretch
Don’t feel overwhelmed. We’ll take it step by step, and honestly, once you get the rhythm of the mesh pattern, it practically flies off your hook.
Step-by-Step Crochet Sneaker Pattern
Part 1: Attaching to the Sole
The rubber sole should have holes punched around the entire perimeter, approximately 5-6mm apart.
Round 1: Holding yarn with metallic thread together (hold them as one strand throughout), join yarn in any hole at the center back heel. Ch 1, work 2 sc in each hole around the entire sole. Sl st to first sc to join. Place marker.
You should have approximately 80-100 sc depending on your sole size. The exact count varies by shoe size, and that’s okay.
Round 2: Ch 1, sc in each st around. Sl st to join. (same stitch count)
Round 3: Ch 1, sc in each st around, working in a slight spiral (don’t join, just keep going). Place marker at beginning of round.
Rounds 4-5: Sc in each st around. At the end of Round 5, sl st to join and fasten off.
This creates a sturdy base that hugs the rubber sole.
Part 2: Toe Cap
Now we shape the front of the sneaker. This section is worked flat, then attached.
Count your stitches around the toe area. You’ll be working across approximately 24-30 stitches at the very front of the shoe.
Row 1: Join yarn at the side of the toe (about where your pinky toe would be). Ch 1, sc across the front 28 sts (adjust for your size). Turn. (28 sts)
Row 2: Ch 1, sc2tog (single crochet decrease), sc to last 2 sts, sc2tog. Turn. (26 sts)
Row 3: Ch 1, sc in each st across. Turn. (26 sts)
Row 4: Ch 1, sc2tog, sc to last 2 sts, sc2tog. Turn. (24 sts)
Row 5: Ch 1, sc in each st across. Turn. (24 sts)
Rows 6-8: Repeat the decrease pattern. You should end with approximately 18-20 sts.
Fasten off, leaving a long tail for seaming.
Part 3: Mesh Upper Panels (Make 2)
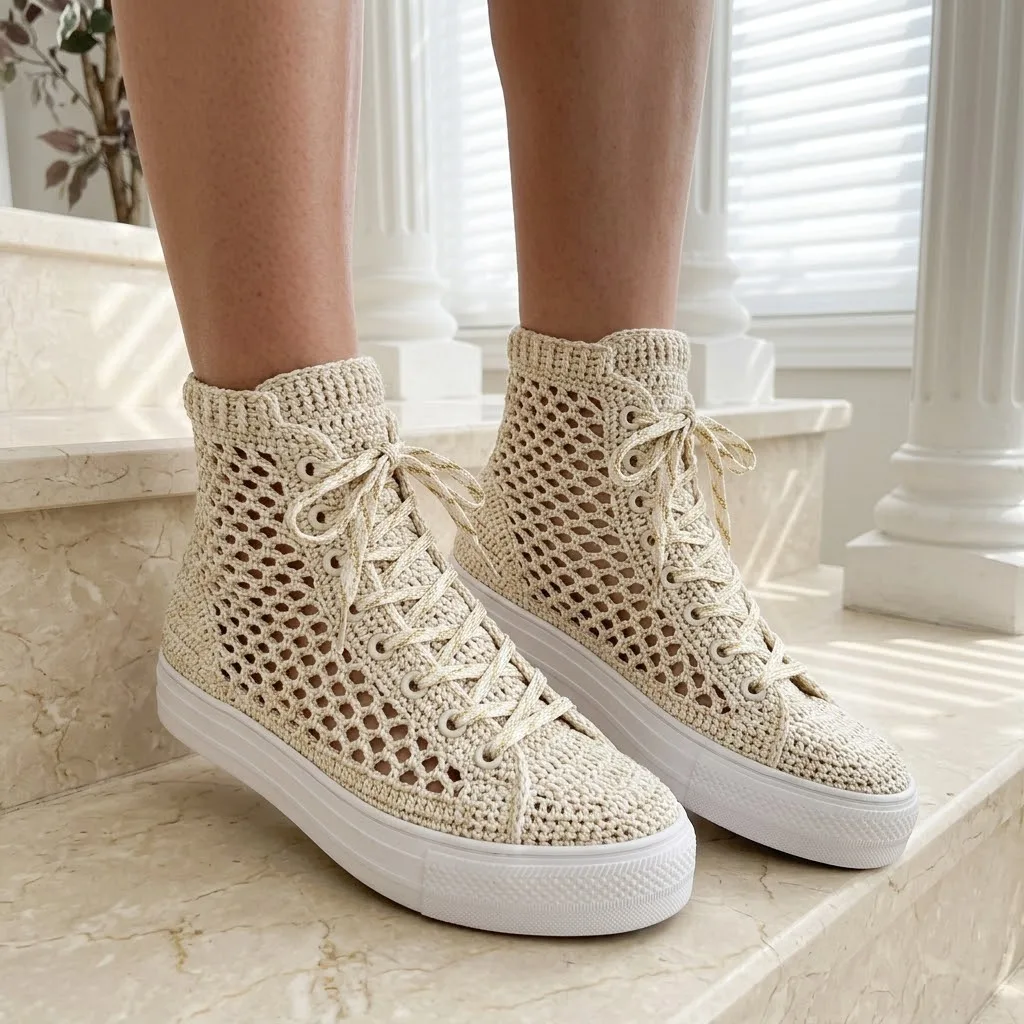
This is where the magic happens. The mesh creates those beautiful open holes you see in the image.
Foundation: Ch 37 (or adjust to fit from toe cap to heel).
Row 1: Dc in 5th ch from hook (the skipped chains count as dc + ch-1), *ch 1, sk 1 ch, dc in next ch.* Repeat across. Turn. (17 dc, 16 ch-1 spaces)
Row 2: Ch 4 (counts as dc + ch-1), sk first ch-sp, dc in next dc, *ch 1, dc in next dc.* Repeat across. Turn.
Rows 3-12: Repeat Row 2.
This creates a panel approximately 6-7 inches tall. The mesh naturally creates the lace holes where you’ll thread your shoelaces.
Creating Reinforced Lace Holes:
On one edge of each panel (the front edge where laces go), you’ll work a border:
Lace Hole Edging: Join yarn at bottom corner. Work sc around each mesh opening along the edge, making approximately 6-8 distinct rounded holes for lacing. Space them evenly.
Part 4: Tongue
Foundation: Ch 14.
Row 1: Sc in 2nd ch from hook and in each ch across. Turn. (13 sts)
Rows 2-20: Ch 1, sc in each st across. Turn. (13 sts)
Shaping the Top:
Row 21: Ch 1, sc2tog, sc to last 2 sts, sc2tog. Turn. (11 sts)
Row 22: Ch 1, sc in each st across. Turn.
Row 23: Ch 1, sc2tog, sc to last 2 sts, sc2tog. Turn. (9 sts)
Rows 24-26: Ch 1, sc in each st across. Turn.
Fasten off, leaving tail for attachment.
Part 5: Ribbed Cuff
This creates that stretchy, structured ankle portion.
Foundation: Ch 11.
Row 1: Sc in 2nd ch from hook and in each ch across. Turn. (10 sts)
Row 2: Ch 1, sc BLO in each st across. Turn. (10 sts)
Rows 3-60: Repeat Row 2.
The ribbing should stretch around your ankle opening. Adjust row count as needed. Seam the short ends together to form a circle.
Part 6: Assembly
Take a breath. You’ve got this. Assembly is where everything comes together.
Step 1: Pin the toe cap to the front of the sole base. Whip stitch or single crochet the edges together along the sides.
Step 2: Position the mesh panels on each side of the sneaker. They should overlap slightly at the back heel and meet the toe cap at the front. Pin in place, then stitch securely using mattress stitch or whip stitch.
Step 3: Attach the tongue to the inside of the toe cap, right at the top edge where the lacing will begin.
Step 4: Whip stitch the ribbed cuff to the top edge of the mesh panels, stretching slightly as you go for even distribution.
Step 5: Weave in ALL ends securely. These are shoes, so they’ll see some stress.
Step 6: Thread shoelaces through the mesh holes, starting from the bottom.
Optional: Extra Durability Tips
If you want your crochet sneakers to last longer:
Sizing Adjustments for This Crochet Pattern
The beauty of this crochet sneaker pattern is its adaptability. Here’s how to adjust:
For smaller sizes (US 5-6): Reduce mesh panel rows by 2, decrease toe cap starting stitches by 4.
For larger sizes (US 10-11): Add 2 rows to mesh panels, increase toe cap starting stitches by 4-6.
Always measure against your foot as you go. Crochet is forgiving, and a little extra effort with sizing pays off big time.
Care Instructions
Hand wash your crochet sneakers in cool water with mild detergent. Reshape while damp and stuff with paper towels to maintain form. Air dry away from direct sunlight to prevent the gold thread from tarnishing.
I really hope you love making these cream and gold shimmer crochet sneakers as much as I loved designing them. They’re the kind of project that makes you feel like an absolute crochet rockstar when you’re done.
If this pattern is going in your project queue, go ahead and pin it to your Pinterest board so you can find it when you’re ready to start. And please, please leave a comment below if you make these! I’d love to hear which color you chose or see your finished sneakers. Happy crocheting, friend!