
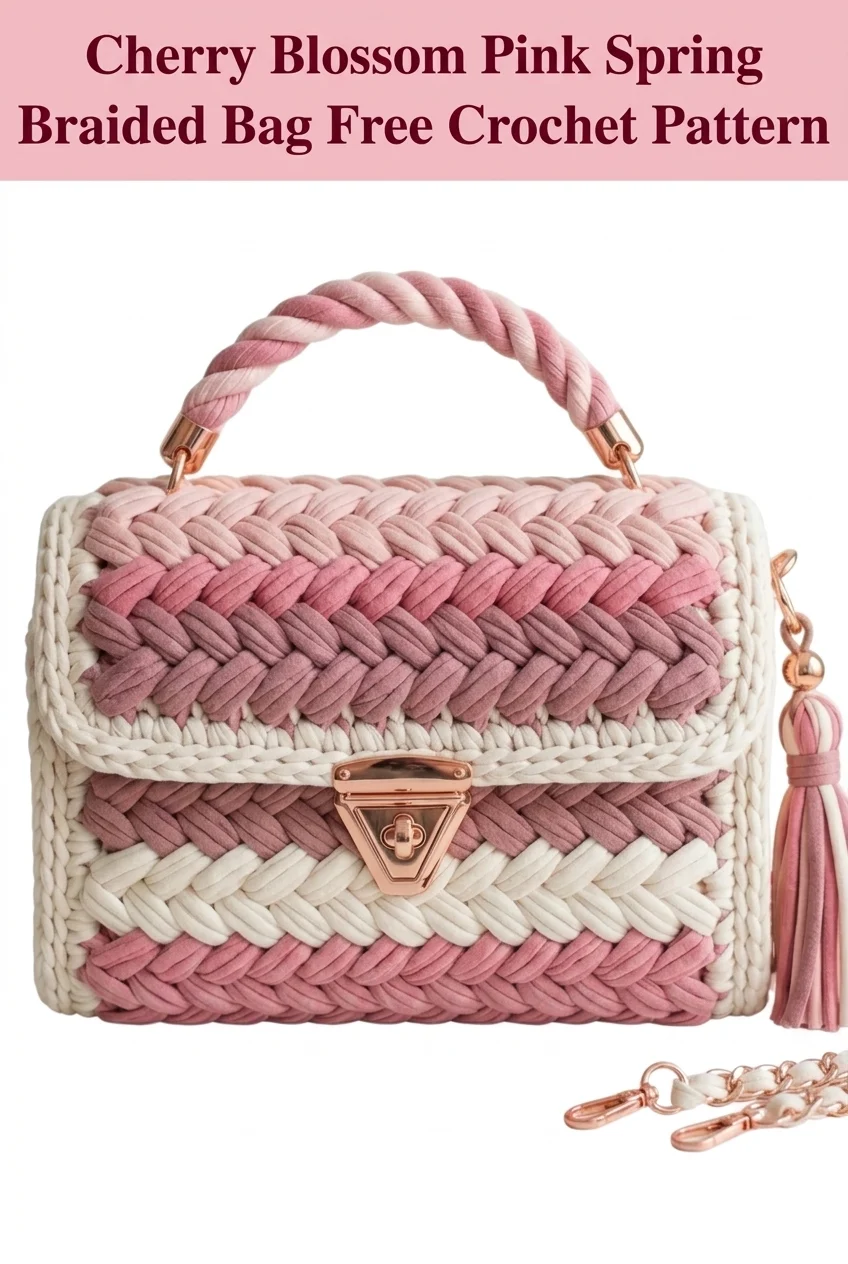
You know that gorgeous skein of t-shirt yarn you’ve been saving for something special? This is the project. Dig it out of your stash because this structured satchel bag works up faster than you’d expect and looks like something from a designer boutique. The braided stitch pattern creates that stunning herringbone texture you see, and honestly, it’s more approachable than it appears. I’d call this an intermediate project. You’ll need to be comfortable with basic stitches and working in joined rounds, but I’ll walk you through every step.
Why You’ll Love This Crochet Bag Pattern
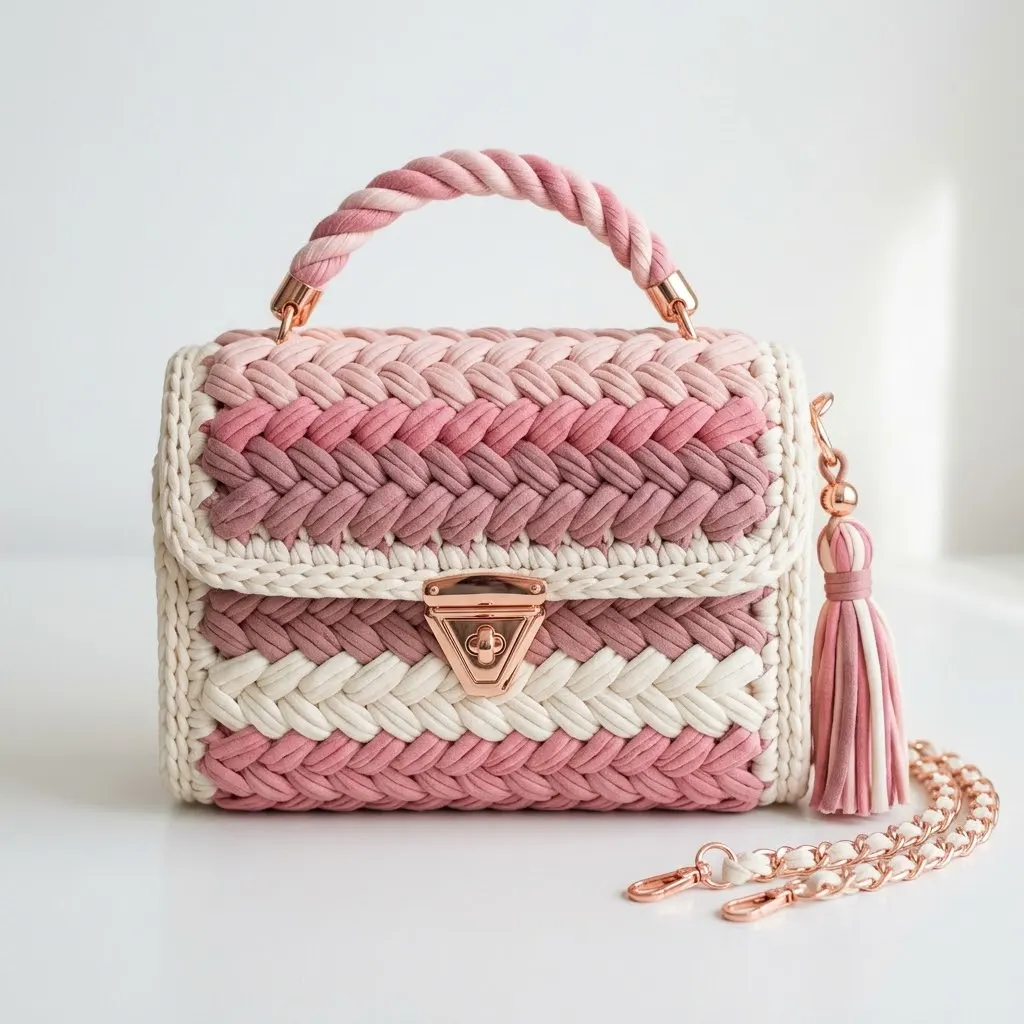
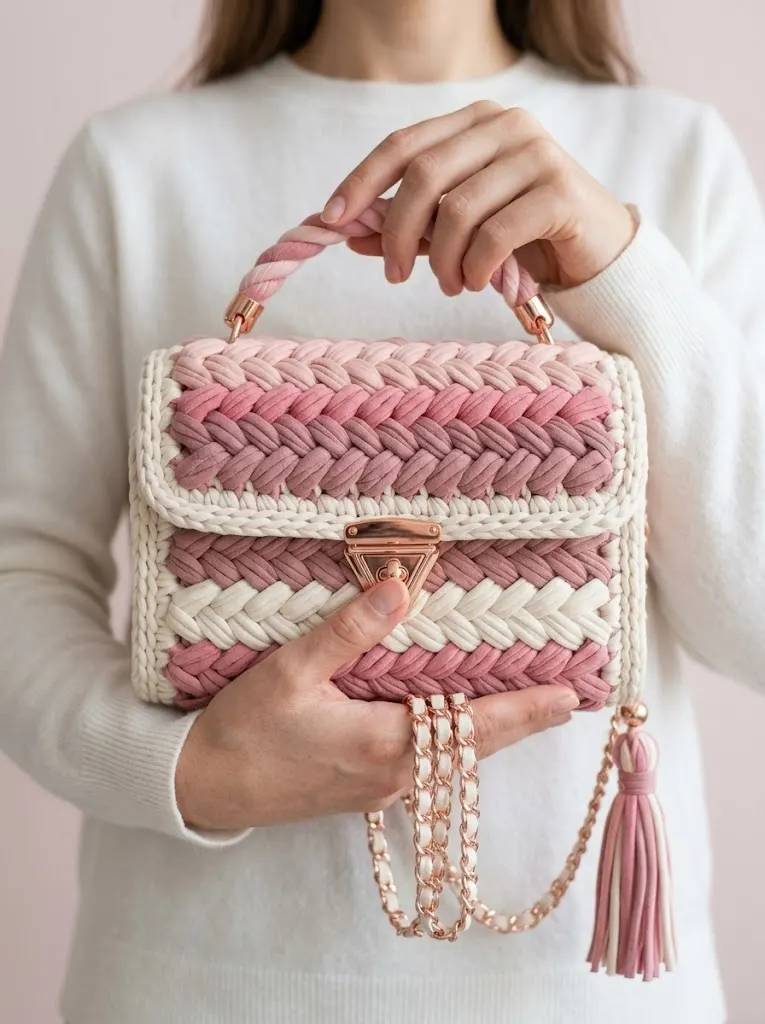
This Cherry Blossom Pink Spring Braided Bag combines soft romantic colors with serious structure. The finished piece holds its shape beautifully and features rose gold hardware that elevates the whole design. I love how the braided stitch creates visual interest without overwhelming the eye. The cream border frames each color section perfectly.
What makes this crochet bag pattern special is the construction method. You’ll work the body as a rectangular tube, then add a separate flap that attaches with the clasp hardware. The result is a proper handbag silhouette that looks professional and polished.
Perfect for: date nights, spring brunches, weddings, or anytime you want a statement accessory that sparks conversation.
Materials Needed
Yarn:
T-shirt yarn is a super bulky weight yarn made from jersey cotton fabric strips. It creates the chunky braided texture you see in the photos. Brands like Hoooked Zpagetti, Bobilon, or Yarn Art Maccheroni work beautifully.
Hook:
Hardware:
Additional Supplies:
Finished Dimensions
Your gauge and yarn brand will affect final size. T-shirt yarns vary in thickness, so don’t stress if your bag comes out slightly different.
Stitch Abbreviations and Definitions
Let me walk you through every stitch you’ll use. Even if you know these, a quick refresher never hurts.
ch – chain: Wrap yarn over hook, pull through loop on hook. This creates your foundation.
sl st – slip stitch: Insert hook into stitch, yarn over, pull through both the stitch and loop on hook in one motion. Used for joining rounds.
sc – single crochet: Insert hook into stitch, yarn over, pull up a loop (2 loops on hook), yarn over, pull through both loops. Creates a short, tight stitch.
hdc – half double crochet: Yarn over, insert hook into stitch, yarn over, pull up a loop (3 loops on hook), yarn over, pull through all 3 loops. Slightly taller than sc.
Braided Stitch (also called herringbone or woven stitch): This is the signature texture of this bag. It’s worked by inserting your hook around the post of stitches from previous rows in a specific pattern to create that woven, braided appearance.
Gauge
With 10mm hook and t-shirt yarn:
8 stitches and 6 rows = 10cm (4 inches) in single crochet
Gauge matters for bags because you want the fabric dense enough that items won’t poke through. If your stitches look too loose or gappy, go down a hook size.
Pattern Notes Before You Begin
Read this section first. It’ll save you confusion later.
1. This bag is worked in joined rounds for the body section. You’ll slip stitch to join at the end of each round, then chain to begin the next.
2. The braided texture is created using a variation of the herringbone stitch. You’ll work into the back bump of your chain foundation, then use a specific insertion technique for subsequent rows.
3. Color changes happen at the beginning of rounds. Fasten off the old color and join the new color with a slip stitch.
4. The flap is worked separately and attached after completing the body.
5. Hardware installation happens during finishing. I’ll guide you through where to place everything.
Step by Step Crochet Pattern Instructions
Base of the Bag
The base creates the rectangular bottom that gives this bag its structured shape.
With Color A (cream) and 10mm hook:
Row 1: Ch 23. Sc in 2nd ch from hook and in each ch across. Turn. (22 sc)
Row 2: Ch 1 (does not count as stitch here and throughout). Sc in each st across. Turn. (22 sc)
Rows 3-8: Repeat Row 2. (22 sc)
You should have a rectangle approximately 22cm x 8cm. This forms your bag bottom.
Body of the Bag
Now we transition to working in rounds around the base. This is where the magic happens.
Round 1 (Setting Up): Do not turn. Ch 1. Working around all edges of the base rectangle: sc 22 across the top edge, sc 3 into the corner, sc 8 down the short side, sc 3 into the corner, sc 22 across the bottom edge (working into the foundation chain), sc 3 into the corner, sc 8 up the remaining short side, sc 3 into the corner. Sl st to first sc to join. (76 sc)
Place a stitch marker at your join point. This marks the back left corner of your bag.
Round 2: Ch 1. Sc in each st around. Sl st to join. (76 sc)
Round 3: Repeat Round 2. (76 sc)
Introducing the Braided Stitch Pattern
This is the technique that creates that gorgeous woven texture. Don’t panic. I’ll break it down.
The Basic Move: Instead of inserting your hook under both loops of the stitch below, you’ll insert from front to back around the POST of the stitch two rows below, then complete a regular hdc. This pulls the yarn across the previous row and creates the braided effect.
Round 4 (First Braided Round): Ch 2 (counts as hdc). *Yarn over, insert hook from front to back around the post of the sc 2 rows below, yarn over, pull up a loop, yarn over, pull through all 3 loops.* Repeat from * around. Sl st to top of ch-2 to join. (76 braided hdc)
If this feels awkward at first, you’re doing it right. The tension settles after a few stitches.
Round 5: Ch 2. Continue braided hdc around, working around the posts of Round 3. Sl st to join. (76 braided hdc)
Adding Color Sections
Now we introduce those beautiful pink tones.
Round 6: Fasten off Color A. Join Color C (medium rose pink) with sl st. Ch 2. Braided hdc around. Sl st to join. (76 braided hdc)
Rounds 7-8: Continue with Color C in braided hdc. (76 braided hdc each round)
Round 9: Fasten off Color C. Join Color D (mauve). Ch 2. Braided hdc around. Sl st to join. (76 braided hdc)
Rounds 10-11: Continue with Color D. (76 braided hdc each round)
Round 12: Fasten off Color D. Join Color A (cream). Ch 2. Braided hdc around. Sl st to join. (76 braided hdc)
Rounds 13-14: Continue with Color A. Fasten off after Round 14.
Creating the Opening Edge
This defines where the flap will fold over.
Round 15: Join Color A at the center back of your work. Ch 1. Sc in each st around. Sl st to join. (76 sc)
Round 16: Ch 1. Working in back loops only (blo), sc in each st around. Sl st to join. (76 sc)
This back loop round creates a subtle ridge that helps the flap fold naturally.
Fasten off and weave in ends.
Bag Flap
The flap works separately, then attaches to the body.
With Color A:
Row 1: Ch 23. Sc in 2nd ch from hook and across. Turn. (22 sc)
Row 2: Ch 1. Sc in each st. Turn. (22 sc)
Row 3: Fasten off Color A. Join Color B (dusty rose). Ch 2. Braided hdc across. Turn. (22 braided hdc)
Rows 4-5: Continue braided hdc with Color B. Turn after each row.
Row 6: Fasten off Color B. Join Color A. Ch 1. Sc across. Turn. (22 sc)
Row 7: Ch 1. Sc across. Fasten off.
Shaping the Flap Point
The flap needs that elegant pointed shape for the clasp.
Row 8: Join Color A at stitch 6 from the right edge. Ch 1. Sc in same st and in next 11 sts. Turn, leaving remaining sts unworked. (12 sc)
Row 9: Ch 1. Sc2tog (single crochet decrease: insert hook in first st, pull up loop, insert hook in next st, pull up loop, yarn over, pull through all 3 loops), sc 8, sc2tog. Turn. (10 sc)
Row 10: Ch 1. Sc2tog, sc 6, sc2tog. Turn. (8 sc)
Row 11: Ch 1. Sc2tog, sc 4, sc2tog. Turn. (6 sc)
Row 12: Ch 1. Sc2tog, sc 2, sc2tog. Turn. (4 sc)
Row 13: Ch 1. [Sc2tog] twice. (2 sc)
Row 14: Ch 1. Sc2tog. Fasten off. (1 sc)
Flap Border
This border cleans up the edges and adds that polished cream trim.
Join Color A at the top right corner of the flap (the straight edge that will attach to the bag).
Border Round: Ch 1. Sc evenly around the entire flap edge, working 3 sc into each corner point and sc2tog at the inner corners where the shaping begins. Aim for smooth edges without puckering. Sl st to first sc.
Fasten off.
Twisted Handle
That gorgeous rope handle is easier than it looks.
Cut 6 strands of t-shirt yarn, each approximately 60cm long. Use 2 strands each of Color B, Color C, and Color A.
1. Knot all strands together at one end.
2. Secure the knot (tape it to a table or have someone hold it).
3. Twist each color section tightly in the same direction until the strands start to kink.
4. Holding all three twisted sections together, let them naturally twist around each other in the opposite direction.
5. Knot the other end.
6. Trim ends and insert into cord end caps. Secure with fabric glue if needed.
Your handle should be approximately 15cm finished length.
Assembly and Finishing
Attaching the Flap
Position the straight edge of the flap along the back top edge of the bag body (the side opposite where you want the clasp to show).
Using Color A and your tapestry needle, whip stitch the flap to the inside of the bag opening. Keep stitches small and tight for security.
Installing Hardware
Turn Lock Clasp:
1. Position the decorative front plate centered on the flap point.
2. Mark where the prongs will go through.
3. Create small holes using scissors or an awl.
4. Push prongs through, fold flat on the inside.
5. Install the turn mechanism on the bag front, centered and aligned with the top plate.
D-Rings for Strap:
Cut two small strips of t-shirt yarn, approximately 8cm each. Fold each through a D-ring and sew the ends to the inside of the bag at each top corner.
Handle Attachment:
Attach cord end caps to the D-ring hardware or create loops to connect the twisted handle to the bag sides.
Tassel (Optional)
Wrap Color B yarn around your hand about 15 times. Tie one end, cut the other. Wrap a piece of yarn around the top to create the tassel head. Attach to the chain strap or D-ring.
Lining (Optional but Recommended)
Cut fabric to fit the interior of your bag with 1cm seam allowance. Sew the lining into a bag shape and hand stitch to the inside of the crochet body. This protects your stitches and gives a professional finish.
Care Instructions
T-shirt yarn bags do best with spot cleaning. For deeper cleaning, hand wash in cool water with mild detergent. Reshape while damp and air dry flat. Remove hardware before washing if possible.
Customization Ideas
Color Variations:
Size Adjustments:
This Cherry Blossom Pink Spring Braided Bag crochet pattern adapts beautifully to your personal style. The construction technique stays the same regardless of color choices.
Troubleshooting Tips
Bag is too floppy: Your gauge is too loose. Try a smaller hook or add a plastic canvas base insert.
Braided stitches look uneven: This improves with practice. Maintain consistent tension and make sure you’re inserting around the correct posts.
Colors don’t transition cleanly: Weave in your ends on the wrong side immediately after color changes. A few extra minutes now saves frustration later.
Hardware won’t stay secure: Add a small piece of felt or leather behind the clasp plate for reinforcement.
I hope this crochet bag pattern brings you as much joy to make as it did for me to design. The braided stitch technique opens up so many possibilities once you’ve mastered it here. If you create your own Cherry Blossom bag, I would absolutely love to see it. Tag me on Instagram or share in our Facebook community. Seeing your makes genuinely brightens my day.
Save this pattern to your Pinterest boards so it’s ready when you are, and please drop a comment below if you give it a try. I read every single one, and your feedback helps me create better patterns for you. Happy crocheting!