Last summer, I was packing for a beach trip and realized I had nothing cute to carry my sunscreen, book, and snacks. Everything I owned was either too big, too plain, or falling apart at the seams. I wanted something structured but fun, something that looked like it came from a boutique but felt like me.
Get the Ad-Free PDF Pattern
You can find the free pattern below, or you can purchase the ad-free printable PDF from my shop.
Get the Printable PDF →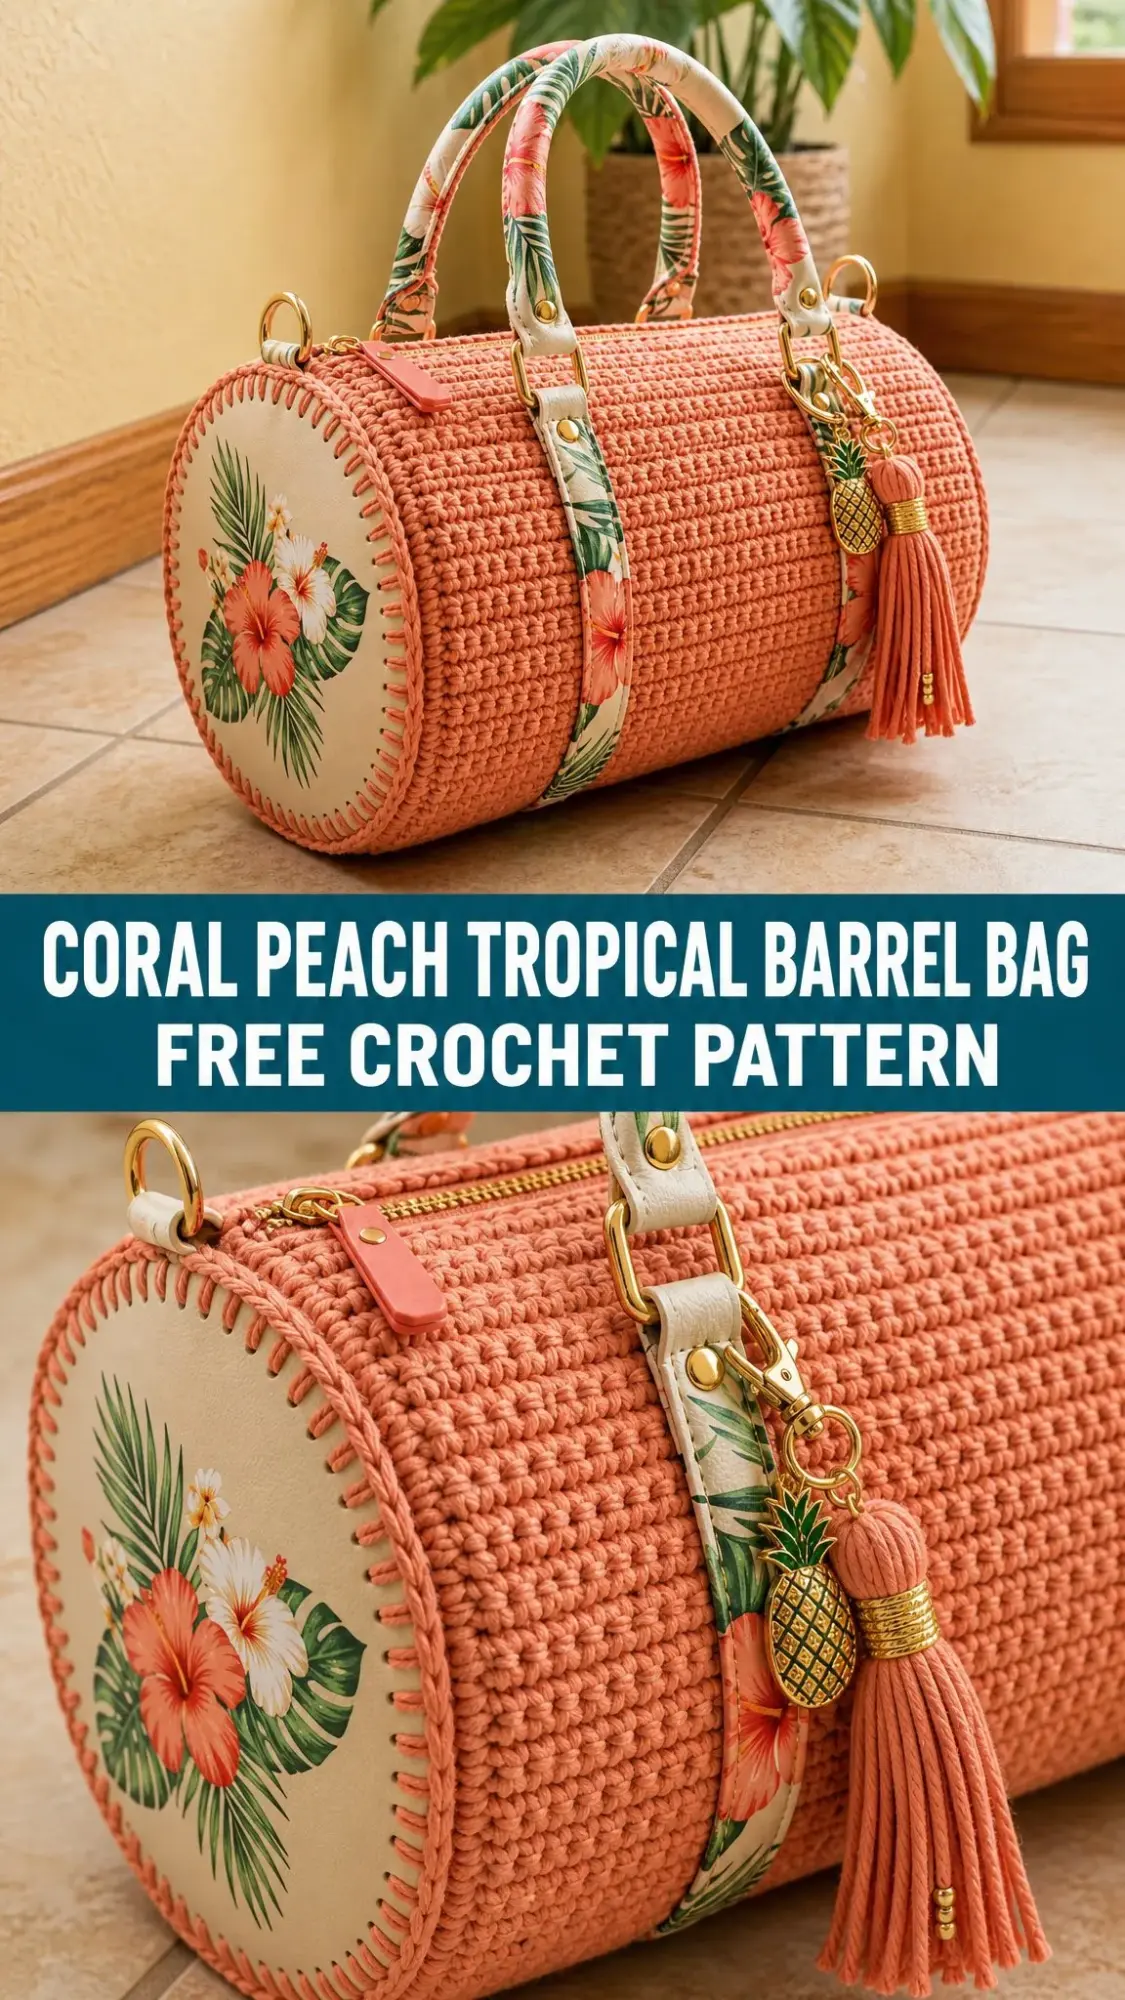
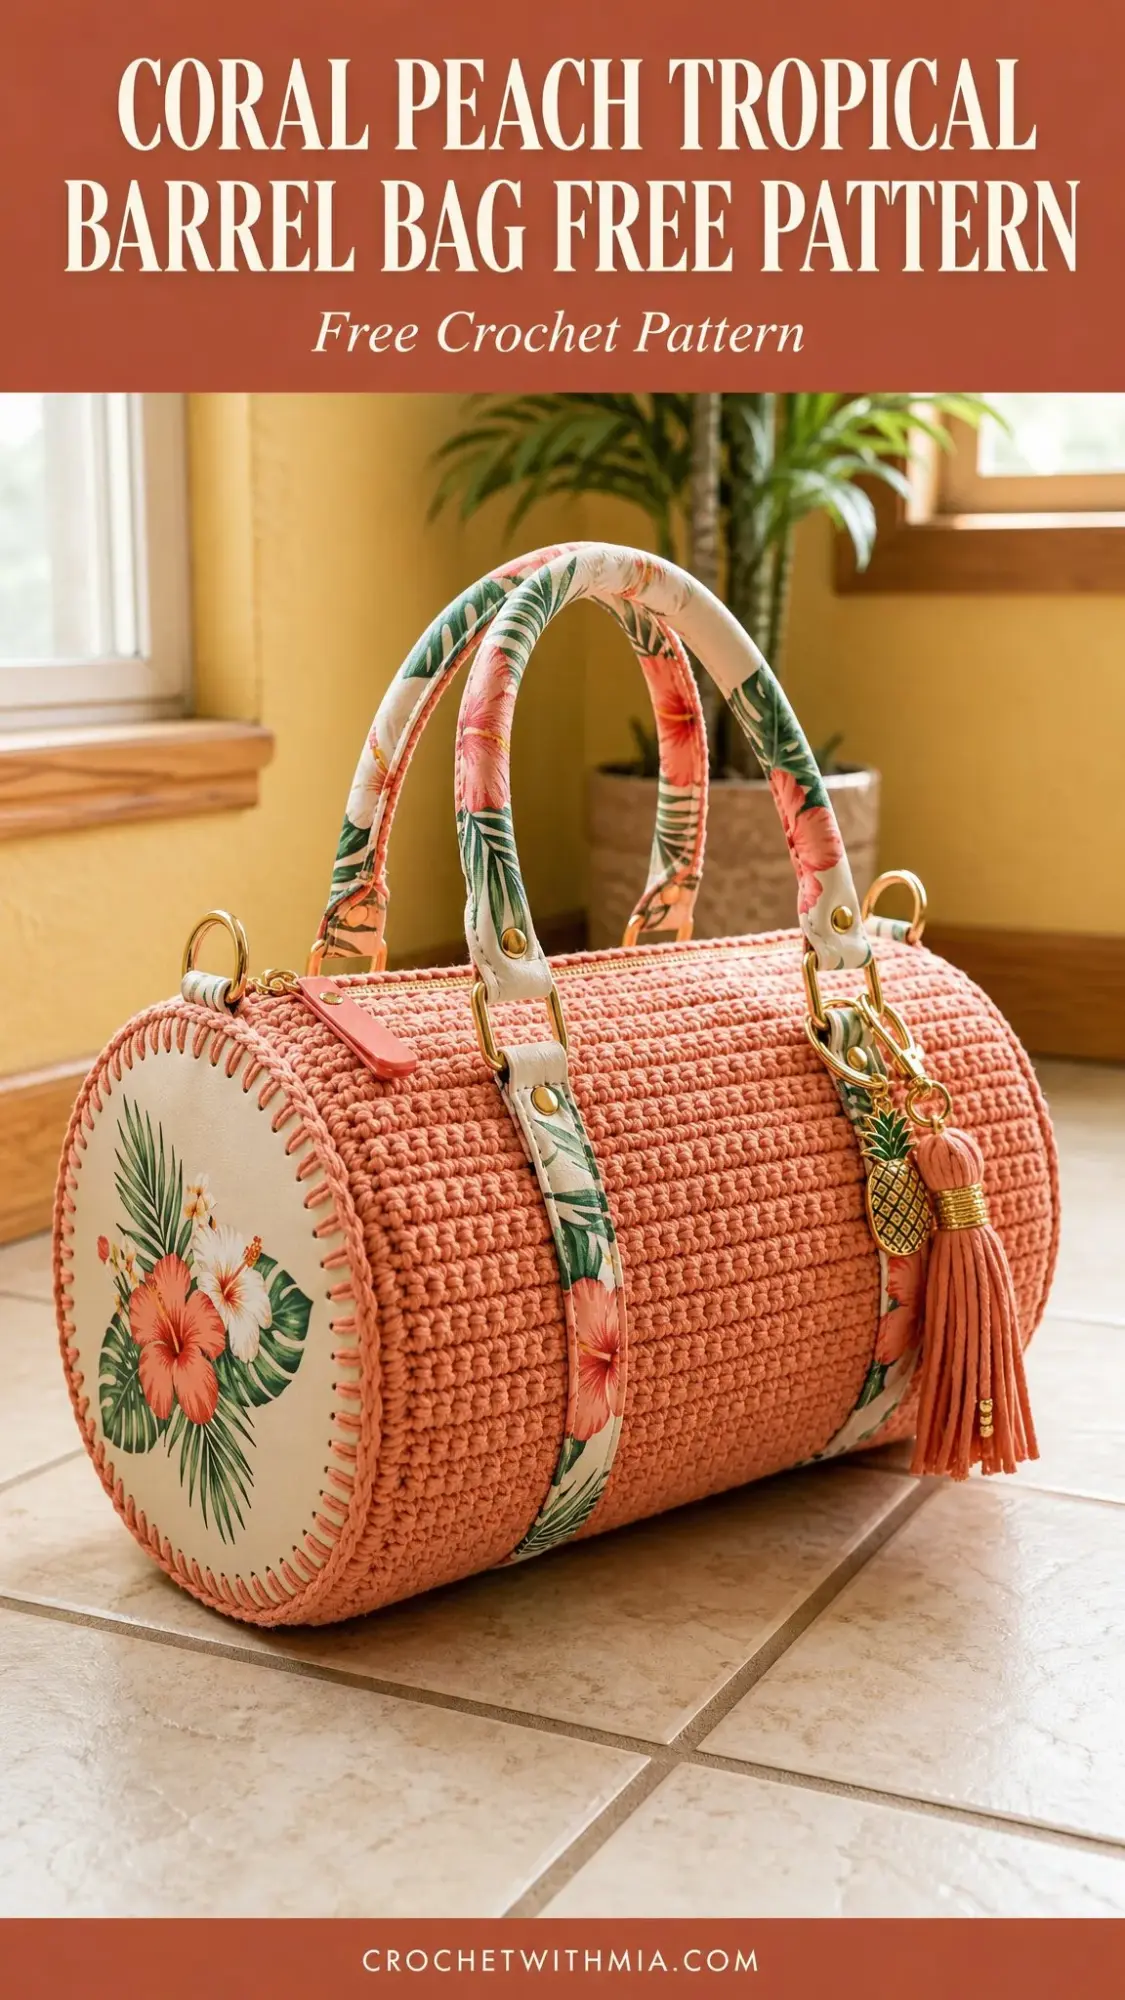
That weekend, I started sketching what would become this barrel bag. I wanted coral tones, tropical vibes, and a shape that actually held its form instead of flopping over the moment I set it down. The combination of textured crochet, pretty fabric accents, and gold hardware felt like exactly the summer accessory I had been missing.
If you have been looking for a bag pattern that feels polished and special, this is the one. The construction is more straightforward than it looks, and the finished piece gets compliments everywhere it goes.
About This Coral Peach Tropical Barrel Bag Pattern
This structured cotton barrel bag features a coral textured body, cream round end panels, tropical fabric accents, gold hardware, a zipper closure, and a playful tassel charm. The finished size measures 9.5 inches long by 4.75 inches in diameter, making it the perfect size for everyday essentials without being bulky.
The bag is built from one textured rectangular body panel, two flat circular end panels, a zipper, wrapped fabric handle straps, decorative bands, and a tassel charm. The crochet body gets seamed into a tube, then the end panels are joined with a visible whipstitch edge that adds a beautiful decorative detail.
This pattern is rated intermediate and takes approximately 8 to 10 hours to complete. If you are comfortable with basic crochet stitches and have done some seaming before, you will find this project enjoyable and rewarding.
Materials You Will Need
Gathering your supplies before you start makes the whole process smoother. Here is everything you need for this crochet barrel bag pattern.
Yarn:
Suggested Yarns:
Tools and Notions:
Gauge
Getting your gauge right is essential for this bag pattern because the zipper and end panels need to fit cleanly together.
Body panel gauge: 16 single crochet stitches by 16 rows equals 4 inches in back loop single crochet, blocked flat.
End circle gauge: The final round circumference should measure about 14.75 to 15 inches before joining.
I recommend making a small swatch and measuring carefully before starting the full project. If your gauge is off, try going up or down a hook size until you match.
Abbreviations and Special Stitches
Let me walk you through the stitches and terms used in this pattern. If any of these are new to you, practice them on a small swatch first.
Back Loop Single Crochet (BLO sc)
This stitch creates the beautiful ribbed barrel texture on the body of the bag. Insert your hook under the back loop only of the next stitch, yarn over, pull up a loop, yarn over, and pull through both loops. Working in the back loop only leaves the front loop exposed, creating horizontal ridges.
Invisible Join for Circles
This technique gives your end panels a seamless finish. Cut the yarn and pull the tail through the last stitch. Thread the tail on your needle, pass under both loops of the first stitch, then back down through the last stitch. Tighten gently for a clean invisible seam.
Whipstitch Join
This is how you will attach the end panels to the body. Hold the pieces with wrong sides together. Insert your needle from front to back through the circle stitch and the matching body row end. Pull snug but not tight, and repeat evenly around the edge.
Important Pattern Notes
Before you begin, here are a few things to keep in mind:
Body Panel Instructions
This panel forms the main barrel shape of your bag. You will work it flat in rows, then seam it into a tube.
With coral peach yarn, chain 39.
Row 1: Single crochet in the 2nd chain from hook and in each chain across. Chain 1, turn. (38 sc)
Rows 2 through 60: Single crochet in the back loop only in each stitch across. Chain 1, turn after each row except the final row. (38 sc each row)
Checkpoints:
Creating the Barrel Tube
Now you will transform your flat panel into a tube. Bring Row 1 and Row 60 together with the right side facing out. Using the long tail you left, whipstitch through the row end loops to form a clean tube.
Do not pull the seam too tight. The tube should remain round and flexible. When finished, the tube circumference should be about 14.75 to 15 inches, and the open length from end to end should be about 9.5 inches.
End Panels Instructions (Make 2)
These cream circles form the decorative ends of your barrel bag. You will add tropical fabric applique to them before attaching to the body.
With cream yarn, make a magic ring. Work in continuous rounds unless told otherwise. Place a marker in the first stitch of each round.
Round 1: Work 6 single crochet in the ring. (6 sts)
Round 2: Increase in each stitch around. (12 sts)
Round 3: Single crochet in the next stitch, increase. Repeat 6 times. (18 sts)
Round 4: Single crochet in the next 2 stitches, increase. Repeat 6 times. (24 sts)
Round 5: Single crochet in the next 3 stitches, increase. Repeat 6 times. (30 sts)
Round 6: Single crochet in the next 4 stitches, increase. Repeat 6 times. (36 sts)
Round 7: Single crochet in the next 5 stitches, increase. Repeat 6 times. (42 sts)
Round 8: Single crochet in the next 6 stitches, increase. Repeat 6 times. (48 sts)
Round 9: Single crochet in the next 7 stitches, increase. Repeat 6 times. (54 sts)
Round 10: Single crochet in the next 8 stitches, increase. Repeat 6 times. Invisible join. (60 sts)
Each finished crochet circle should measure about 4.75 inches across and have 60 outer stitches.
Adding the Fabric Applique
Cut two fabric circles measuring 3.75 to 4 inches across. Fuse lightweight interfacing to the wrong side of each circle. Center one fabric circle on each crochet end panel and stitch around the applique by hand or machine before joining the panels to the body.
Zipper Installation
Installing the zipper gives your bag a polished, functional closure.
1. Flatten the tube with the seam centered at the bottom.
2. Mark the top center opening.
3. Pin or clip the zipper behind the top edge so the teeth sit just above the crochet edge.
4. Hand sew the zipper tape to the inside top edge using small backstitches.
5. Keep your stitches even and avoid catching the zipper teeth.
6. Add a small fabric zipper tab at the pull end if desired.
Joining the End Panels
This step brings your bag together. Pin one end panel to one open side of the tube, matching the top, bottom, and side quarter points first. The 60 stitches of the end panel join evenly to the 60 body row end spaces.
With coral yarn and a yarn needle, whipstitch through one end panel stitch and one body row end space all the way around. Repeat for the second side.
After joining, your bag should be a smooth barrel measuring 9.5 inches long and about 4.75 inches in diameter. If the seam ripples, remove a few inches and rejoin with lighter tension.
Straps, Bands, and Tassel
These finishing touches transform your crochet piece into a stunning accessory.
Wrapped Strap Bands
1. Cut two fabric strips measuring 1.5 by 22 inches.
2. Press the long edges to the wrong side, then fold and stitch into firm straps about 0.75 inches wide.
3. Wrap each strap around the barrel from bottom to top, placing one strap about 2 inches from each end.
4. Stitch firmly through the fabric strap and crochet body.
5. Add D-rings or strap loops near the top edge using rivets or reinforced hand stitching.
Handles
1. Cut two handle strips measuring 1.5 by 14 inches.
2. Wrap around foam cord or folded interfacing for a padded handle.
3. Stitch each handle to the top D-rings with a 4 inch handle drop.
4. Reinforce each attachment point several times for durability.
Tassel Charm
1. Wrap coral yarn around a 4 inch card 30 times.
2. Tie at the top, cut the lower loops, and wrap the neck firmly.
3. Trim the tassel to 3.25 inches.
4. Attach to a D-ring with a jump ring or crocheted chain loop.
5. Add a pineapple charm or gold bead if desired.
Optional Lining
Adding a lining gives your bag a professional finish and protects the inside.
1. Cut lining fabric: one rectangle measuring 10 by 15 inches and two circles measuring 4.5 inches.
2. Sew the rectangle into a tube and attach the lining circles.
3. Press the upper edge under.
4. Slip the lining into the bag and hand stitch it just below the zipper tape.
Blocking and Final Shape
1. Lightly steam the crochet body from the wrong side through a cloth.
2. Insert a rolled towel or foam form inside the bag while it cools to set the barrel shape.
3. Avoid heavy steam on the zipper tape, rivets, or glued embellishments.
Care Instructions
To keep your barrel bag looking beautiful:
Troubleshooting Tips
End panel cups: Loosen your tension or block flat. The circle should be 4.75 inches after Round 10.
Tube too small for end panel: Add body rows in pairs until the circumference matches the circle.
Zipper waves: Remove and resew with the zipper fully closed. Do not stretch the crochet as you sew.
Straps pull forward: Reinforce through the lining and add small backing patches inside.
Size Adjustments
Want to customize your bag? Here are some easy modifications:
You Did It!
Thank you so much for choosing this pattern for your next project. I hope you love making this coral peach tropical barrel bag as much as I loved designing it. The combination of crochet texture, tropical fabric, and gold hardware creates something truly special that you will reach for again and again.
If you make this bag, I would absolutely love to see it! Tag me on Instagram or share a photo in my Facebook group. Seeing your finished projects is honestly the best part of my day.
If this pattern caught your eye and you want to find it easily later, go ahead and save it to your Pinterest boards. And please drop a comment below if you give it a try. I love hearing how your projects turn out and answering any questions along the way. Happy crocheting!
Want a Quick & Easy Printable Version?
Get a clean, beautifully formatted PDF of this pattern — easy to follow step by step, ready to print or save on any device. No scrolling, no distractions, just the pattern.
Get the Printable PDF →