
When I sat down to design this romper, I had three goals in mind. I wanted dimensional flowers that actually look like roses, a modular construction that would not intimidate intermediate crocheters, and a finished piece pretty enough to frame but practical enough for real baby wear. After dozens of swatches and more than a few ripped-out roses, I landed on this 3×3 granny square layout with layered three-dimensional blooms in the center of each block.
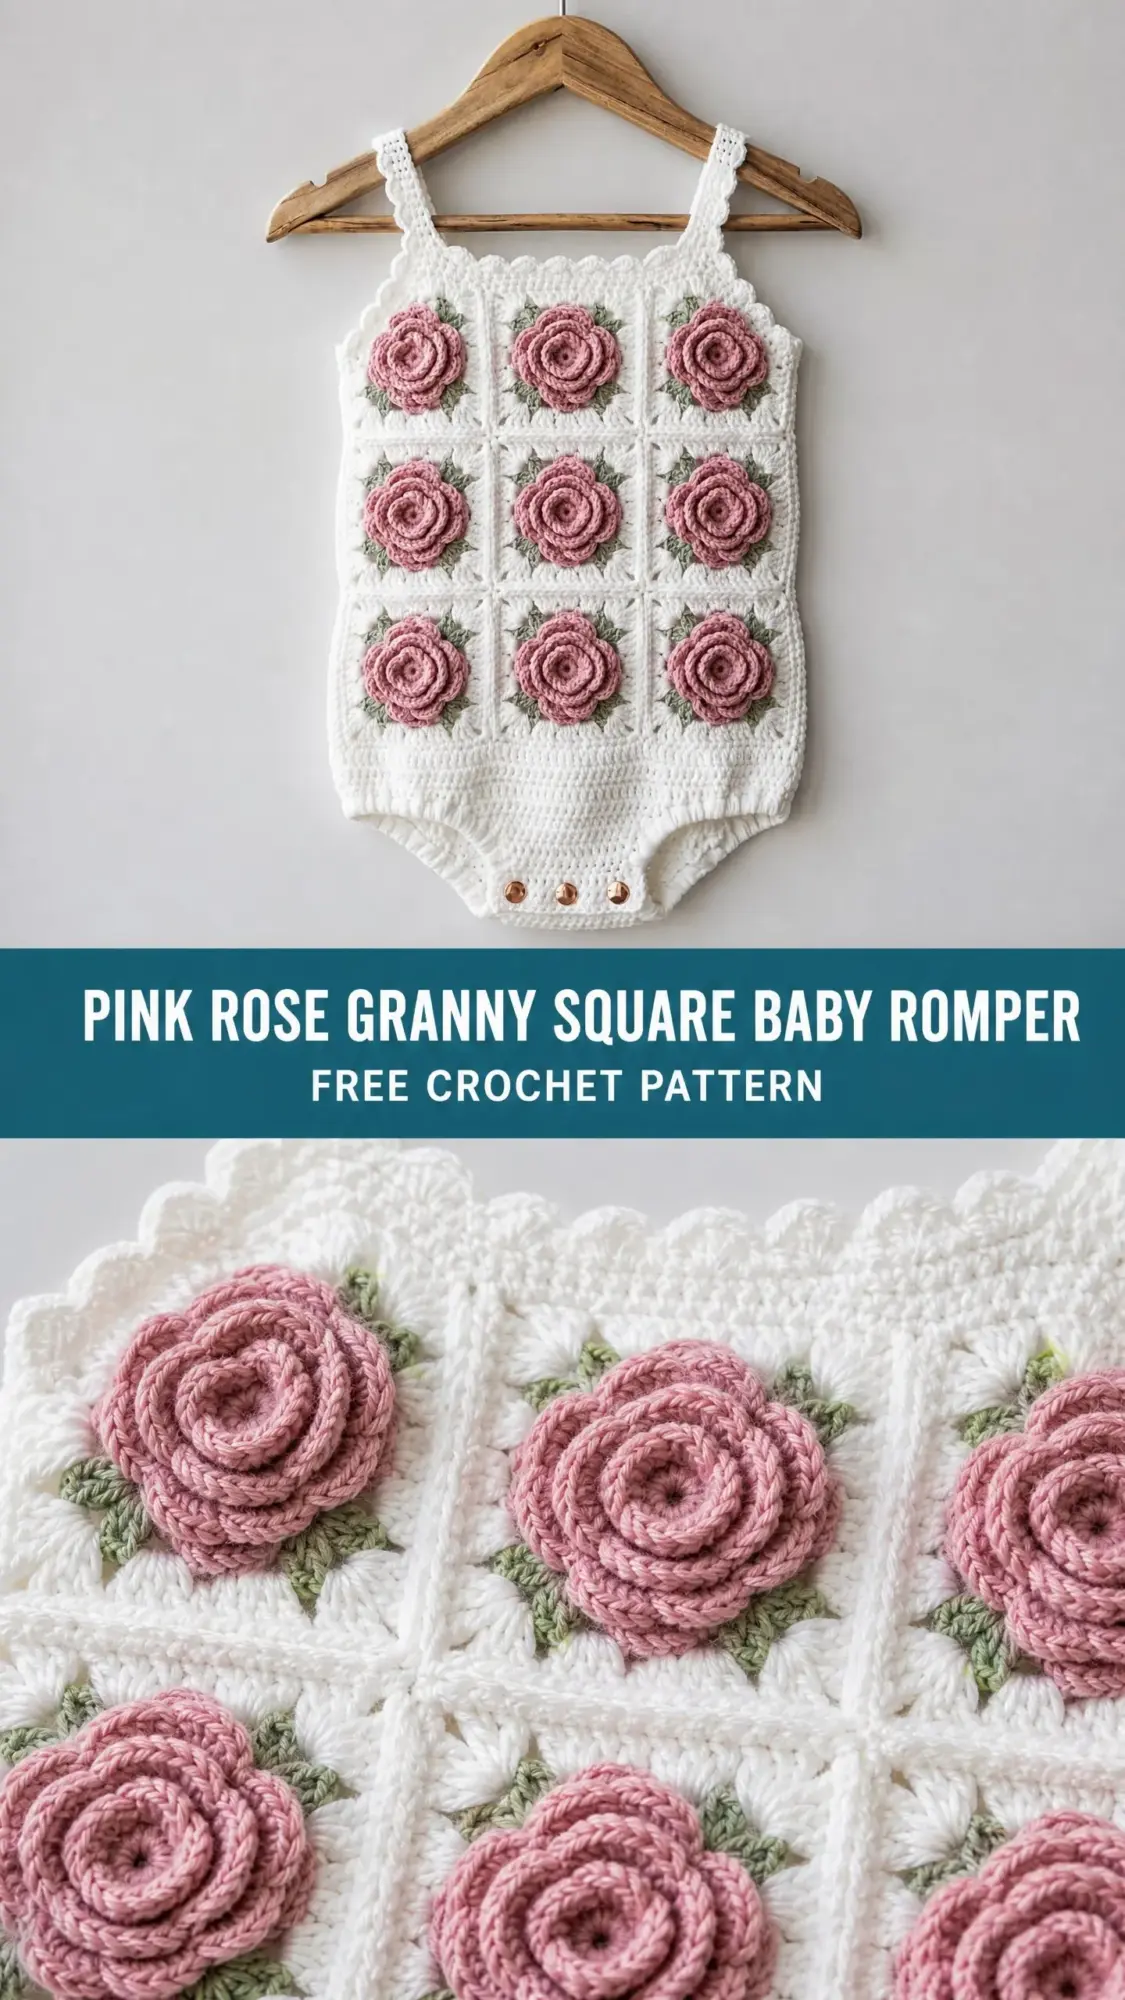
The result makes me genuinely giddy. Those spiraling petals, those tiny sage leaves tucked into the corners, that scalloped edging along the neckline. Every detail came together exactly how I pictured it.
I am SO pleased with how this turned out, and I cannot wait for you to make one too.
About This Pink Rose Granny Square Baby Romper Pattern
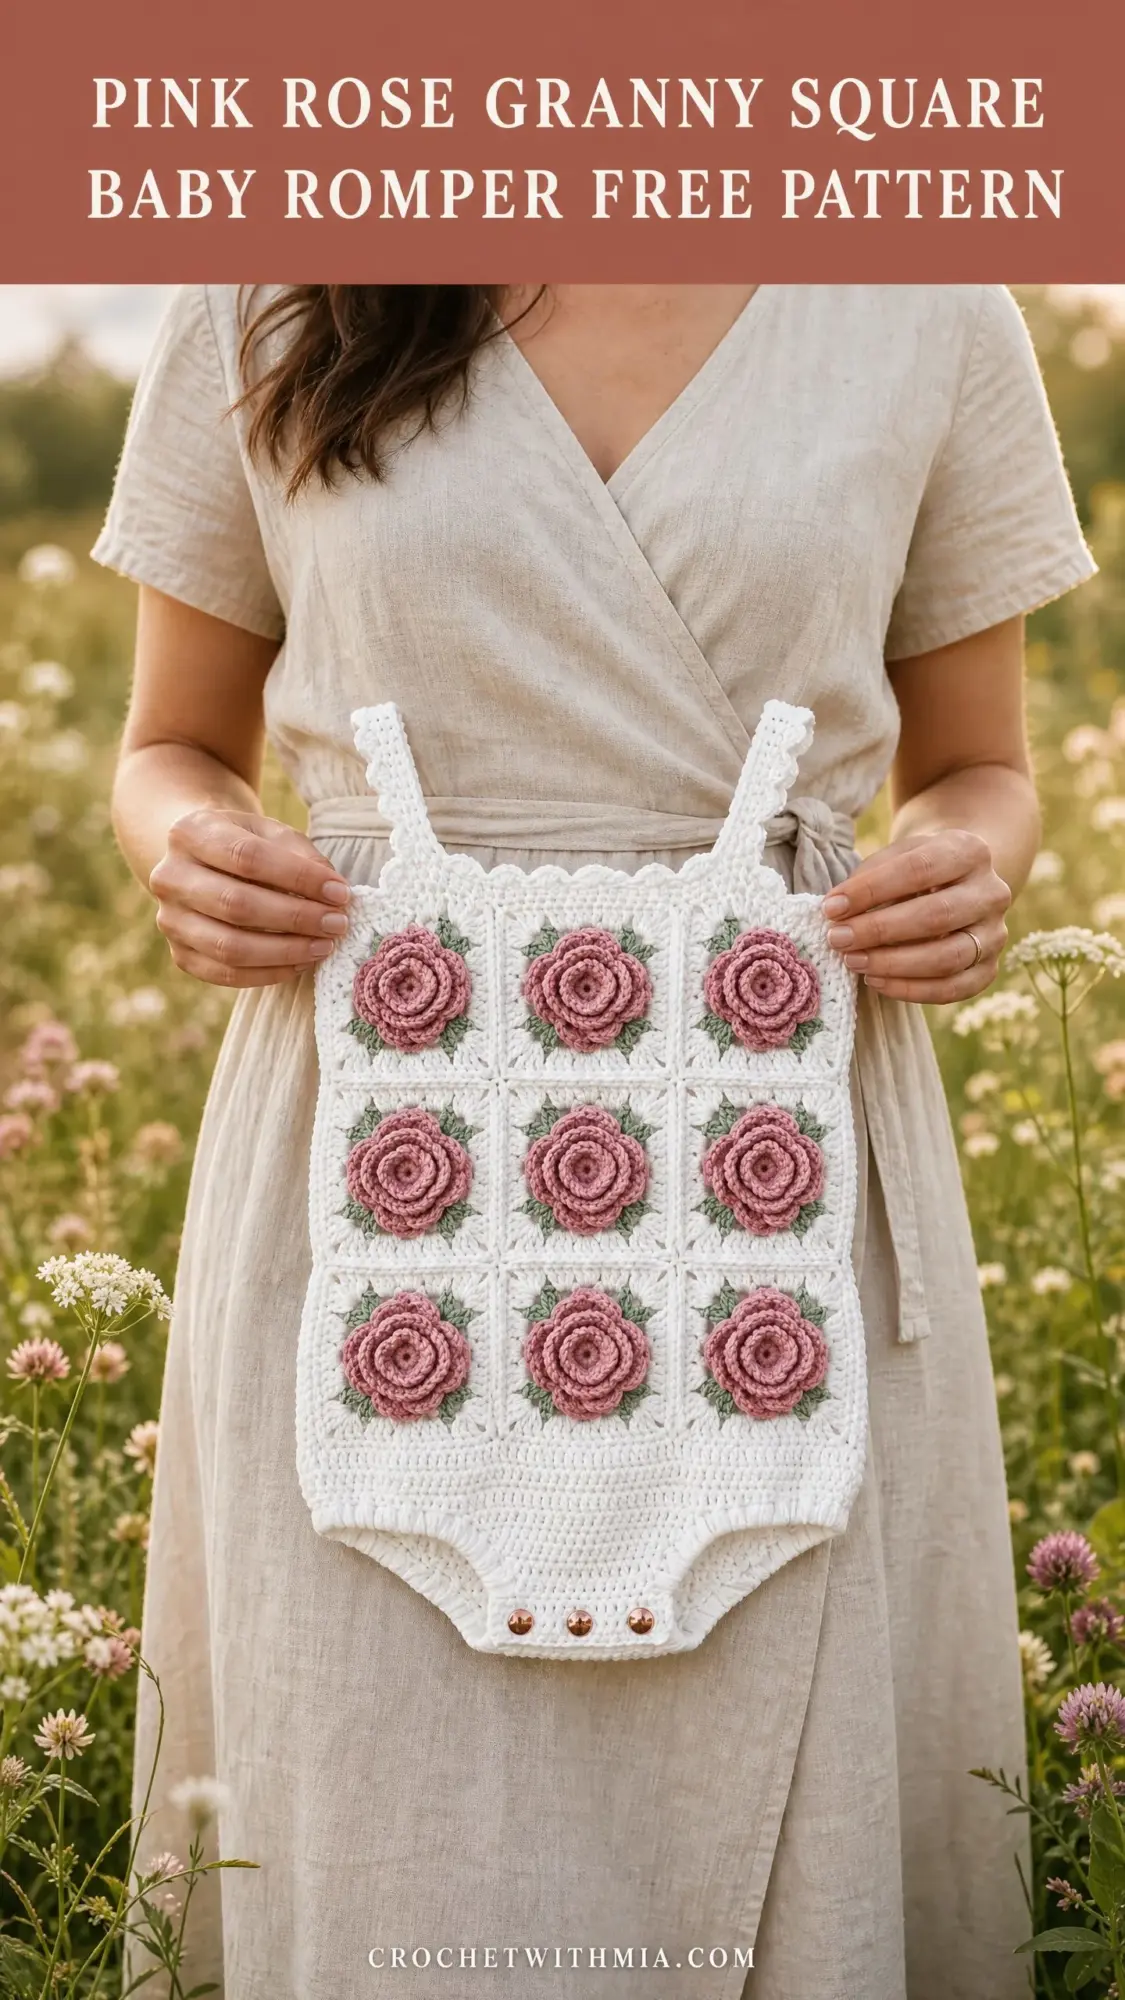
This baby romper is built from eighteen rose granny squares arranged in two identical 3×3 panels. The front and back are mirror images of each other. Each square features a stunning three-dimensional rose worked separately and sewn to the center, surrounded by four small leaf accents pointing inward like a little green frame.
The construction is modular, which means you will work all your squares first, then join them into panels, then assemble those panels into the finished garment. This approach keeps the project manageable and portable. You can crochet squares on your lunch break, work roses while watching TV, and save the assembly for a focused weekend session.
Skill level: Intermediate. The granny squares themselves are approachable for confident beginners. The 3D rose technique requires familiarity with working into specific loops and managing multiple petal layers. Garment assembly, including side seams, crotch shaping, and strap attachment, takes careful attention.
Time estimate: 12 to 18 hours depending on your experience. Plan about 20 to 25 minutes per rose. They are the most time-intensive element but also the most rewarding.
Finished Measurements
Newborn / 0-3 Months:
3-6 Months:
Instructions are written for 0-3 months with 3-6 month adjustments noted in parentheses throughout.
Materials Needed for the Crochet Baby Romper
Yarn:
You will need DK weight yarn (weight category 3) in three colors.
Yarn Suggestions:
Paintbox Yarns Simply DK (100% acrylic, 276 yards per 100g ball) gives excellent stitch definition and is fully machine washable. Perfect for everyday use and gifting.
Drops Safran (100% cotton, 175 yards per 50g ball) adds a slight sheen and natural breathability for warmer months. Cotton has less stretch than acrylic, so swatch carefully.
Lion Brand Feels Like Butta (100% polyester microfiber, 218 yards per 100g ball) is exceptionally soft against newborn skin with a slightly drapier fabric.
Choose any DK weight yarn that achieves gauge. For baby garments, prioritize softness and machine washability. Avoid high wool content unless labeled superwash.
Hook: US size E-4 / 3.5 mm, or size needed to obtain gauge
Notions:
Gauge
One completed granny square after blocking:
In double crochet: 20 dc x 10 rows = 4 inches / 10 cm using E-4 / 3.5 mm hook
Gauge is critical for this garment. The finished dimensions depend entirely on blocked square size. Work a test square, block it, and measure before making all 18 squares. Go up a hook size for larger squares, down for smaller.
Abbreviations Used in This Pattern
Let me walk you through every stitch abbreviation before we begin. If you are newer to crochet pattern reading, bookmark this section.
Special Stitches and Techniques
Granny Square Shell
The standard granny square shell consists of 3 dc worked into the same space. When the pattern says "work shell," simply work 3 dc into the indicated chain space or corner space.
Scallop Edging
This decorative border creates the pretty wavy edge at the neckline and along the straps. The repeat is: skip 1 stitch, work 5 dc into the next stitch (shell made), skip 1 stitch, slip stitch into the next stitch. This 4-stitch repeat continues across.
3D Rose
This is the star of the pattern. The rose is worked in four stages, building outward from a center ring. Each layer of petals is worked into the back loops of the previous round, which allows the petals to spiral forward and create beautiful dimension.
Stage 1, Foundation Ring:
Using RC, ch 5, sl st to first ch to form ring. (5-ch ring made)
Stage 2, First Petal Layer (5 small inner petals):
Round 1: Ch 1, work 10 sc into the ring, sl st to first sc. (10 sc)
Round 2: (Ch 3, sk 1 sc, sl st into the next sc) 5 times. (5 ch-3 loops)
Round 3: Into each ch-3 loop work (sc, hdc, 3 dc, hdc, sc). Sl st to base of first petal. (5 petals made, first layer complete)
Stage 3, Second Petal Layer (5 medium middle petals):
Round 4: Working behind the first layer of petals, insert hook into the BLO of each sc in Round 1 (the back loops that were skipped in Round 2). (Ch 4, sl st into next available BLO) 5 times. (5 ch-4 loops)
Round 5: Into each ch-4 loop work (sc, hdc, 5 dc, hdc, sc). Sl st to base of first petal. (5 petals made, second layer complete)
Stage 4, Third Petal Layer (5 large outer petals):
Round 6: Working behind the second layer of petals and below the first, sl st into the ring at the base, then (ch 5, sl st into the ring, moving one position) 5 times. (5 ch-5 loops, worked directly from the foundation ring)
Round 7: Into each ch-5 loop work (sc, hdc, dc, 3 tr, dc, hdc, sc). Sl st to base of first petal. (5 petals made, third and outermost layer complete)
Fasten off RC, leaving a 12-inch / 30 cm tail for sewing. Your rose should now have three visible concentric rings of petals spiraling outward.
Leaf Accent
Using LC, ch 6.
Row 1: Sc into 2nd ch from hook, hdc into next ch, dc into next ch, hdc into next ch, sc into last ch. Do not turn.
Work 3 sl sts back along the bottom edge of the chain to the base. Fasten off, leaving a 6-inch / 15 cm tail. (1 leaf complete)
Make 4 leaves per granny square. Sew one leaf at each inner corner of the square, angling each leaf slightly toward the center so the points radiate inward like a star.
Pattern Instructions
Section A: Granny Square (Make 18)
All squares are worked in the round with MC. Never turn. Join each round with a sl st to the first stitch.
Round 1: Using MC, ch 4, sl st to first ch to form ring. Ch 3 (counts as first dc now and throughout), work 2 dc into ring, ch 2, (3 dc into ring, ch 2) 3 times, sl st to top of beg ch-3 to join. (4 groups of 3 dc, 4 ch-2 corner spaces)
Round 2: Sl st to first ch-2 sp. Ch 3, work 2 dc into same ch-2 sp (first corner shell made), ch 2, 3 dc into same sp (second half of corner), ch 1, (3 dc, ch 2, 3 dc) into next ch-2 sp, ch 1. Rep from to twice more. Sl st to top of beg ch-3. (8 groups of 3 dc, 4 ch-2 corner spaces, 4 ch-1 side spaces)
Round 3: Sl st to first ch-2 corner sp. Ch 3, 2 dc into same sp, ch 2, 3 dc into same sp, ch 1, 3 dc into ch-1 sp, ch 1, (3 dc, ch 2, 3 dc) into ch-2 corner sp, ch 1, 3 dc into ch-1 sp, ch 1. Rep from to twice more. Sl st to top of beg ch-3. (12 groups of 3 dc, 4 ch-2 corner spaces, 8 ch-1 side spaces)
Round 4: Sl st to first ch-2 corner sp. Ch 3, 2 dc into same sp, ch 2, 3 dc into same sp, (ch 1, 3 dc into next ch-1 sp) twice, ch 1, (3 dc, ch 2, 3 dc) into ch-2 corner sp, (ch 1, 3 dc into next ch-1 sp) twice, ch 1. Rep from to twice more. Sl st to top of beg ch-3. (16 groups of 3 dc, 4 ch-2 corner spaces, 12 ch-1 side spaces)
Fasten off and weave in ends.
For 3-6 month size only, work Round 5:
Sl st to first ch-2 corner sp. Ch 3, 2 dc into same sp, ch 2, 3 dc into same sp, (ch 1, 3 dc into next ch-1 sp) 3 times, ch 1, (3 dc, ch 2, 3 dc) into ch-2 corner sp, (ch 1, 3 dc into next ch-1 sp) 3 times, ch 1. Rep from to twice more. Sl st to top of beg ch-3. (20 groups of 3 dc, 4 ch-2 corner spaces, 16 ch-1 side spaces)
Fasten off and weave in ends.
Block each square to finished measurements before assembly. Pin to a blocking mat, spritz with water, and allow to dry completely.
Section B: Leaf Accents (Make 72 Total)
Make 4 leaves per square following the Leaf Accent instructions in Special Stitches. Sew one leaf at each inner corner of the square, framing the space where the rose will be placed.
Section C: 3D Rose (Make 18 Total)
Follow the 3D Rose instructions in Special Stitches. Make 18 complete roses. Sew each rose firmly to the center of its granny square, directly over the center ring. Take several stitches through the base of the rose into the square. The rose should not wobble or lift.
Section D: Panel Assembly
You will make two panels: one front and one back. Each panel is a 3×3 grid of 9 squares.
Lay out 9 squares with all RS facing up in a 3×3 arrangement.
Joining squares horizontally into rows:
Hold two adjacent squares with WS together (RS facing outward). Using MC and the slip stitch flat join, insert hook through the corresponding ch-2 corner sp of both squares, sl st through both, then sl st through each corresponding ch-1 sp and dc group across the shared edge, ending with a sl st through the opposite ch-2 corner sp. Fasten off. Repeat to join all three squares in each row.
Joining rows vertically:
Join Row 1 to Row 2, then Row 2 to Row 3 using the same flat join method. At intersections where 4 squares meet, work through all 4 corner spaces with a single sl st to lock the join securely.
Make two identical panels this way.
Section E: Neckline Edging
Work this on each panel separately before joining sides.
With RS facing and MC, join yarn with a sl st to the top-right corner sp of the right-most square in the top row.
Round 1 (edging setup): Ch 1, sc evenly across the top edge of the panel. Work 1 sc into each dc, 1 sc into each ch-1 sp, and 2 sc into each ch-2 corner sp. (approximately 30 sc for 0-3 months / 36 sc for 3-6 months)
Adjust sc count slightly to achieve an even multiple of 4 for the scallop repeat.
Round 2 (scallop): Ch 1, sl st into first sc. (Sk 1 sc, 5 dc into next sc, sk 1 sc, sl st into next sc) across. (7 scallops for 0-3 months / 9 scallops for 3-6 months) Fasten off.
Section F: Side Seams
Place front and back panels with WS together. Using MC and the flat sl st join, join the left side seam from top-left corner down the full left side edge to the bottom-left corner. Fasten off.
Repeat for the right side seam.
The romper body is now tube-shaped with the top and bottom open.
Section G: Crotch and Leg Opening Shaping
With RS of front panel facing, join MC with sl st to the bottom-right corner of the front panel.
Row 1: Ch 1, sc evenly across the bottom edge of the front panel. (30 sc / 36 sc)
Row 2: Ch 1, turn. Sc2tog over first 2 sts, sc across to last 2 sts, sc2tog. (28 sc / 34 sc)
Row 3: Ch 1, turn. Sc2tog, sc across to last 2 sts, sc2tog. (26 sc / 32 sc)
Row 4: Ch 1, turn. Sc2tog, sc across to last 2 sts, sc2tog. (24 sc / 30 sc)
Fasten off. Repeat Rows 1-4 for the back panel.
Join the crotch: Hold front and back crotch edges with WS together. Using MC, sl st across all 24 (30) sts, joining front to back. Fasten off.
Leg Opening Edging (work on each leg opening):
With RS facing and MC, join yarn at the center bottom of one leg opening.
Round 1: Ch 1, sc evenly around the entire leg opening. (approximately 30 sc / 36 sc)
Round 2: Ch 1, (sk 1 sc, 5 dc into next sc, sk 1 sc, sl st into next sc) around. (7 scallops / 9 scallops) Fasten off.
Repeat for the second leg opening.
Section H: Shoulder Straps (Make 2)
Each strap begins at the front neckline. The left strap attaches at approximately the 3rd scallop from the left edge, and the right strap at the 3rd scallop from the right edge.
With MC, join yarn with sl st at strap attachment point on front neckline.
For a 3-stitch wide strap:
Row 1: Ch 1, sc into same st and next 2 sts of scallop edging, turn. (3 sc)
Row 2: Ch 1, sc into each st across, turn. (3 sc)
Continue until strap measures 6 inches / 15 cm (6.5 inches / 16.5 cm for 3-6 months). Fasten off leaving a 12-inch / 30 cm tail.
Strap Edging: With MC, work 1 round of sc evenly along both long sides and the top short end of each strap, then work scallop edging along both long edges. Fasten off.
Attach to back: Thread the long tail onto a yarn needle. Position the free end of the strap at the corresponding position on the back neckline edge. Sew firmly with several passes. Weave in end.
Make and attach the second strap symmetrically.
Section I: Snap Closures
Using a hand-sewing needle and matching thread, sew the socket (female) half of each snap to the front panel crotch edge, evenly spaced approximately 0.5 inches / 1.3 cm apart. Sew the stud (male) half to the corresponding position on the back panel crotch edge.
Finishing and Care
Give the entire romper a final wet block after all crochet work is complete. Submerge in cool water, gently press out water (never wring), lay flat on a blocking mat, and allow to dry completely.
Weave in all ends securely. Take extra care with rose tails as these hold the 3D structure in place.
Care instructions:
Size Customization Tips
For 6-9 months: Add one additional round to each granny square (approximately 3.5 inches / 9 cm squares). Increase strap length to 7 inches / 18 cm. Work 5 decrease rows in crotch shaping instead of 4.
For Preemie / up to 7 lbs: Work only 3 rounds per granny square (approximately 2 inches / 5 cm squares). Shorten straps to 5 inches / 12.5 cm. Work only 2 decrease rows in crotch shaping.
For chest width adjustments, the measurement is controlled entirely by square size. Each additional round adds approximately 0.5 inches / 1.3 cm per side.
For length adjustments, try a 4×3 or 5×3 grid instead of 3×3. Each added row of squares adds the full square measurement in length.
Thank you so much for choosing this pattern for your little one or for someone special in your life. This romper takes time and attention, but the finished piece is absolutely worth every stitch. I would love to see your version! Tag me on Instagram or share your photos in my Facebook group.
If this pattern is calling your name but life is busy right now, go ahead and pin it to your Pinterest boards so you can find it when you are ready to cast on. And if you do make one, please drop a comment below. Hearing from you truly makes my day, and I love seeing how each crocheter puts their own spin on these designs.