
I have been dreaming about designing a collection of woodland animal hats for ages. I wanted something that would work for adults, use a straightforward construction method, and still look absolutely adorable without being overly complicated. The challenge was creating four distinct animals using the same base hat pattern while giving each one its own personality through clever applique work. After tons of swatching, sketching ear shapes, and perfecting that sweet little acorn detail, I am SO pleased with how these turned out!
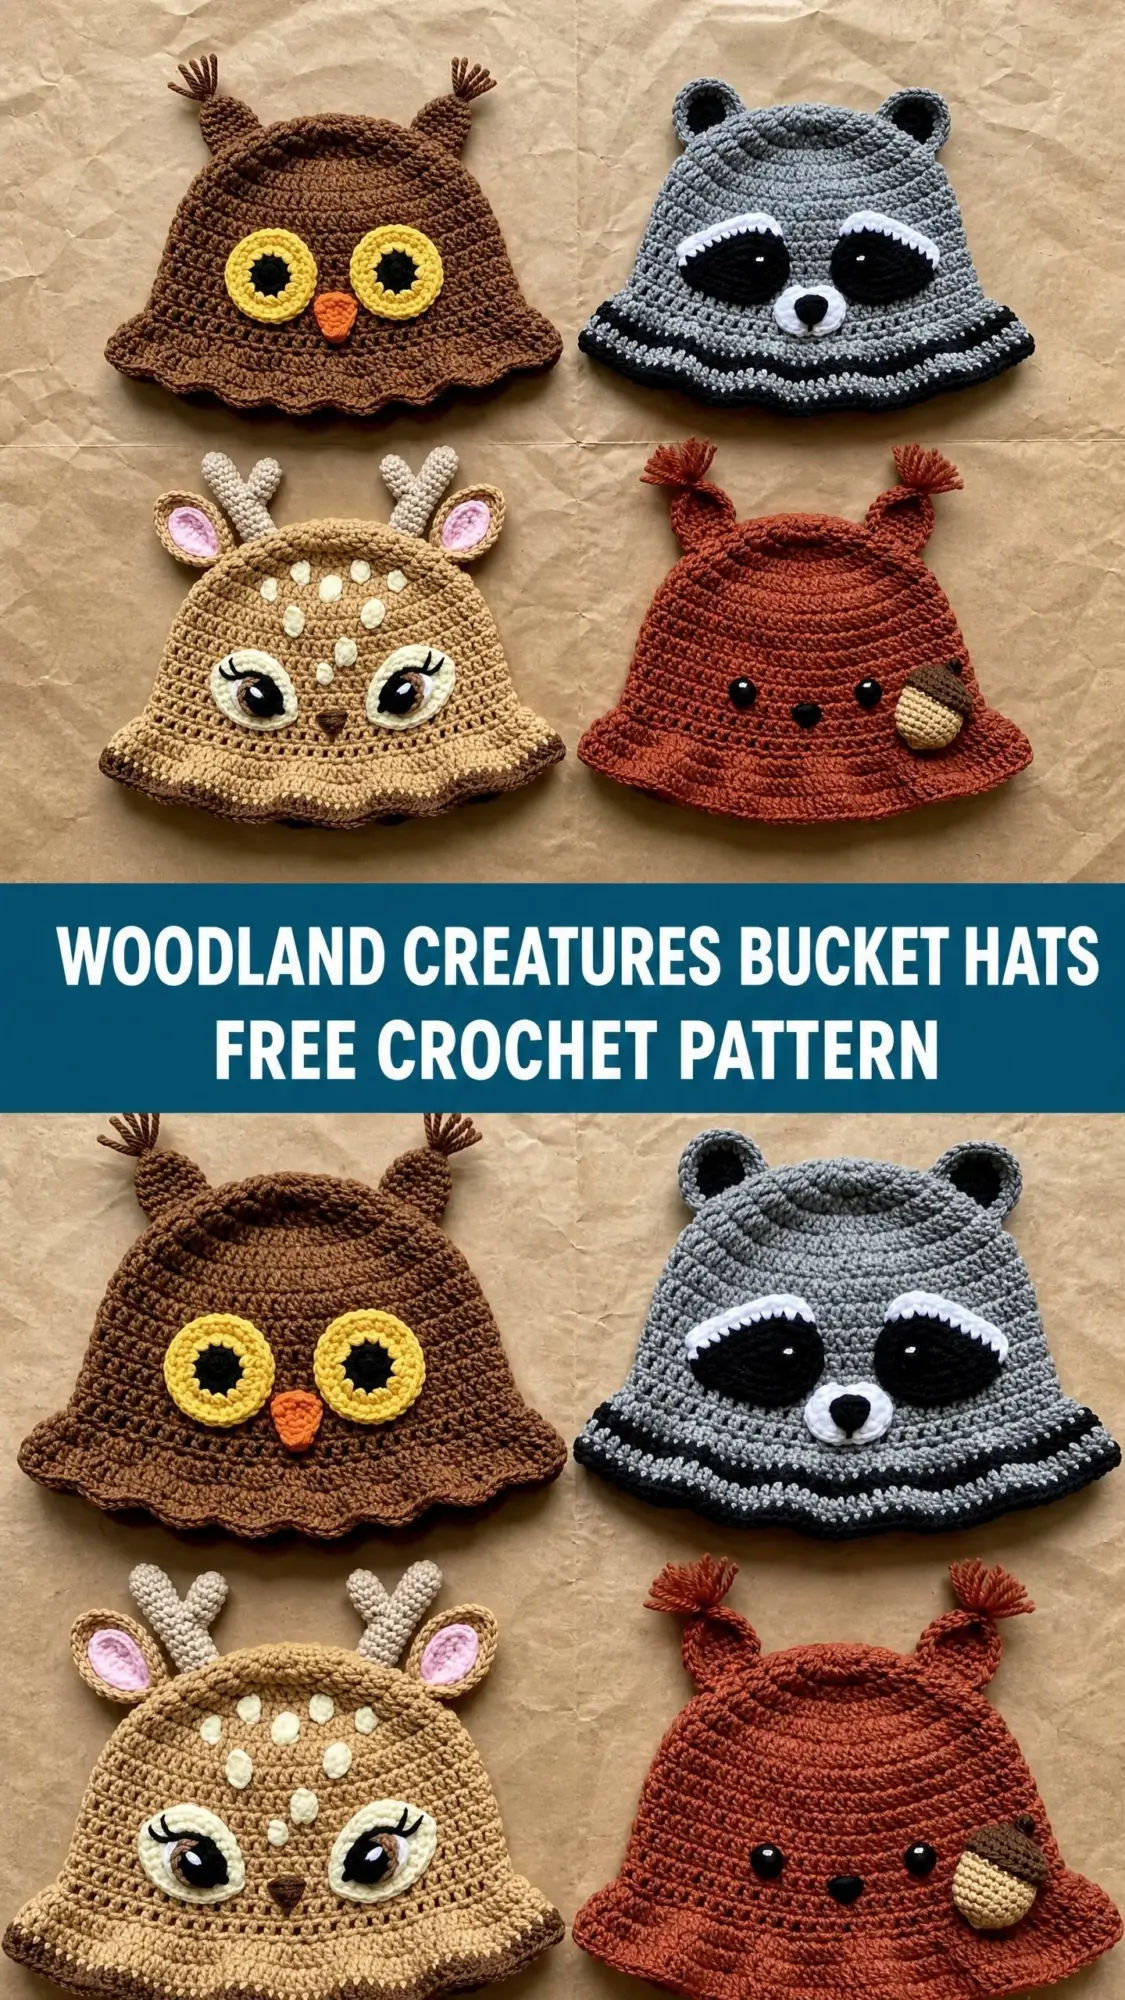
These bucket hats feature an owl, raccoon, deer, and squirrel. Each one starts with the exact same crown and body construction, which means once you make your first hat, the other three practically fly off your hook. The magic happens in the embellishments, where simple flat circles and small shaped pieces transform a basic bucket hat into something truly special.
Whether you are making one for yourself or working through the whole woodland gang as gifts, this crochet pattern delivers maximum cuteness with approachable techniques. Let me walk you through everything you need to know.
About This Woodland Bucket Hat Pattern
This collection features four crocheted bucket hats shaped like woodland creatures. You will work each hat from the top down in continuous rounds, starting with a flat circle crown, building up the sides, and finishing with a flared brim. The animal faces come to life through separately crocheted appliques that you sew on at the end.
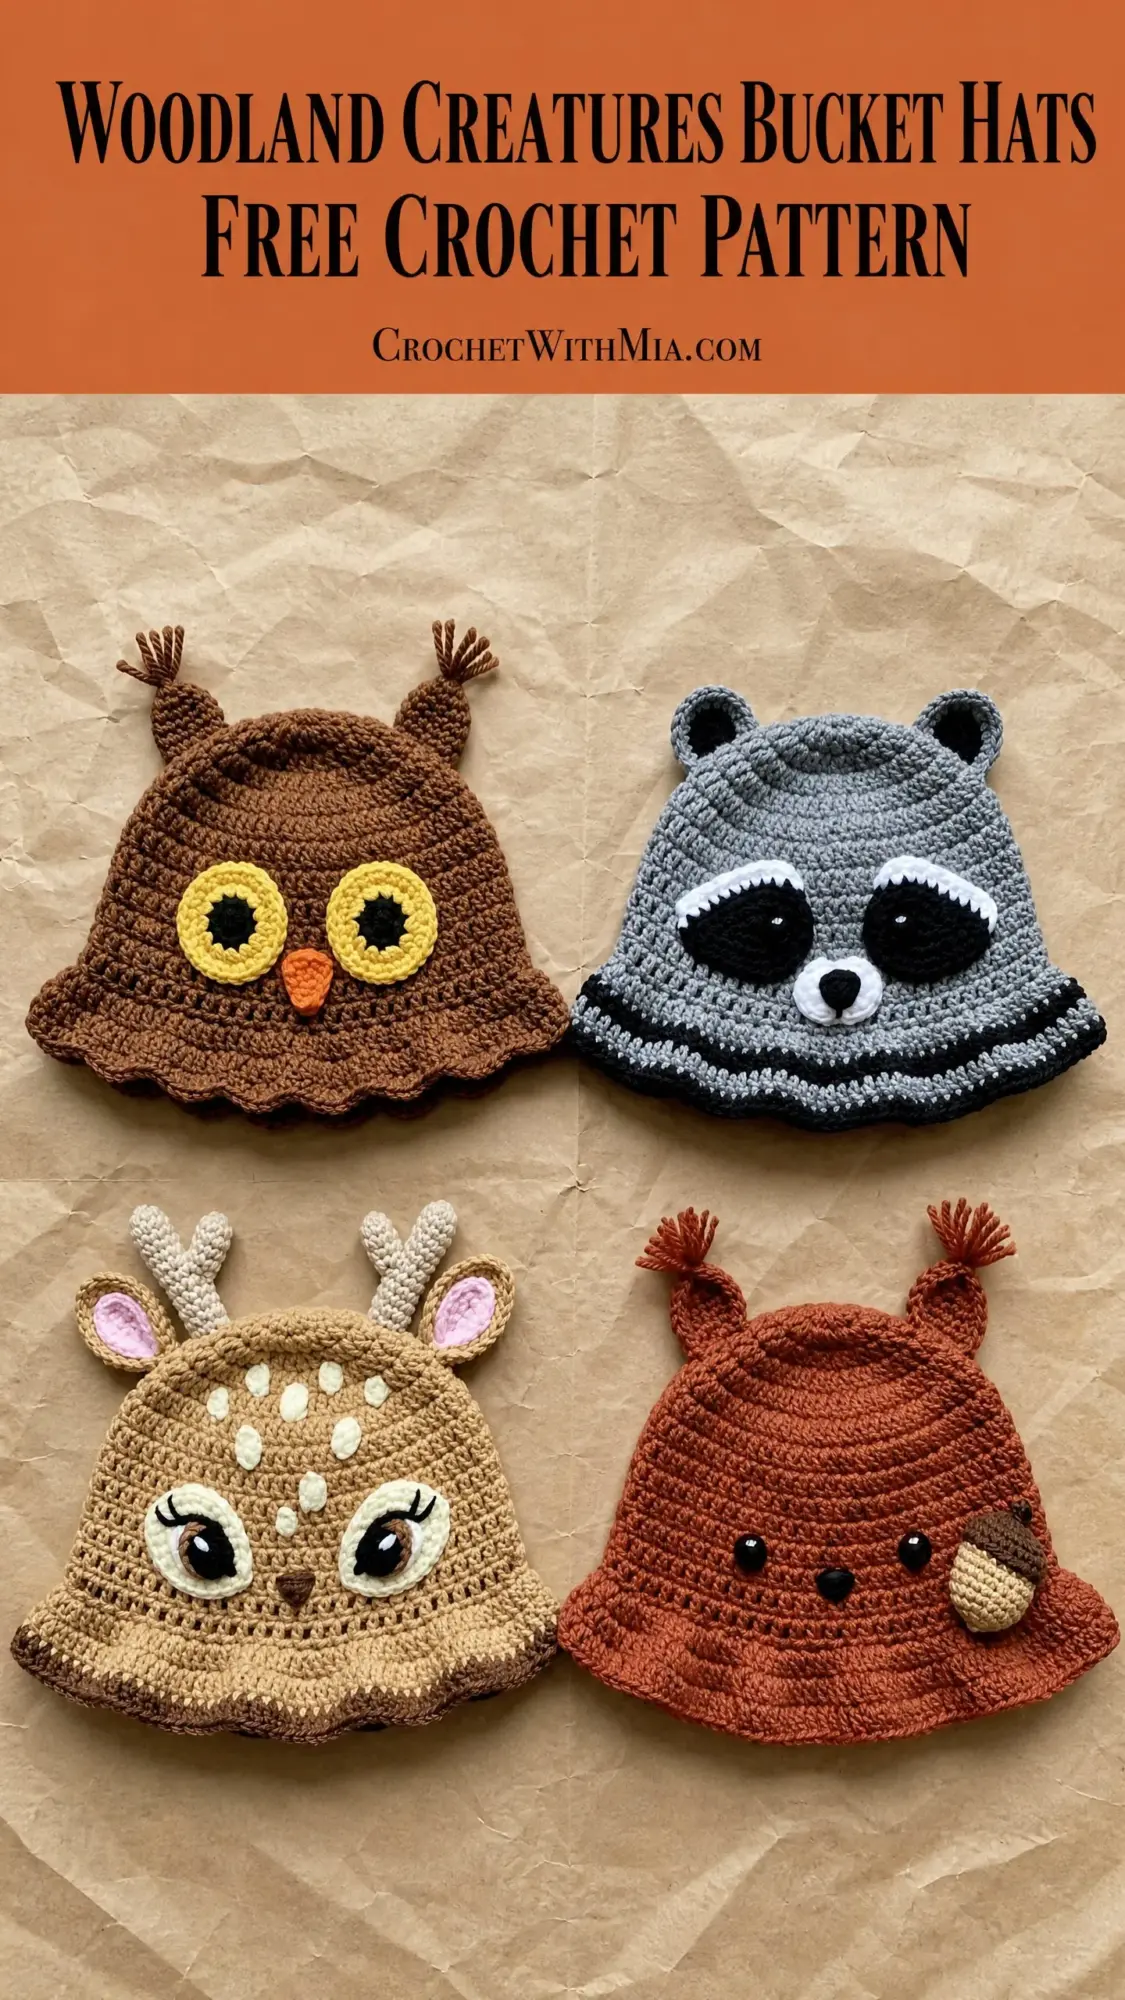
The owl sports big yellow eyes with black pupils, a tiny orange beak, and distinctive ear tufts with frayed fringe at the tips. The raccoon wears its signature black mask with white highlights around the eyes, plus cute rounded ears with black centers and a striped brim detail. The deer features cream colored facial shading, scattered fawn spots, embroidered eyelashes, and branched antlers with pink lined ears. The squirrel keeps things sweet with tufted ears, a tan face center, and an adorable dimensional acorn held right on its cheek.
The base hat fits an average adult head measuring 22 to 23 inches around. I have included size customization tips at the end if you need to go bigger or smaller.
Skill Level
I would call this an intermediate pattern. The hat body itself uses only single crochet worked in continuous rounds, which is totally beginner territory. However, you will also need to feel comfortable working in the round without joining, reading stitch counts carefully, crocheting small circular appliques, and sewing pieces onto the hat neatly. If you have completed two or three small projects and feel confident counting stitches, you can absolutely tackle this.
Time Estimate
Here is roughly what to expect for each hat:
Finished Measurements
Materials Needed
Yarn
Main Color (MC): Approximately 200 yards (183 meters) of worsted weight yarn in your chosen animal’s primary color
Contrast Colors (CC): Small amounts of 15 to 30 yards (14 to 27 meters) each as listed below
Owl Hat Colors:
Raccoon Hat Colors:
Deer Hat Colors:
Squirrel Hat Colors:
Recommended Yarns
Lion Brand Pound of Love works beautifully here. It is worsted weight, 100% acrylic, machine washable, and offers excellent stitch definition with a wide color range.
Paintbox Yarns Simply DK held doubled creates a soft, slightly lighter fabric. If you go this route, hold two strands together throughout and definitely check your gauge before starting.
Cascade 220 gives beautiful drape and stitch clarity if you prefer wool. Just note this yarn requires hand washing.
Avoid highly textured, bouclé, or fuzzy yarns. The facial feature appliques will not show clearly against busy fabric.
Hook
US size J (6 mm) crochet hook
Notions
Gauge
18 single crochet stitches and 20 rounds = 4 inches (10 cm) worked in continuous rounds with a US J (6 mm) hook.
To make a gauge swatch, chain 20 and work single crochet in rows for 22 rows. Block lightly and measure the center 4 by 4 inch area, avoiding edges. Use a larger hook if your swatch is smaller than gauge, or a smaller hook if your swatch is larger.
Gauge is critical for hat fit. Even one stitch per inch off will result in a hat that does not fit correctly.
Abbreviations
Special Stitches
Magic Ring (MR)
This technique creates a tightly closed center for working in the round.
1. Drape yarn over your non dominant hand, crossing the tail over the working yarn to form a loop.
2. Insert hook into the loop (not the tail), yarn over the working yarn, and pull through the loop.
3. Chain 1. This does not count as a stitch.
4. Work the required number of single crochet stitches into the center of the ring.
5. Pull the tail end firmly to close the ring.
If the magic ring intimidates you, you can chain 2 and work your stitches into the second chain from the hook instead. It leaves a tiny hole but works fine.
Scallop Stitch
This creates the decorative brim edging on some variations.
1. Skip 2 stitches.
2. Work 5 double crochet into the next stitch.
3. Skip 2 stitches.
4. Work 1 slip stitch into the next stitch.
This uses 6 stitches per scallop unit.
Pattern Notes
This hat is worked in continuous rounds without joining at the end of each round. Place a stitch marker in the first stitch of each round and move it up as you work. This prevents losing your place.
The right side faces you throughout. Do not turn your work.
All stitch counts appear in parentheses at the end of each round.
Appliques are worked separately and pinned in place before sewing. This lets you adjust positioning until everything looks perfect.
Ear and horn embellishments get stuffed lightly with yarn scraps or polyfill before attaching to give them dimension.
Base Bucket Hat Instructions
All four animal variations use this same base construction.
Crown
Begin with MC. Make a magic ring.
Rnd 1: Work 6 sc into the magic ring. Pull ring closed. (6 sc)
Rnd 2: Inc in each st around. (12 sc)
Rnd 3: (Sc 1, inc) rep 6 times. (18 sc)
Rnd 4: (Sc 2, inc) rep 6 times. (24 sc)
Rnd 5: (Sc 3, inc) rep 6 times. (30 sc)
Rnd 6: (Sc 4, inc) rep 6 times. (36 sc)
Rnd 7: (Sc 5, inc) rep 6 times. (42 sc)
Rnd 8: (Sc 6, inc) rep 6 times. (48 sc)
Rnd 9: (Sc 7, inc) rep 6 times. (54 sc)
Rnd 10: (Sc 8, inc) rep 6 times. (60 sc)
Rnd 11: (Sc 9, inc) rep 6 times. (66 sc)
Rnd 12: (Sc 10, inc) rep 6 times. (72 sc)
Checkpoint: Lay your work flat. The circle should measure approximately 6.5 inches (16.5 cm) in diameter. If it is significantly off, adjust your hook size and restart.
Hat Body
Rnd 13: Sc in BLO in each st around. (72 sc)
Working in the back loop only for this one round creates a crisp turning ridge between the crown and sides.
Rnd 14 through Rnd 29: Sc in each st around. (72 sc each round)
Work these 16 rounds even without increasing or decreasing.
Checkpoint: The hat body from Round 13 through Round 29 should measure approximately 3.5 inches (9 cm) tall.
Brim Transition
Rnd 30: (Sc 5, inc) rep 12 times. (84 sc)
Rnd 31: (Sc 6, inc) rep 12 times. (96 sc)
Rnd 32: (Sc 7, inc) rep 12 times. (108 sc)
Rnd 33: Sc in each st around. (108 sc)
Note for Raccoon variation: On Round 32, change to CC1 (black) for the final yarn over of the last stitch. Work Round 33 entirely in CC1 to create the dark brim stripe. Then fasten off CC1 and rejoin MC for the edging.
Brim Scallop Edging
Slip stitch to join the round at the start of Round 34.
Rnd 34 (Scallop Round): (Skip 2 sts, 5 dc in next st, skip 2 sts, sl st in next st) rep 18 times. Join with sl st to beginning sl st.
Fasten off and weave in ends.
Note for Owl and Deer: Work the scallop edging as written. The owl’s scallops create a ruffled feather appearance.
Note for Squirrel and Raccoon: Work a plain brim instead. After Round 33, work 3 additional rounds of sc in each st around, then fasten off. This creates a cleaner, flatter brim edge.
Owl Hat Embellishments
Owl Eye (Make 2)
Eye Layer 1, Black Pupil:
With CC2 (black), make a magic ring.
Rnd 1: Work 6 sc into ring. Join with sl st. Fasten off, leaving a 6 inch tail. (6 sc)
Eye Layer 2, Yellow Iris:
With CC1 (golden yellow), make a magic ring.
Rnd 1: Work 6 sc into ring. (6 sc)
Rnd 2: Inc in each st around. Join with sl st. (12 sc)
Rnd 3: (Sc 1, inc) rep 6 times. Join with sl st. Fasten off, leaving a 12 inch tail for sewing. (18 sc)
Assembly: Place the black pupil onto the center of the yellow iris with wrong sides together. Whipstitch around the outer edge of the black circle through both layers. The finished eye measures approximately 1.25 inches (3 cm) in diameter.
Owl Beak
With CC3 (orange), make a magic ring.
Rnd 1: Work 3 sc into ring. (3 sc)
Rnd 2: Inc in first st, sc 1, inc in last st. (5 sc)
Rnd 3: Sc in each st. Fasten off, leaving a tail for sewing. (5 sc)
Do not stuff.
Owl Ear Tufts (Make 2)
With MC (brown), make a magic ring.
Rnd 1: Work 4 sc into ring. (4 sc)
Rnd 2: Inc in each st. (8 sc)
Rnd 3: Sc in each st. (8 sc)
Rnd 4: (Sc2tog) rep 4 times. (4 sc)
Stuff lightly. Close the 4 remaining stitches by pulling the yarn tail through all 4 loops and cinching tight. Leave a long tail for attaching.
Fringe: Cut 4 to 6 lengths of MC approximately 2 inches long. Fold in half and use a crochet hook to pull them through the top of each ear tuft as fringe. Fray the ends slightly.
Owl Ear Base (Make 2)
With MC, ch 2.
Row 1: Work 3 sc into the second ch from hook. (3 sc)
Row 2: Turn. Inc in first st, sc 1, inc in last st. (5 sc)
Row 3: Turn. Inc in first st, sc 3, inc in last st. (7 sc)
Fasten off, leaving a long tail. Do not stuff.
Owl Ear Assembly
Pin the flat ear base to the top of the hat crown, approximately 2 inches apart and 1 inch from the center of the crown. Sew in place. Attach the ear tuft on top of each ear base, positioning the fringe tips to point upward and outward.
Owl Face Assembly
Pin the two eye units to the front of the hat. Position each eye center approximately 3.5 inches up from the brim edge and 1.25 inches apart from center to center. Sew firmly in place.
Pin the beak between and just below the eyes, pointing downward. The top edge of the beak should sit at the level of the eye centers. Sew in place.
Optional: Using MC yarn and a yarn needle, embroider 6 to 8 straight stitches radiating outward from each eye to suggest feather detail.
Raccoon Hat Embellishments
Raccoon Mask
With CC1 (black), ch 18.
Row 1: Sc in second ch from hook and in each ch across. (17 sc)
Row 2: Ch 1, turn. Inc in first st, sc 15, inc in last st. (19 sc)
Row 3: Ch 1, turn. Sc across. (19 sc)
Row 4: Ch 1, turn. Inc in first st, sc 2, inc, sc 5, inc, sc 5, inc, sc 2, inc in last st. (24 sc)
Row 5: Ch 1, turn. Sc across. (24 sc)
Fasten off CC1.
Inner Mask Highlight (Make 2)
With CC2 (white), make a magic ring.
Rnd 1: 6 sc into ring. (6 sc)
Rnd 2: Inc in each st. (12 sc)
Rnd 3: (Sc 1, inc) rep 6 times. Join with sl st. Fasten off. (18 sc)
Sew one white circle onto each half of the black mask, leaving the center bridge clear.
Eyes: Embroider a horizontal oval approximately 0.5 inches wide in the center of each white circle using black yarn, or insert 12 mm black safety eyes before sewing to the mask.
Raccoon Nose
With CC1 (black), make a magic ring.
Rnd 1: 4 sc into ring. (4 sc)
Rnd 2: Inc in each st. Join. Fasten off. (8 sc)
Sew centered at the bottom of the mask.
Raccoon Ears (Make 2)
Outer ear with MC (gray):
Make a magic ring.
Rnd 1: 6 sc into ring. (6 sc)
Rnd 2: Inc in each st. (12 sc)
Rnd 3: (Sc 1, inc) rep 6 times. Fasten off, leaving a tail. (18 sc)
Inner ear with CC1 (black):
Make a magic ring.
Rnd 1: 6 sc into ring. (6 sc)
Rnd 2: Inc in each st. Join. Fasten off, leaving a tail. (12 sc)
Sew the black inner ear onto the gray outer ear. Attach finished ears to hat crown approximately 2.5 inches apart.
Raccoon Face Placement
Position the mask on the hat front with the bottom edge approximately 3.5 inches up from the brim. Sew all edges securely. Sew the nose below the mask center.
Deer Hat Embellishments
Deer Antlers (Make 2)
With CC3 (dark brown), ch 8.
Row 1: Sc in second ch from hook and in each ch to end. (7 sc)
Row 2: Turn, ch 1, sc 5. Leave 2 sts unworked to begin the branch shape. (5 sc)
Row 3: Turn, ch 1, sc in each st across. (5 sc)
Row 4: Turn, ch 1, sc 3. (3 sc)
Row 5: Turn, ch 1, sc 3. (3 sc)
Fasten off.
Rejoin yarn at the base of Row 2 on the unworked 2 stitches. Work 3 sc across those stitches and 1 chain space to form a short side branch. Fasten off.
Pin antlers to hat top approximately 2 inches from center, angled outward. Sew securely.
Deer Ears (Make 2 outer, 2 inner)
Outer ear with MC (tan):
Ch 5.
Row 1: Sc in second ch from hook and in next 3 ch. (4 sc)
Row 2: Turn, ch 1, inc, sc 2, inc. (6 sc)
Row 3: Turn, ch 1, inc, sc 4, inc. (8 sc)
Row 4: Turn, ch 1, sc across. (8 sc)
Row 5: Turn, ch 1, sc2tog, sc 4, sc2tog. (6 sc)
Row 6: Turn, ch 1, sc2tog, sc 2, sc2tog. (4 sc)
Fasten off.
Inner ear with CC2 (pink):
Repeat Rows 1 through 4, stopping after Row 4. Fasten off.
Sew pink inner ear onto tan outer ear, aligning bottom edges. Fold the bottom slightly inward and sew beside each antler base.
Deer Face
With CC1 (cream), make a magic ring.
Rnd 1: 6 sc into ring. (6 sc)
Rnd 2: Inc in each st. (12 sc)
Rnd 3: (Sc 1, inc) rep 6 times. (18 sc)
Rnd 4: (Sc 2, inc) rep 6 times. (24 sc)
Rnd 5: (Sc 3, inc) rep 6 times. (30 sc)
Rnd 6: (Sc 4, inc) rep 6 times. Join with sl st. Fasten off. (36 sc)
Sew to front center of hat with the top approximately 5 inches up from the brim.
Deer Spots
With CC1, make 6 to 8 tiny circles: magic ring, 5 sc into ring, join, fasten off. (5 sc each)
Scatter and sew across the upper front of the hat.
Deer Eyes and Nose
Insert 12 mm brown safety eyes through the cream face oval, spaced approximately 1.5 inches apart. Or embroider using CC4 (black) and CC3 (dark brown).
Using dark brown, embroider 3 to 4 short eyelash stitches fanning from the upper outer corner of each eye.
For the nose, with CC3 (dark brown), make a magic ring, work 4 sc into ring, join, fasten off. Sew to lower center of cream face.
Squirrel Hat Embellishments
Squirrel Ears (Make 2)
With MC (rust), ch 4.
Row 1: Sc in second ch from hook, sc 2. (3 sc)
Row 2: Turn, ch 1, inc, sc 1, inc. (5 sc)
Row 3: Turn, ch 1, inc, sc 3, inc. (7 sc)
Row 4: Turn, ch 1, sc across. (7 sc)
Row 5: Turn, ch 1, sc2tog, sc 3, sc2tog. (5 sc)
Row 6: Turn, ch 1, sc2tog, sc 1, sc2tog. (3 sc)
Fasten off.
Using CC1 (tan), embroider a smaller almond shape of satin stitch onto the center of each ear.
Fringe: Cut 4 lengths of MC approximately 1.5 inches long. Fold in half and pull 2 loops through the tip of each ear as a fringe tuft.
Attach ears to hat crown approximately 2 inches from center on each side.
Squirrel Face Center
With CC1 (tan), make a magic ring.
Rnd 1: 6 sc into ring. (6 sc)
Rnd 2: Inc in each st. (12 sc)
Rnd 3: (Sc 1, inc) rep 6 times. (18 sc)
Rnd 4: (Sc 2, inc) rep 6 times. Join with sl st. Fasten off. (24 sc)
Sew to front center of hat, positioned approximately 3.5 to 4 inches up from the brim.
Squirrel Eyes and Nose
Insert 10 mm black safety eyes through the hat, approximately 0.75 inches above the tan face circle and 1.25 inches apart. Or embroider using CC3 (black).
For the nose, with CC2 (medium brown), make a magic ring, work 4 sc into ring, join, fasten off. Sew to center of tan face circle.
Squirrel Acorn
Acorn body with CC2 (medium brown):
Make a magic ring.
Rnd 1: 6 sc into ring. (6 sc)
Rnd 2: Inc in each st. (12 sc)
Rnd 3: (Sc 1, inc) rep 6 times. (18 sc)
Rnd 4: Sc in each st. (18 sc)
Rnd 5: (Sc 1, sc2tog) rep 6 times. (12 sc)
Stuff lightly with yarn scraps.
Rnd 6: (Sc2tog) rep 6 times. (6 sc)
Pull tail through remaining 6 sts and cinch closed. Fasten off.
Acorn cap with CC1 (tan):
Make a magic ring.
Rnd 1: 6 sc into ring. (6 sc)
Rnd 2: Inc in each st. (12 sc)
Rnd 3: Working in BLO: sc in each st. (12 sc)
Rnd 4: Sc in each st. Join with sl st. Fasten off, leaving a long tail. (12 sc)
Place cap over top of acorn body and sew in place. Add a short stem by cutting a 3 inch length of CC2, folding in half, and pulling through the top center of the cap as a loop.
Sew completed acorn to lower center of tan face circle.
Size Customization
For a larger adult head (up to 24 inches):
After Round 12, add one more increase round: (Sc 11, inc) rep 6 times. (78 sc). Continue the body with 78 sc per round. For the brim, work (Sc 5, inc) rep 13 times for 91 sc, then (Sc 6, inc) rep 13 times for 104 sc, then (Sc 7, inc) rep 13 times for 117 sc. Adjust to 120 sc if needed and work 20 scallop units.
For an older child (20 to 21 inch head):
Stop crown increases after Round 10 (60 sc). Work the body with 60 sc per round for 14 rounds. For the brim, work (Sc 4, inc) rep 12 times for 72 sc, then (Sc 5, inc) rep 12 times for 84 sc, then (Sc 6, inc) rep 12 times for 96 sc. Work 16 scallop units.
Adding height: Each additional round adds approximately 0.2 inches (0.5 cm).
Finishing and Blocking
Weave in all yarn ends securely using a yarn needle. For ends near appliques, weave through several stitches in different directions.
For wet blocking, soak the completed hat in cool water for 10 minutes. Gently squeeze out excess water without wringing. Place the hat on a hat form, an inflated balloon, or a bowl of the appropriate size. Shape the brim flat and allow to dry completely.
You Did It!
Thank you so much for choosing this woodland creatures bucket hat crochet pattern. I genuinely hope you love making these as much as I loved designing them. Whether you make just one favorite animal or crochet the whole collection, you are going to have the cutest hat in the forest.
If you make one, I would absolutely love to see it! Tag me on Instagram or share a photo in my Facebook group. Seeing your finished projects is the best part of sharing patterns.
If you loved this pattern, go ahead and save it to your Pinterest boards so you can find it again when you are ready to make the next animal. And please drop a comment below if you give it a try. I read every single one and they always make my day!