
I don’t know about you, but I absolutely melt when I see a newborn snuggled up in something handmade. There’s just something about tiny humans wrapped in cozy yarn that makes my heart do a little flip.
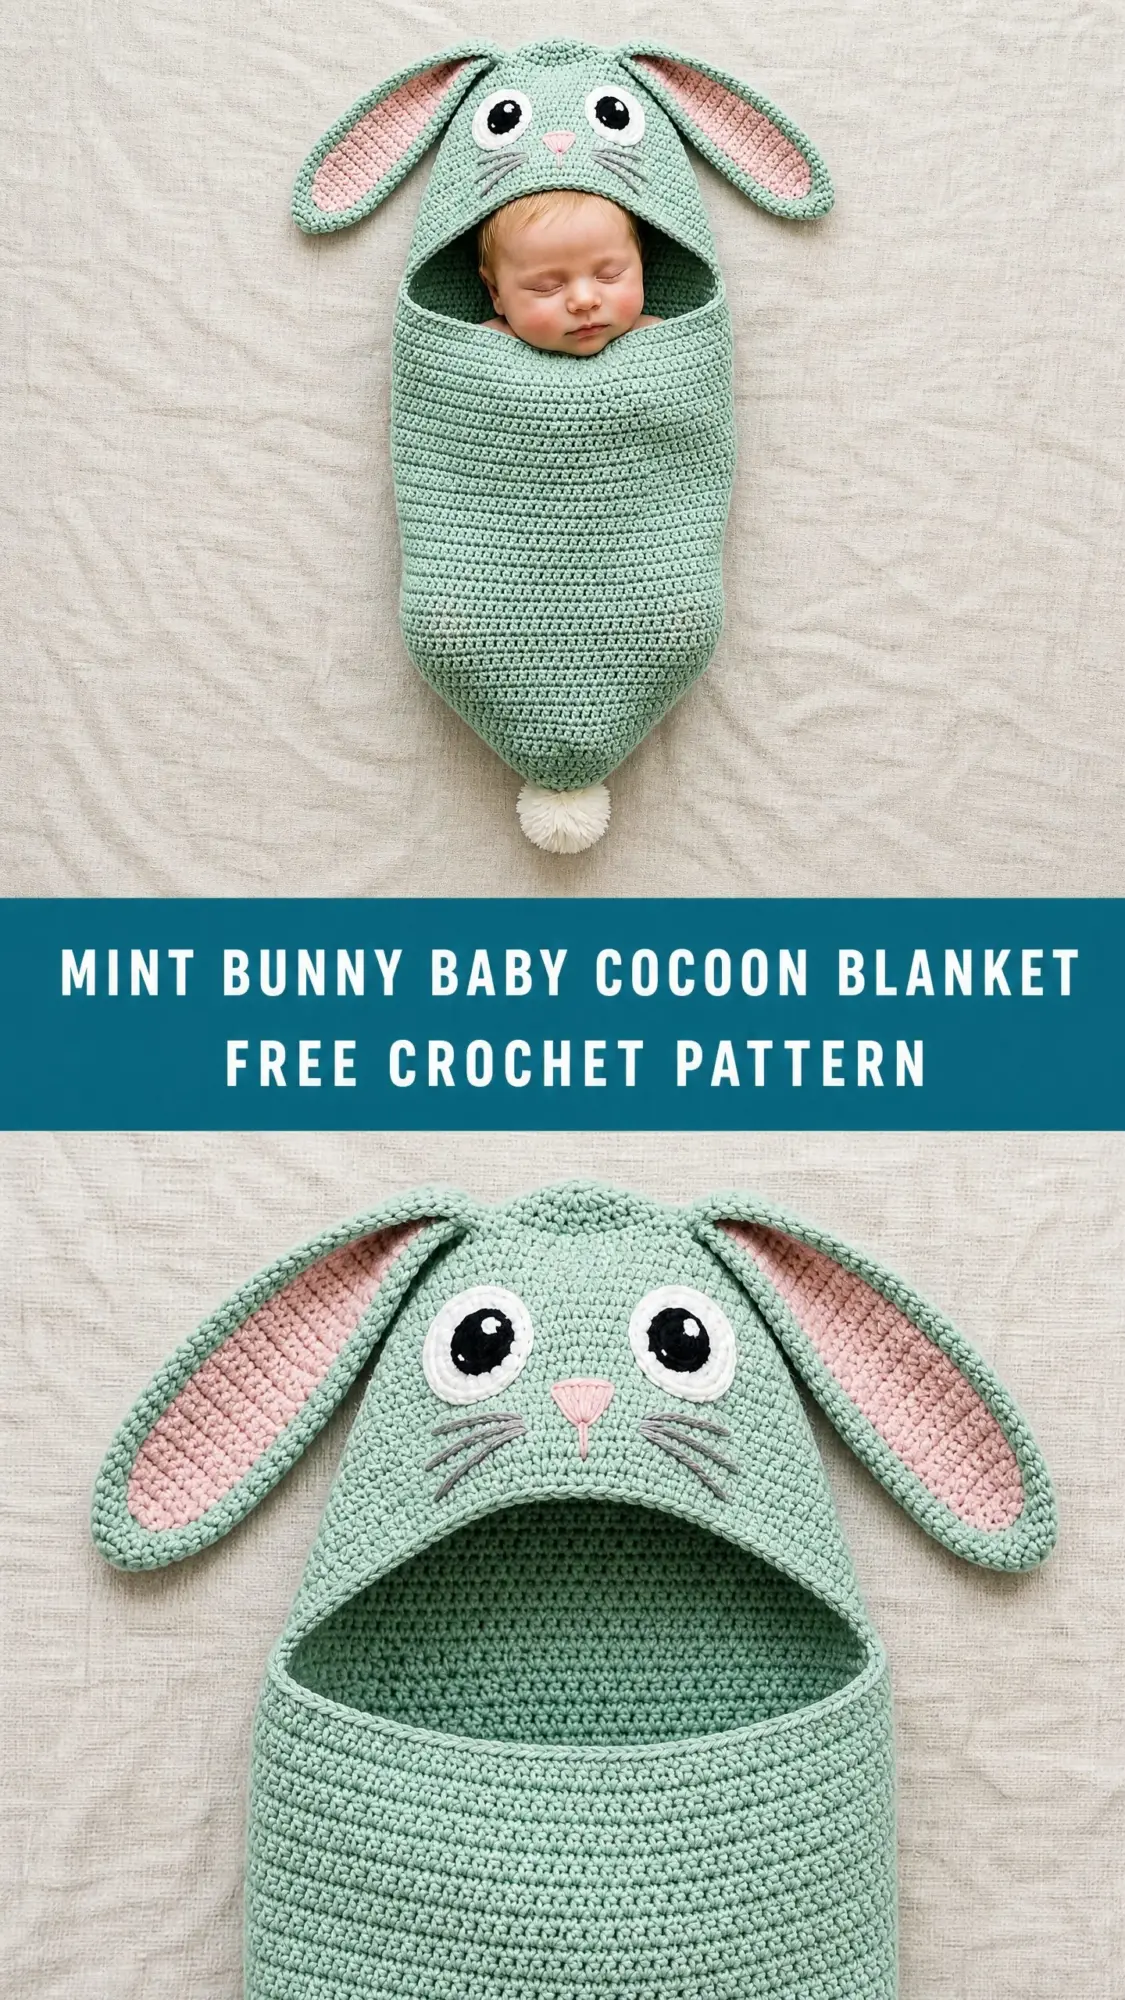
This bunny cocoon has been living rent-free in my head ever since I first sketched it out. The floppy ears, the sweet embroidered face, that fluffy pompom tail at the bottom. It’s the kind of project that makes people gasp when they see it, and yet it’s built entirely on single crochet stitches.
If you’ve been looking for a showstopper baby gift that looks way more complicated than it actually is, you’ve found it. Let me walk you through every single step.
About This Crochet Pattern
This mint bunny baby cocoon is worked from the bottom up in continuous rounds, creating a snug pod shape that cradles a newborn beautifully. The construction starts with a small oval at the base, expands into a cylindrical tube, then widens gently toward the opening where the hood attaches.
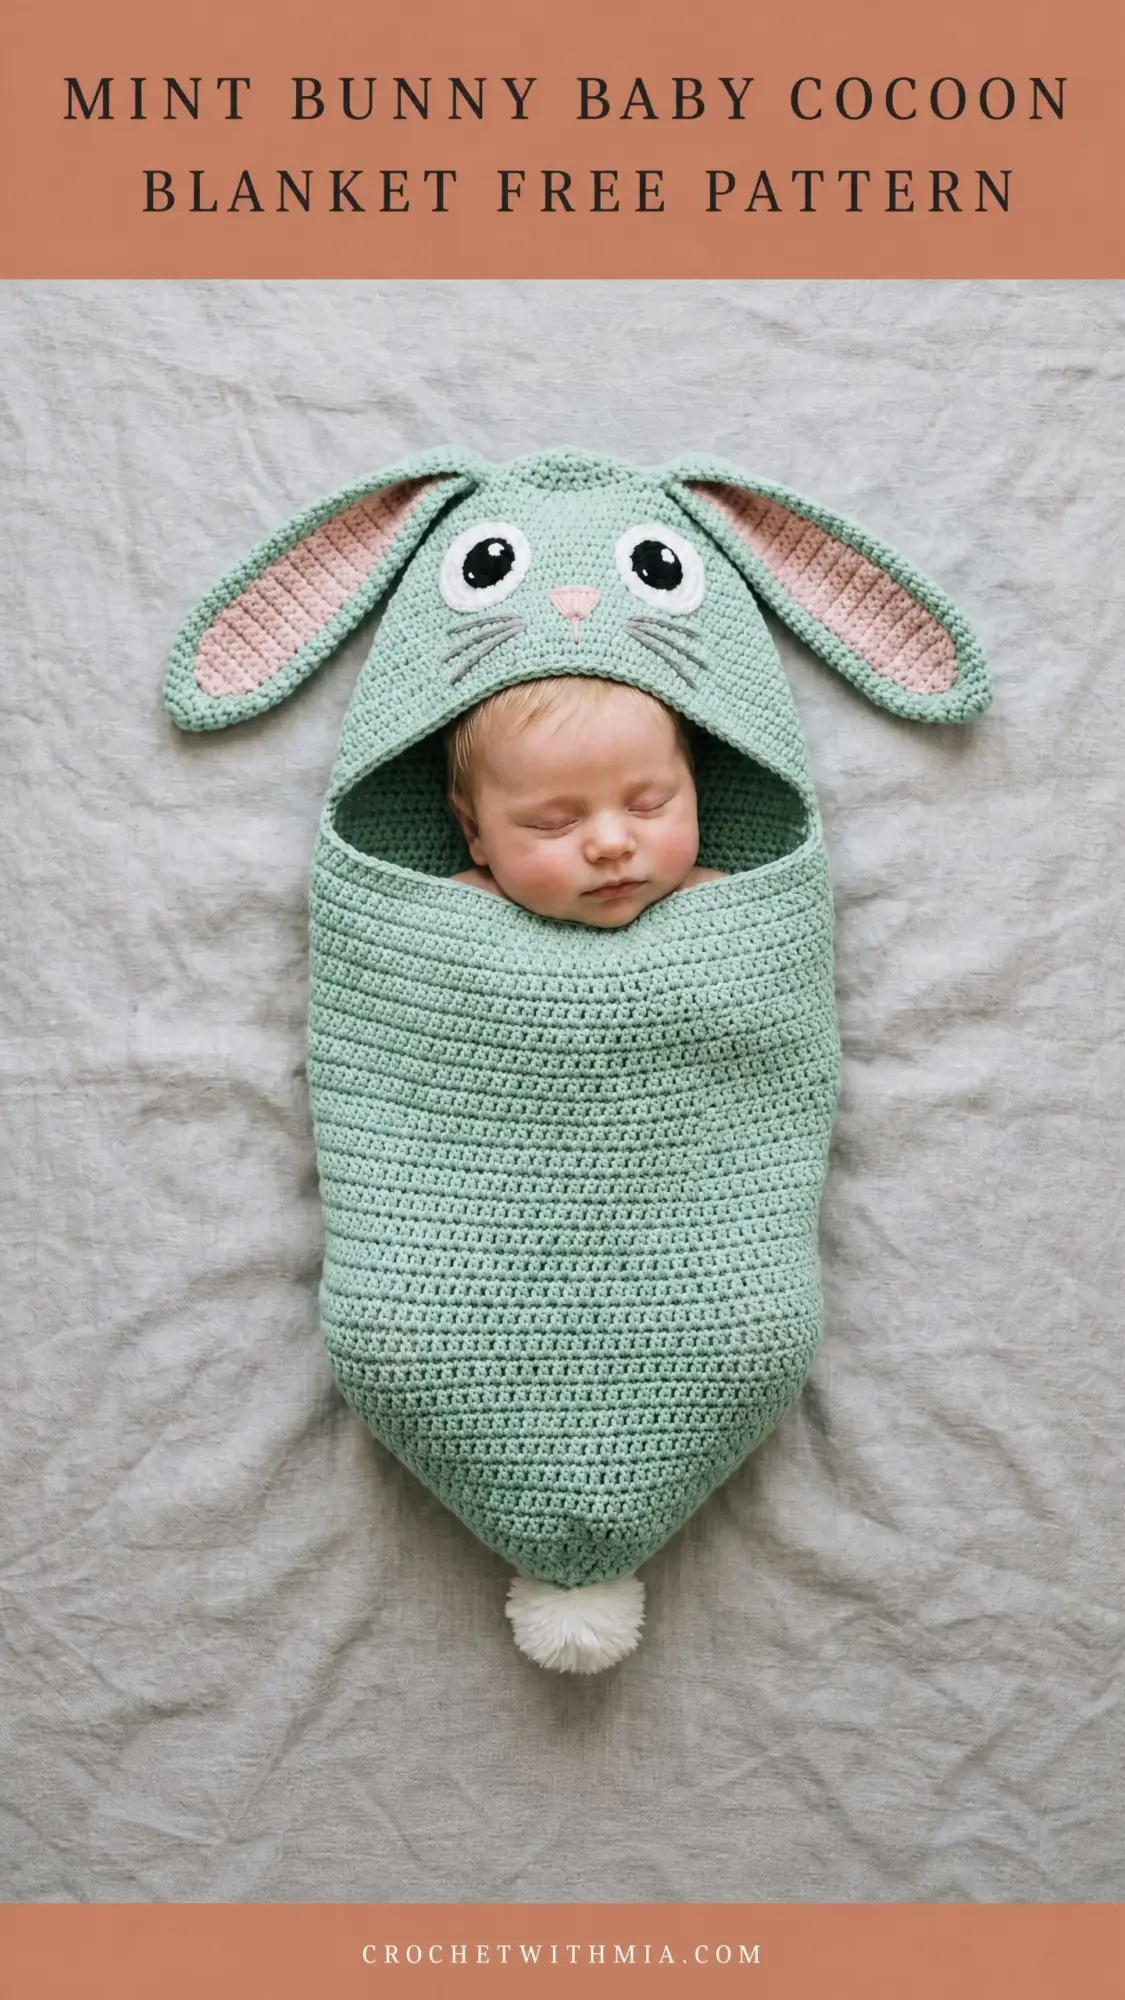
The hood is made separately and features those signature long floppy bunny ears with dusty rose inner linings. You’ll add embroidered eyes, a tiny pink nose, and whiskers to bring the face to life. The whole thing finishes with a fluffy white pompom tail at the very bottom.
This cocoon is perfect for newborn photography sessions or everyday snuggling. The dense single crochet fabric creates a warm, stretchy material that’s gentle against delicate baby skin.
Skill Level
I’d call this an intermediate crochet pattern. You’ll need to be comfortable working in continuous rounds, making color changes for the ear linings, and shaping with increases and decreases. The embroidery is basic, just straight stitches and filled shapes.
No complex stitches here. The entire project uses single crochet throughout. But pay close attention to your stitch counts, especially during the shaping sections. A stitch marker will be your best friend.
How Long Does This Take?
Plan for about 12 to 16 hours of work if you’re an experienced crocheter moving at a comfortable pace. Add extra time for the embroidery and finishing details. This isn’t a quick weekend project, but the result is absolutely worth the investment.
Finished Measurements
Cocoon body: approximately 20 inches long by 11 inches wide at the widest point (51 cm by 28 cm)
Hood circumference: approximately 14 inches (35.5 cm), sized for newborn to 3 months
Ear length: approximately 4.5 inches (11.5 cm) each
This size fits a newborn up to approximately 3 months, or about 12 pounds (5.4 kg).
Materials You’ll Need
Yarn
Main Color (MC): Soft mint or sage green, approximately 600 yards (550 m) of worsted weight yarn (weight category 4)
Color A (CA): Dusty rose or blush pink, approximately 60 yards (55 m) of worsted weight yarn, for the ear linings
Color B (CB): White or cream, approximately 20 yards (18 m) of worsted weight yarn, for the pompom tail
Small amounts of black and gray worsted weight yarn or embroidery floss for the facial features
Hook
US size H-8 / 5.0 mm crochet hook
Notions
Yarn Recommendations
Lion Brand Pound of Love works beautifully here. It’s worsted weight, 100% acrylic, machine washable, and available in a pale mint colorway. Very budget-friendly when you need this much yardage.
Paintbox Yarns Simply DK (used at tighter tension) or their worsted weight Cotton Mix gives excellent stitch definition. Available in both sage and blush tones.
Bernat Softee Baby is another lovely option, though it runs lighter than true worsted. If you use this yarn, swatch carefully and consider dropping to a US G-6 / 4.0 mm hook. You may need to add extra rounds to reach the target size.
Any smooth, washable worsted weight yarn will work well. Avoid fuzzy or heavily textured yarns since they’ll obscure your stitch definition and make the embroidery tricky.
Gauge
17 single crochet stitches by 20 rows = 4 inches by 4 inches (10 cm by 10 cm), worked in continuous rounds with a US H-8 / 5.0 mm hook and worsted weight yarn, after blocking.
Gauge matters here. This cocoon needs to be snug enough to feel cozy but roomy enough to be comfortable. Please swatch before starting. Adjust your hook size up or down as needed.
Abbreviations Used
blo = back loop only
ch = chain
flo = front loop only
inc = increase (work 2 sc in the same stitch)
MC = main color (mint)
CA = color A (blush pink)
CB = color B (white/cream)
MR = magic ring
pm = place marker
rem = remaining
rep = repeat
rnd = round
rs = right side
sc = single crochet
sc2tog = single crochet two together (a decrease)
sl st = slip stitch
sp = space
st(s) = stitch(es)
ws = wrong side
Special Stitches Explained
Magic Ring (MR)
Make a loop by crossing the working yarn over itself. Insert your hook into the loop, yarn over and pull up a loop, yarn over and draw through to make a starting chain. Work the required number of stitches into the ring, then pull the tail to close the ring tightly.
If magic rings stress you out, you can substitute by chaining 2 and working your stitches into the first chain instead.
Single Crochet Two Together (sc2tog)
This is your decrease stitch. Insert your hook into the next stitch and pull up a loop (2 loops on hook). Insert your hook into the following stitch and pull up a loop (3 loops on hook). Yarn over and draw through all 3 loops on hook. You’ve just turned 2 stitches into 1.
Continuous Rounds
Unlike traditional joined rounds, you won’t slip stitch and chain at the end of each round here. Just keep spiraling. Place a stitch marker in the first stitch of each round and move it up as you go. This helps you track where your rounds begin.
Color Joining
When switching colors, complete the last stitch of the previous round until 2 loops remain on your hook. Draw the new color through those 2 loops to complete the stitch, then continue with the new color.
Pattern Notes
The cocoon body is worked from the bottom up in continuous rounds using the main color throughout.
The hood is worked separately in continuous rounds, then seamed to the open top of the body.
The ears are worked separately in two layers (one mint, one pink), slip stitched together around the edges, then attached to the hood.
The pompom tail is made separately and attached to the bottom exterior of the cocoon.
All rounds are worked with the right side facing out unless noted otherwise.
Do not turn at the end of rounds in the body or hood sections unless specifically directed.
Stitch counts appear in parentheses at the end of each round.
Add facial embroidery after completing the hood but before attaching it to the body.
Crochet Pattern Instructions
Part 1: Cocoon Body
The body begins at the bottom with a small oval, then expands into a full tube.
Bottom Oval Foundation
Round 1: Using MC, make a MR. Work 6 sc into the ring. Pull tail to close ring. Do not join. Place marker in first stitch. (6 sc)
Round 2: Work 2 sc in each st around. (12 sc)
Round 3: (Sc 1, inc) repeat 6 times around. (18 sc)
Round 4: (Sc 2, inc) repeat 6 times around. (24 sc)
Round 5: (Sc 3, inc) repeat 6 times around. (30 sc)
Round 6: (Sc 4, inc) repeat 6 times around. (36 sc)
Round 7: (Sc 5, inc) repeat 6 times around. (42 sc)
Round 8: (Sc 6, inc) repeat 6 times around. (48 sc)
Checkpoint: After round 8, your oval bottom should measure approximately 3.5 inches (9 cm) in diameter. The piece should lie flat.
Lower Body Tube
Rounds 9 through 25: Sc in each st around. Work 17 rounds even. (48 sc each round)
Checkpoint: After round 25, the cocoon body from the bottom point should measure approximately 7 inches (18 cm) tall. The tube should be snug and cylindrical.
Upper Body Expansion
Round 26: (Sc 7, inc) repeat 6 times around. (54 sc)
Rounds 27 through 30: Sc in each st around. Work 4 rounds even. (54 sc each round)
Round 31: (Sc 8, inc) repeat 6 times around. (60 sc)
Rounds 32 through 36: Sc in each st around. Work 5 rounds even. (60 sc each round)
Round 37: (Sc 9, inc) repeat 6 times around. (66 sc)
Rounds 38 through 43: Sc in each st around. Work 6 rounds even. (66 sc each round)
Round 44: (Sc 10, inc) repeat 6 times around. (72 sc)
Rounds 45 through 52: Sc in each st around. Work 8 rounds even. (72 sc each round)
Checkpoint: After round 52, the cocoon body should measure approximately 18 to 19 inches (46 to 48 cm) from the bottom. The widest circumference should measure approximately 17 inches (43 cm). The opening at the top should be fully open and circular.
Fasten off with a slip stitch into the next stitch to close the final round cleanly. Leave a long tail of approximately 24 inches (61 cm) for seaming the hood to the body later. Set body aside.
Part 2: Hood
The hood is a deep rounded cap worked in continuous rounds. The circumference matches the body opening.
Round 1: Using MC, make a MR. Work 6 sc into the ring. Pull tail to close. (6 sc)
Round 2: Work 2 sc in each st around. (12 sc)
Round 3: (Sc 1, inc) repeat 6 times around. (18 sc)
Round 4: (Sc 2, inc) repeat 6 times around. (24 sc)
Round 5: (Sc 3, inc) repeat 6 times around. (30 sc)
Round 6: (Sc 4, inc) repeat 6 times around. (36 sc)
Round 7: (Sc 5, inc) repeat 6 times around. (42 sc)
Round 8: (Sc 6, inc) repeat 6 times around. (48 sc)
Round 9: (Sc 7, inc) repeat 6 times around. (54 sc)
Round 10: (Sc 8, inc) repeat 6 times around. (60 sc)
Round 11: (Sc 9, inc) repeat 6 times around. (66 sc)
Round 12: (Sc 10, inc) repeat 6 times around. (72 sc)
Rounds 13 through 23: Sc in each st around. Work 11 rounds even. (72 sc each round)
Checkpoint: After round 23, the hood should measure approximately 7 inches (18 cm) in diameter and approximately 5.5 inches (14 cm) tall from the top. The interior should be deep enough to cradle a newborn head with the hat pulled down to the eyebrows.
Hood Facing Edge
Round 24: Working in back loops only, sc in each st around. This ridge creates a fold line for the facial frame. (72 sc)
Round 25: Sc in each st around. (72 sc)
Round 26: Sc in each st around. (72 sc)
Slip stitch into the next stitch to close the round. Fasten off leaving a 24-inch (61 cm) tail for seaming. Set hood aside.
Part 3: Ears
Each ear consists of one outer panel and one inner panel, slip stitched together. Make 2 outer panels in mint (MC) and 2 inner panels in blush pink (CA).
Outer Ear Panel (make 2, in MC)
Row 1: Chain 9. Sc in 2nd ch from hook and in each ch across. Turn. (8 sc)
Rows 2 through 10: Ch 1, sc in each st across. Turn. (8 sc)
Row 11: Ch 1, sc2tog, sc 4, sc2tog. Turn. (6 sc)
Row 12: Ch 1, sc in each st across. Turn. (6 sc)
Row 13: Ch 1, sc2tog, sc 2, sc2tog. Turn. (4 sc)
Row 14: Ch 1, sc in each st across. Turn. (4 sc)
Row 15: Ch 1, sc2tog, sc2tog. Turn. (2 sc)
Row 16: Ch 1, sc2tog. (1 sc)
Fasten off, leaving a long tail.
Inner Ear Panel (make 2, in CA)
Row 1: Chain 7. Sc in 2nd ch from hook and in each ch across. Turn. (6 sc)
Rows 2 through 7: Ch 1, sc in each st across. Turn. (6 sc)
Row 8: Ch 1, sc2tog, sc 2, sc2tog. Turn. (4 sc)
Row 9: Ch 1, sc in each st across. Turn. (4 sc)
Row 10: Ch 1, sc2tog, sc2tog. Turn. (2 sc)
Row 11: Ch 1, sc2tog. (1 sc)
Fasten off, leaving a long tail.
Ear Assembly
Hold one outer ear panel and one inner ear panel together with wrong sides facing. Center the inner ear on the outer ear (the inner ear is slightly smaller and sits inside the shape of the outer ear).
Using MC and a yarn needle, whip stitch around the outer edges through both layers. Alternatively, place pieces together and single crochet around the edges through both layers using MC, working 3 sc into each corner point to keep edges flat.
The blush lining will be visible on the front facing side. Fasten off and weave in ends. Repeat for the second ear.
Part 4: Facial Embroidery
Before attaching the hood to the body, embroider the face onto the front of the hood.
Eyes
If using safety eyes: Insert the 20 mm or 22 mm safety eyes approximately 1.5 inches (4 cm) apart, centered horizontally on the hood, positioned approximately 2.5 inches (6.5 cm) up from the facing edge. Secure backing washers on the inside.
If embroidering eyes: Using black yarn threaded on a yarn needle, embroider two filled oval shapes approximately 0.75 inches (2 cm) tall by 0.5 inches (1.5 cm) wide, spaced 1.5 inches (4 cm) apart. Add a small white highlight stitch in the upper right of each eye using white yarn.
Nose
Using blush pink yarn or floss, embroider a small upside-down triangle approximately 0.5 inches (1.5 cm) wide at the center of the hood, approximately 1 inch (2.5 cm) below the eye placement.
Whiskers
Using gray yarn or embroidery floss, make 3 long straight stitches radiating outward from each side of the nose, approximately 1 inch (2.5 cm) long each.
Part 5: Assembly
Attaching Hood to Body
Hold the hood and body with right sides facing out and openings aligned. The body has 72 stitches at its top edge. The hood has 72 stitches at its base edge. These match perfectly.
Using the long tail left on the body (or a length of MC threaded on a yarn needle), whip stitch or single crochet the two pieces together around all 72 stitches, matching stitch for stitch.
Position the face to the front of the cocoon opening so the bunny face frames the baby’s face correctly.
Attaching Ears
Fold the base of each ear slightly inward (about 0.25 inches / 0.5 cm on each side) to give a slight cup shape. Pin ears to the top of the hood, one on each side, positioned approximately 1.5 inches (4 cm) apart from center.
Angle them slightly outward and downward as seen in the reference photo. Using MC threaded on a yarn needle, sew through the bottom of each ear and through the hood stitches firmly at least 3 times around the base. Fasten off and weave in ends on the inside of the hood.
Pompom Tail
Using CB white yarn, make a full and fluffy pompom approximately 2 to 2.5 inches (5 to 6.5 cm) in diameter using a pompom maker or cardboard circles. Trim evenly. Tie off securely.
Using the long tail of the pompom, thread onto a yarn needle and insert through the bottom exterior of the cocoon at the center point (the tip of the oval bottom). Pull through and tie securely on the inside. Trim excess tail.
Size Customization Tips
For a 3 to 6 month size: After reaching the starting 48 stitch tube, work 25 rounds even instead of 17 before beginning expansion rounds. Add one additional expansion step after round 44: (sc 11, inc) repeat 6 times for 78 stitches, then work 6 more even rounds. Adjust hood by adding one additional expansion round to 78 stitches (sc 12, inc repeat 6 times) and working the even rounds section up to 12 rounds. The body will measure approximately 22 inches (56 cm) long and 12 inches (30 cm) wide.
For a smaller newborn or preemie size: Work only through round 7 of the bottom oval (42 stitches), then work the tube with no expansion. Work 14 even rounds before seaming. Reduce hood rounds by 2 even rounds. Finished length will be approximately 17 inches (43 cm).
Always adjust ears proportionally if resizing the hood significantly.
Finishing and Blocking Your Bunny Cocoon
Weave in all remaining yarn ends securely using a yarn needle. Bury tails through at least 1 inch of adjacent stitches.
To block, soak the finished cocoon in cool water with a small amount of wool wash or gentle detergent for 15 minutes. Gently press out excess water without wringing. Lay flat on a blocking mat or clean towels.
Shape the cocoon into its natural rounded pod form, gently patting the hood into a smooth dome and positioning the ears upright. Allow to dry completely before use. This may take 24 hours.
Blocking evens the single crochet fabric and softens the yarn for newborn skin contact.
Care Instructions
Machine wash on gentle or delicate cycle in cold water. Place in a mesh laundry bag for extra protection. Tumble dry on low heat or lay flat to dry. Do not iron directly. Do not bleach.
If you used safety eyes, check the washers periodically. If any come loose, remove and replace them, or switch to embroidered eyes.
Final Thoughts on This Crochet Tutorial
This mint bunny baby cocoon crochet pattern is one of those projects that looks incredibly impressive while being totally achievable for anyone comfortable with single crochet. The construction is straightforward, the shaping makes sense once you get going, and the finishing touches bring the whole thing to life.
Whether you’re making this for a baby shower gift, a photography prop, or your own little one, I promise the recipient will absolutely treasure it. There’s nothing quite like a handmade hug for a brand new baby.
Thank you so much for choosing this pattern. I really hope you enjoy making it as much as I enjoyed designing it. If you’d like to share your finished cocoon, I’d love to see it! Tag me on Instagram or post a photo in our Facebook group.
If this pattern made you smile, save it to your Pinterest boards so you can find it again later. And please drop a comment below if you make one. I love seeing what colors and yarn choices you come up with. Happy crocheting!