
I don’t know about you, but I have a serious soft spot for baby items that double as adorable costumes. There’s something about a little one dressed as a woodland creature that just makes my heart melt.
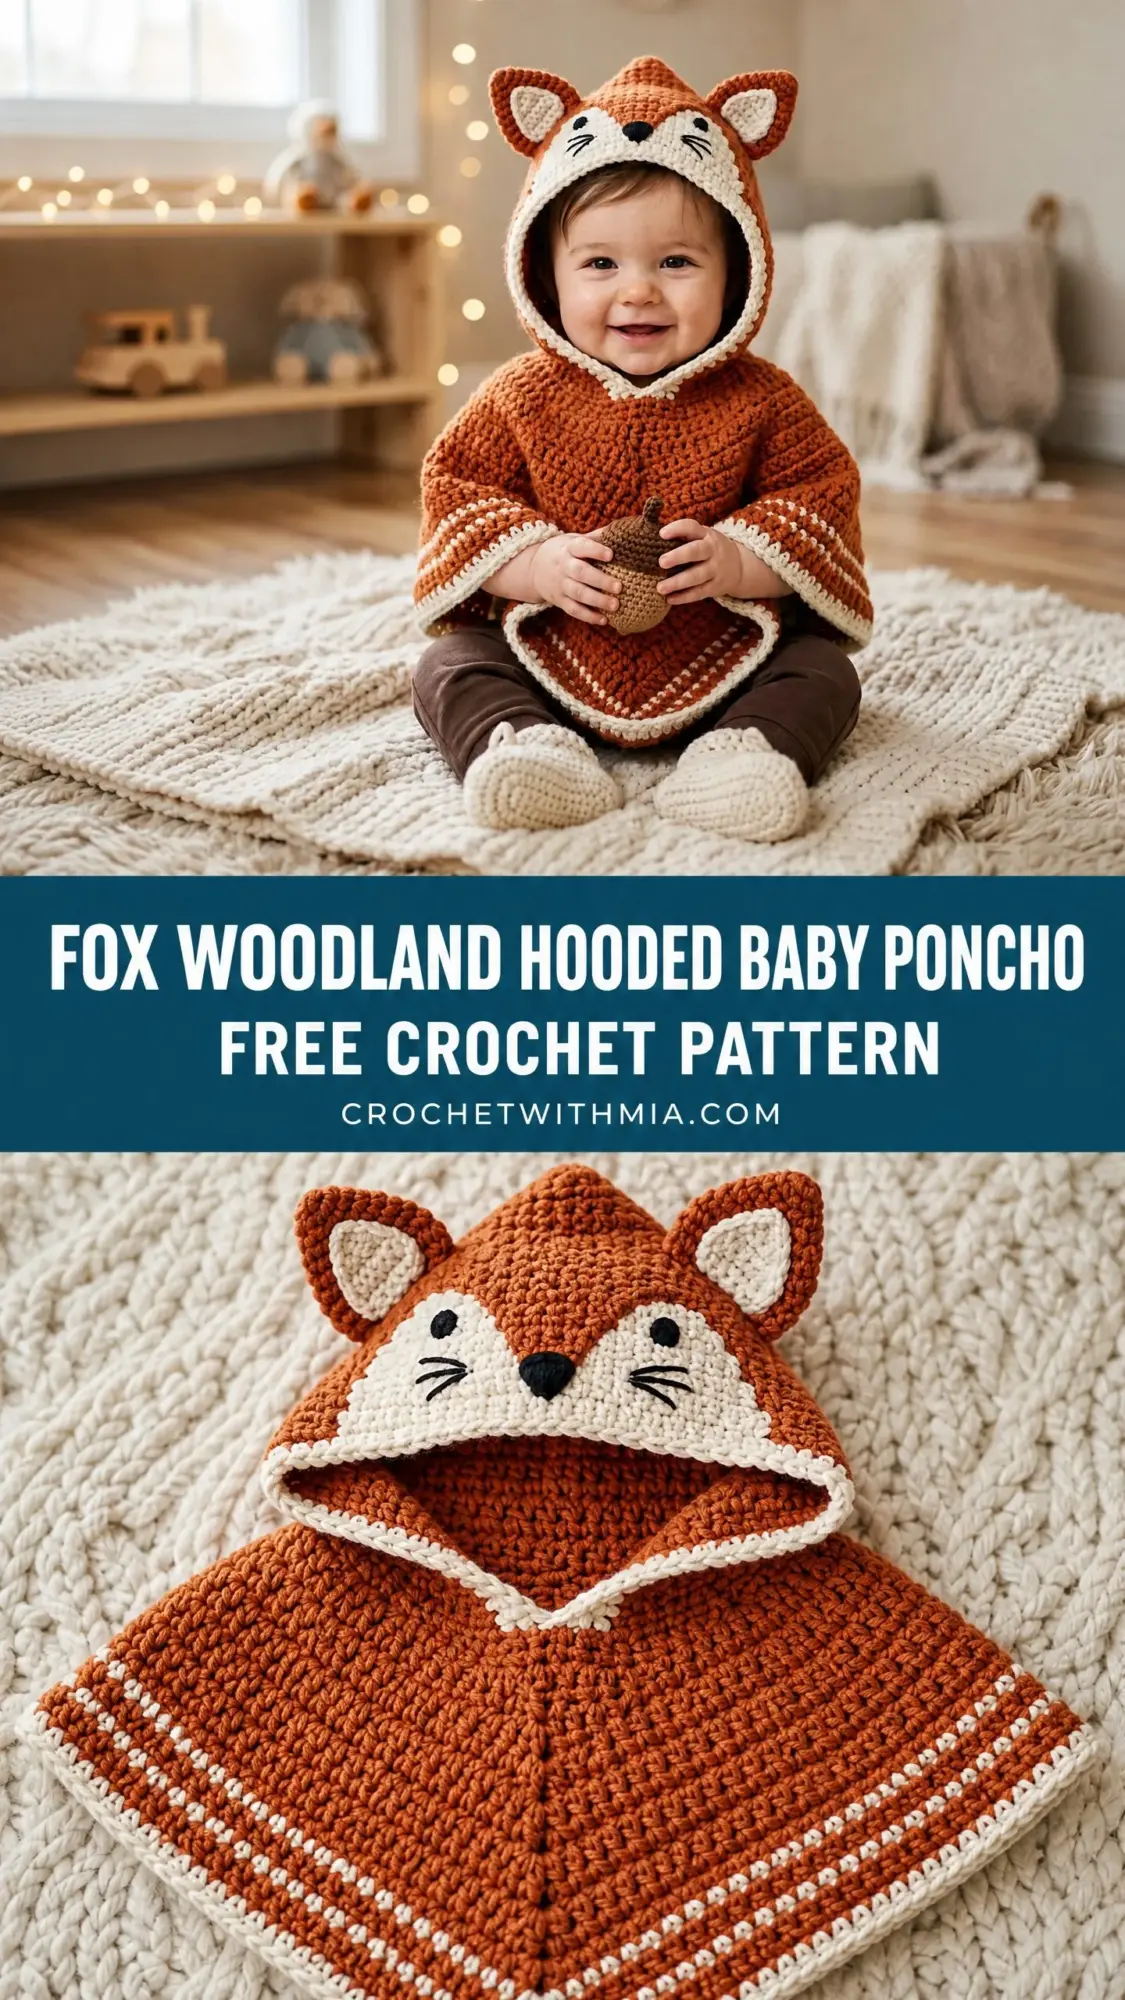
This fox hooded poncho delivers all the cozy warmth of a blanket with the irresistible charm of a forest friend. No complicated costume pieces to wrestle onto a wiggly baby. Just slip it over their head and watch the cuteness unfold.
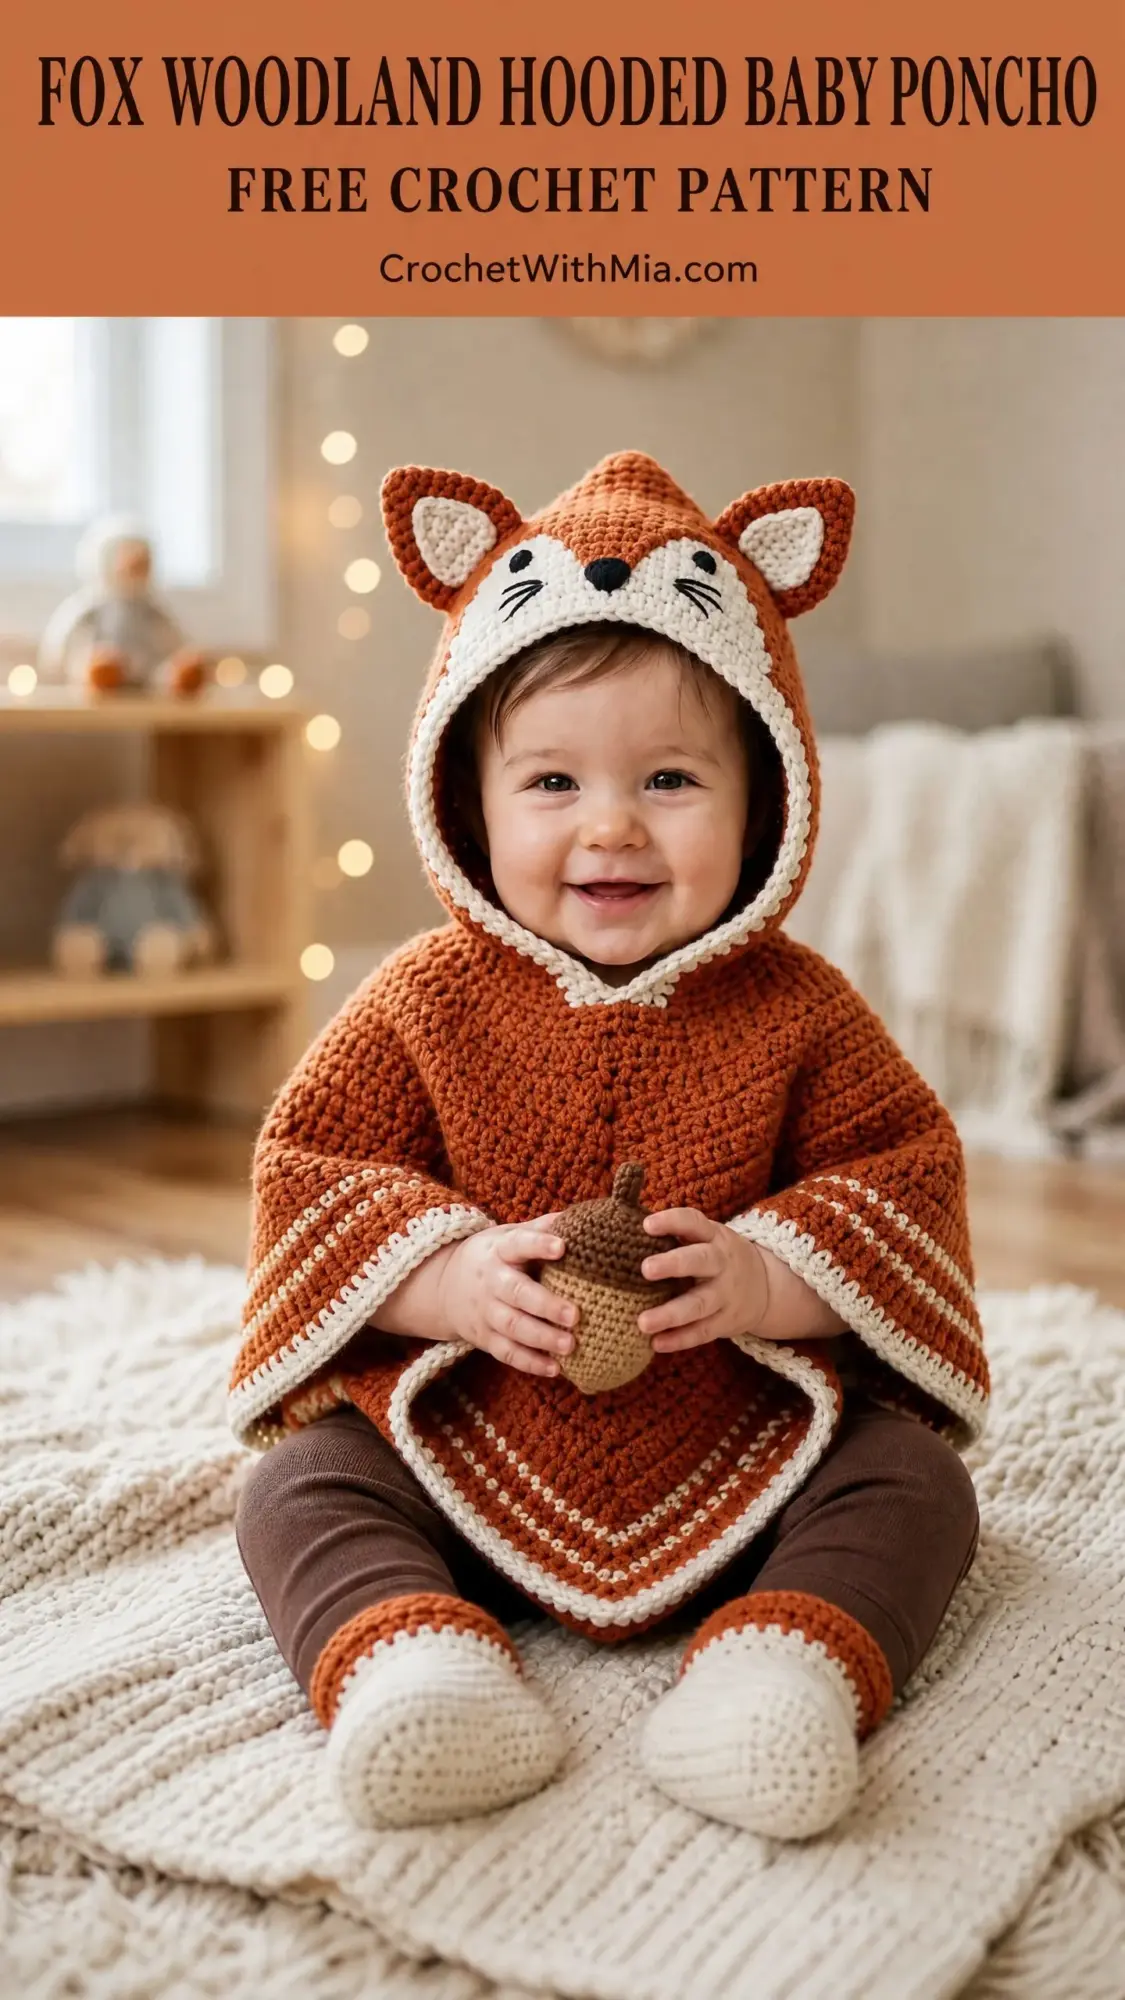
The rust orange body, cream face panel, and those perky pointed ears come together to create a wearable piece that works for everyday warmth or makes the perfect photo op. And honestly? It’s way easier to make than it looks.
Why You’ll Love This Crochet Pattern
This woodland fox poncho hits the sweet spot between impressive and achievable. The construction uses basic single crochet (sc) throughout, which means you’re working one of the most fundamental stitches in crochet over and over. If you can chain and single crochet, you have the skills for this project.
What makes it look so professional is the assembly. You’re creating separate pieces, each one simple on its own, then bringing them together into something that looks like it came from a boutique. The poncho body is just two flat rectangles. The hood builds up from the neck in rounds. The ears are tiny triangles. The magic happens when you combine them.
The finished poncho fits babies aged 6 to 18 months, with clear instructions for sizing up if needed. It works beautifully as a gift for baby showers, first birthdays, or fall photo sessions.
Finished Measurements
Size: 6 to 12 months (with notes for 12 to 18 months)
| Measurement | Size |
|---|---|
| Poncho body width (flat, each panel) | 13 in / 33 cm |
| Poncho body length (shoulder to hem) | 11 in / 28 cm |
| Neck opening | approximately 5 in / 12.5 cm diameter |
| Hood height (back of head to face opening) | 7 in / 18 cm |
| Hood circumference at face opening | approximately 16 in / 40.5 cm |
Materials Needed
Yarn:
Hook: US Size J-10 / 6.0 mm crochet hook
Notions:
Yarn Suggestions
Any worsted weight yarn will work beautifully here. For baby items, I always recommend machine washable acrylics. Parents will thank you.
Lion Brand Pound of Love in Butterscotch and Fisherman gives excellent stitch definition and softness. Paintbox Yarns Simply Aran in Burnt Orange and Champagne White is another fantastic choice. Caron Simply Soft in Autumn Red and Off White offers a lovely drape and budget-friendly price.
Whatever you choose, make a gauge swatch first. I know, I know. But trust me on this one.
Gauge
15 sc x 18 rows = 4 in / 10 cm worked flat in single crochet with a US J-10 / 6.0 mm hook, blocked.
Gauge matters here because the neck opening needs to fit over a baby’s head comfortably. Too tight and it won’t go on. Too loose and it looks sloppy. Make a swatch at least 5 inches square, wash and dry it the way you’ll care for the finished poncho, then measure.
If you’re getting fewer stitches per inch (your work is too loose), go down one hook size. More stitches per inch (too tight)? Go up one hook size.
Abbreviations and Stitch Definitions
Let me walk you through every abbreviation you’ll see in this pattern. If you’re newer to crochet, bookmark this section.
Skill Level
This pattern is rated intermediate. You should be comfortable with working in both rows and rounds, changing colors, seaming pieces together, and basic embroidery. The individual pieces are straightforward, but the construction involves multiple components that need to be assembled thoughtfully.
If you’re an ambitious beginner who has completed a few projects, you can absolutely tackle this. Just take it one section at a time and don’t rush the assembly.
Pattern Notes Before You Begin
Read through these notes before you start. They’ll save you confusion later.
1. The poncho body is two identical flat rectangles seamed at the shoulders, leaving a centered neck opening.
2. All single crochet rows begin with chain 1, turn. The chain 1 does NOT count as a stitch.
3. When changing colors for the hem border, complete the last pull-through of the final stitch in the new color. You can carry the unused color loosely up the side.
4. The hood is worked in joined rounds. Each round ends with a slip stitch to join, then chain 1 to begin the next round. The chain 1 does NOT count as a stitch.
5. Safety eyes must be inserted before the face panel is fully attached. For babies under 3 years old, I strongly recommend embroidering the eyes instead for safety.
6. Stitch counts appear in parentheses at the end of each row or round, like this: (48 sc)
7. The right side of your work is the smooth side of single crochet fabric.
Step-by-Step Crochet Pattern Instructions
Poncho Body: Front Panel
Make 2 identical panels (one becomes the front, one becomes the back).
With Color A and US J-10 / 6.0 mm hook, ch 50.
Row 1 (RS): sc in 2nd ch from hook and in each ch across, turn. (49 sc)
Rows 2 through 50: ch 1, sc in each st across, turn. (49 sc)
After Row 50, do not fasten off. You’ll continue directly to the hem border.
Checkpoint: Your panel should measure approximately 13 in / 33 cm wide and 11 in / 28 cm tall. If your measurements are off by more than half an inch, recheck your gauge.
Hem Border
The striped border creates that polished look you see in the photos. Work this on each panel before seaming them together.
After completing Row 50, rotate your work so you’re looking at the foundation chain edge (the bottom of your rectangle). You’ll work across this edge.
Hem Border Row 1: With Color A, ch 1, sc in each foundation ch st across. (49 sc) Turn.
Hem Border Row 2: Ch 1, sc in each st across. (49 sc) Turn.
Hem Border Row 3: Change to Color B. Ch 1, sc in each st across. (49 sc) Turn.
Hem Border Row 4: Ch 1, sc in each st across. (49 sc) Turn.
Hem Border Row 5: Change to Color A. Ch 1, sc in each st across. (49 sc) Turn.
Hem Border Row 6: Ch 1, sc in each st across. (49 sc) Turn.
Hem Border Row 7: Change to Color B. Ch 1, sc in each st across. (49 sc) Turn.
Hem Border Row 8: Ch 1, sc in each st across. (49 sc) Turn.
Hem Border Row 9: Change to Color A. Ch 1, sc in each st across. (49 sc) Turn.
Hem Border Row 10: Ch 1, sc in each st across. (49 sc)
Fasten off Color A. Weave in ends. Repeat the entire hem border on the second panel.
Seaming the Panels
Lay both panels with right sides facing outward (wrong sides together). Using Color A and your yarn needle, join the top edges (Row 50) as follows:
Left Shoulder: Seam stitches 1 through 13 together. (13 sts seamed)
Neck Opening: Leave stitches 14 through 36 open. This creates your neck hole. (23 sts open)
Right Shoulder: Seam stitches 37 through 49 together. (13 sts seamed)
The sides of the poncho remain open for the draped look shown. If you prefer a closed poncho, seam 2 to 3 inches at each side from the shoulder down.
Hood Construction
The hood builds directly up from the neck opening. First, you’ll create a clean base.
Neck Edge Preparation Round:
With RS facing, join Color A at any point along the neck opening. Work 1 sc in each st around the entire neck circumference. You should have approximately 48 sc total. Join with sl st to first sc. (48 sc)
Adjust by one stitch if needed to achieve exactly 48.
Rnd 1: Ch 1, sc in each st around, join. (48 sc)
Rnd 2: Ch 1, sc in each st around, join. (48 sc)
Rnd 3: Ch 1, [sc in next 7 sts, inc in next st] 6 times, join. (54 sc)
Rnd 4: Ch 1, sc in each st around, join. (54 sc)
Rnd 5: Ch 1, sc in each st around, join. (54 sc)
Rnd 6: Ch 1, [sc in next 8 sts, inc in next st] 6 times, join. (60 sc)
Rnd 7: Ch 1, sc in each st around, join. (60 sc)
Rnd 8: Ch 1, sc in each st around, join. (60 sc)
Rnd 9: Ch 1, [sc in next 9 sts, inc in next st] 6 times, join. (66 sc)
Rnd 10: Ch 1, sc in each st around, join. (66 sc)
Rnd 11: Ch 1, sc in each st around, join. (66 sc)
Rnd 12: Ch 1, [sc in next 10 sts, inc in next st] 6 times, join. (72 sc)
Rnds 13 through 15: Ch 1, sc in each st around, join. (72 sc)
Now you’ll shape the crown with decreases.
Rnd 16: Ch 1, sc in first 33 sts, sc2tog, sc2tog, sc in last 35 sts, join. (70 sc)
Rnd 17: Ch 1, sc in first 32 sts, sc2tog, sc2tog, sc in last 34 sts, join. (68 sc)
Rnd 18: Ch 1, sc in first 31 sts, sc2tog, sc2tog, sc in last 33 sts, join. (66 sc)
Rnd 19: Ch 1, sc in first 30 sts, sc2tog, sc2tog, sc in last 32 sts, join. (64 sc)
Rnd 20: Ch 1, sc in first 29 sts, sc2tog, sc2tog, sc in last 31 sts, join. (62 sc)
Rnd 21: Ch 1, sc in first 28 sts, sc2tog, sc2tog, sc in last 30 sts, join. (60 sc)
Rnd 22: Ch 1, sc in first 27 sts, sc2tog, sc2tog, sc in last 29 sts, join. (58 sc)
Rnd 23: Ch 1, sc in first 26 sts, sc2tog, sc2tog, sc in last 28 sts, join. (56 sc)
Rnd 24: Ch 1, sc in first 25 sts, sc2tog, sc2tog, sc in last 27 sts, join. (54 sc)
Rnd 25: Ch 1, sc in first 24 sts, sc2tog, sc2tog, sc in last 26 sts, join. (52 sc)
Rnd 26: Ch 1, sc in first 23 sts, sc2tog, sc2tog, sc in last 25 sts, join. (50 sc)
Rnd 27: Ch 1, sc in first 22 sts, sc2tog, sc2tog, sc in last 24 sts, join. (48 sc)
Rnd 28: Ch 1, sc in first 21 sts, sc2tog, sc2tog, sc in last 23 sts, join. (46 sc)
Rnd 29: Ch 1, sc in first 20 sts, sc2tog, sc2tog, sc in last 22 sts, join. (44 sc)
Rnd 30: Ch 1, sc in first 19 sts, sc2tog, sc2tog, sc in last 21 sts, join. (42 sc)
Fasten off, leaving a 12 in / 30.5 cm tail. Flatten the remaining opening and seam closed with your yarn needle.
Hood Face Border
With Color B, join at any point around the face opening of the hood.
Rnd 1: Ch 1, sc evenly around the face opening, working approximately 48 sc total. Join with sl st. (48 sc)
Rnd 2: Ch 1, sc in each st around, join. (48 sc)
Fasten off Color B. Weave in ends.
Fox Ears (Make 2)
Outer Ear (Color A): Make 2
Ch 10.
Row 1: sc in 2nd ch from hook and in each ch across, turn. (9 sc)
Row 2: ch 1, sc2tog, sc in next 5 sts, sc2tog, turn. (7 sc)
Row 3: ch 1, sc2tog, sc in next 3 sts, sc2tog, turn. (5 sc)
Row 4: ch 1, sc2tog, sc in next st, sc2tog, turn. (3 sc)
Row 5: ch 1, sc2tog, sc in next st, turn. (2 sc)
Row 6: ch 1, sc2tog. (1 sc)
Fasten off, leaving a 12 in / 30.5 cm tail.
Inner Ear (Color B): Make 2
Ch 7.
Row 1: sc in 2nd ch from hook and in each ch across, turn. (6 sc)
Row 2: ch 1, sc2tog, sc in next 2 sts, sc2tog, turn. (4 sc)
Row 3: ch 1, sc2tog, sc2tog, turn. (2 sc)
Row 4: ch 1, sc2tog. (1 sc)
Fasten off, leaving a tail.
Ear Assembly:
Place one Inner Ear on top of one Outer Ear, centering the smaller triangle. Whip stitch around three sides, leaving the base open. Repeat for the second ear.
Pin both ears to the top of the hood at roughly the 10 o’clock and 2 o’clock positions, about 2 inches apart at their inner bases. Sew securely with Color A.
Fox Face Panel
This cream oval creates the fox’s characteristic light muzzle area.
With Color B, ch 9.
Rnd 1: Starting in 2nd ch from hook, sc in next 7 chs, 3 sc in last ch (bottom curve), working back along other side of foundation ch: sc in next 6 chs, 2 sc in last ch (top curve), join with sl st to first sc. (18 sc)
Rnd 2: Ch 1, inc in first st, sc in next 6 sts, inc in each of next 2 sts, sc in next 6 sts, inc in last st, join. (22 sc)
Rnd 3: Ch 1, inc in first st, sc in next 8 sts, inc in each of next 2 sts, sc in next 8 sts, inc in last st, join. (26 sc)
Rnd 4: Ch 1, inc in first st, sc in next 10 sts, inc in each of next 2 sts, sc in next 10 sts, inc in last st, join. (30 sc)
Rnd 5: Ch 1, sc in each st around, join. (30 sc)
Fasten off, leaving a 15 in / 38 cm tail. Sew the face panel inside the hood’s face opening.
Adding Facial Features
Nose: Position at the bottom center of the face panel, about 0.75 inches up from the bottom edge. Sew a small felt circle or embroider a filled triangle using Color C.
Eyes: Position about 1 inch above the nose and 0.75 inches apart. Insert safety eyes and secure, or embroider small filled circles.
Whiskers: Using Color C, embroider three straight stitches on each side of the nose, about 0.75 inches long, radiating outward.
Blocking Your Finished Poncho
Wet blocking makes a noticeable difference in the finished look. Hand wash in cool water with gentle soap, press out excess water (don’t wring!), and lay flat to dry. Pin the poncho panels to 13 in wide by 11 in long. For the hood, use a balloon inflated to about 17 inches around. Allow 24 hours to dry completely.
Size Adjustments for 12 to 18 Months
For a larger size, make these modifications:
Care Instructions
Machine wash cold on gentle cycle in a mesh bag. Tumble dry low or lay flat. Do not bleach. Before each use, check that safety eyes are secure. If any feel loose, remove them and replace with embroidered eyes.
You Did It!
This fox woodland hooded baby poncho is one of those projects that looks far more complicated than it actually is. Every piece is simple. The magic is in how they come together. Once you’ve made one, you’ll probably want to make a whole forest of woodland creatures.
I hope you enjoyed making this pattern as much as I enjoyed writing it. If you try this project, I would absolutely love to see your finished poncho! Tag me on Instagram or share in my Facebook group. Seeing your makes genuinely brightens my day.
Don’t forget to save this pattern to your Pinterest boards so you can find it when you’re ready to start. And please drop a comment below if you make this little fox. I read every single one and love hearing about your crochet adventures!