
I don’t know about you, but I have a soft spot for baby garments that look like tiny heirlooms. The kind of piece that makes people stop and ask, "Did you actually make that?" This romper is exactly that project.
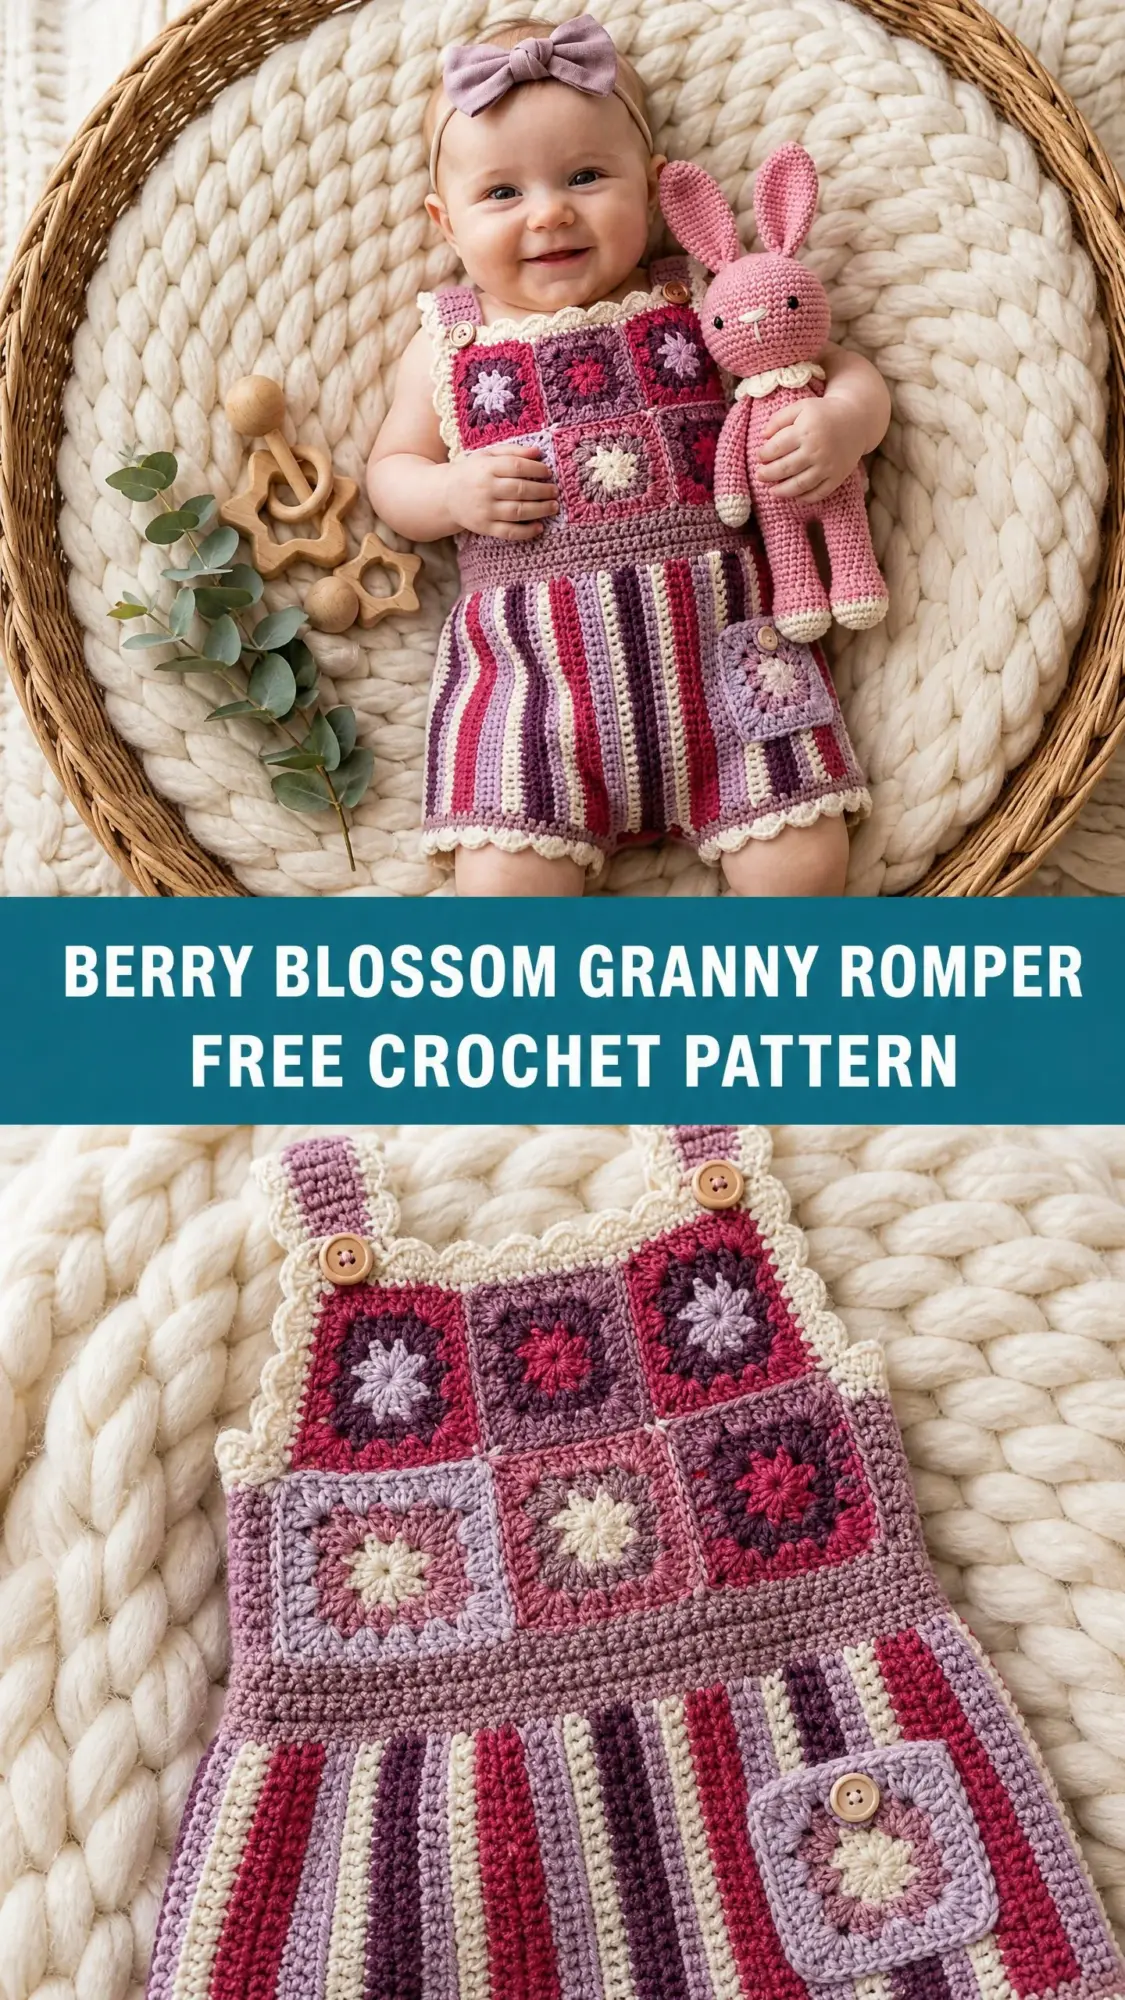
The Berry Blossom Granny Romper combines classic granny squares with cheerful vertical stripes, all finished with delicate picot edging. It looks intricate and impressive, but the construction is more straightforward than you might expect. You are essentially making small squares, a striped rectangle, and then joining everything together.
If you have been wanting to try garment making but feel intimidated by complicated shaping, this is a wonderful place to start. The fit comes from simple geometry rather than tricky decreases. And that adorable little pocket? It is just one more granny square sewn on. Let me walk you through every single step.
About This Crochet Pattern
This baby romper is designed for size 3 to 6 months, with a finished chest circumference of 16 inches and a total length of 10 inches from shoulder to leg hem. The construction happens in stages: you will make individual granny squares and seam them into bodice panels, work a striped rectangle for the skirt and shorts portion, join everything together, then add straps, a pocket, and pretty edging.
The color palette uses five shades: dusty rose, cranberry red, soft lavender, deep plum, and cream. The cream acts as your joining color and edging accent, tying all those berry tones together beautifully.
Skill level: Intermediate. You should be comfortable with basic crochet stitches, joining granny squares, working color changes, and following multi-section instructions. No advanced shaping techniques are required here.
Time estimate: Plan for 12 to 18 hours if you are an experienced crocheter. If this is your first garment project, give yourself 20 to 24 hours and enjoy the process.
Materials You Will Need
Yarn (DK weight, CYCA 3, Light):
Total yardage: approximately 265 yards
Recommended yarn brands: Paintbox Yarns Simply DK works beautifully for this project with excellent stitch definition. Lion Brand Pound of Love is a budget-friendly machine washable option. Scheepjes Catona in sport weight also works if you adjust your gauge.
Hooks:
Notions:
Gauge
Getting gauge right matters for garment fit. With your E-4 hook:
Make a test square and a small swatch before diving into the full project. Adjust your hook size up if your work is too tight, or down if it is too loose.
Abbreviations and Stitch Definitions
Let me break down every abbreviation you will see in this pattern:
Special Stitches
Granny Square (Classic 3-Round Version)
This pattern uses the traditional granny square worked in the round. Each square uses two or three colors as specified in the color combinations below.
Round 1 (Center color):
Make a magic ring. Chain 3 (this counts as your first double crochet). Work 2 double crochet into the ring. Chain 2. Work 3 double crochet into ring, chain 2. Repeat this sequence 2 more times for a total of 4 clusters. Join with slip stitch to top of beginning chain-3. Fasten off. You will have 4 clusters of 3 double crochet and 4 chain-2 corner spaces.
Round 2 (Second color):
Join yarn with slip stitch to any chain-2 corner space. Chain 3 (counts as double crochet). Work 2 double crochet in same space. Chain 2. Work 3 double crochet in same space. This creates your corner. Chain 1. Skip the 3 double crochet cluster. In the next chain-2 corner space, work 3 double crochet, chain 2, 3 double crochet. Chain 1. Continue around all 4 corners. Join with slip stitch to top of beginning chain-3. Fasten off. You now have 8 clusters of 3 double crochet, 4 chain-2 corner spaces, and 4 chain-1 side spaces.
Round 3 (Third color or same as Round 2):
Join yarn with slip stitch to any chain-2 corner space. Chain 3. Work 2 double crochet in same space. Chain 2. Work 3 double crochet in same space. Chain 1. Work 3 double crochet in the chain-1 side space. Chain 1. In the next chain-2 corner space, work 3 double crochet, chain 2, 3 double crochet. Chain 1. Work 3 double crochet in the next chain-1 side space. Chain 1. Continue this pattern around all 4 corners. Join with slip stitch to top of beginning chain-3. Fasten off. You now have 12 clusters, 4 corner spaces, and 8 side spaces.
Picot Edging
This decorative trim finishes all the edges beautifully. Work as follows: single crochet in the next stitch, chain 3, slip stitch in the first chain of that chain-3 you just made. This creates a tiny decorative loop called a picot. Then single crochet in the next stitch. Continue alternating plain single crochet stitches with picot single crochet stitches around your edge.
Joining Granny Squares
Hold two squares with wrong sides facing each other. Using your yarn needle and Color E (cream), whipstitch through both outer loops of each corresponding stitch along the joining edge. This creates a visible cream seam on the right side, which adds to the handmade aesthetic of this design.
Pattern Instructions
Section A: Making the Granny Squares
You will make 18 squares for the bodice plus 1 square for the pocket. Here are the color combinations:
Square Type 1 (make 4): Round 1 in Deep Plum, Round 2 in Cranberry Red, Round 3 in Soft Lavender
Square Type 2 (make 4): Round 1 in Cranberry Red, Round 2 in Dusty Rose, Round 3 in Cream
Square Type 3 (make 4): Round 1 in Soft Lavender, Round 2 in Deep Plum, Round 3 in Dusty Rose
Square Type 4 (make 4): Round 1 in Dusty Rose, Round 2 in Soft Lavender, Round 3 in Cranberry Red
Square Type 5 (make 2): Round 1 in Deep Plum, Round 2 in Cranberry Red, Round 3 in Cream
Pocket square: Make 1 additional square of any type. Type 1 is shown in the design.
Each finished square should measure 2.75 inches.
Assembling the Bodice Panels
Front Bodice Layout (3 squares wide x 3 squares tall):
Back Bodice Layout (3 squares wide x 3 squares tall):
Using the whipstitch method with Color E, join squares into horizontal strips first (3 squares across), then join those strips together vertically. Repeat for both front and back panels. Do not join front to back yet.
Each completed panel should measure approximately 8.25 inches wide x 8.25 inches tall.
Section B: Shoulder Trim on Bodice Panels
Before joining front to back, stabilize the top edges for strap attachment.
Using Color E and your E-4 hook, join with slip stitch to the top right corner of the front bodice panel with right side facing.
Row 1 (top edge only, worked flat):
Chain 1. Single crochet evenly across the top edge of the panel. Work 1 single crochet into each double crochet stitch and 1 single crochet into each chain-1 space. Work 2 single crochet into each chain-2 corner space along the top edge.
Target count: 33 sc
Fasten off. Repeat on back bodice panel top edge. (33 sc each)
Section C: Striped Skirt and Shorts Body
The stripes run horizontally as you work but will appear vertical when the piece is attached to the bodice.
Foundation Chain:
Using Color B and E-4 hook, chain 67.
Row 1 (WS): Single crochet in 2nd chain from hook and in each chain across. Turn. (66 sc)
Row 2 (RS): Chain 1. Single crochet in each stitch across. Change to Color C at end of row. Turn. (66 sc)
Row 3: Chain 1. Single crochet in each stitch across. Turn. (66 sc)
Row 4: Chain 1. Single crochet in each stitch across. Change to Color D at end of row. Turn. (66 sc)
Row 5: Chain 1. Single crochet in each stitch across. Turn. (66 sc)
Row 6: Chain 1. Single crochet in each stitch across. Change to Color A at end of row. Turn. (66 sc)
Row 7: Chain 1. Single crochet in each stitch across. Turn. (66 sc)
Row 8: Chain 1. Single crochet in each stitch across. Change to Color E at end of row. Turn. (66 sc)
Row 9: Chain 1. Single crochet in each stitch across. Turn. (66 sc)
Row 10: Chain 1. Single crochet in each stitch across. Change to Color B at end of row. Turn. (66 sc)
Rows 11-20: Continue the stripe sequence, working 2 rows each of Colors B, C, D, A, and E. Each row maintains 66 sc.
Fasten off after Row 20.
Seaming: With right sides together, slip stitch or whipstitch the two short 20-row side edges together to form a tube. The seam sits at the left side of the garment.
The striped tube should measure 16.5 inches in circumference and 4 inches tall.
Section D: Leg Opening Shaping
Orient the skirt tube so the foundation chain edge is at the top (waist) and Row 20 is at the bottom. Place a stitch marker at the center front bottom edge (33rd stitch from the side seam).
Crotch Bridge:
Using Color B, join yarn with slip stitch to the bottom edge at the center front marker.
Crotch Row 1: Chain 1. Single crochet in next 6 stitches. Turn. (6 sc)
Crotch Row 2: Chain 1. Single crochet in each stitch across. Turn. (6 sc)
Crotch Row 3: Chain 1. Single crochet in each stitch across. Fasten off. (6 sc)
Leg Openings:
You now have 30 stitches on each side of the crotch bridge (66 total minus 6 crotch = 60, divided by 2).
Leg Round 1 (right leg): Join Color B at the right edge of the crotch bridge. Single crochet across 30 stitches along the bottom edge (right half of tube). Single crochet 3 stitches across the short end of crotch bridge. Join with slip stitch to first single crochet. (33 sc)
Leg Round 2: Chain 1. Single crochet in each stitch around. Join with slip stitch. (33 sc)
Leg Round 3: Chain 1. Single crochet in each stitch around. Join with slip stitch. (33 sc)
Fasten off. Repeat for left leg opening.
Section E: Joining Bodice to Skirt Body
First, add stabilizing trim to the bottom edge of each bodice panel: join Color E and work 33 single crochet across the bottom edge of each panel.
Hold the front bodice panel (right side out) against the front of the skirt tube, aligning the bottom edge of the bodice with the top (waist) edge of the skirt.
Using Color E and yarn needle, whipstitch the bottom edge of the front bodice panel to the front top edge of the skirt tube, matching stitches one to one. (33 sts joined)
Repeat to join the back bodice panel to the back top edge of the skirt tube. (33 sts joined)
Closing the side seams: Whipstitch the first 5 rows of each side edge of the front panel to the corresponding 5 rows of the back panel, starting from the waist seam upward. This closes the lower 1.5 inches of each side seam. Leave the remaining upper portion open as the armhole.
Section F: Straps
Make 2 straps.
Using Color C and E-4 hook, chain 7.
Row 1: Single crochet in 2nd chain from hook and in each chain across. Turn. (6 sc)
Rows 2-24: Chain 1. Single crochet in each stitch across. Turn. (6 sc)
Button Loop Row (Row 25): Chain 1. Single crochet in first 2 stitches. Chain 4. Skip next 2 stitches. Single crochet in last 2 stitches. Turn. (4 sc + chain-4 loop)
Row 26: Chain 1. Single crochet in first 2 stitches. Single crochet 4 stitches across the chain-4 loop. Single crochet in last 2 stitches. Turn. (8 sc)
Row 27: Chain 1. Single crochet in each stitch across. Fasten off. (8 sc)
Attaching straps: Sew the straight end of each strap to the top edge of the front bodice panel. Position each strap approximately one square width (2.75 inches) in from each outer edge.
Sew buttons to the top back edge of the back bodice panel at corresponding positions to match the button loops when the straps cross over the shoulders.
Section G: Pocket
Take your pocket granny square and work an edging round to stabilize it.
Pocket Edging Round:
Join Color E to any corner chain-2 space. Chain 1. Work single crochet evenly around all 4 sides of the square (approximately 11 single crochet per side, 3 single crochet in each corner chain-2 space). Join with slip stitch to first single crochet. Fasten off.
Sew the pocket to the lower right front of the skirt body, approximately 0.5 inch above the leg opening edging and 0.5 inch from the right side seam. Sew along the bottom and two side edges only. Leave the top edge open.
Sew one small wooden button to the center top edge of the pocket for decoration.
Section H: Edging
All edging is worked with the D-3 (3.25 mm) hook and Color E.
Neckline and Armhole Edging:
Join Color E to any corner of the opening. Chain 1.
Round 1: Single crochet evenly around the entire opening edge, working 1 single crochet per stitch and 1 single crochet per row end. Join with slip stitch to first single crochet.
Round 2 (Picot Edging): Chain 1. Single crochet in first stitch. Chain 3, slip stitch in first chain of chain-3 to form picot. Single crochet in next stitch. Single crochet in next stitch. Repeat this pattern around. Join with slip stitch. Fasten off.
Repeat for each armhole opening.
Leg Opening Edging:
Join Color E to any stitch around one leg opening.
Round 1: Chain 1. Single crochet in each stitch around. Join with slip stitch. (33 sc)
Round 2: Work picot edging around entire leg opening. Fasten off.
Repeat for second leg opening.
Section I: Finishing and Blocking
Weave in all yarn ends securely, burying them within the fabric.
Blocking: Soak the finished romper in cool water with a drop of gentle soap for 15 minutes. Gently squeeze out water without wringing. Lay flat on a blocking mat or clean towels. Pin to finished measurements. Allow to dry completely away from heat and direct sunlight.
Button attachment: Sew wooden buttons to back bodice at marked positions using a double strand of Color E. Sew through button holes at least 4 times for security. Knot firmly on wrong side and weave in end.
Finished Measurements
Size Customization Tips
For 6-12 months: Increase each granny square to 4 rounds (approximately 3.5 inches). Increase foundation chain to 85 (84 sc). Increase leg openings to 42 stitches each. Lengthen straps to 32 rows before the button loop.
For 0-3 months: Work only 2 rounds per granny square (approximately 2 inches). Build the bodice from a 4×3 grid. Reduce foundation chain to 61 (60 sc). Reduce leg openings to 30 stitches each. Shorten straps to 18 rows.
For longer shorts legs: Add 6 to 10 additional single crochet rounds around each leg opening before adding the picot edging.
Care Instructions
Hand wash in cool water with gentle baby-safe detergent. Do not wring. Lay flat to dry. Do not tumble dry or bleach. Check button security before each use.
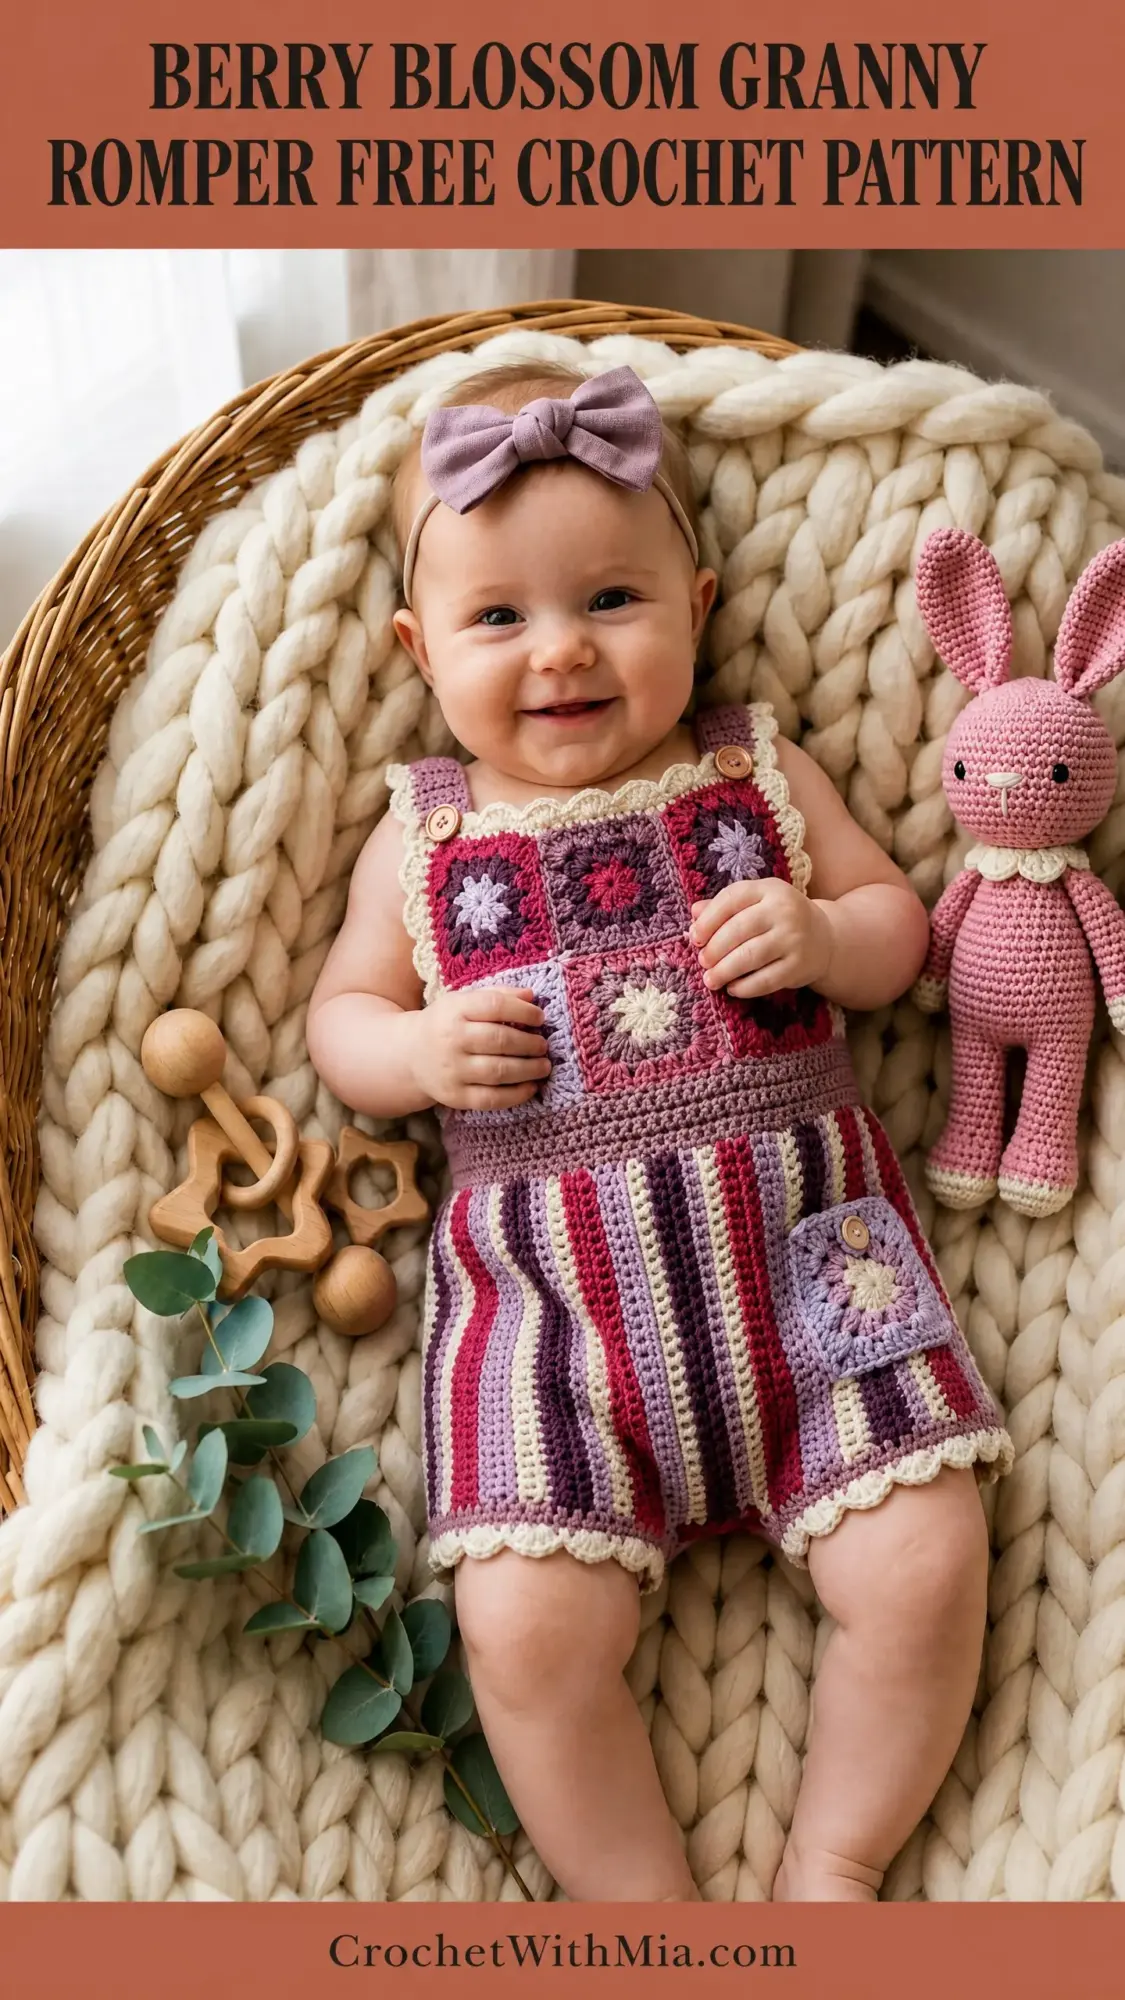
You Did It!
Thank you so much for choosing this pattern for your next crochet project. I hope you enjoy every stitch of this sweet little romper. It makes such a thoughtful handmade gift, and I would absolutely love to see your finished creations. Tag me on Instagram or share in our Facebook group so I can cheer you on!
If this pattern caught your eye, go ahead and save it to your Pinterest boards so you can find it when you are ready to cast on. And if you make one, please leave a comment below. I read every single one, and nothing makes my day quite like seeing your beautiful work come to life.