
A lightweight layering piece that keeps you cool while adding effortless style to any outfit. That’s exactly what this Sage Leaf Trail Vest delivers.
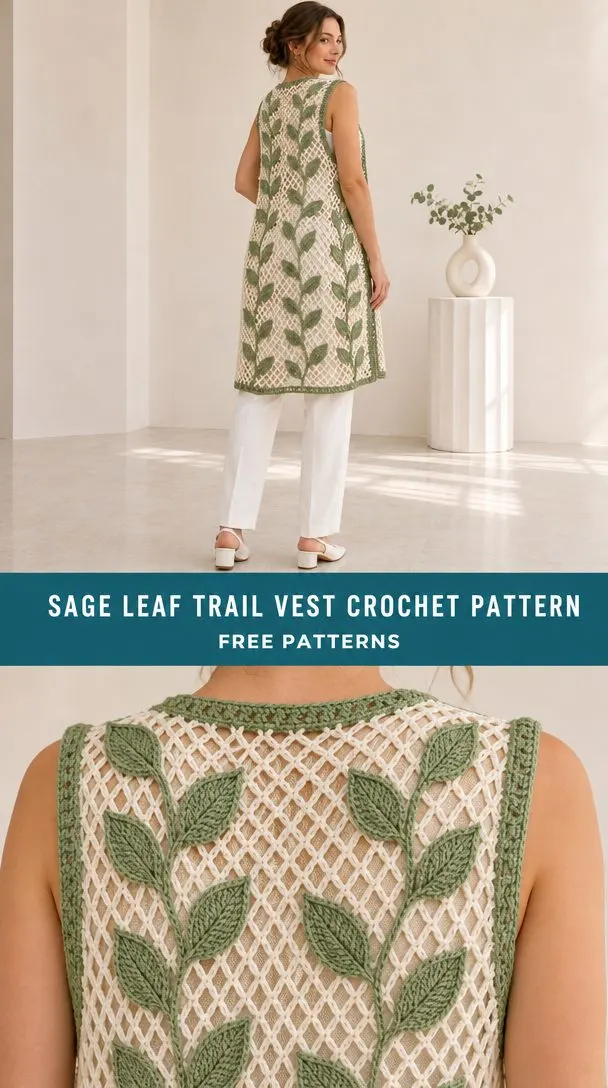
This open-front vest features a clever construction method: an ivory mesh base with sage green leaf motifs sewn on top. The result is a garment that looks intricate but builds from simple, manageable pieces. You’ll work three rectangular panels in a basic lattice stitch, join them at the shoulders and sides, then add the decorative leaves and surface chain stems.
Perfect for spring mornings, summer evenings, or layering over a tank in air-conditioned spaces. The design fits bust sizes 90 to 100 cm comfortably, and the pattern includes clear guidance for adding extra width or length if needed. Whether you’re making this for yourself or as a thoughtful handmade gift, the combination of textures makes it a satisfying project from start to finish.
Why This Design Works
The Sage Leaf Trail Vest solves a common problem with decorative crochet garments: getting consistent sizing. By working the mesh panels first and then adding motifs on top, you control the fit before committing to placement. The mesh acts as your structural foundation, and the leaves become embellishments rather than load-bearing elements.
This approach means you can block your panels to exact measurements, try on the assembled vest, and only then sew the motifs where they look best. No surprises, no math errors cascading through your project.
The trailing vine effect comes from surface slip stitches worked vertically up the panels, with paired leaves sewn on either side. It’s a technique that looks complex but requires only basic skills and a tapestry needle.
Skill Level
Intermediate. You should be comfortable with:
- Working in rows and rounds
- Double crochet stitches
- Slip stitch joins
- Basic seaming
- Surface crochet (or willingness to learn)
If you’ve made a few garments or worked with mesh stitches before, you’re ready for this vest.
Materials and Tools
Gather everything before you begin. The pattern uses sport weight cotton yarn, which provides excellent stitch definition and breathability.
Yarn
| Color | Purpose | Amount |
|---|---|---|
| Ivory | Mesh panels and borders | 250 g |
| Sage green | Leaves and stems | 200 g |
| Total | 450 g / 1440 m |
The pattern specifies sport weight cotton at 160 m per 50 g. This weight gives the mesh enough body to hold its shape while remaining lightweight for layering.
Tip: Weigh one blocked leaf motif and multiply by 128 before purchasing all your sage yarn. If your sample leaf weighs over 2 g, add an extra 50 g to your total.
Hooks
- 3.5 mm for the mesh fabric
- 3 mm for motifs and edging
Having both hooks ready prevents gauge issues between your structural pieces and decorative elements.
Notions
- Tapestry needle
- 12 stitch markers
- Measuring tape
- Blocking mat and pins
Gauge
Getting gauge right matters for garment fit. The mesh is your structural fabric, so it sets everything else.
Mesh gauge: 8 square cells and 8 rows = 10 x 10 cm after washing
One cell consists of a double crochet (dc) post plus a chain 1 (ch 1) opening. Think of it as a grid where each square measures about 1.25 cm.
Motif gauge: A single leaf should measure approximately 6 cm long.
How to Swatch
- Chain 35 stitches
- Work 16 cells by 16 rows in mesh pattern
- Wash and dry flat
- Measure the central 10 x 10 cm section
Adjust your hook size up if your swatch is too small, down if too large. The mesh must match gauge before you begin the panels.
For leaves, make one complete motif with your 3 mm hook. If it’s larger than 6 cm, try a 2.75 mm hook. The motifs should sit comfortably on the mesh without pulling or distorting it.
Abbreviations and Special Stitches
Here’s every stitch term used in this pattern, with plain-English explanations.
| Abbreviation | Full Name | What You Do |
|---|---|---|
| ch | chain | Yarn over, pull through loop |
| sl st | slip stitch | Insert hook, yarn over, pull through stitch and loop on hook |
| sc | single crochet | Insert, yarn over, pull up loop, yarn over, pull through both |
| hdc | half double crochet | Yarn over, insert, pull up loop, yarn over, pull through all 3 |
| dc | double crochet | Yarn over, insert, pull up loop, yarn over, pull through 2, yarn over, pull through 2 |
| st(s) | stitch(es) | Individual loops you work into |
| sp | space | The gap between stitches |
| sk | skip | Pass over without working |
| rep | repeat | Do the bracketed instructions again |
| RS/WS | right side/wrong side | The front or back of your work |
| rnd | round | One complete circuit when working in the round |
Special Techniques
Mesh M(C): This creates a filet-style grid. Chain (2C+3), then dc in the fifth chain from hook. Work [ch 1, skip 1 chain, dc in next chain] across. This gives you C cells and C+1 posts.
For subsequent rows: Chain 4 (counts as first post plus ch 1), dc in next post, [ch 1, dc in next post] across. Place your final dc in the third chain of the previous turning chain.
Star Connector: Chain 4 and join into a ring. Work [ch 4, sl st in ring] 8 times, then fasten off. These decorative elements fill gaps between leaf groupings.
Surface Slip Stitch: With the RS facing, insert your hook from front to back through the mesh, yarn over from behind, and pull through both the fabric and the loop on your hook. This creates a raised chain line on the surface.
Finished Dimensions
This vest fits an adult with a bust measurement of 90 to 100 cm. The garment is worn open over an opaque top.
| Piece | Width | Length |
|---|---|---|
| Back panel | 50 cm | 90 cm |
| Each front panel | 25 cm | 90 cm |
| Armhole depth | — | 20 cm |
| Shoulder seam | 15 cm | — |
| Neck opening (back) | 20 cm | — |
Total fabric span: 100 cm around the body, plus approximately 8 cm open front gap.
Sizing Adjustments
Need more room? Add 4 cells to the back panel and 2 cells to each front panel for 10 cm extra width.
Want more length? Add 8 rows to each panel for 10 cm extra length.
Keep the upper 20 cm (16 row ends) of each side open for armholes regardless of your adjustments.
Construction Overview
The Sage Leaf Trail Vest builds in stages:
- Work three mesh rectangles (one back, two fronts)
- Block panels to exact measurements
- Join shoulders and sides with seaming
- Add surface chain stems vertically
- Sew leaf motifs in pairs along the stems
- Place star connectors in the gaps
- Work edgings around the outer border and armholes
This modular approach lets you check fit before committing to motif placement.
Pattern Instructions
Back Panel
Row 1: Make M(40). [40 cells / 41 posts]
Rows 2 through 72: Repeat the mesh row. [40 cells / 41 posts]
Fasten off. Block to 50 x 90 cm.
Mark the outer 12 cells at each top corner for shoulders. The central 16 cells form the back neck opening.
Front Panels (Make 2)
Row 1: Make M(20). [20 cells / 21 posts]
Rows 2 through 72: Repeat the mesh row. [20 cells / 21 posts]
Fasten off. Block each panel to 25 x 90 cm.
Mark the outer 12 cells at the top for the shoulder. The inner 8 cells remain part of the open front neckline.
Leaf Motifs (Make 128)
Work all leaves in sage green using your 3 mm hook.
Round 1: Chain 9. Starting in the second chain from the hook, work: sc, hdc, dc in the next 4 chains, hdc, 3 sc in the last chain. Continue along the opposite side of the foundation chain: hdc, dc in the next 4 chains, hdc, sc. Join with a slip stitch. [17 stitches]
Round 2: Slip stitch in each stitch around. At the tip only, chain 2 to create a small point. [17 sl st + 1 ch-2 tip]
Fasten off, leaving a tail for sewing.
Surface Chain Stems
Using sage green yarn and your 3.5 mm hook, work surface slip stitches vertically along:
- 4 columns on the back panel
- 2 columns on each front panel
Start each stem 5 cm above the hem and end 5 cm below the shoulder. Keep your chains loose so the fabric stays flat and doesn’t pucker.
Star Connectors (Make 35)
Work in ivory using the instructions from the abbreviations section.
To make: Chain 4, join into a ring. Work [ch 4, sl st in ring] 8 times. Fasten off.
These fill the gaps between leaf groupings. Place them between the vertical rows of motifs, avoiding the armhole openings.
Assembly
Seaming the Vest
Shoulder seams: With RS together, whip stitch or mattress stitch each front shoulder to the corresponding back shoulder. Work through the outer 12 cells on each side. [2 seams]
Side seams: Starting at the hem, seam each side upward through Row 56. Leave the upper 16 rows (20 cm) open for armholes. [2 seams]
Placing Motifs
Step 1: Mark 8 horizontal layout rows evenly spaced between 5 cm above the hem and 5 cm below the top edge.
Step 2: Position back motifs at approximately 6.25 cm, 18.75 cm, 31.25 cm, and 43.75 cm from one side edge. Front motifs sit at 6.25 cm and 18.75 cm from the side edge. This creates 8 motif sites per horizontal row.
Step 3: Sew each leaf in place using sage green yarn and a tapestry needle. Secure at multiple points along the leaf body. Use 2 paired leaves at every site, one on each side of the surface chain stem. [128 leaves total]
Step 4: Sew star connectors in the available gaps between leaf groupings. Anchor all 8 spoke tips loosely to the mesh. Keep joins flexible. [35 connectors]
Edgings
Switch to your 3 mm hook and ivory yarn for all border work.
Outer Border
Round 1: Working around both fronts, back neck, and hem, pick up: 1 sc per dc post, 1 sc per ch-1 space, and 2 sc per mesh row end along the sides. Work 3 sc at each sharp corner. Join. Record your total as E. [E sc]
Round 2: Chain 4 (counts as dc plus ch 1), skip 1 sc, dc in next sc. Work [ch 1, skip 1 sc, dc in next sc] around. If one stitch remains at the end, work dc into it. Work 3 dc at corners. Join. Record your post count as P. [P posts + intervening ch-1 spaces]
Round 3: Sc in each post and each ch-1 space around. Work 3 sc at corner centers. Join. [Q sc]
Fasten off.
Armhole Edging (Work on Each Armhole)
Round 1: Pick up 2 sc per row end around the armhole opening. Join. [64 sc]
Round 2: Sc in each sc around. Join. [64 sc]
Fasten off. Repeat for the second armhole.
Finishing
Weaving Ends
Thread each yarn tail onto your tapestry needle. Weave at least 5 cm through matching stitches, then reverse direction and weave 5 cm more. Trim close to the fabric.
Final Blocking
Dampen the completed vest and lay it flat on your blocking mat. Pin the mesh panels to their target dimensions. Gently lift the leaf motifs with your fingertips so they sit on top of the fabric rather than flattening into it.
Allow to dry completely before moving. For best results, let the vest hang for 24 hours after blocking to check that the motifs aren’t distorting the mesh.
Care Instructions
Follow your yarn label for specific guidance. For most sport weight cottons:
- Hand wash gently in cool water with mild detergent
- Do not wring or twist
- Support the wet garment when lifting
- Reshape on a clean towel
- Dry flat away from direct heat or sunlight
- Store folded to prevent stretching
Tips for Success
Block as you go. Blocking each panel before assembly makes seaming easier and ensures accurate fit.
Don’t skip the swatch. The mesh sets your garment dimensions. Five minutes of swatching saves hours of frustration.
Keep surface chains loose. Tight surface stitches will pucker your mesh. Aim for chains that lie flat without pulling.
Try on before adding motifs. The seamed vest should fit comfortably before you commit to leaf placement.
Use stitch markers generously. Marking your motif positions before sewing prevents uneven spacing.
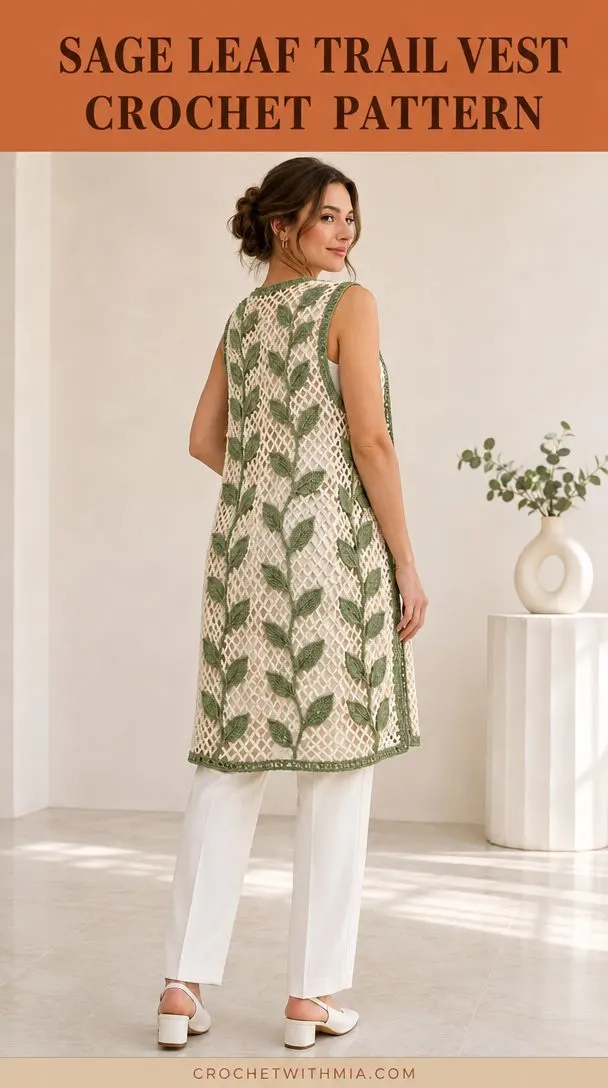
Final Thoughts on the Sage Leaf Trail Vest Crochet Pattern
This vest brings together classic crochet techniques in a fresh, modern way. The mesh-first construction gives you control over fit, while the trailing leaf motifs add visual interest without overwhelming complexity.
It’s the kind of project that looks impressive on the finished rack but builds from straightforward pieces. Each component, the mesh panels, the simple leaves, the surface chain stems, is manageable on its own. Together, they create something truly special.
Thank you for choosing this pattern. If you make the Sage Leaf Trail Vest, I’d love to see your version. Share your photos on Instagram or Facebook and tag your work so fellow crafters can admire your creation.
Save this pattern to your Pinterest boards so you can find it when you’re ready to cast on. And if you make this vest, drop a comment below. I’d love to hear how it turns out for you.